Supercharge Your App: Unveil the Magic of QR & Barcode Features with Appery.io

Unlock the full potential of your app development skills with our latest video guide! Dive into the world of QR and barcode technology with Appery.io and discover how easy it is to integrate these powerful features into your mobile and web applications. Our step-by-step tutorial will walk you through the process of creating, scanning, and managing codes while seamlessly connecting with a backend database. This video is packed with insights and practical tips to elevate your app projects. Watch now and transform the way you build apps!

Step into the Future of App Development

Why is QR and barcode integration a hot trend? Simple. It enhances user interaction and streamlines data processes. With Appery.io, developing these features becomes an enjoyable journey, even for beginners.

Building Blocks: Your QR and Barcode App Foundation

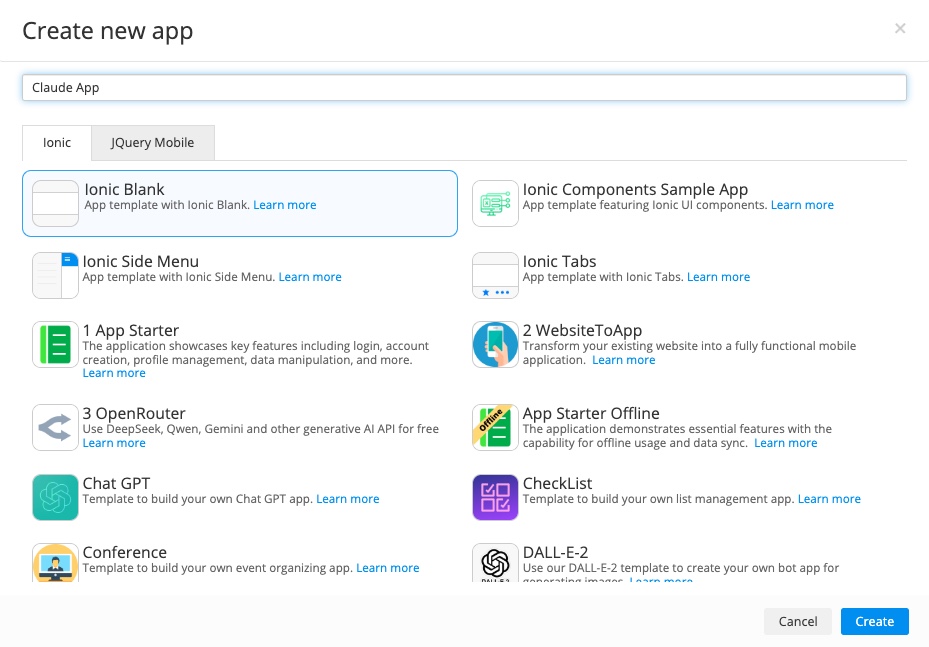
Start by creating a new app with Appery.io’s blank Ionic template. The goal? Add products with specific codes to your database and scan these codes for detailed information retrieval.

Step 1: Code Creation

Use Appery.io’s versatile “QR Code Generator.” Don’t let the name fool you—it handles all code types! Customizing your code is a breeze: adjust size, color, and format to suit your needs. QR codes are popular, so we’ll start there.

Step 2: Database Integration

Harness the power of Appery.io’s “List Details” plugin to manage product info linked to your QR codes. Create a database, add a collection for items, and include fields like “name” and “description.” Importing this plugin adds two powerful pages to your app, ready for data entry and editing.

Scanning and Display: Bringing It All Together

The final step? Scanning codes to display corresponding information. Appery.io offers a “QR and Barcode Scanner” plugin, adding seamless scanning capability. This integration works beautifully across mobile, web, and PWA environments.

Test and Optimize

For real-world effectiveness, use Appery.io’s Tester app on your device. It’s free and straightforward: scan your generated QR code and your app is instantly mobile-ready. Play around with different code formats, test your database connectivity, and refine your user interface for the best results.

Elevate Your App Experience

Integrate navigation tabs for a polished user experience. Appery.io’s simplicity lets you focus on creativity, not complexity.

Conclusion: Become an App Maestro

With Appery.io, creating a complex app with QR and barcode features has never been simpler. It’s an exciting time to explore the possibilities, test your creations, and ultimately produce an efficient and engaging application.

Keep exploring, keep innovating, and let Appery.io guide you through the remarkable process of app development. Dive into this opportunity, and soon, you’ll be coding like a pro.

Happy coding!

Power Up Your App: Effortlessly Fuse ChatGPT Plugin with Appery.io for Next-Level Image Processing Magic

In today’s tech-driven world, mobile app development has evolved to be more accessible and efficient than ever before. With the emergence of innovative tools like the ChatGPT plugin and platforms like Appery.io , building powerful apps has become a breeze, even for those with no coding experience.

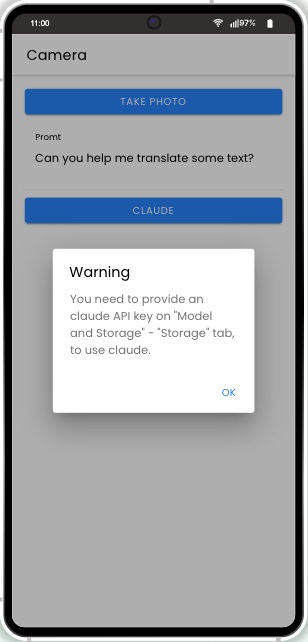
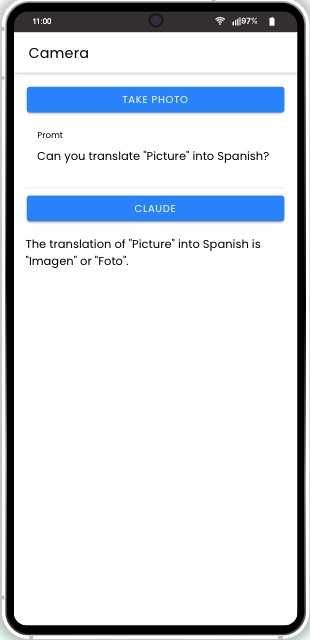
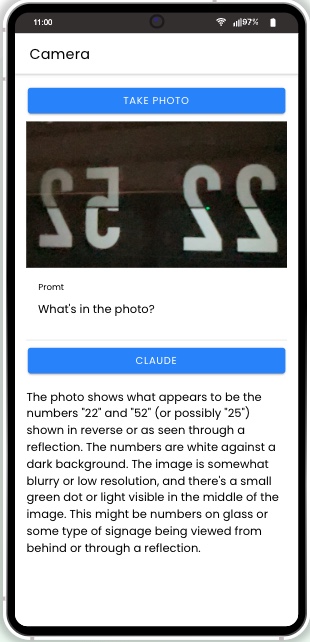
At the forefront of this technological advancement is the integration of the ChatGPT-4o functionality into mobile apps using Appery.io . This dynamic duo enables developers to process uploaded images and receive human-like responses seamlessly.

To kickstart this process, the Appery.io team showcases how to leverage the Appery.io platform as a no-code editor, alongside the new Appery ChatGPT plugin. With predefined services at your fingertips, the integration of OpenAI’s power into your app becomes a seamless experience – no coding required!

Key takeaways from the integration process:

1. Create a new blank Ionic app on Appery.io, naming it “ChatGPT-4o Image Processing_No-Code” for easy identification.

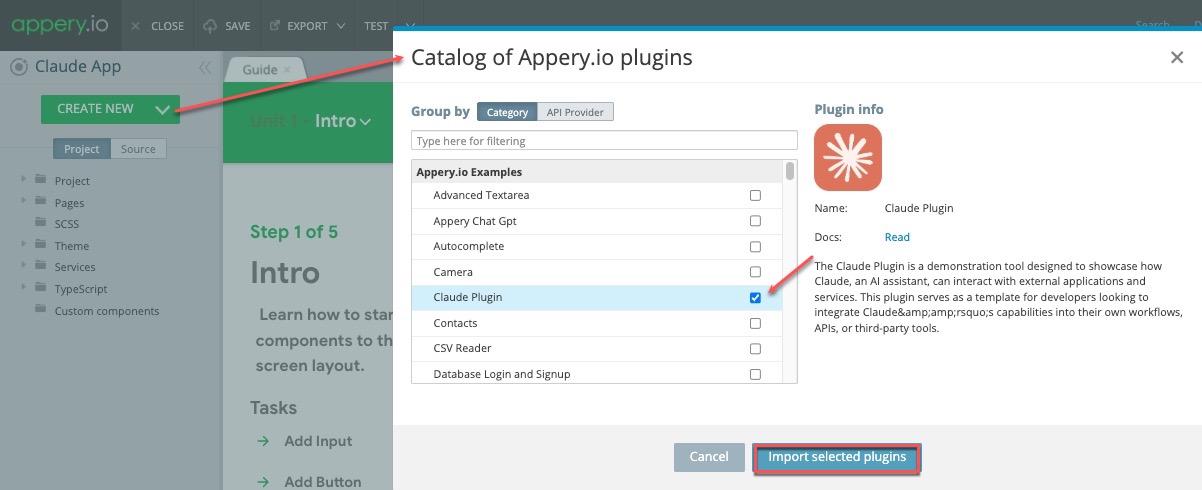
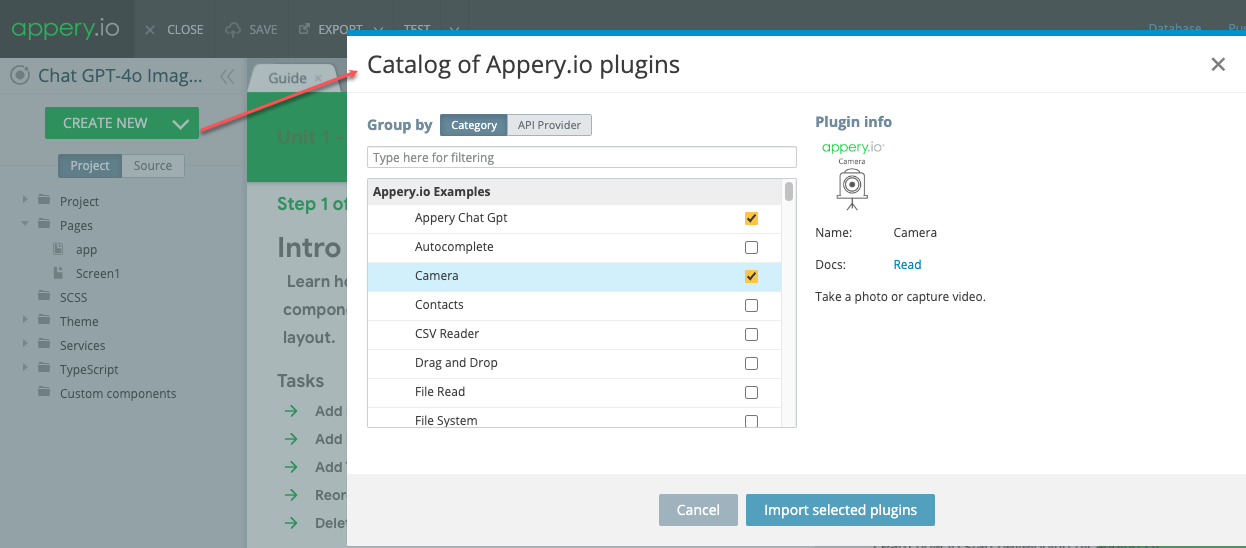
2. Click CREATE NEW > From Plugin and add the Appery Chat GPT plugin by selecting it from the Appery.io plugins catalog.

3. Also, add the Camera service for uploading images effortlessly.

4. Integrate the OpenAI key from the OpenAI portal into the Settings service of your app.

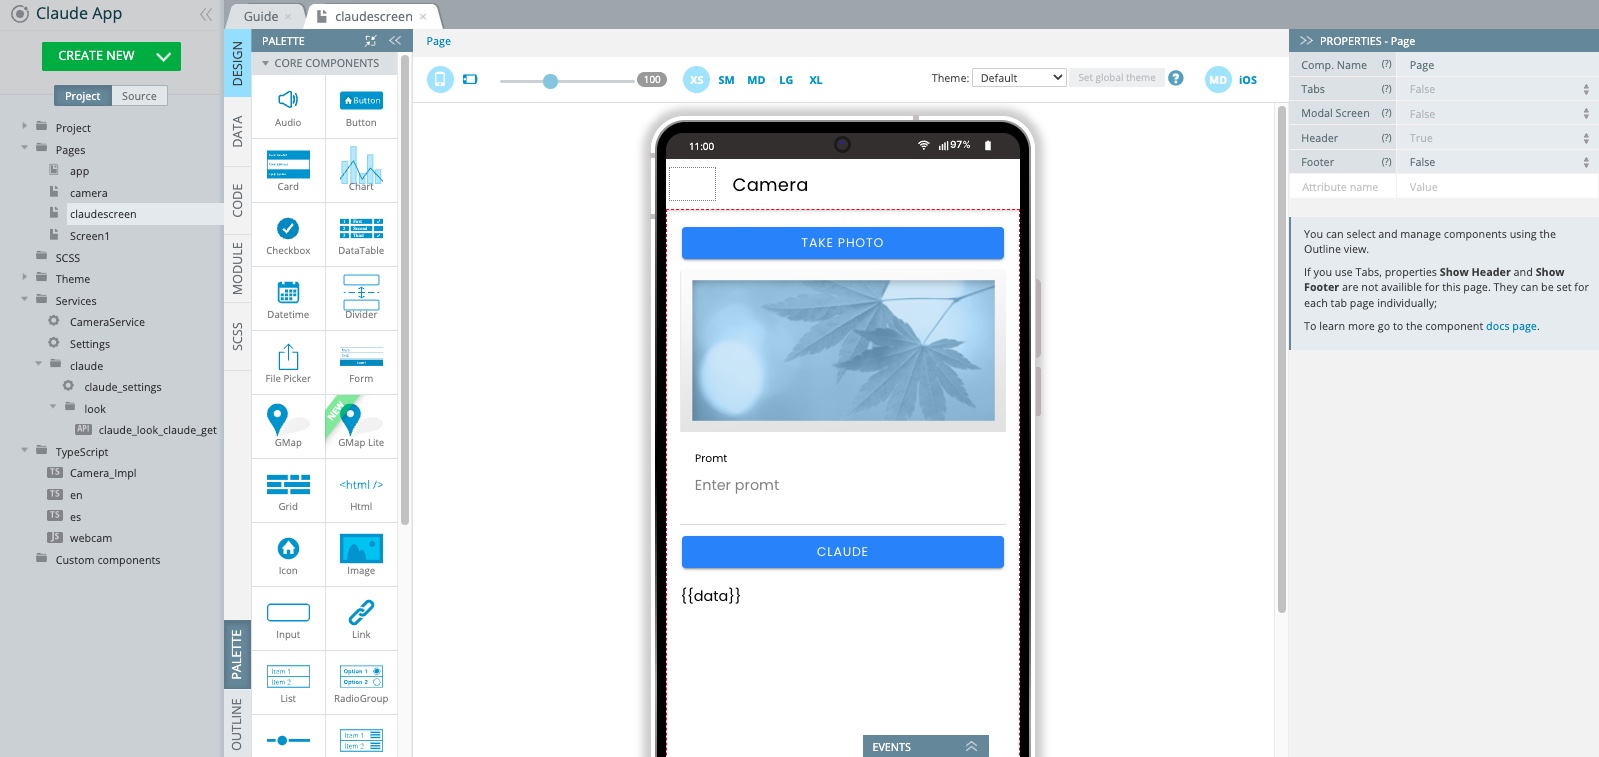
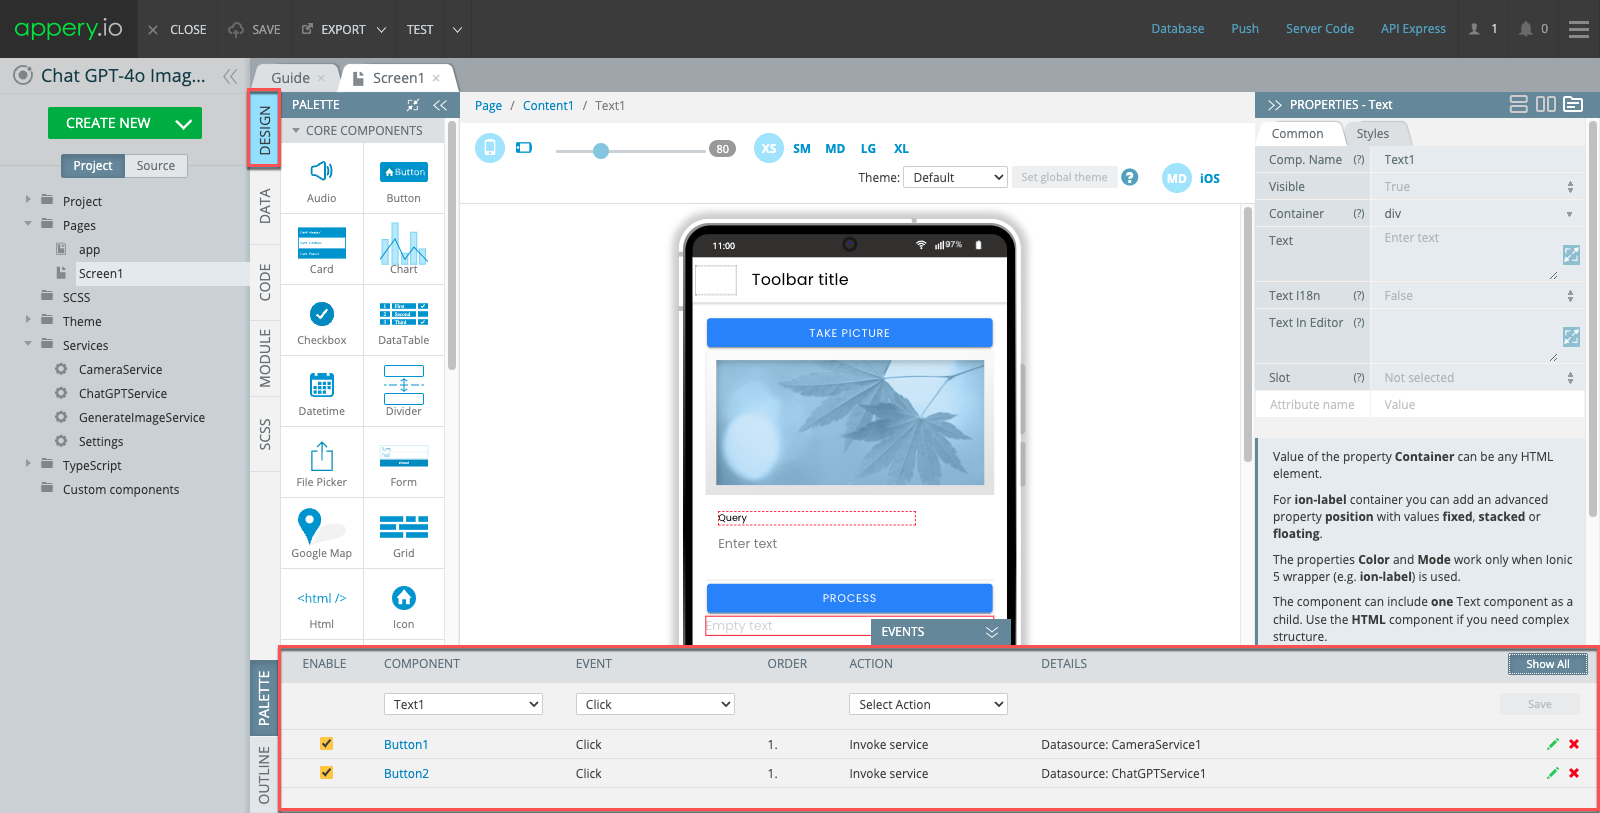
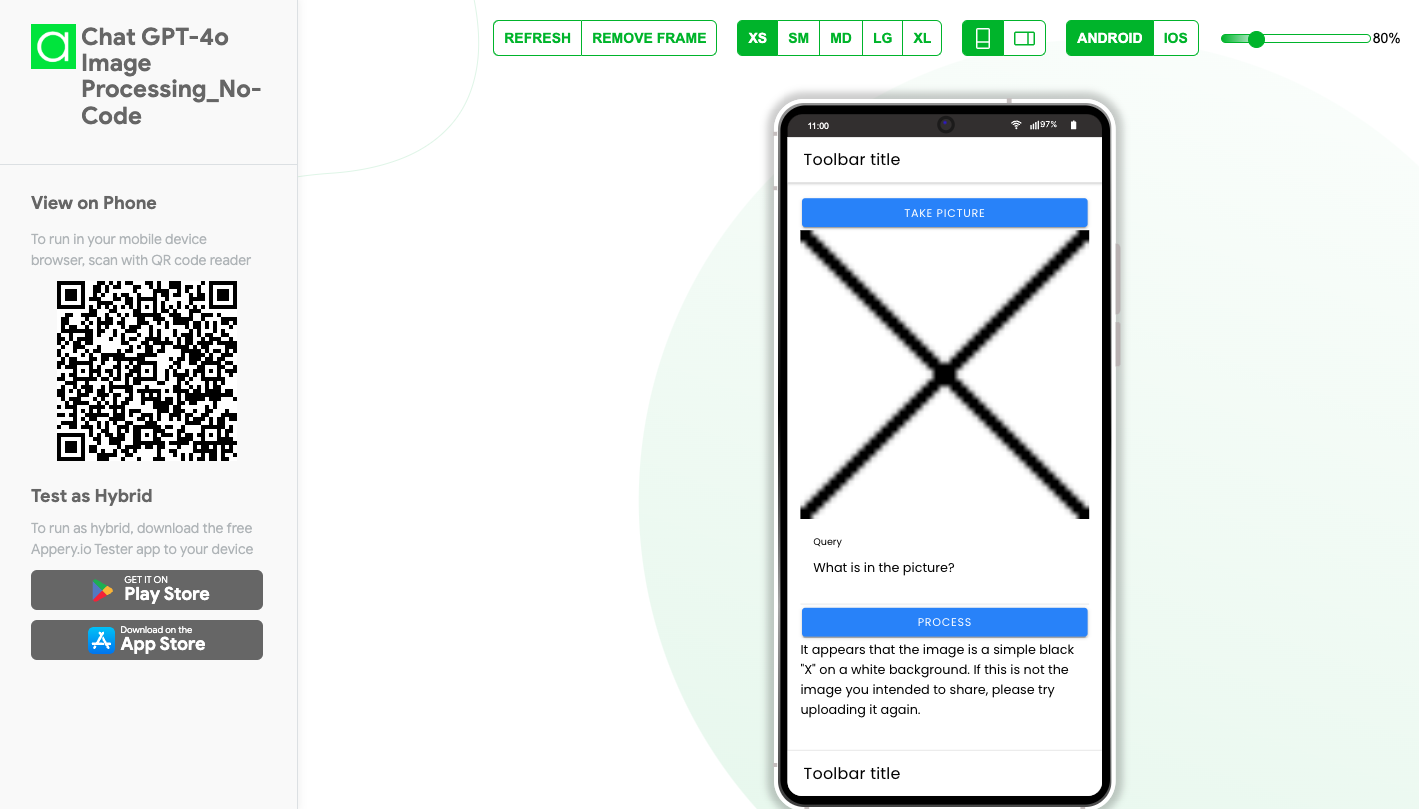
5. Once the building blocks are in place, it’s time to craft the app’s user interface. With components like buttons for capturing images, uploading functions, and querying ChatGPT for responses, the app promises a user-friendly experience.

6. The integration doesn’t stop at the UI design – defining services such as input and output mappings ensure that the app functions smoothly. With the Camera service mapping images to display on the screen and ChatGPT service processing queries, the app’s core functionalities come to life effortlessly.

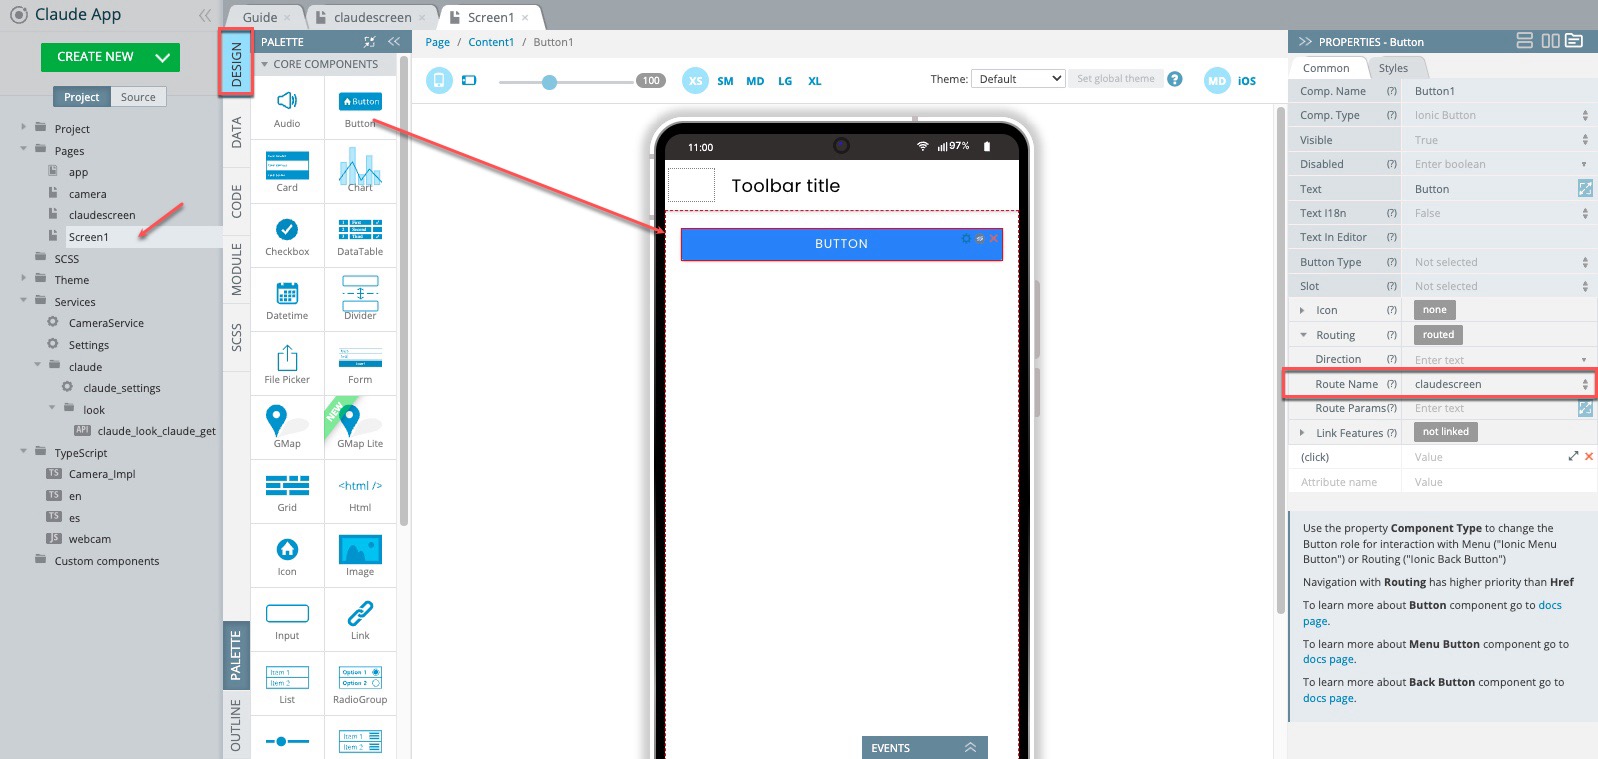
7. Appery.io’s platform streamlines the process further by enabling direct triggering of services with a simple button click.

8. Testing the app’s functionality, whether on a mockup image or a real device using the Appery Tester tool, showcases the app’s capabilities in real-time.

In conclusion, the seamless integration of ChatGPT plugin on Appery.io signifies a paradigm shift in mobile app development, proving that complex application logic can be achieved without writing a single line of code.

Stay tuned for more insights on leveraging Appery as a low-code editor in our upcoming video!

Unlock Real-Time Communication with WebSockets on Appery.io

Introduction to WebSockets with Appery.io

Have you ever wondered how apps send updates in real-time? The magic happens with WebSockets. Today, we’ll show you how to add WebSockets to your apps using Appery.io. This low-code app-building platform makes it easy to create complex apps quickly. Note that this post supports our comprehensive video tutorial and if you are interested in details, you are welcome to watch it.

By following the steps below, you can easily enhance your app with real-time communication features using WebSockets and Appery.io. Exciting, right? Let’s get started!

Setting Up Your App

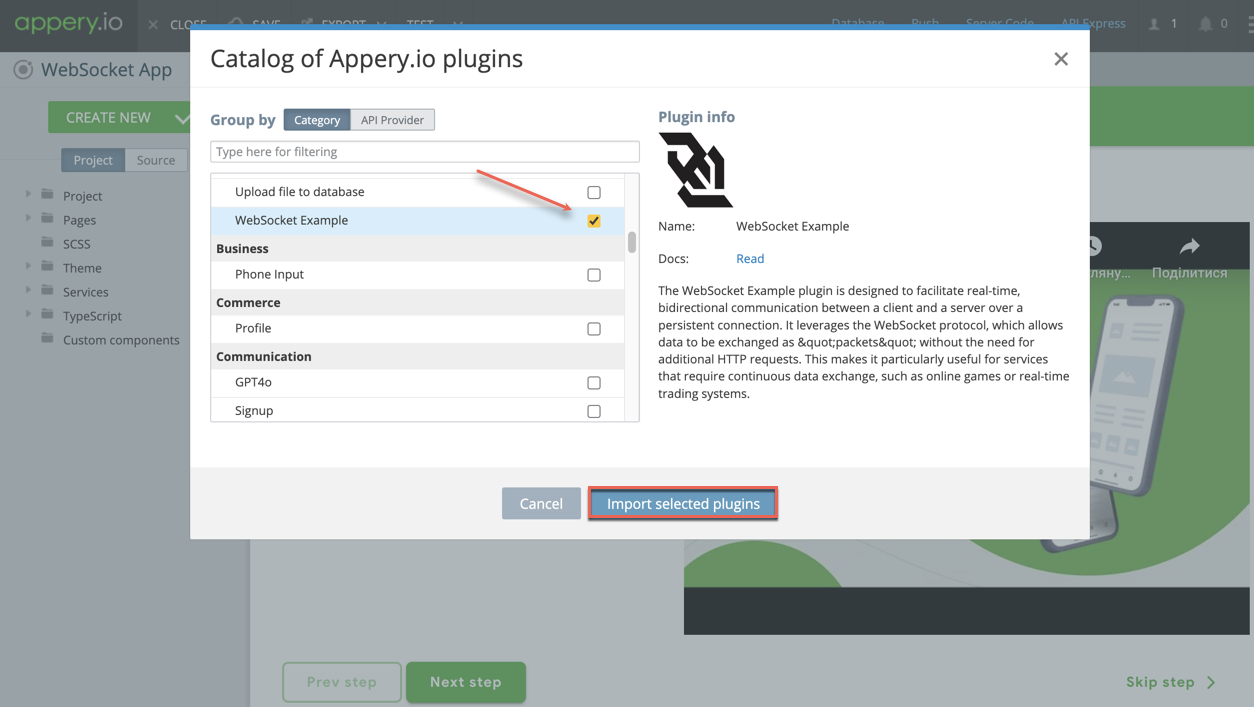
First, create an empty app in Appery.io. Then, go to the Catalog of Appery.io plugins and select the WebSocket Example plugin.

Before importing it, you can click the link to open its documentation page. You’ll see it contains the code for the WebSocket server. This server needs to be run somewhere. While real applications may use Amazon or Azure, we’ll use CodeSandbox for testing.

Using CodeSandbox

1. Create a new Devbox.

2. Select Node.js Server from the list of backend frameworks.

3. Name your Devbox and set its visibility to “Public”.

4. Install two npm modules: `express` and `socket.io`.

Now, let’s move to the next step.

Setting Up Your WebSocket Server

Copy the server code from the documentation page and paste it into your `index.js` file in CodeSandbox. If everything is correct, the server should start successfully.

Back to Appery.io

Return to the Appery.io project and click Import selected plugins with the WebSocket Example plugin checked. This plugin helps you integrate WebSockets into your app. But first, let’s test it.

Testing Your App

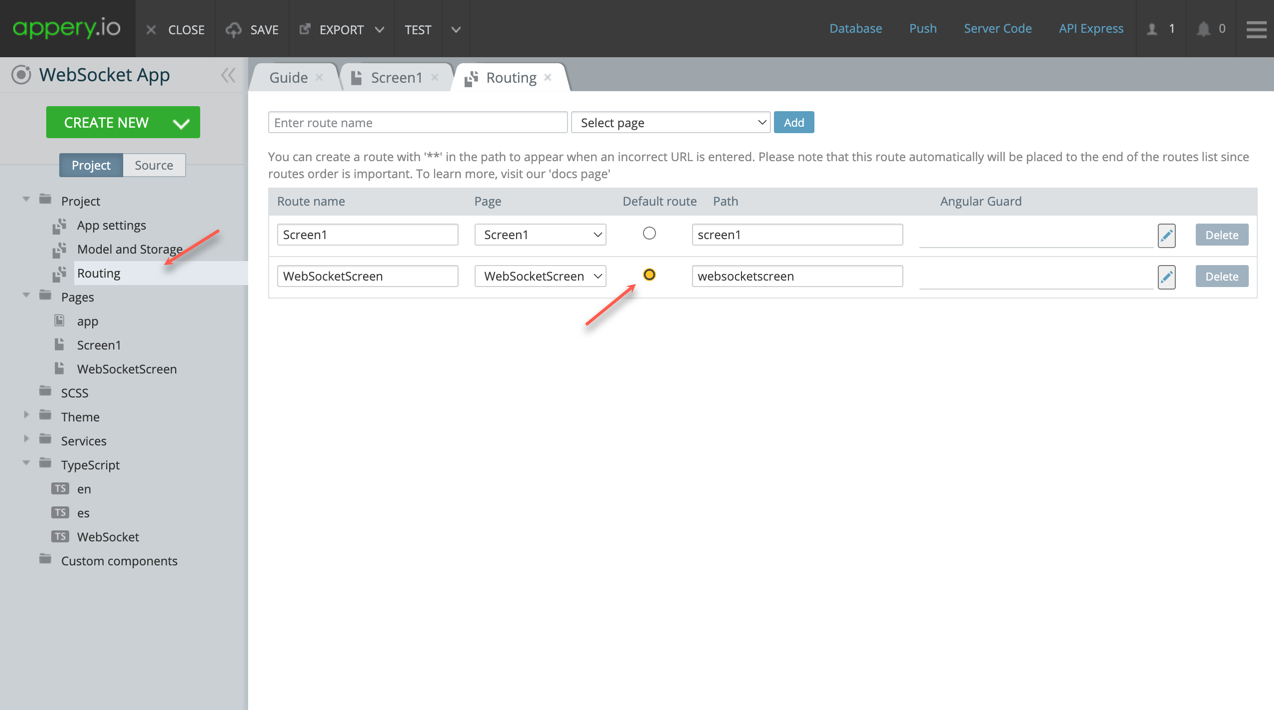
Go to the Project > Routing section and set “WebSocketScreen” as the default page.

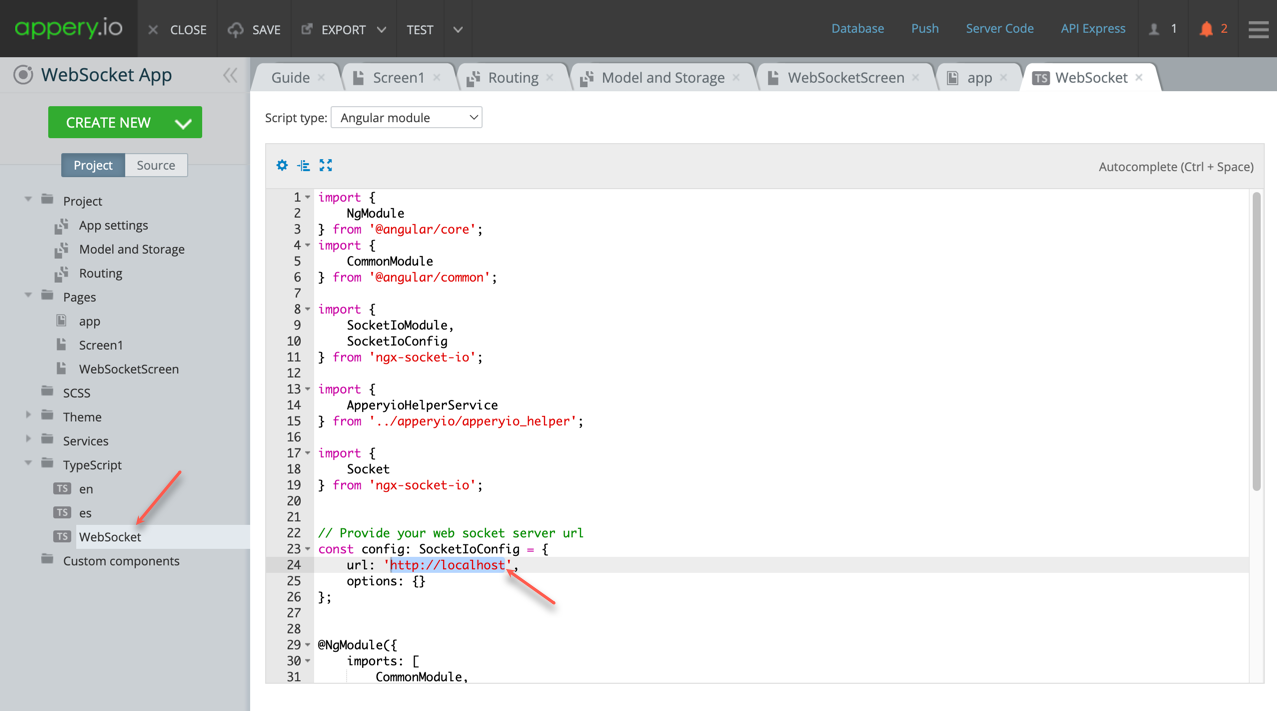
Next, navigate to TypeScript > WebSocket and specify the URL of your WebSocket server obtained from CodeSandbox.

Now, run your app in different browsers like Google Chrome, Firefox, and Edge. Enter a test message and click the “Send” button.

Ready! The message should be delivered to all clients in real-time.

Conclusion

Now you’ve seen how to add Websockets to your apps using Appery.io. This post is a companion piece to our detailed video tutorial. The demo app isn’t a finished product but provides a solid template for building your own real-time communication features. Give it a try and unlock powerful networking capabilities in your applications!

Google reCAPTCHA Now on Appery.io: Boost Your Site Security:

In the fast-paced app world, safety is crucial. At Appery.io, we’re thrilled to introduce Google reCAPTCHA plugins for added web app protection.

About Google reCAPTCHA: Quick Overview

Google reCAPTCHA is a strong tool to tell real users from bots, adding an extra security layer. It stops spam and guards your sites from fake activities.

Easy Integration with Appery.io: Simple and Effective

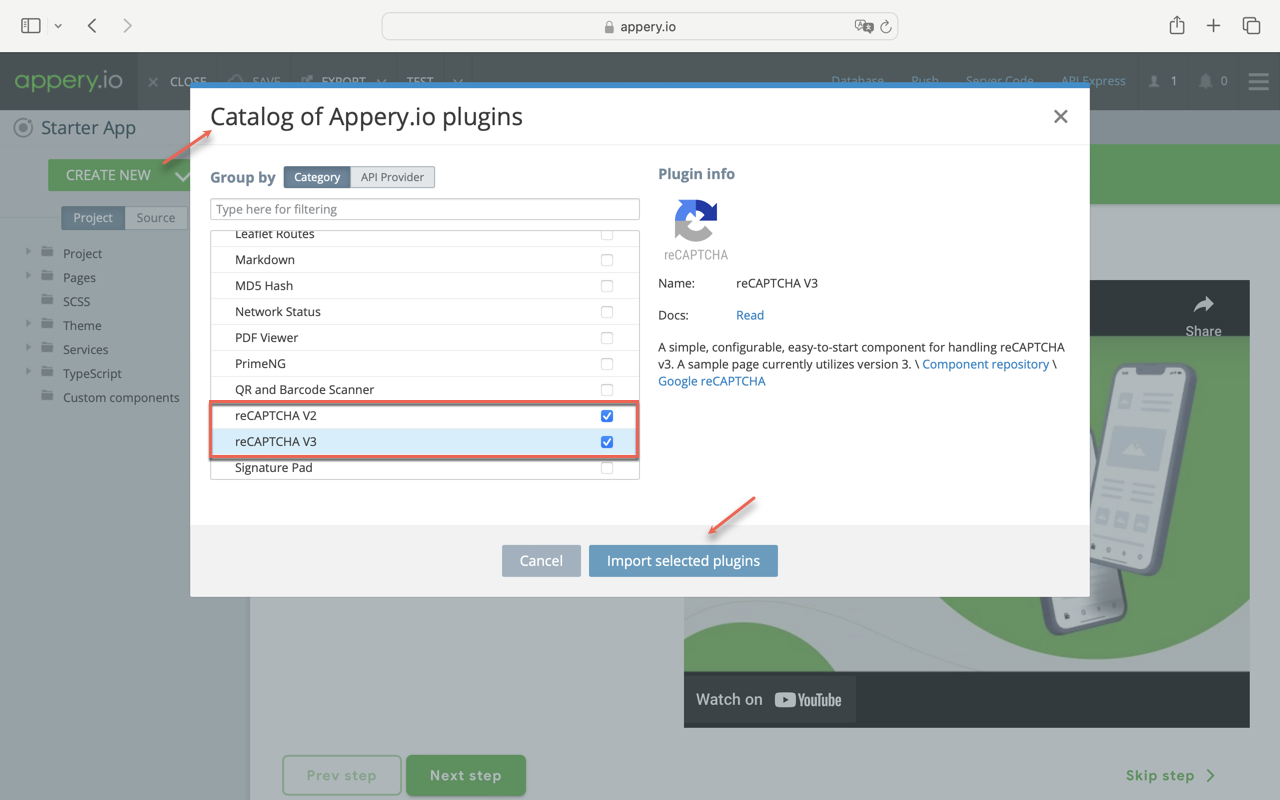
Our App Builder now easily adds Google reCAPTCHA plugins, both version 2 and version 3. To start, sign up with Google reCAPTCHA to get unique keys, ensuring a secure and personalized app integration.

Why Go for reCAPTCHA Plugins on Appery.io?

  1. Strong Defense: Shield your web app using advanced security from Google reCAPTCHA.

  2. User-Friendly: Our App Builder simplifies the process for all-level developers.

  3. Version Choices: Customize security with options for version 2 or version 3 based on your needs.

Getting Started: Easy Guide

  1. Open App Builder: In Appery.io App Builder, go to the Plugins section.

  2. Find reCAPTCHA: Look for reCAPTCHA plugins (version 2 and version 3) in the Appery.io catalog.

  3. Sign Up and Get Keys: Before adding the plugin, sign up with Google reCAPTCHA to get keys for secure app integration.

  4. Pick Your Version: Choose either version 2 or version 3 based on your security preference.

  5. Simple Configuration: Customize plugin settings in the Appery.io App Builder, including adding keys from Google.

  6. Test and Deploy: Ensure a smooth user experience before deploying your web application.

You can find more details on the Plugins page.

Or check out our YouTube video tutorial if you need visual assistance!

Stay Tuned for More Upgrades

This is just the beginning! As we focus on security and user experience, more enhancements and features are coming soon to Appery.io.

Thank you for using Appery.io and Happy Developing!

Your Appery.io Team

How to Read CSV Files in Your Application | Appery.io

From now on, you can read CSV files and display their content on both web and mobile applications created in Appery.io. Watch our new tutorial to learn more about the CSV Reader plug-in that does all the work for you.

How to Redirect Your App to HTTPS | Appery.io

If you need a secure application with an HTTPS-only protocol, then you’re in the right spot. Check out our new video and learn how to redirect your application from an HTTP to HTTPS protocol by installing the HttpToHttps plug-in from the Appery.io development team.

How to Add a Validation Feature to Ionic 4 Apps | Appery.io

If you’ve ever wondered how to add a validation functionality to your Appery.io app, you’re in the right place. In our new video tutorial, we demonstrate how to install and configure a new validation plug-in to your app in 10 minutes!


Development Tip: Use Server Code Plug-ins and Snippets for Quicker Coding

snippets

Using Server Code snippets and plug-ins are a great way to save time when making server scripts. Instead of digging through the Server Code documentation, you can simply choose one of the snippets located on the right side of the screen in script editor mode. The set of snippets provided by the Server Code API are the most common, but if you think of other useful snippets, let us know and we’ll add them to the list.

Server Code plug-ins are another way to save time when implementing your logic. To find Server Code plug-ins, go to the Server Code page and then to the Plugins tab. For now, there are two plug-ins. With them, you can quickly integrate with the Twilio or SendGrid API via XHR (XMLHTTPRequest). Simply click “Import” to create the server script based on the plug-in selected, and then customize it by specifying your API keys.

Make sure you check out all of our mobile development tips.

Do you want to build apps fast? Start developing with our trial plan!

PayPal Secure Payments for Your Ionic & AngularJS App

paypal_logoPayPal API is one of the most popular Appery.io plug-ins, and now it’s also available for Ionic & AngularJS!

Our users have frequently requested the ability to add payments to their Ionic & AngularJS mobile apps more quickly, for example, to create an online shop. Now, with the help of this plug-in, you could build an online shop (for instance) to be used by your Ionic & AngularJS app really easily.

A few notes about the security implemented in this app:

  • Authentication with PayPal occurs via a Server Code script. It takes your PayPal app credentials and sends XHR to PayPal. The token is stored to the database.
  • By using the Secure Proxy feature, the actual token value will be substituted on the server side. This way any PayPal API can be triggered.
  • Because of the server-based authentication, sensitive data such as the client secret or token value will never be shown in the app, which eliminates the possibility of theft.

Finally, a few, more general, notes:

  • The flow implemented in this plug-in is similar to PayPal’s flow.
  • We have a PayPal API plug-in tutorial here. Check it out to configure the plug-in.
  • The plug-in is configured for a test environment, so use the PayPal guide too see what you need to do when going live.

Development Tip: Adding Cordova Plug-ins To Your App

import_cordova_plugins

With just a few quick steps, you can easily add any 3rd-party Cordova plug-in to your Appery.io app:

  1. Go to the Github page of the plug-in and download the latest stable version by clicking “Download ZIP.” It’s important to download the latest stable version.
  2. Go to Resources > Cordova plug-insand click Import Cordova plug-in, then: Choose file, locate the downloaded file and click Import plug-in The plug-in will appear under Cordova plug-ins

To manage all of the Cordova plug-ins for a particular app, go to Project > App settings > Cordova plug-ins and you’ll see the list. You can quickly enable or disable any plug-in.

Learn more in our documentation, and make sure to check out all of our mobile development tips.

Do you want to build apps fast? Start developing with our trial plan!