Unlock Real-Time Communication with WebSockets on Appery.io
Introduction to WebSockets with Appery.io
Have you ever wondered how apps send updates in real-time? The magic happens with WebSockets. Today, we’ll show you how to add WebSockets to your apps using Appery.io. This low-code app-building platform makes it easy to create complex apps quickly. Note that this post supports our comprehensive video tutorial and if you are interested in details, you are welcome to watch it.
By following the steps below, you can easily enhance your app with real-time communication features using WebSockets and Appery.io. Exciting, right? Let’s get started!
Setting Up Your App
First, create an empty app in Appery.io. Then, go to the Catalog of Appery.io plugins and select the WebSocket Example plugin.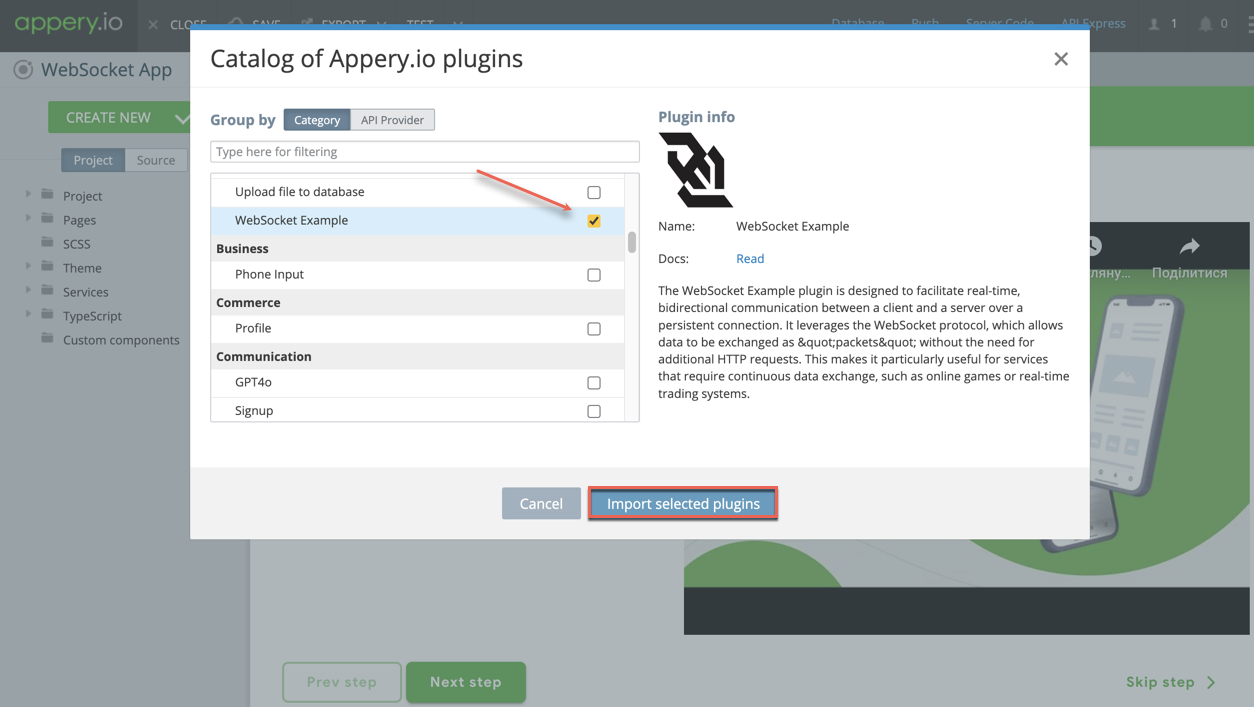
Before importing it, you can click the link to open its documentation page. You’ll see it contains the code for the WebSocket server. This server needs to be run somewhere. While real applications may use Amazon or Azure, we’ll use CodeSandbox for testing.
Using CodeSandbox
1. Create a new Devbox.
2. Select Node.js Server from the list of backend frameworks.
3. Name your Devbox and set its visibility to “Public”.
4. Install two npm modules: `express` and `socket.io`.
Now, let’s move to the next step.
Setting Up Your WebSocket Server
Copy the server code from the documentation page and paste it into your `index.js` file in CodeSandbox. If everything is correct, the server should start successfully.
Back to Appery.io
Return to the Appery.io project and click Import selected plugins with the WebSocket Example plugin checked. This plugin helps you integrate WebSockets into your app. But first, let’s test it.
Testing Your App
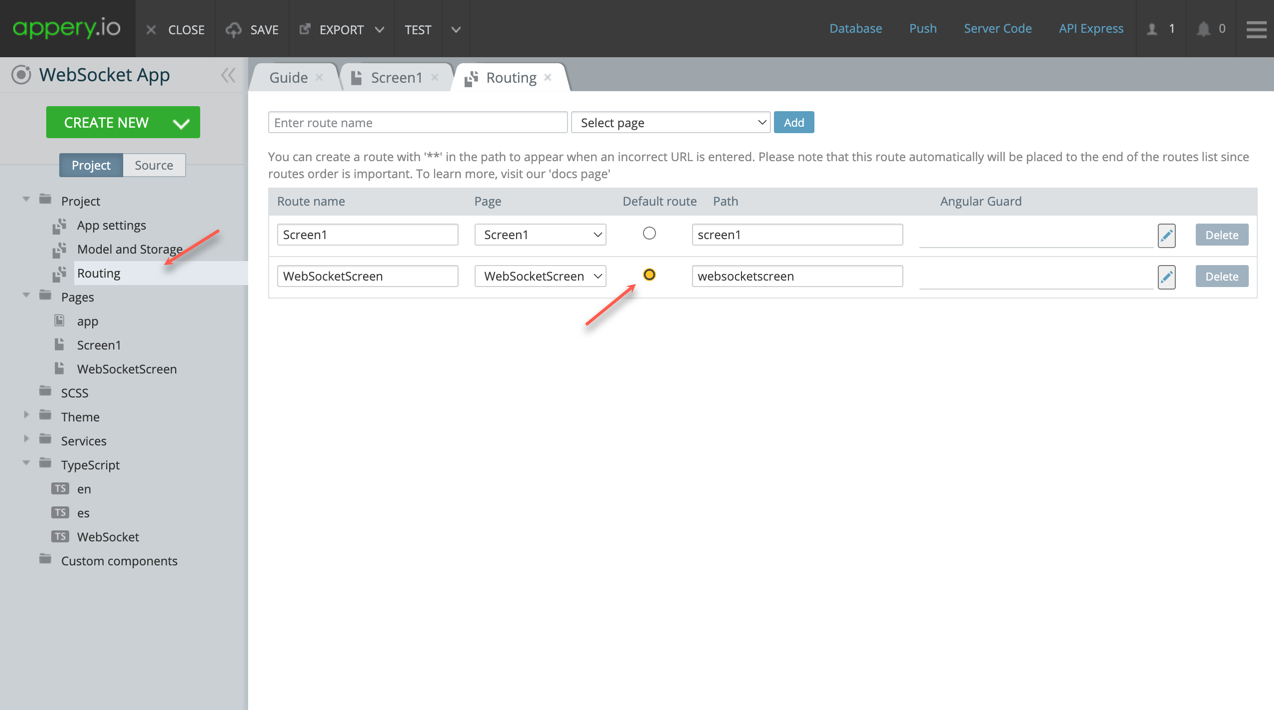
Go to the Project > Routing section and set “WebSocketScreen” as the default page.
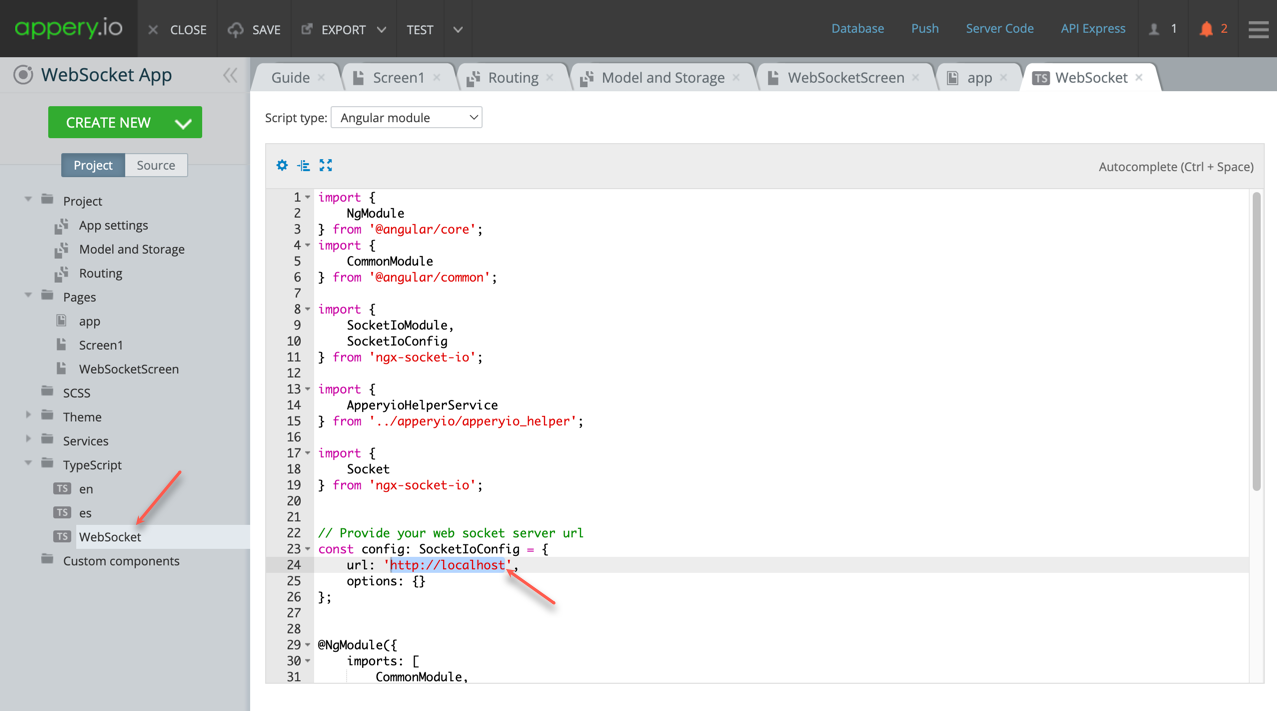
Next, navigate to TypeScript > WebSocket and specify the URL of your WebSocket server obtained from CodeSandbox.
Now, run your app in different browsers like Google Chrome, Firefox, and Edge. Enter a test message and click the “Send” button.
Ready! The message should be delivered to all clients in real-time.
Conclusion
Now you’ve seen how to add Websockets to your apps using Appery.io. This post is a companion piece to our detailed video tutorial. The demo app isn’t a finished product but provides a solid template for building your own real-time communication features. Give it a try and unlock powerful networking capabilities in your applications!