New Videos: New UI Themes, Page Templates, Using The Customer Console, and Farmers Market Search App

Check out some of the new videos we recently posted on our Youtube channel:
Check out some of the new videos we recently posted on our Youtube channel:
We just published a bunch of new UI themes. We took all our existing themes and updated them to look modern and flat.
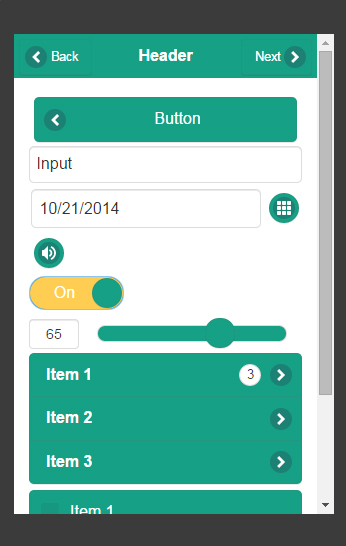
Example of one of the new themes
Recently, the Appery.io App Builder was updated with several significant features. One of the most important and fundamental changes was the introduction of Model and Storage notions. To show the best practices of using these features, we created a MusicShop app and step-by-step tutorial which describes in detail how to build such an app from scratch. This tutorial also has a MusicShop app backup attached to allow you to pay more attention to Model and Storage usage (you shouldn’t create the app step-by-step in this case, just create it from the backup).
This video shows:
This 5-minute video shows how to create a simple, yet real mobile app that talks to an API backend.
We just added a second template called Slide Panel App Example in addition to the Tabbed Pages App Example we published last week. When you create a new app, you can base the app on this template and use it a great starting point. The app has a Panel menu which slides from the left, and allows you to navigate to three pages. The Panel is configured via page templates. This simplifies app development as you need to make changes to navigation only in one place.
Developers love to look at examples. A very nice feature in Appery.io platform is that you can create a new app based on an existing example/template. We just added a new Tabbed Pages Example and will be adding more soon.
The Appery.io team just released a number of really nice features. Learn about what’s new in this post.
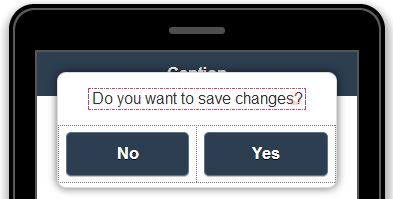
The new jQuery Mobile Popup component gives you more power to build app UI. The component can be used to notify the user to confirm an action, or just display any important information.
We added a number of properties to the list to simplify UI building. For instance, it is now easy to make the list read-only.

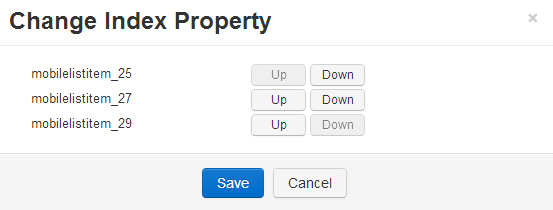
We also added the ability to manage the list items order. You can do this by using the Index property in the Properties panel:
Everyone likes icons, and there is now a better way to select one. If the component supports an icon (List, Button etc.), the Icon property will be available:
![]()
By clicking “Choose,” the icons list will appear:
![]()
This is much more fun as you can see the actual icon.
The Appery.io cloud database got a number of very useful upgrades.
By adding the ability to manage database indexes, we allow you speed up the frequently used queries. It’s a good thing to use when transferring a lot of data between the devices and Appery.io backend:

To reduce data transfer and speed up the app, use the MongoDB Projection concept that the Appery.io database now supports. By using Projection, you can selectively retrieve columns from the database without the need to transfer excess data (columns). This will decrease the data being sent to the client (app), and also increase app responsiveness.
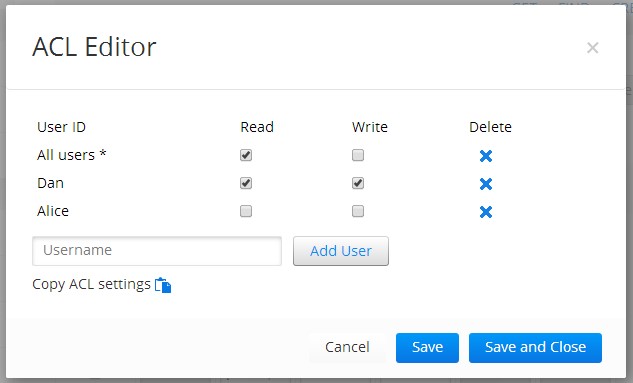
User access control is now more flexible with the new ACL editor. You can specify access rights for each user separately, for all users at once, or just for the user that created a specific collection entry:
The Appery.io database now supports the Media Manager that helps manage files. You can upload and delete any sort of files directly from the database console by using it:
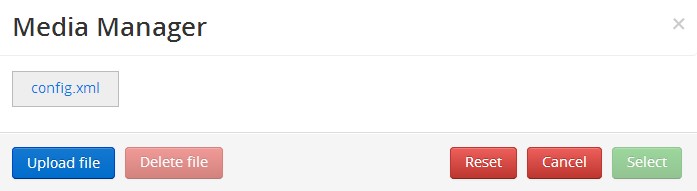
It’s now possible to get a file list based on the Files collection content and provided ACL for every file (you can of course control user access rights for files too).
It’s always a good idea to make a backup of your database. With the new database versioning features, you can create versions (backups) of the database and restore to a particular version instantly:

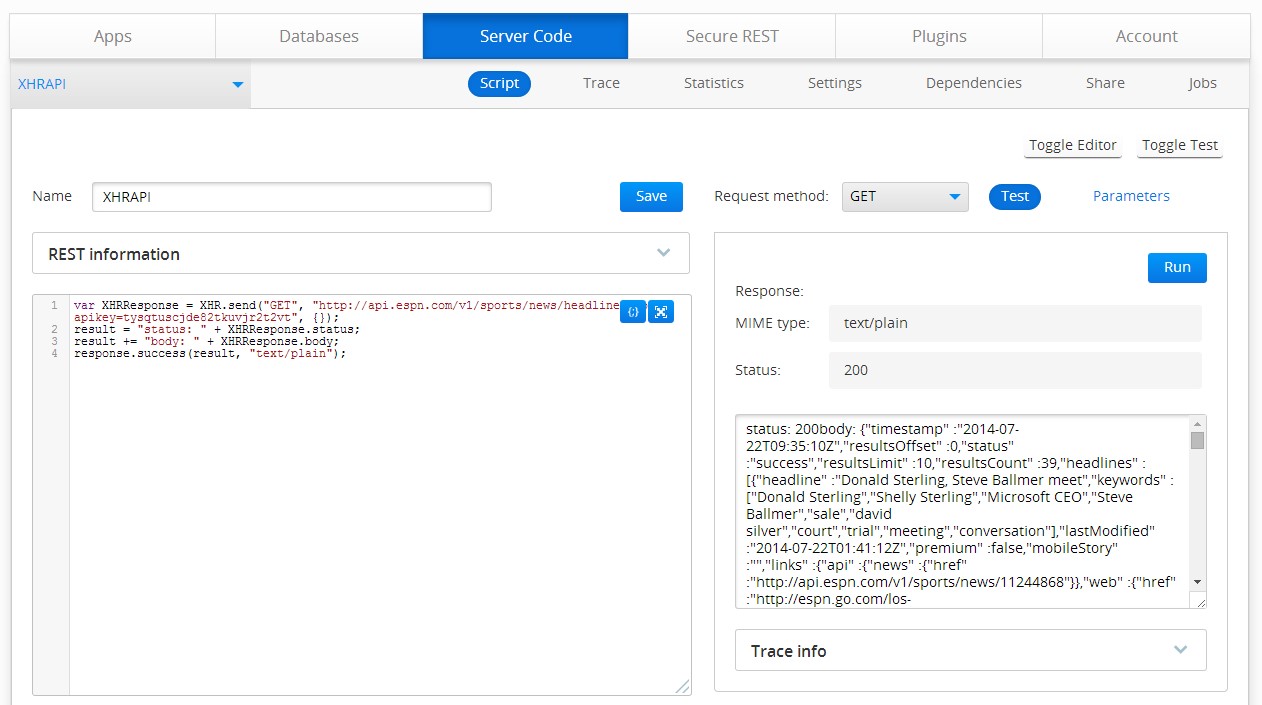
To make development and testing faster, we combined the Script tab and Test tab into a single page. You can now quickly test the script and see the execution result without the need to switch tabs:
The Server Code API was upgraded with a new service – multiUpdateObject. By using it, you can update multiple objects via a single REST service. See the Server Code API to learn what functionality can be used on the Appery.io server side.
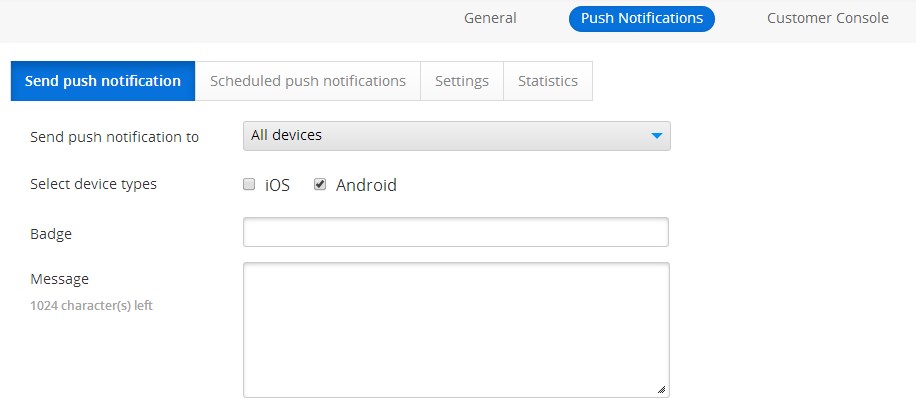
Customer Console is a great way to create a development process where a customer can manage databases and push notifications without the developer attention. The Customer Console adds the following new features:
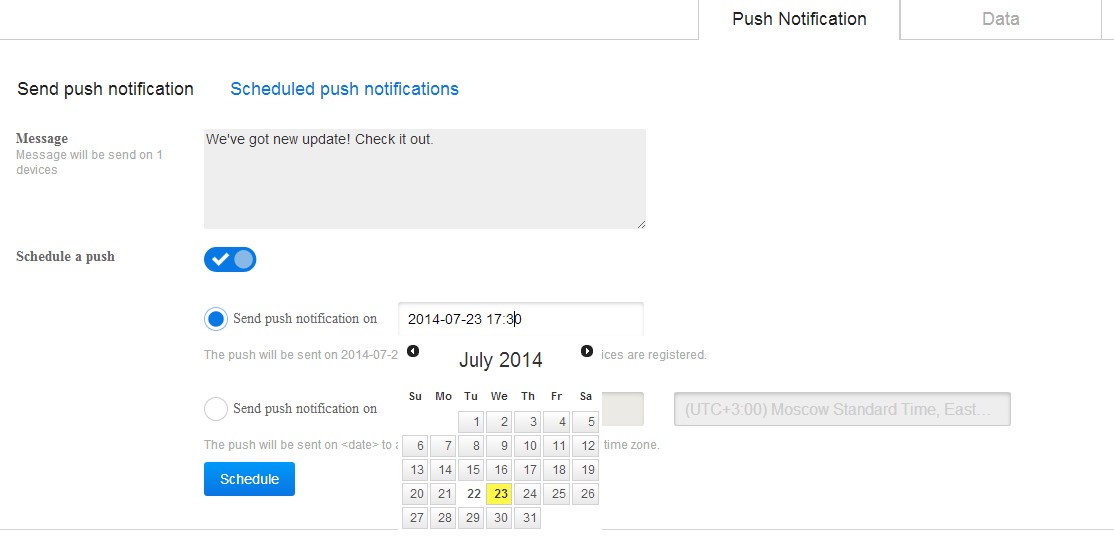
To simplify working with Push, we have moved the Push tab together with the app. So now it’s a lot simpler; with every app, you can enable its own push capability:
If you new to Appery.io Push Notifications, we recommend starting with this tutorial.
Now, when the app is exported from the Appery.io with “Release” checkbox checked, JavaScript files will be minified. This option works for all binary exports and reduces the final binary size. Head to the Exporting the app section if you want to know more about Appery.io app exporting possibilities.
With every new Appery.io update, our goal is to make app development faster and simpler in the cloud.
Follow us Twitter, and Facebook. And if there is anything we can do better, let us know on the forum.
We pushed a number of really nice features over the weekend. Check out the release notes and what’s new. A full blog post is coming up shortly.
Building mobile apps with identity management wasn’t simple, until now. Auth0, a cloud service that eliminates the friction of identity for your app, and Appery.io, the only cloud platform with visual development tools and integrated backend services, are collaborating to make this happen. With the jointly created Appery.io Auth0 plugin, you can simplify identity management integration for your app, and this post will show you how.
Appery.io is the only cloud-based platform with visual development tools and integrated backend services. Appery.io provides a powerful visual environment to build HTML5 and hybrid mobile apps connected to any API.
The Appery.io platform provides the following core features: