Build an AI Chatbot App for Free – No Coding!

Did you know you can create a mobile app that uses popular AI chatbots like DeepSeek, Qwen, Gemini, and more—completely free? If not, don’t worry! In this video, we’ll walk you through it step by step.

We’ll be using Appery.io to build the app, and you can sign up for free to follow along.


SETUP

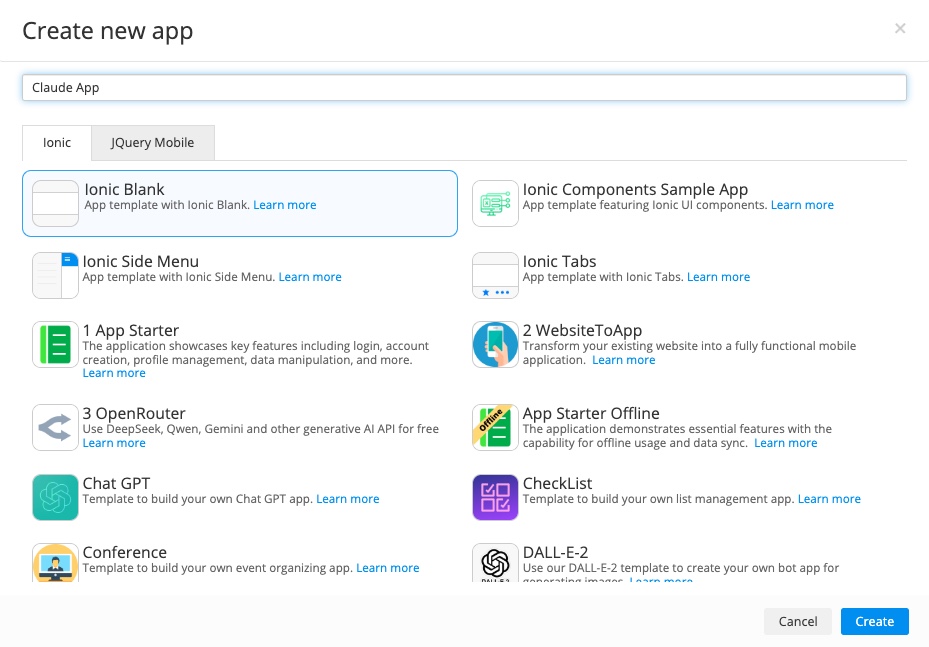
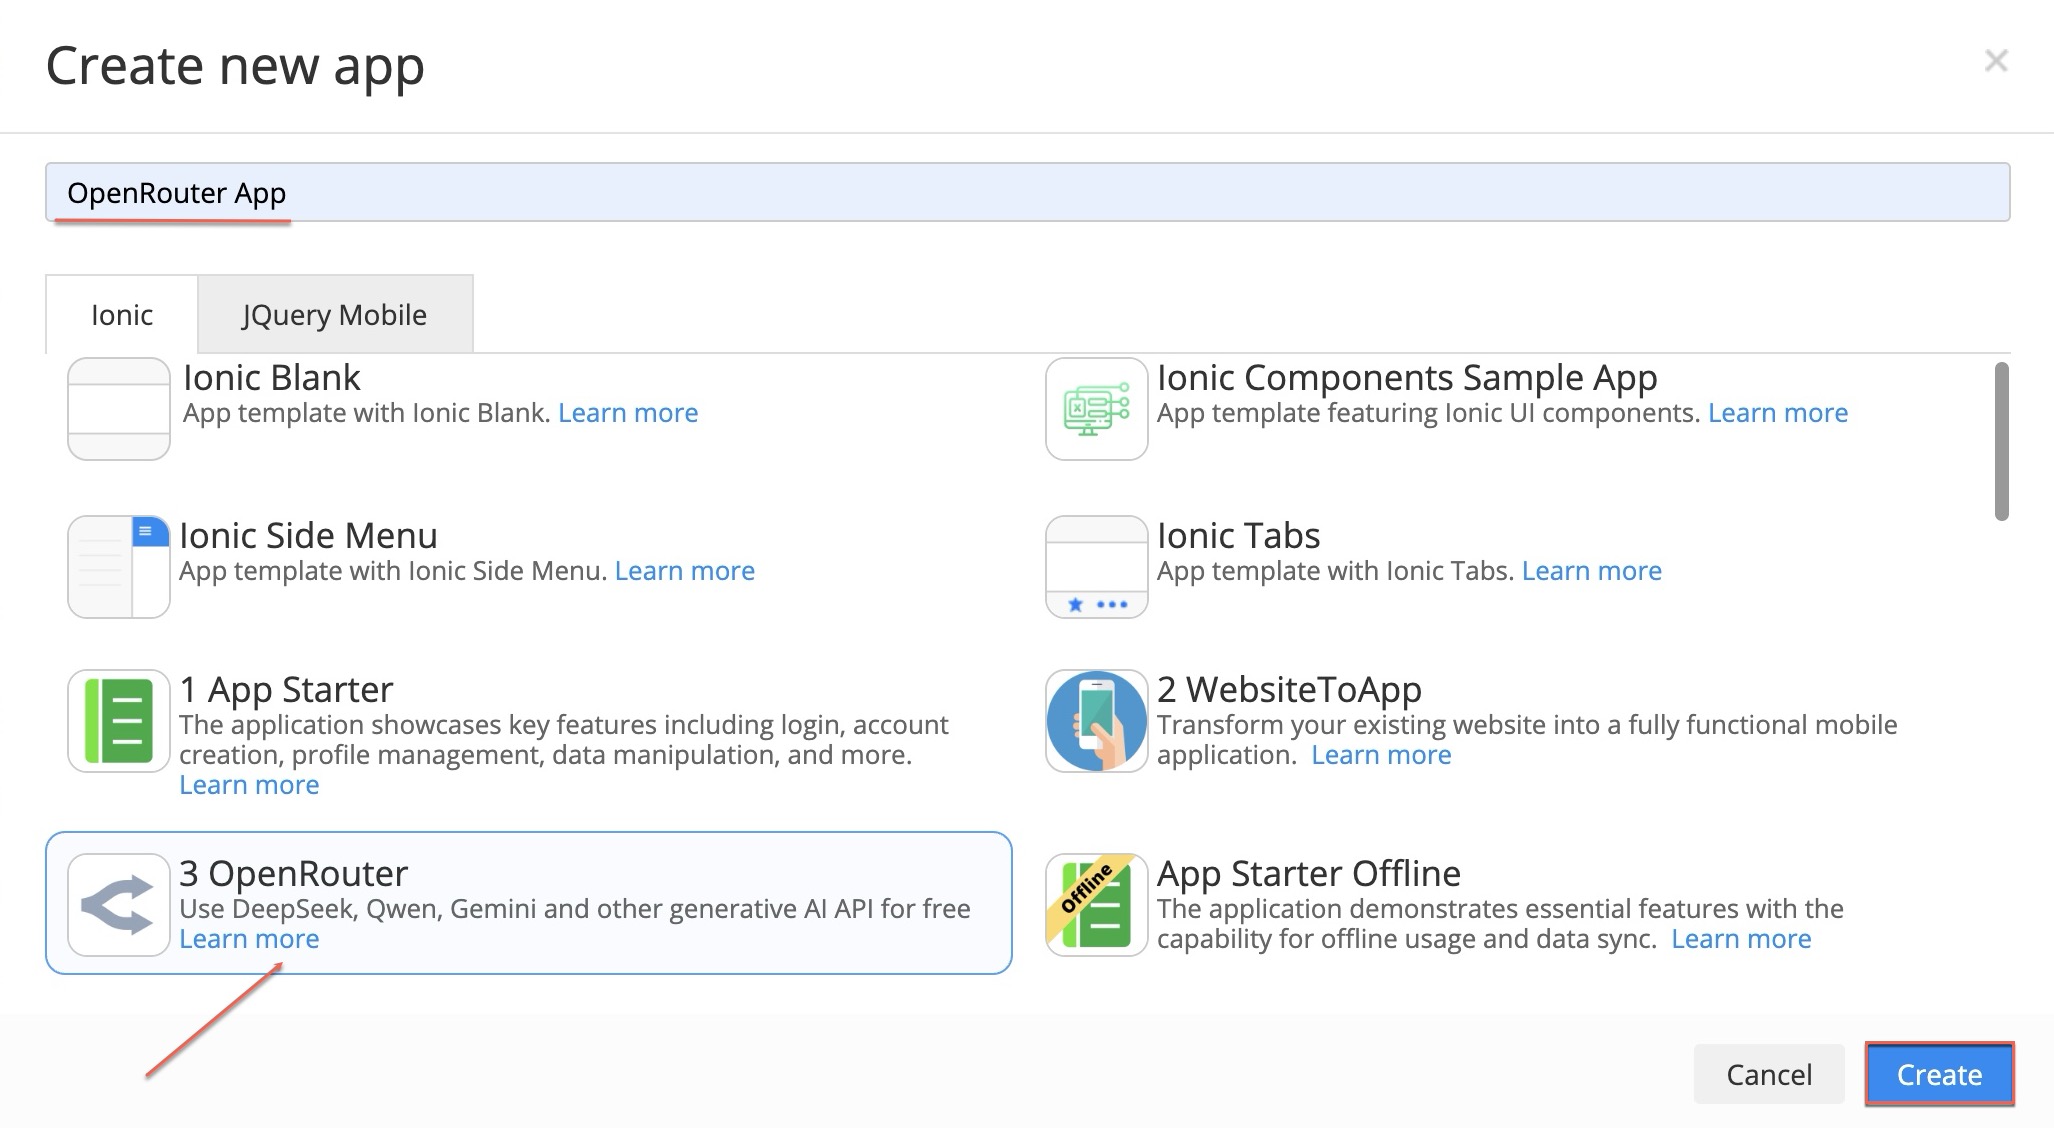
  1. Once you’ve created an Appery account, start by creating a new app using the OpenRouter template.

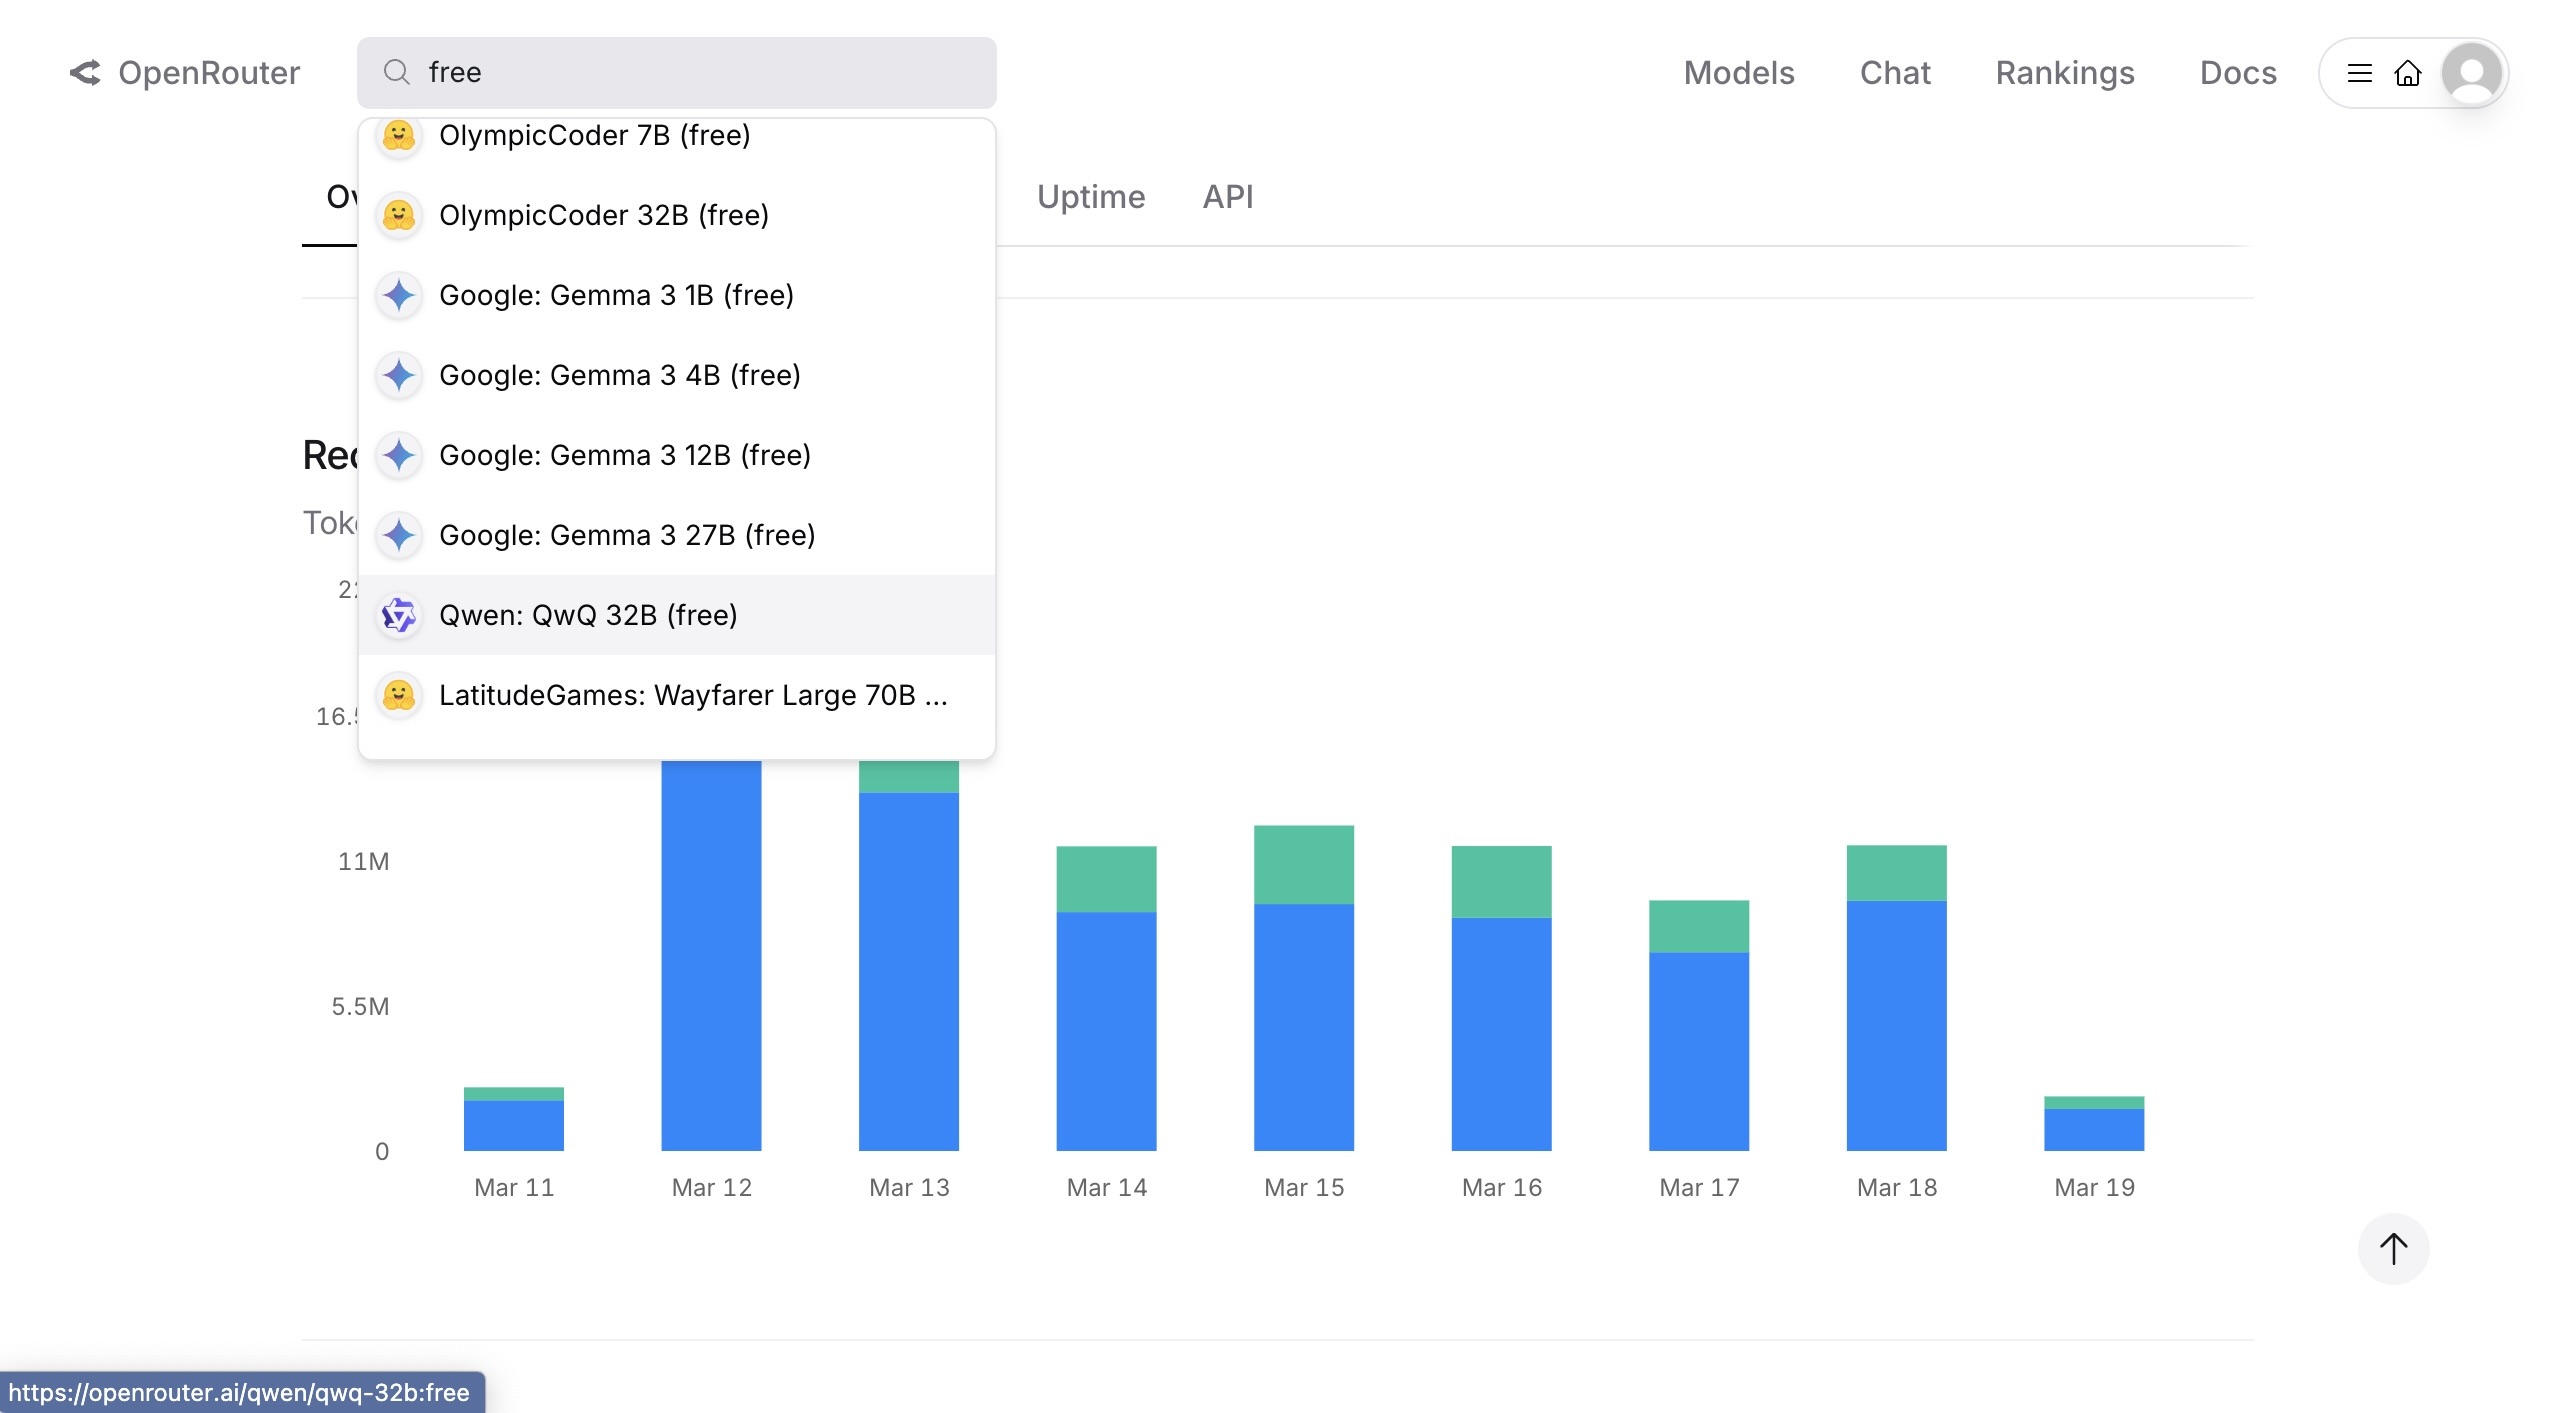
2. Next, head over to OpenRouter.AI and sign up. In the top-left corner, you’ll see a list of model APIs. To find free models, type “free” in the search bar to filter out paid options.

For this example, I’ll select Qwen:QwQ 32B as the chatbot model.

3. After selecting the model:
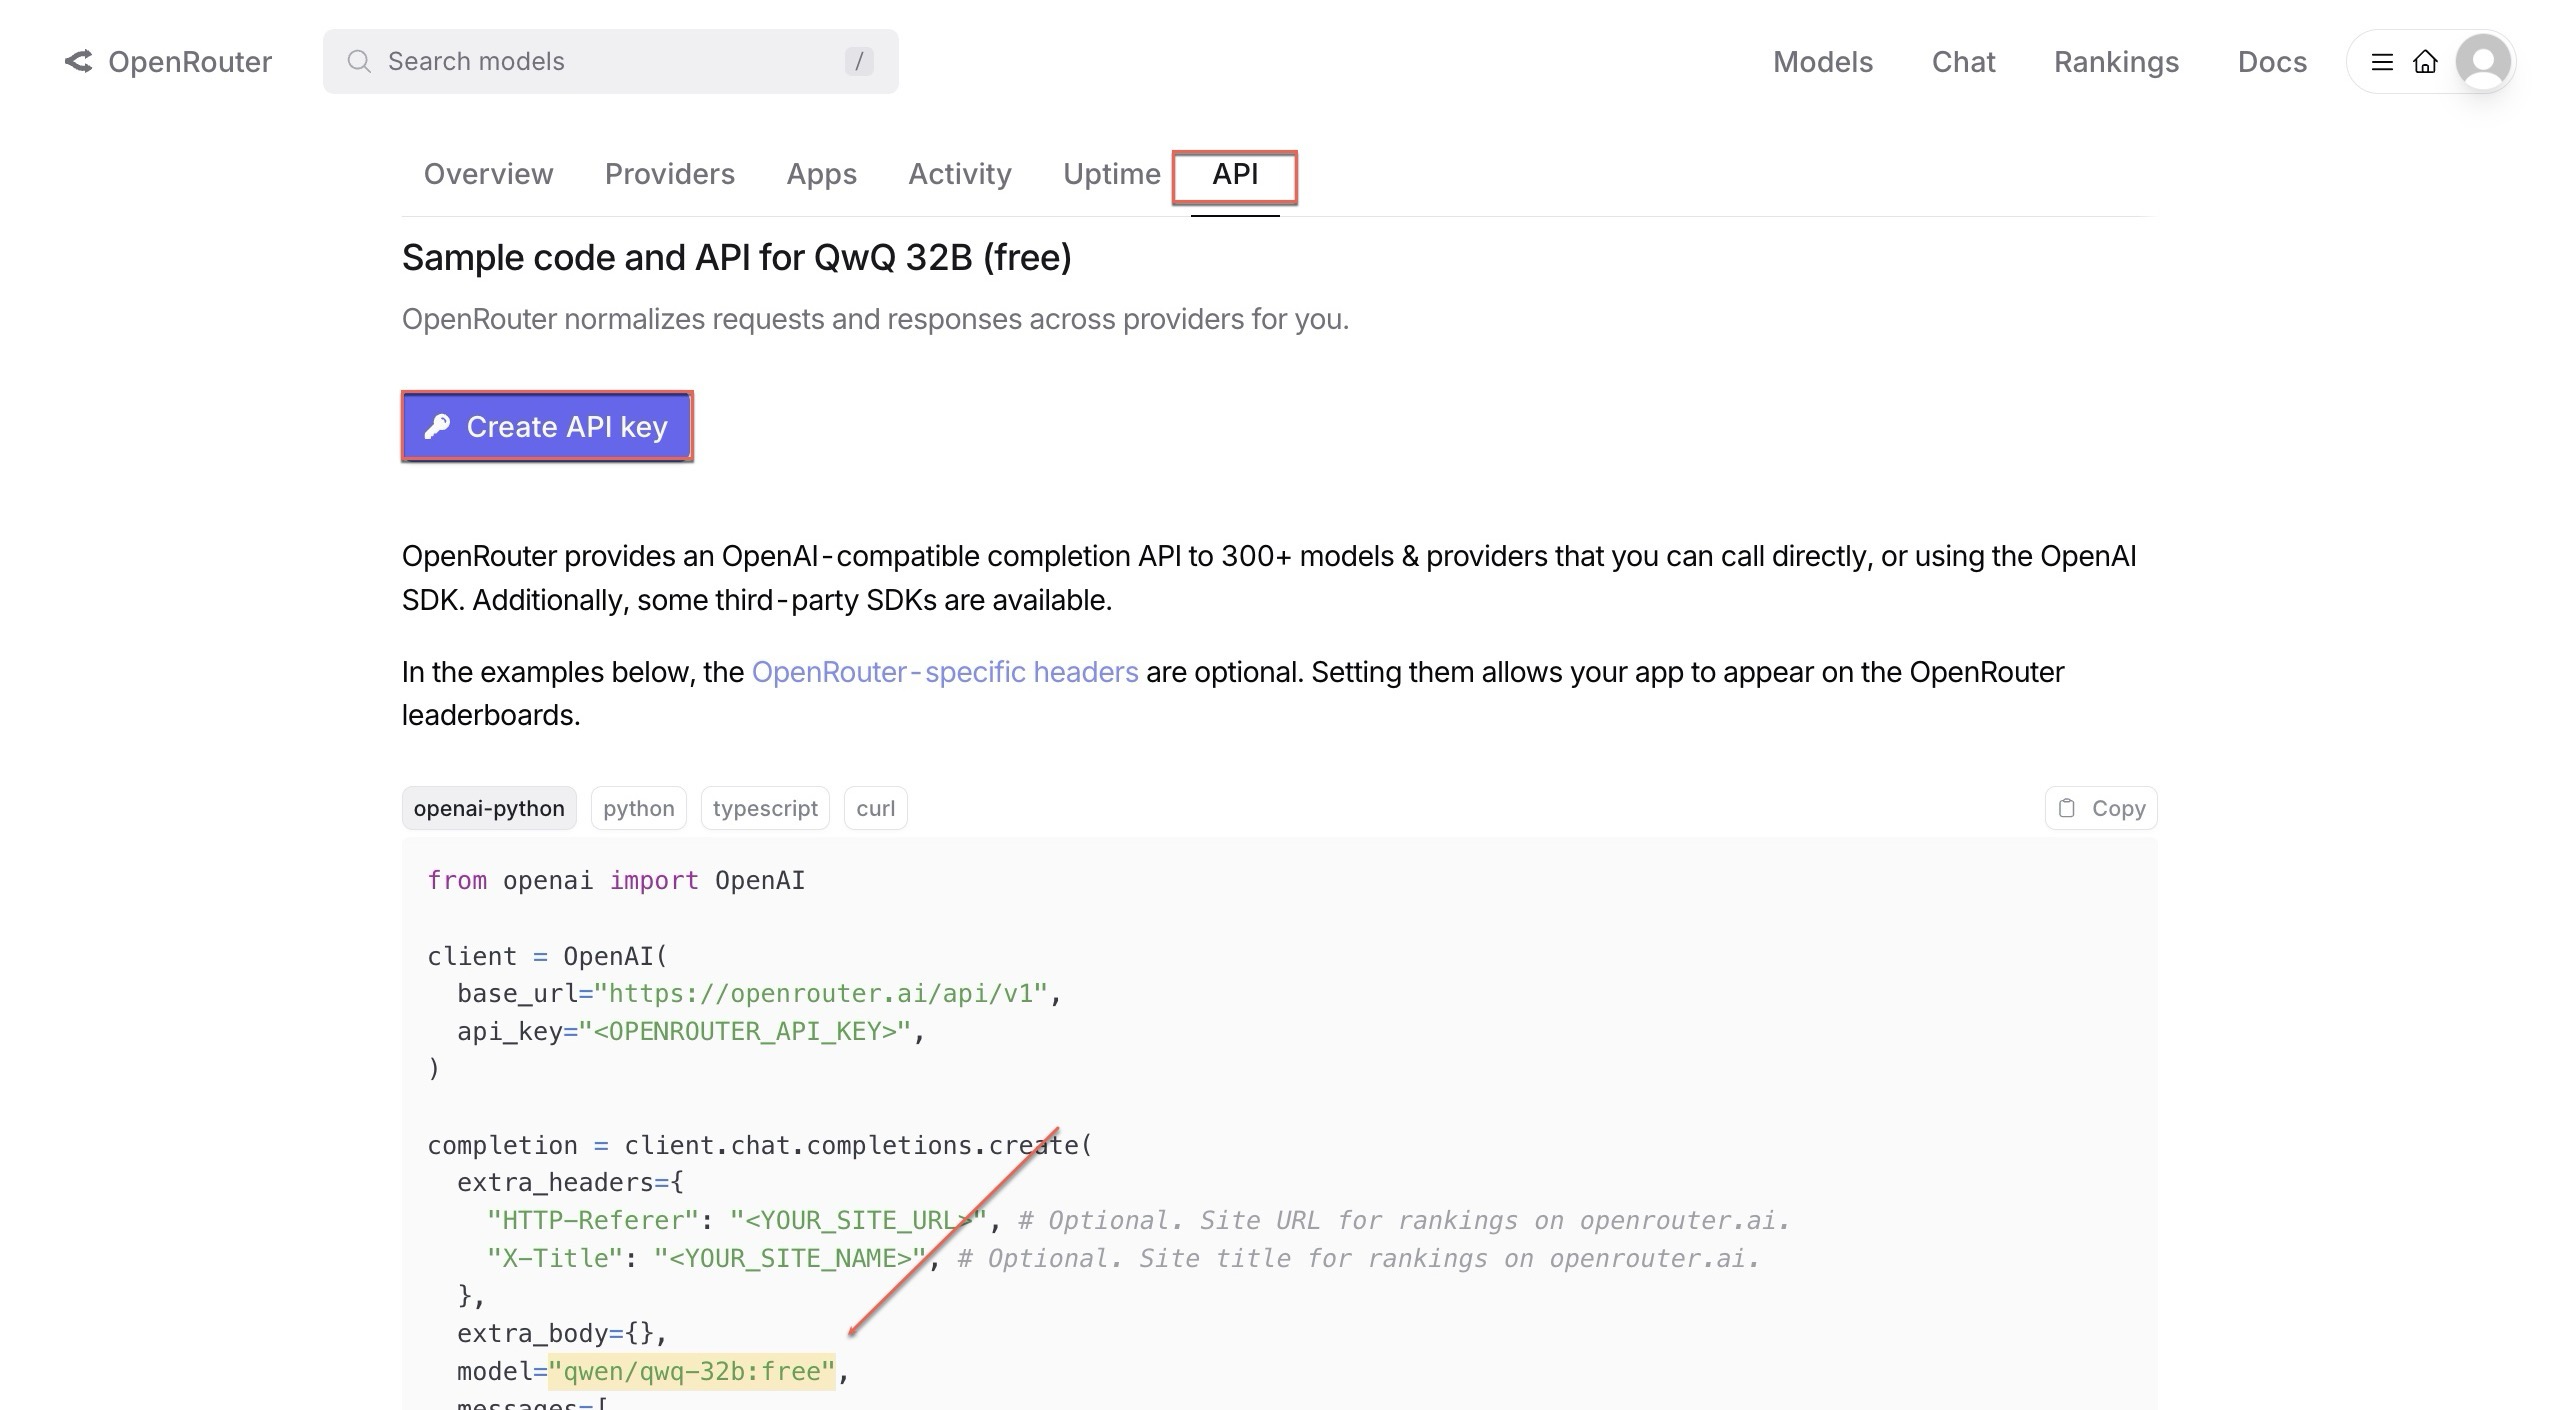
✅ Create an API key (just give it a name).
✅ Copy the key once it’s generated.

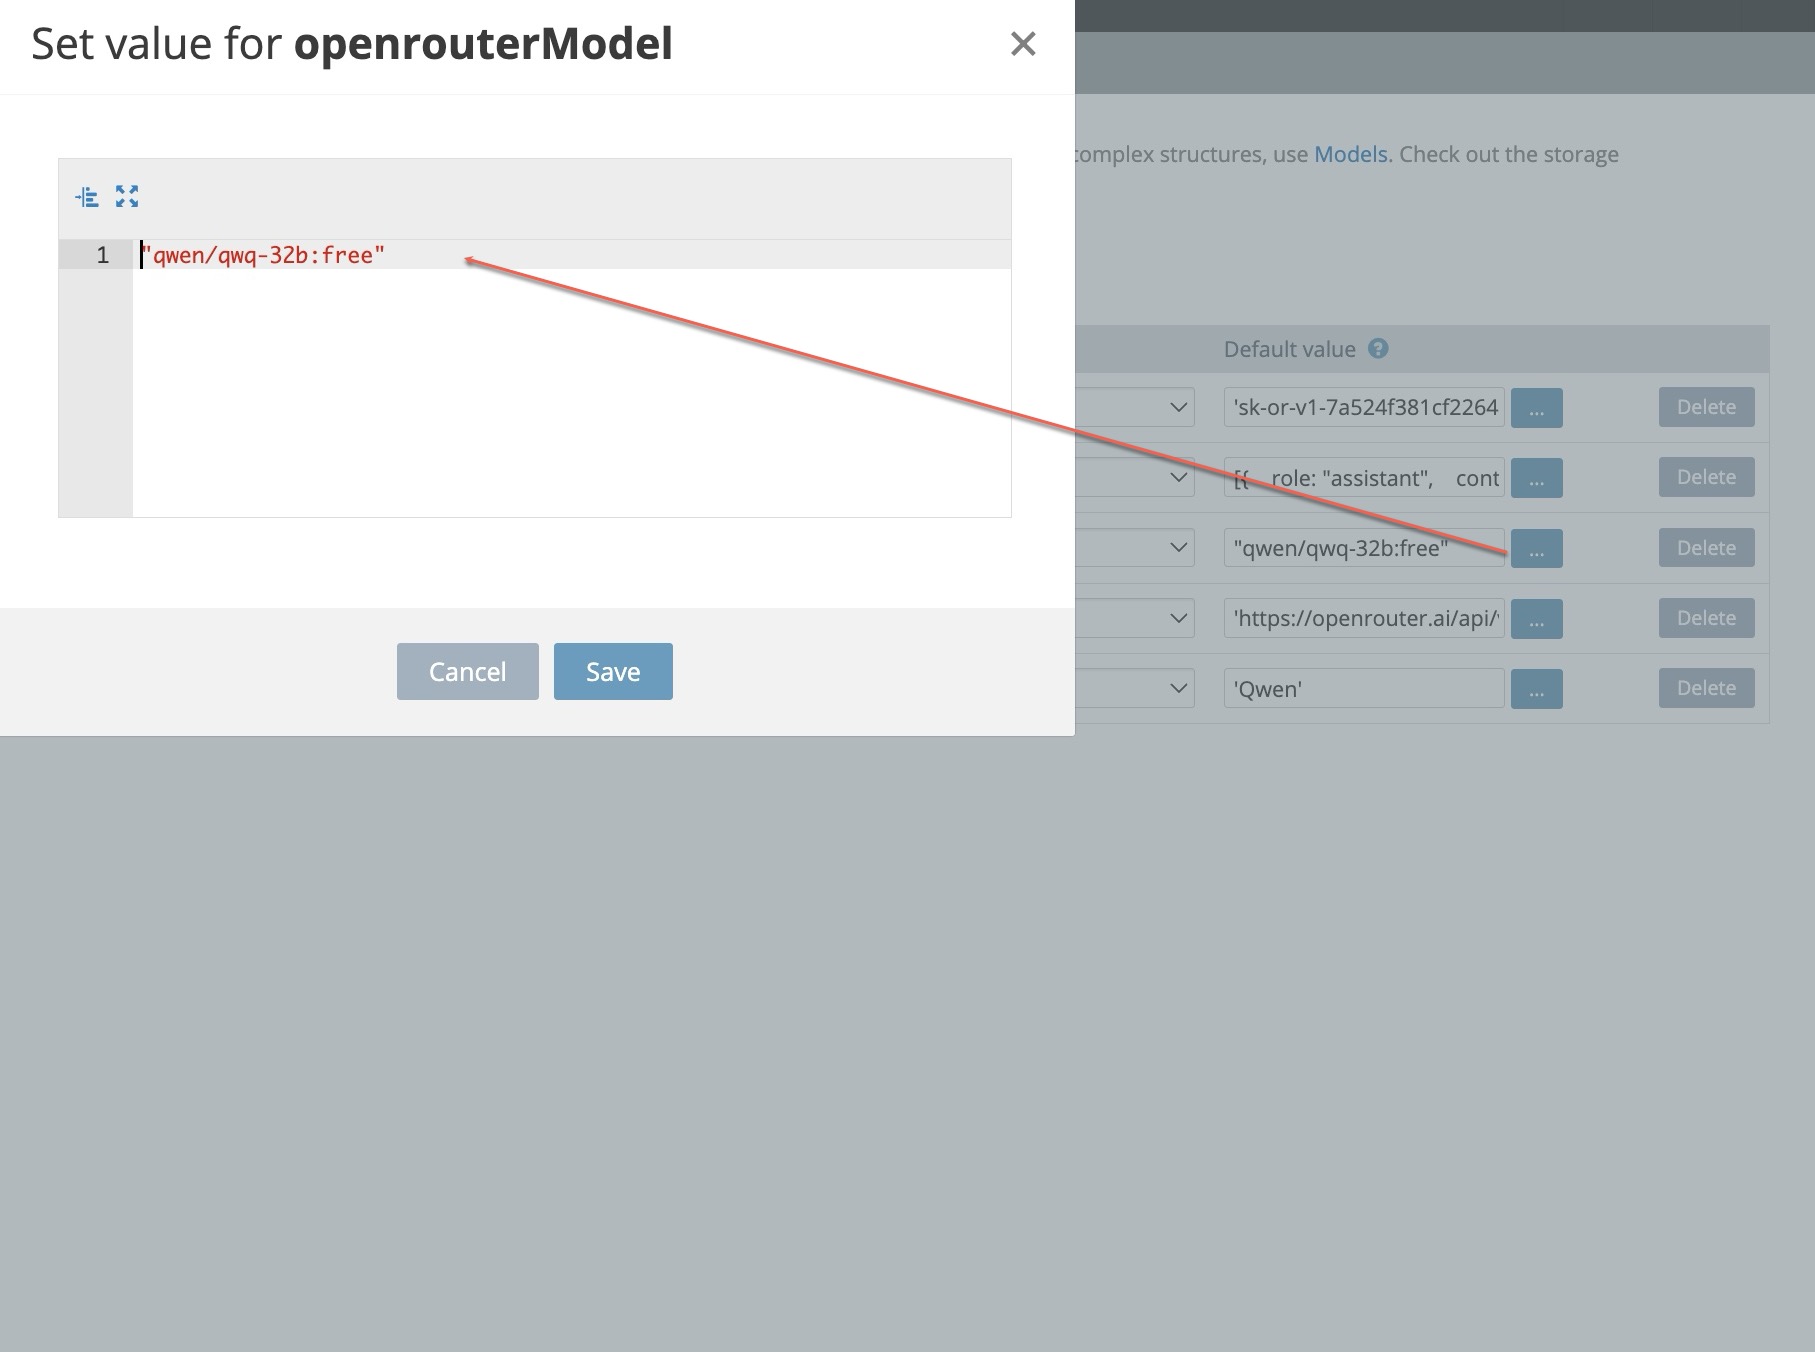
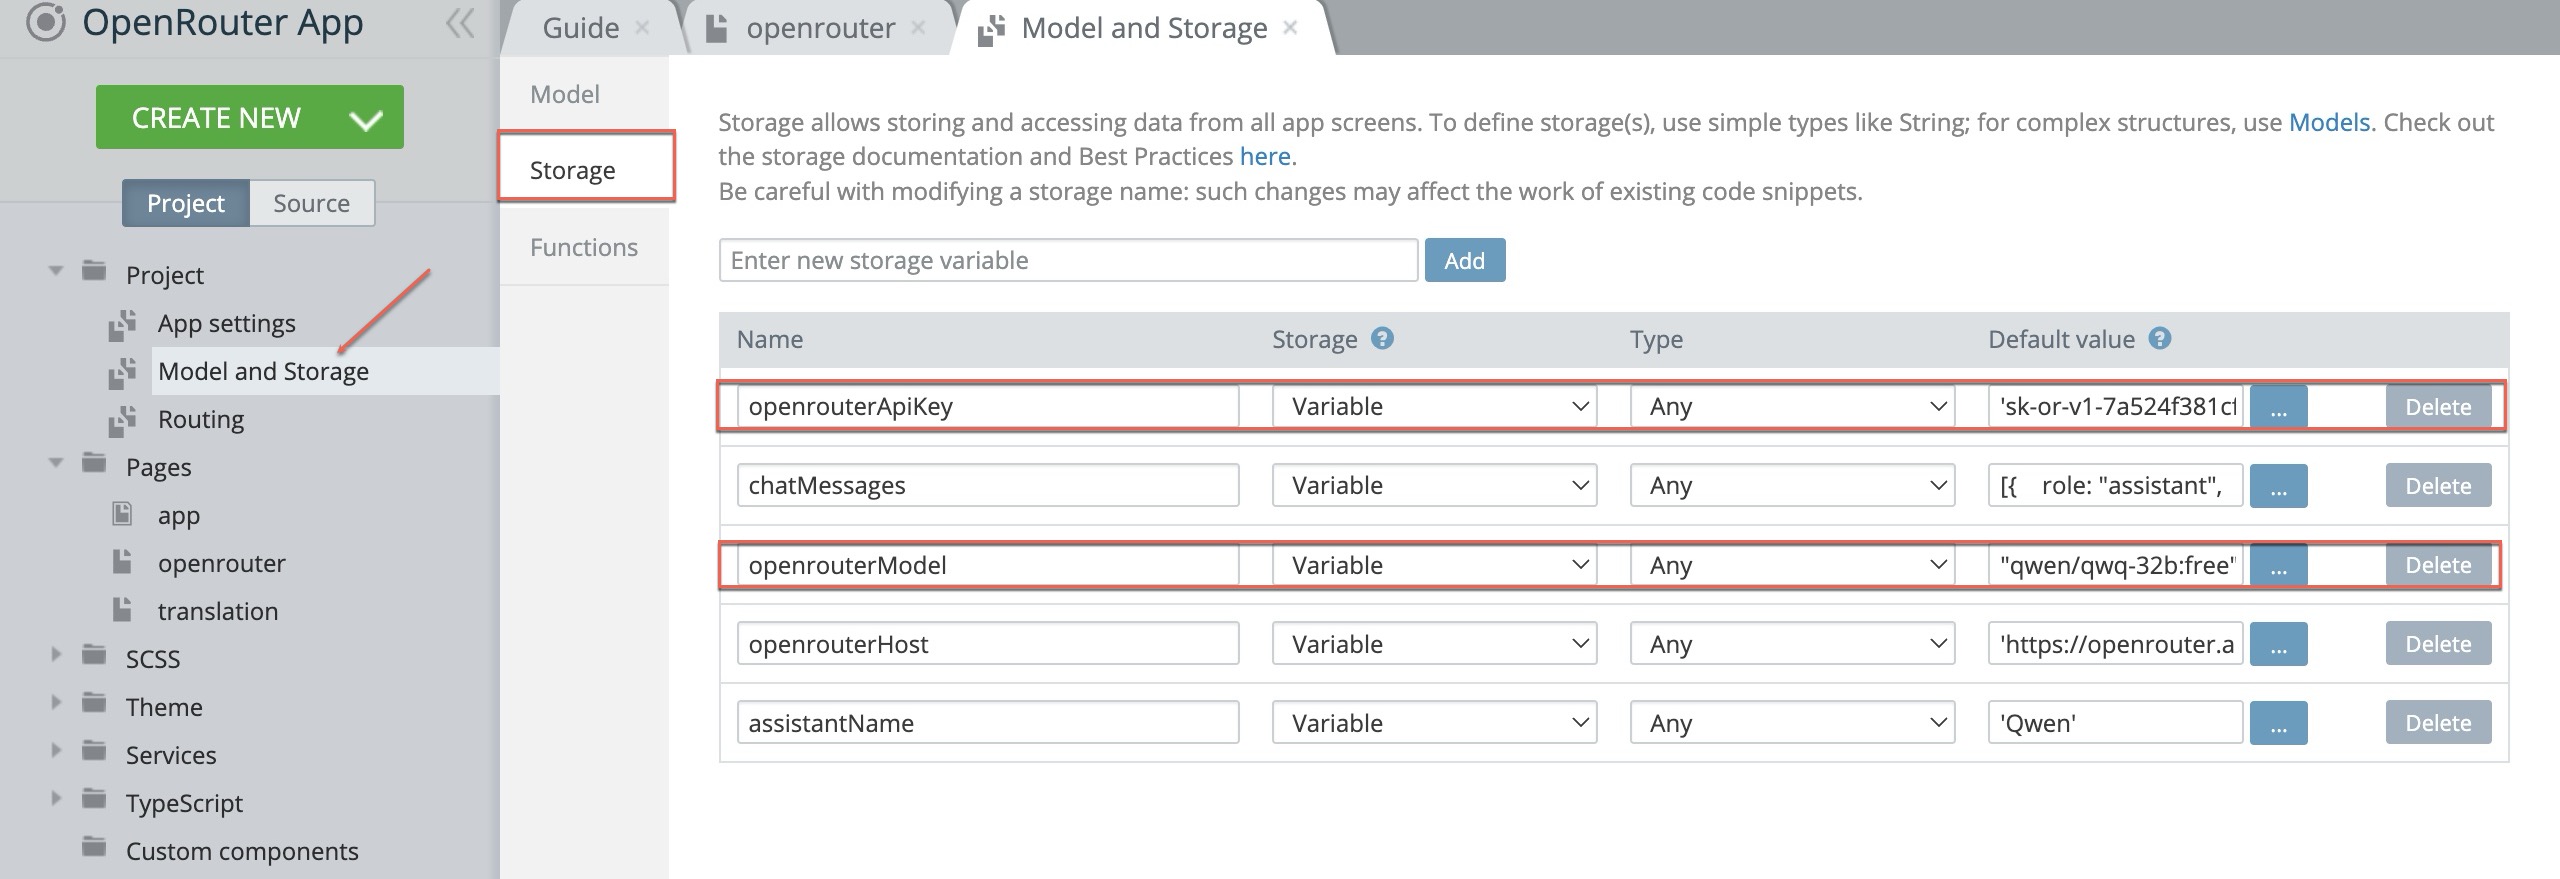
4. Now, go back to Appery.io, navigate to Model & Storage, and paste the API key into the OpenRouter API Key field.

You’ll also need to update the model name:

5. Copy it from the OpenRouter API tab and paste it as the value for OpenRouter Model.

6. Hit the Test button—and after a few seconds, your app is ready! 🎉

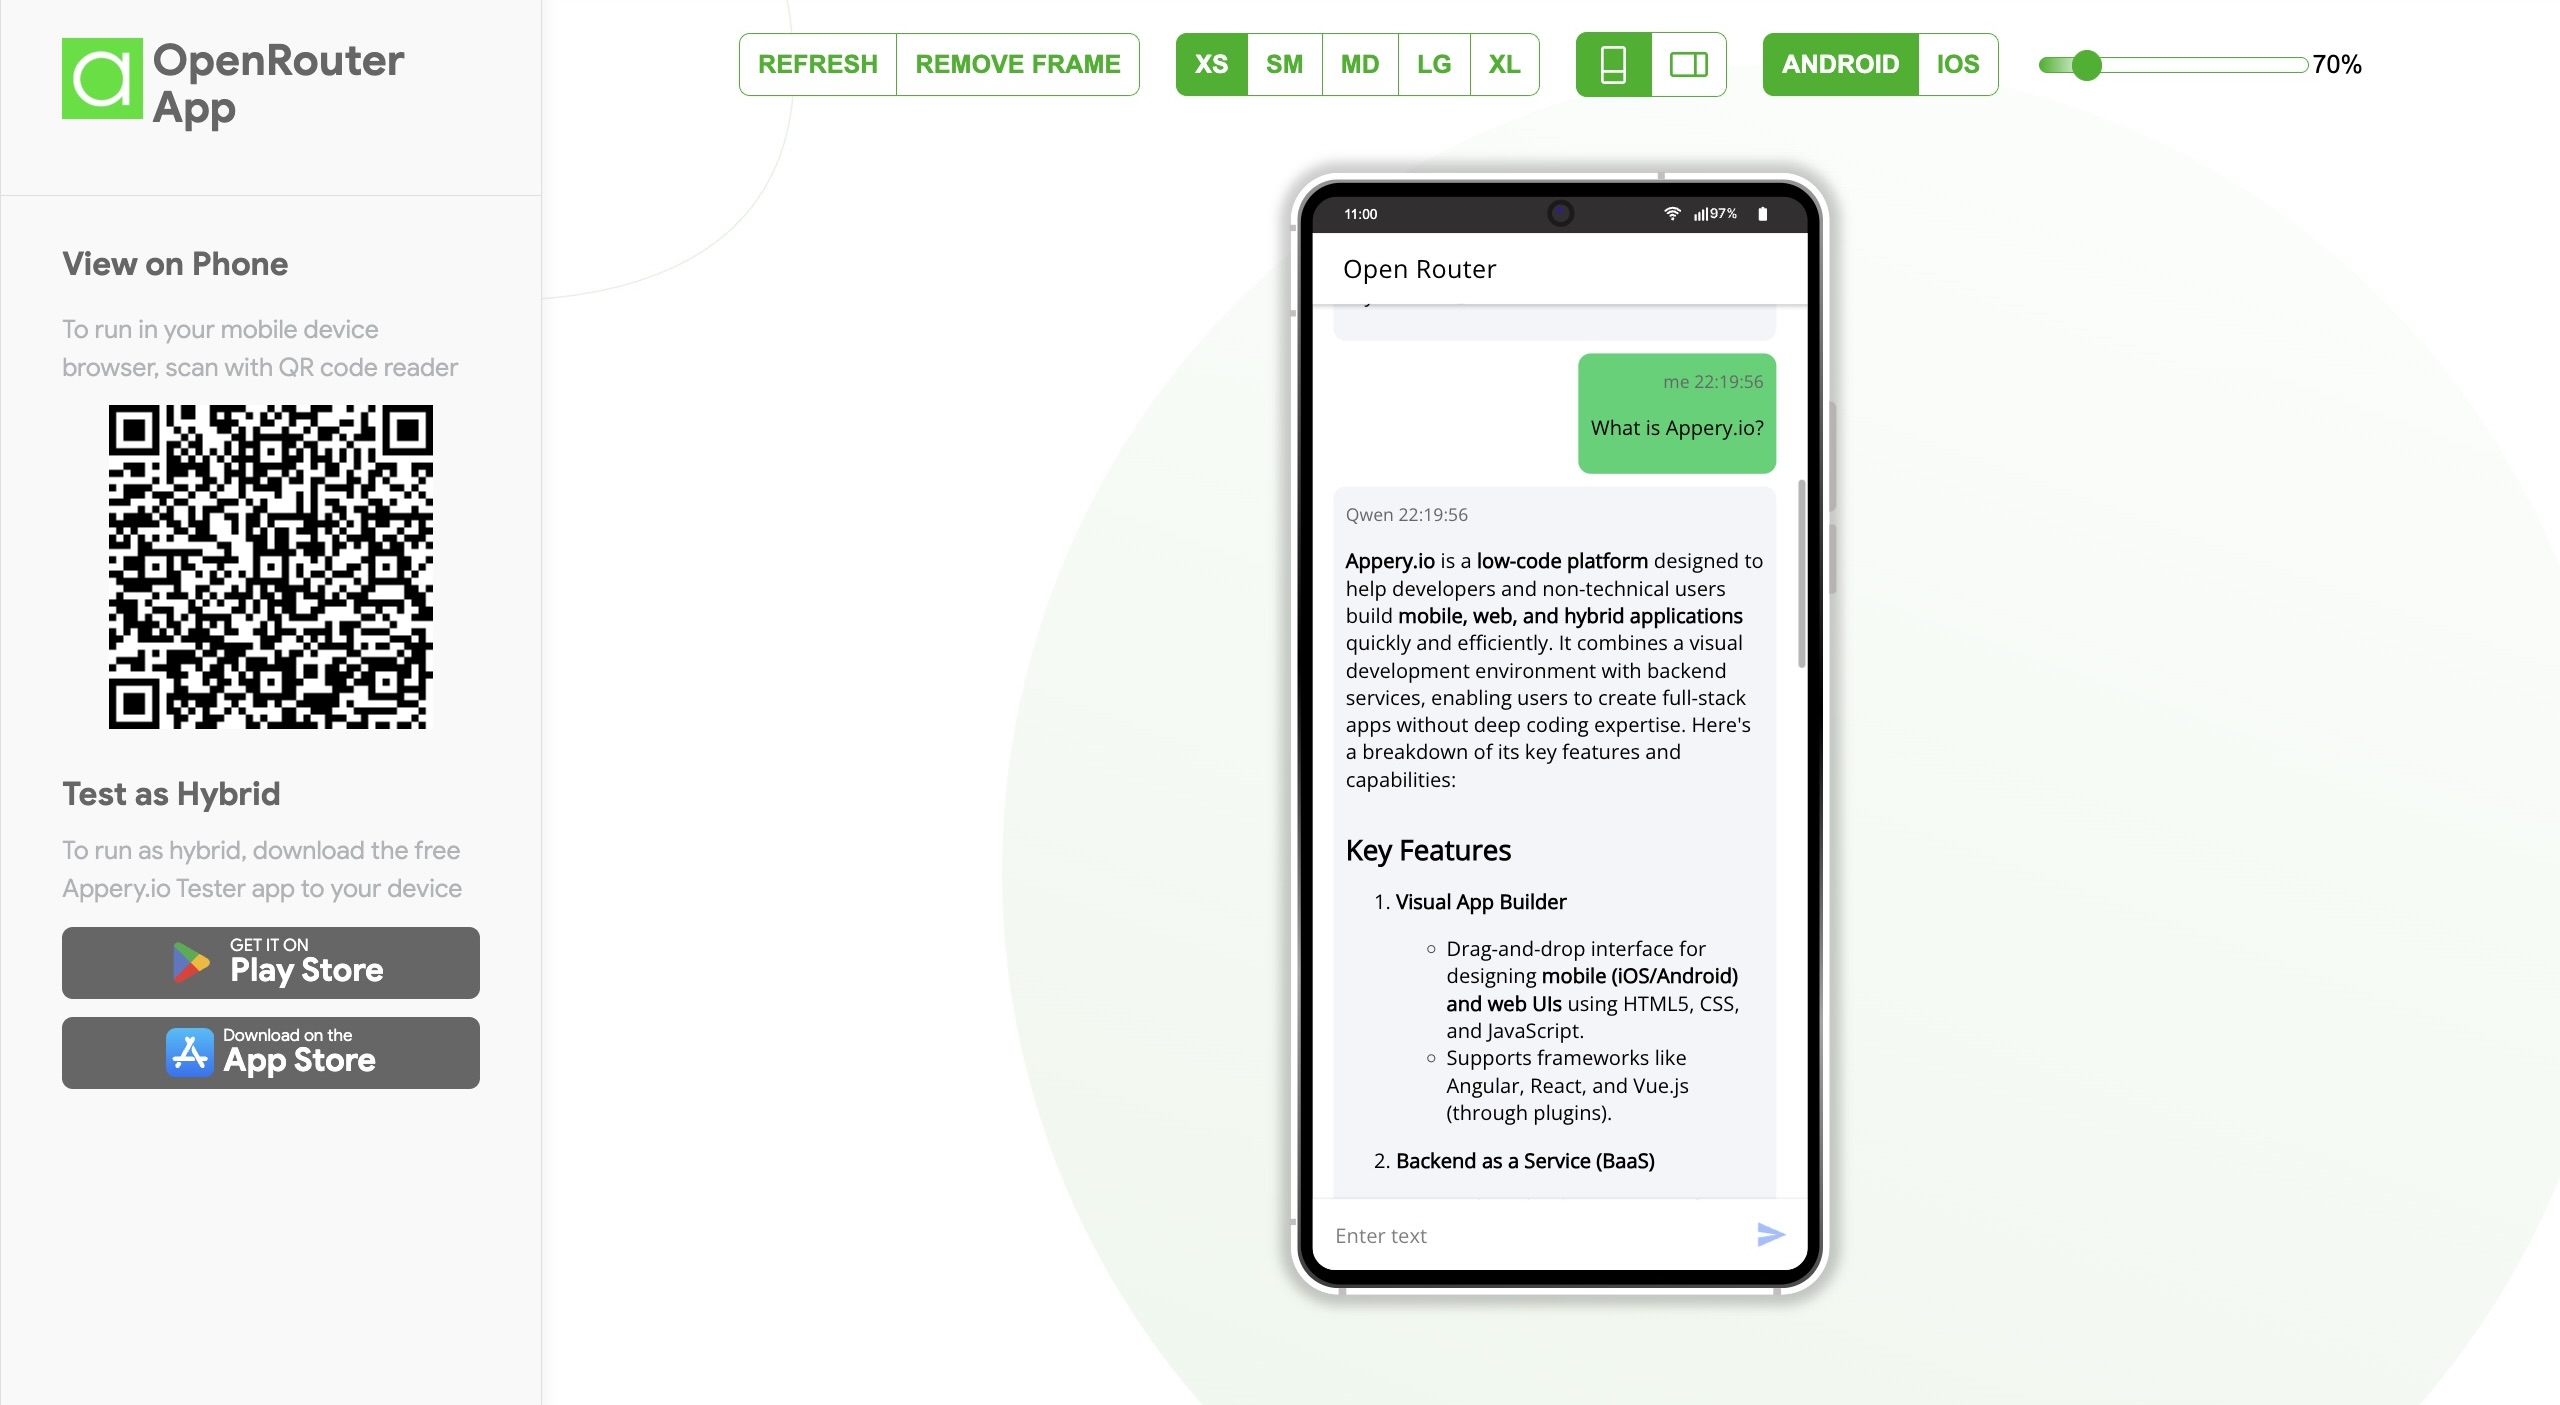
Try asking: “What is Appery.io?” 💡
And just like that, the chatbot responds!

UNDERSTANDING THE APP

Now, let’s take a look under the hood to see how the app works.

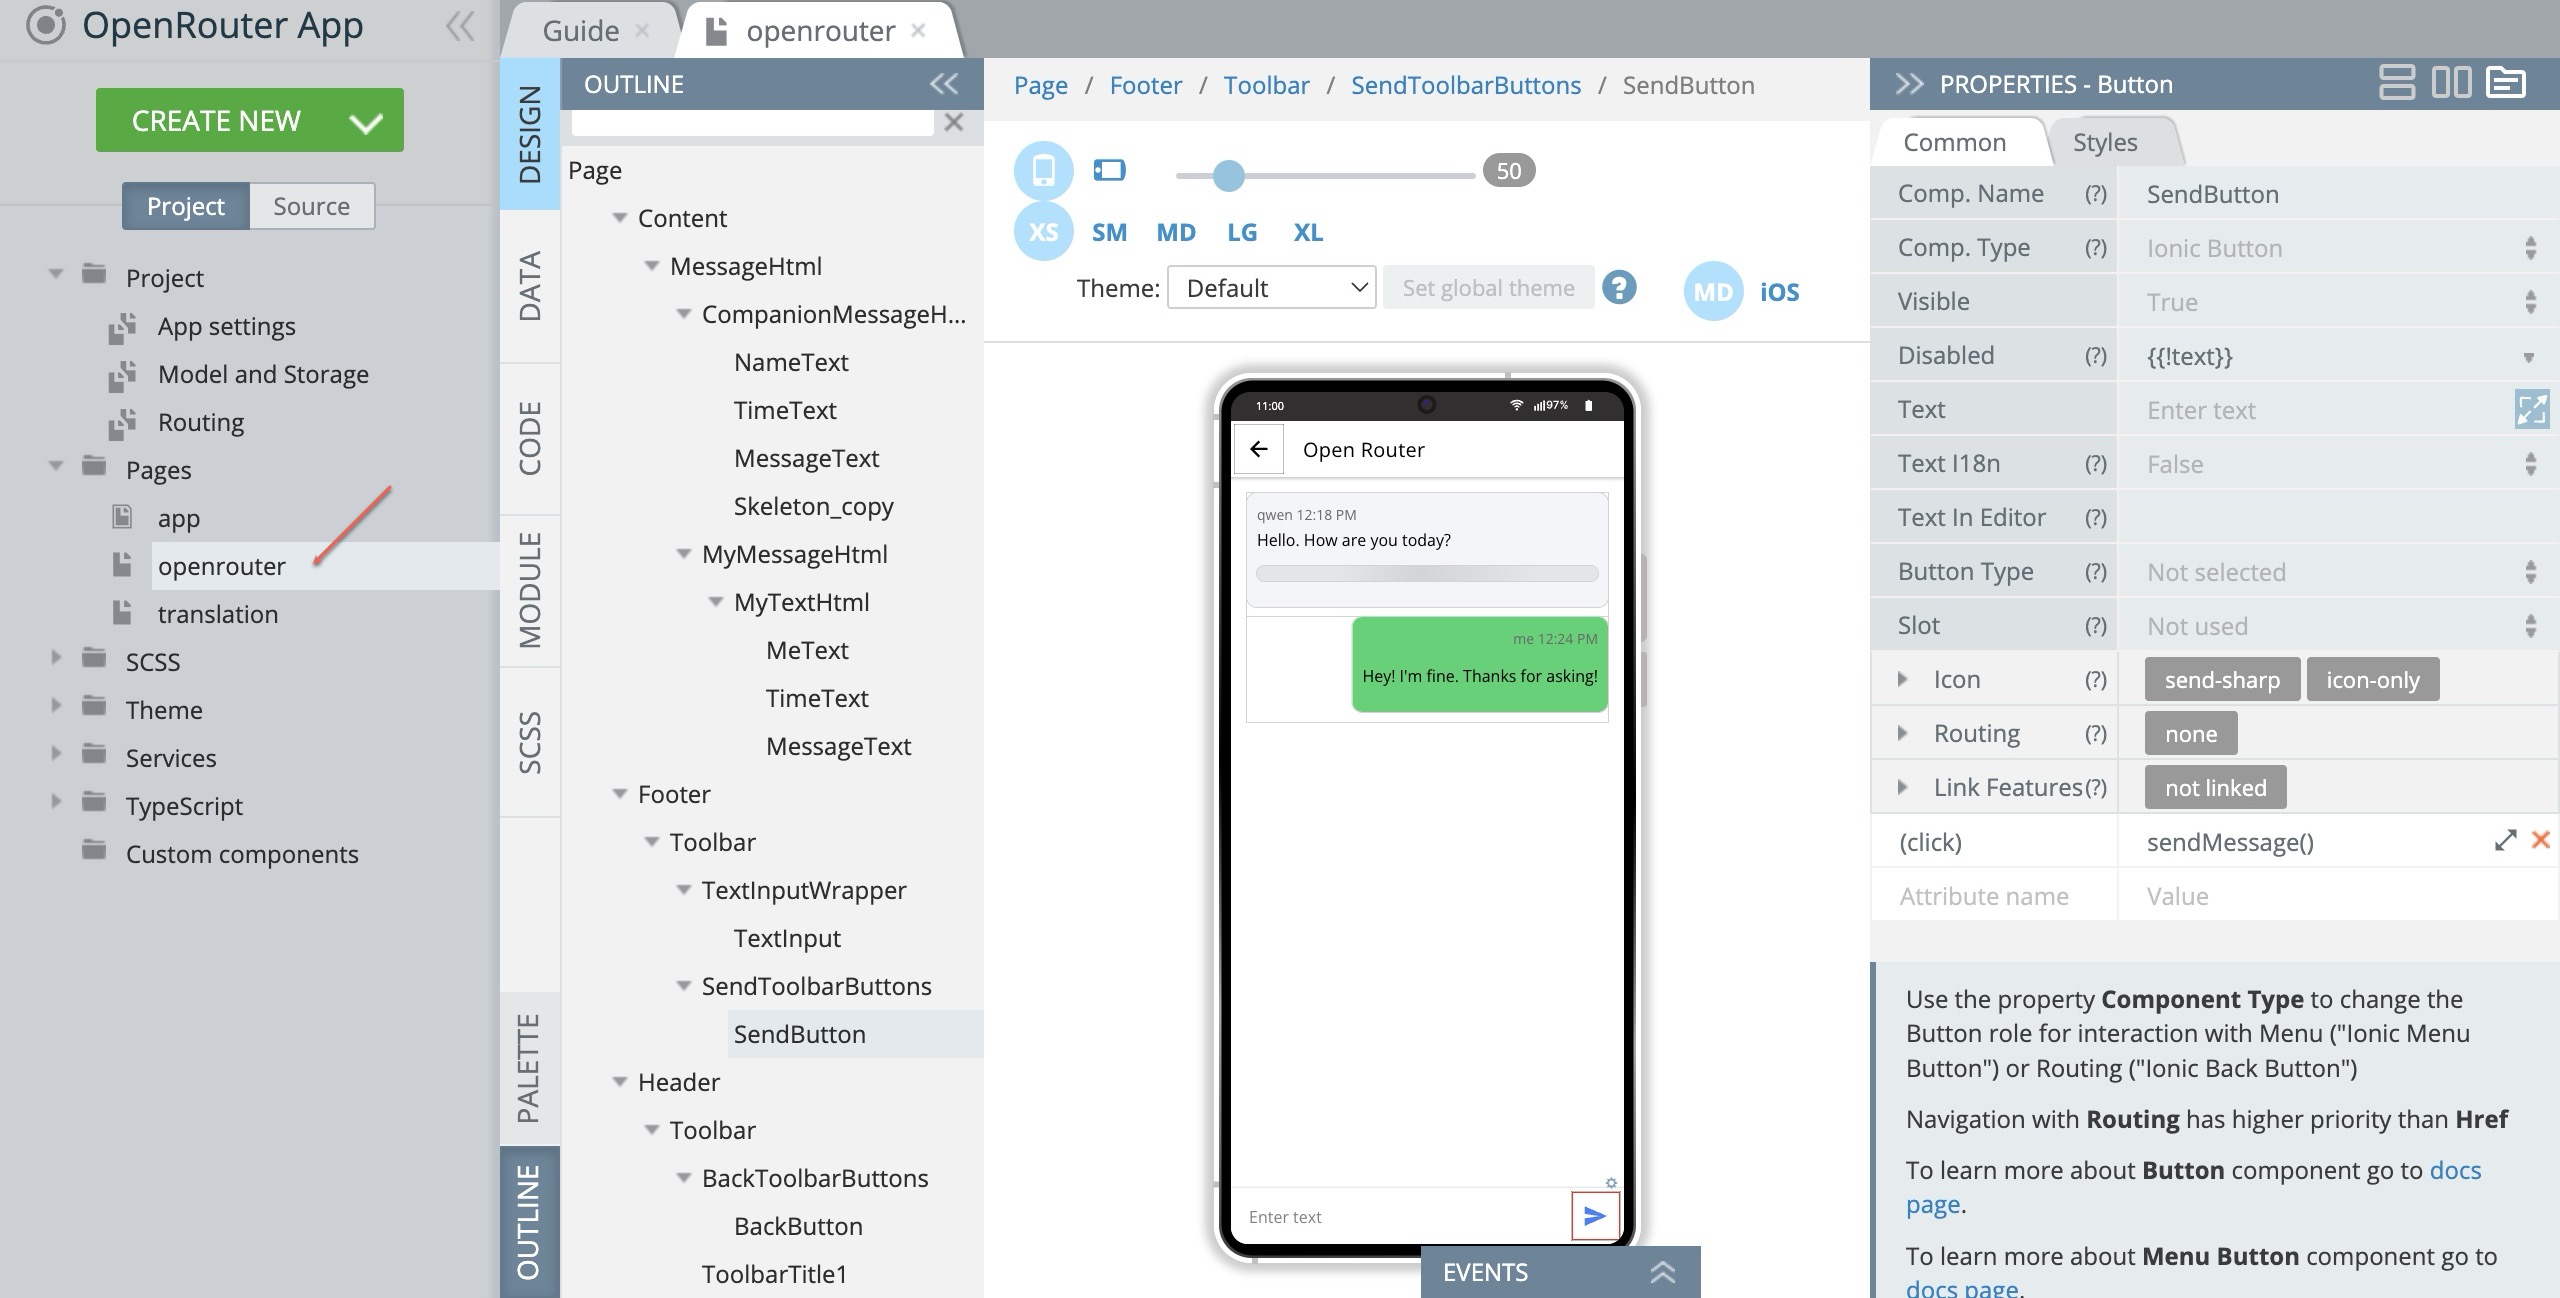
1️⃣ Go to the Pages section in Appery.io and open the OpenRouter screen.

  • The green box displays your messages.
  • The gray box contains chatbot replies.
  • The input field at the bottom is where you type your questions.
  • Press Send, and the Send Message function is triggered.

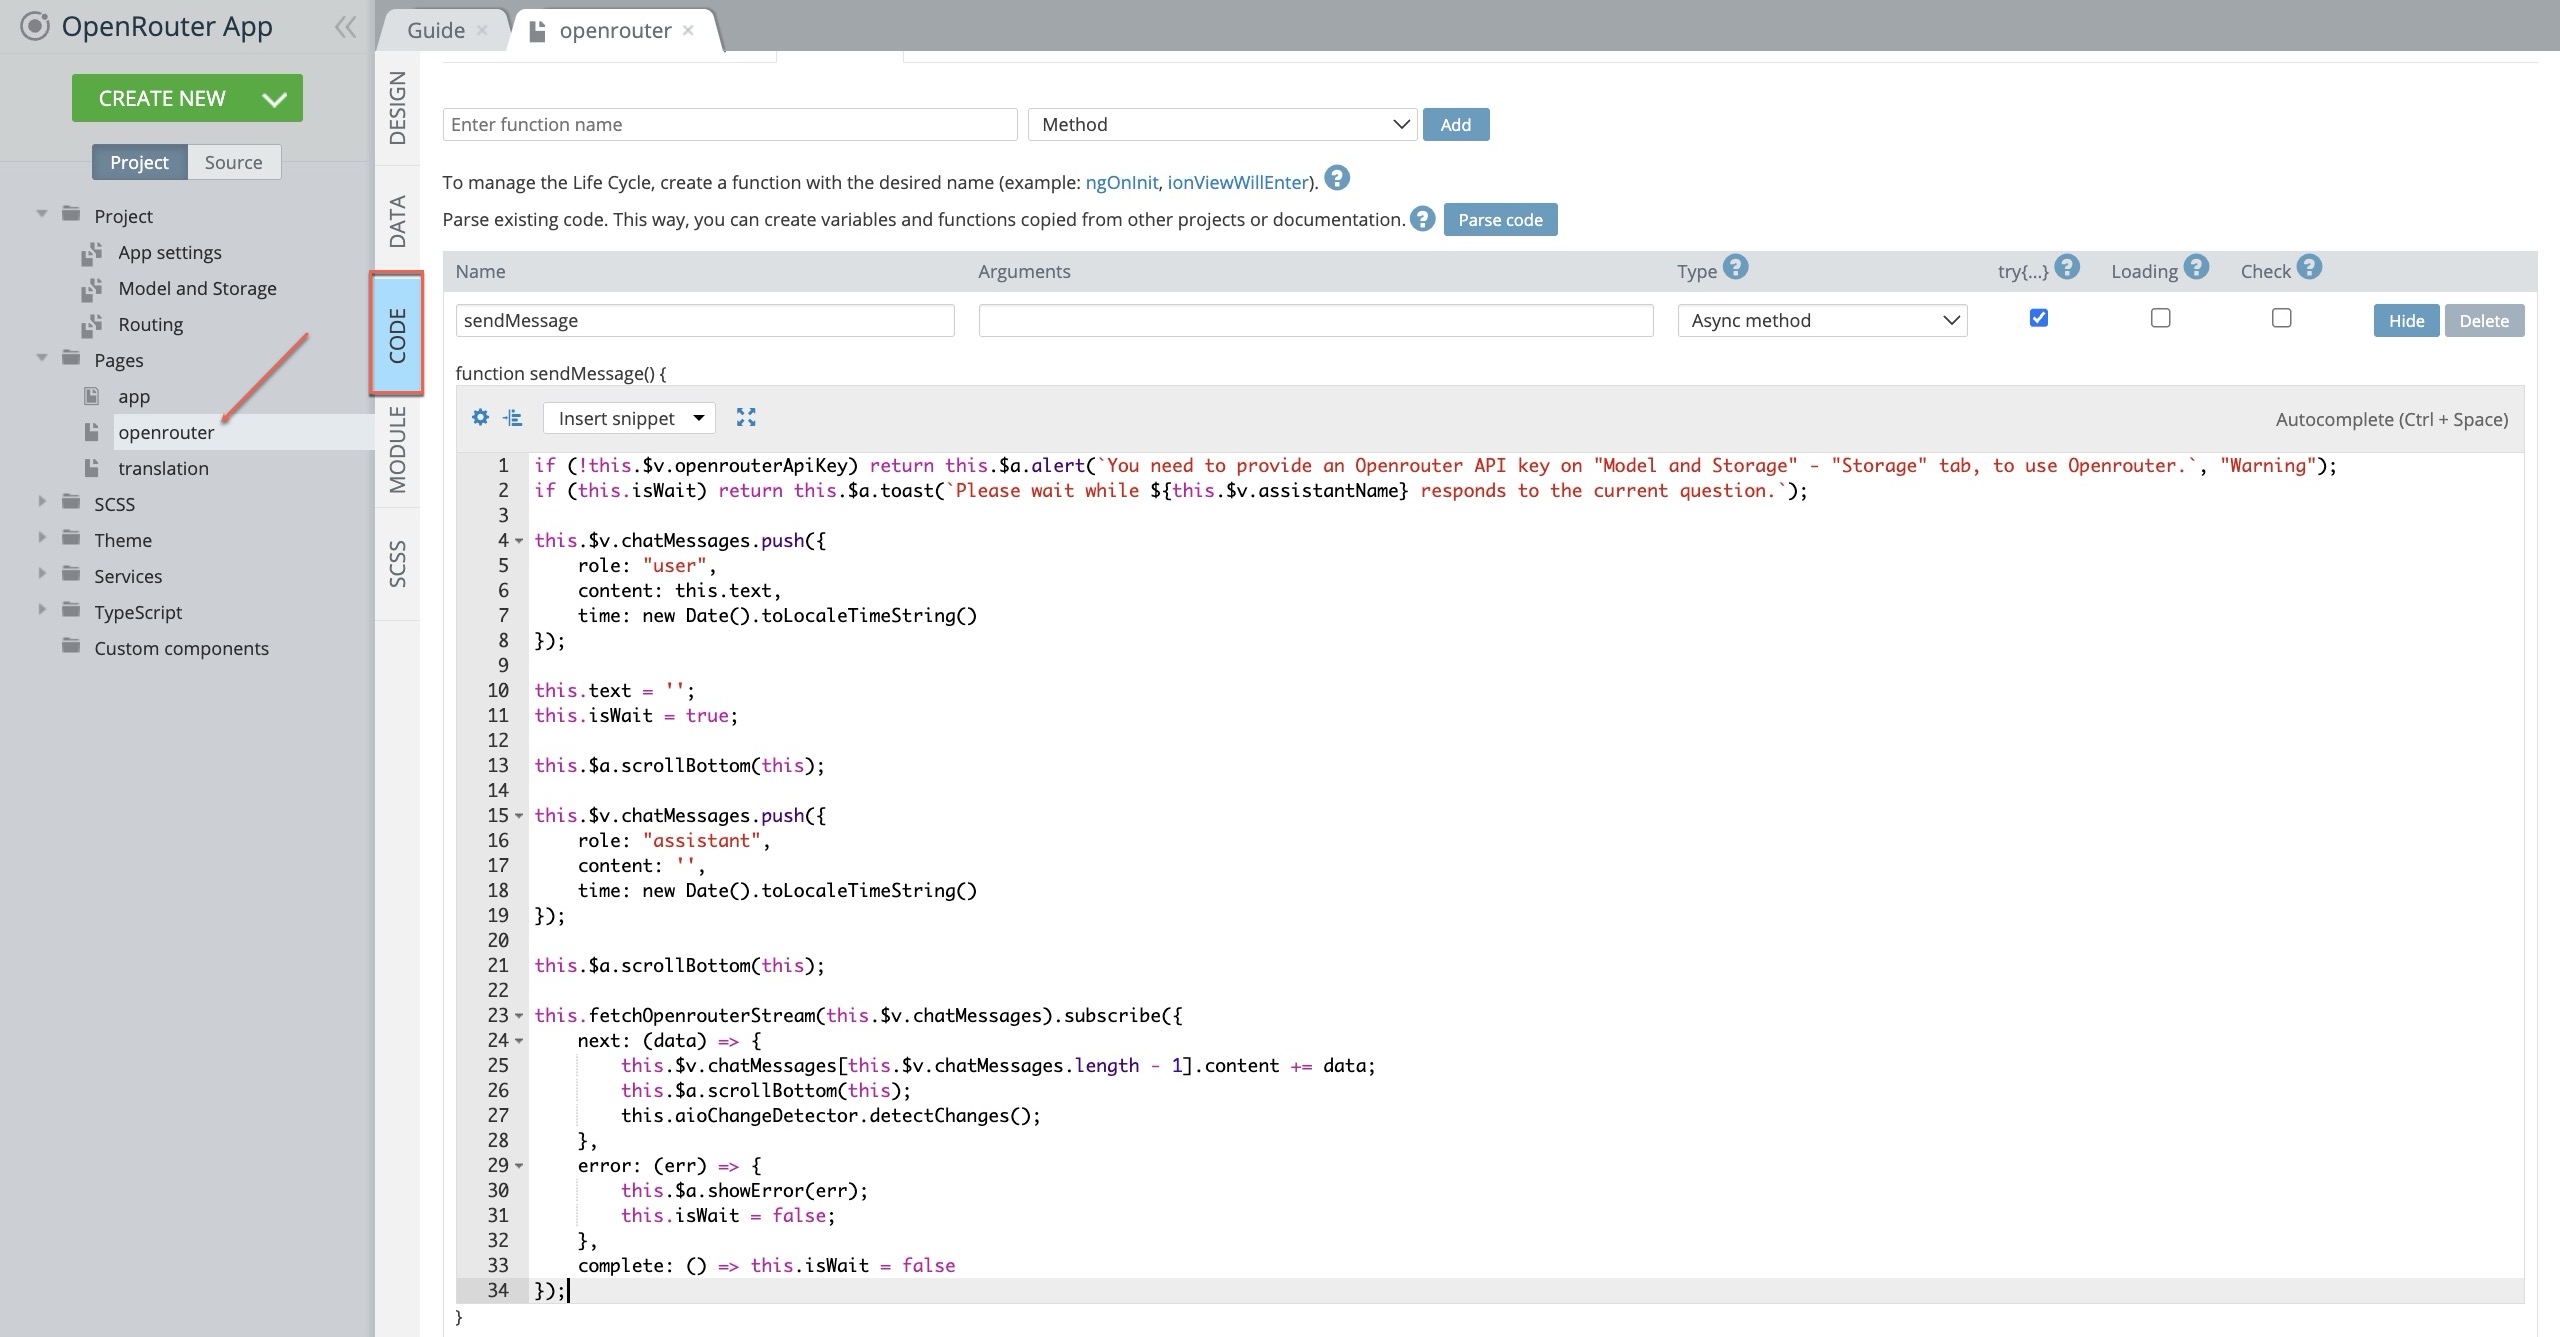
2️⃣ Check the app’s code:

  • Open the CODE tab and go to Functions.
  • Here, you’ll see a chatMessages array that keeps track of conversations.
  • When you send a message, the app creates a new screen and updates it with the chatbot’s response.


BONUS FEATURE: TRANSLATION SCREEN

This template also includes a Translation screen! 🌍

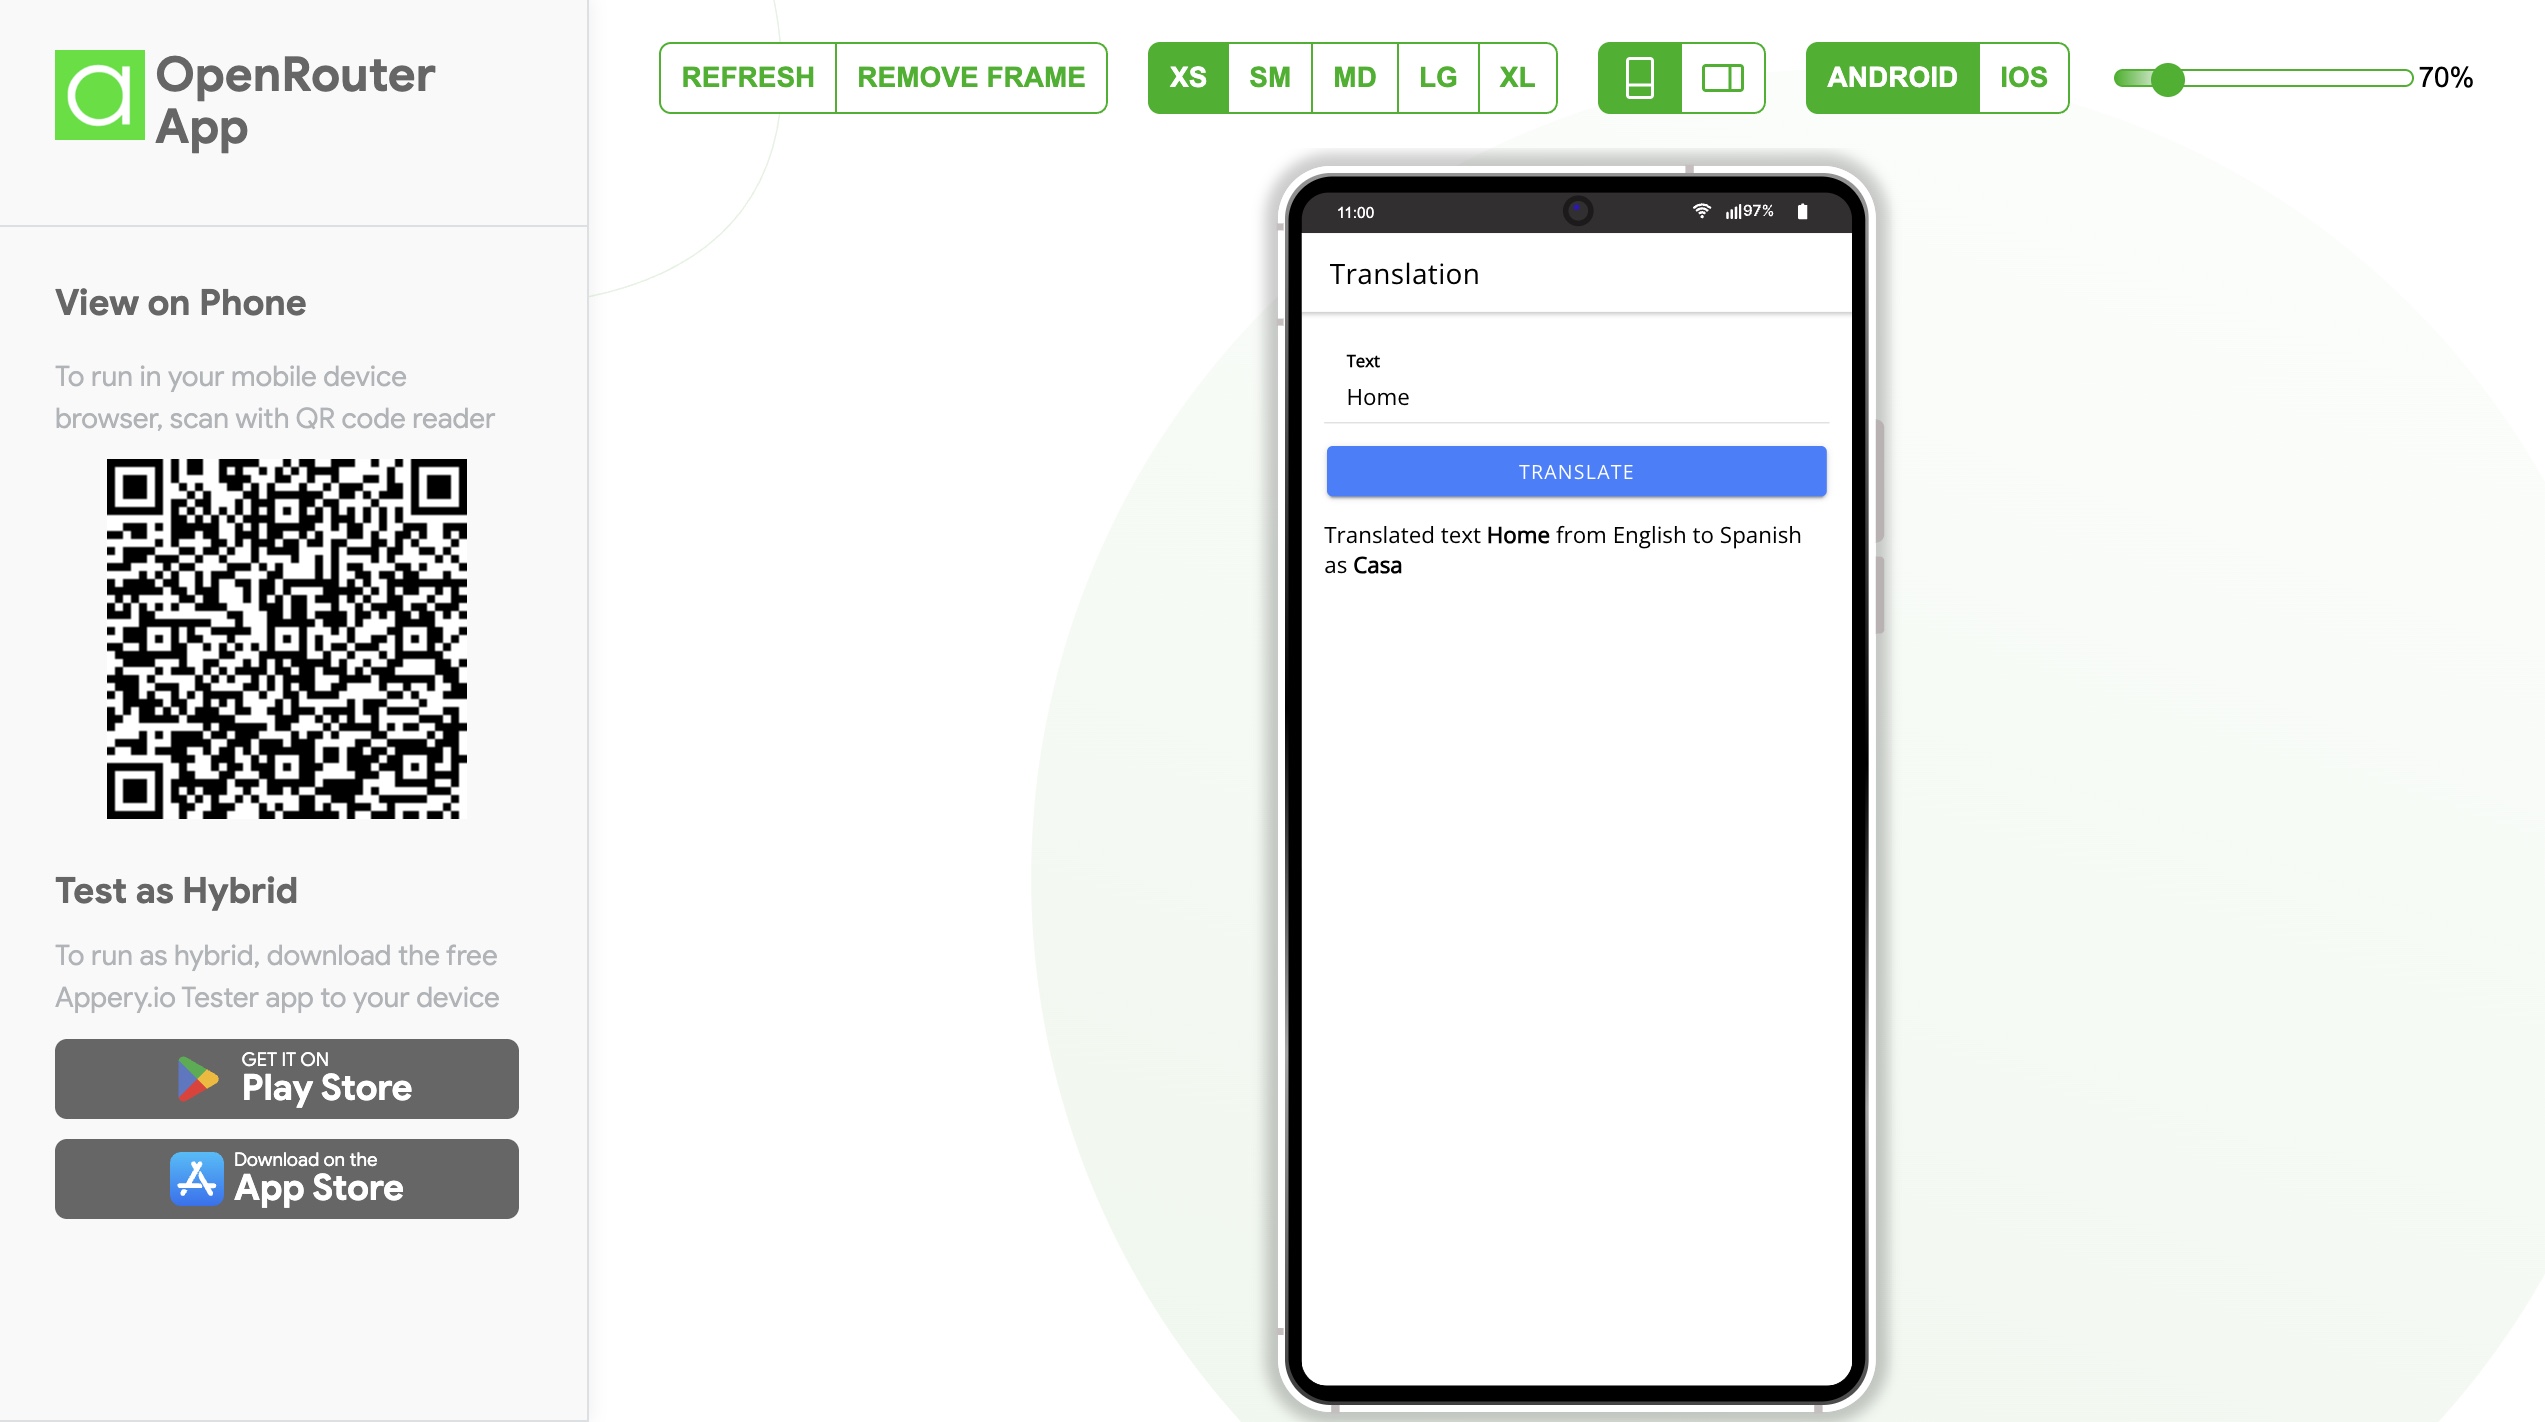
  • Type a sentence in English, and the chatbot will translate it into Spanish.
  • To see how it works, open the CODE tab and check out the Translate function.
  • It’s super simple—it sends your text to the chatbot and returns the translated result.

Let’s test it:
✅ Type “Home” → Press TRANSLATE → You’ll get “Casa” in Spanish.

If you want this feature in other languages, you can easily modify the chatbot prompt!


EXPORTING TO ANDROID

Finally, let’s turn this into a real mobile app! 📱

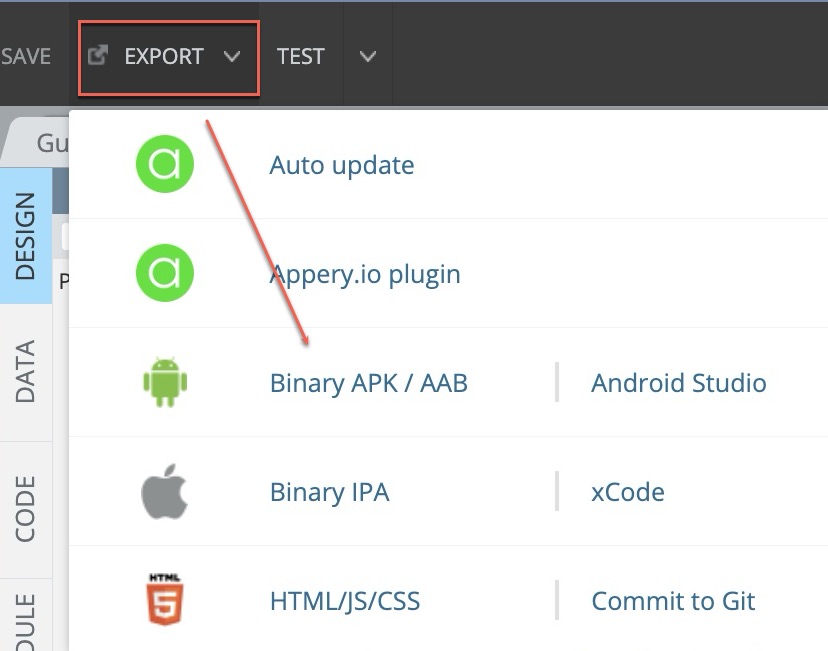
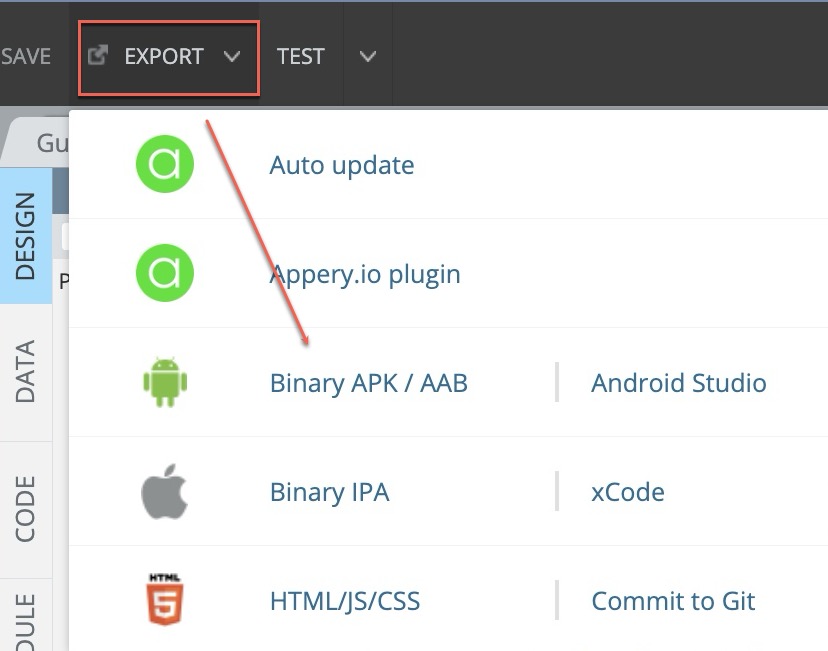
1️⃣ Select EXPORT
2️⃣ Choose Binary APK/AAB

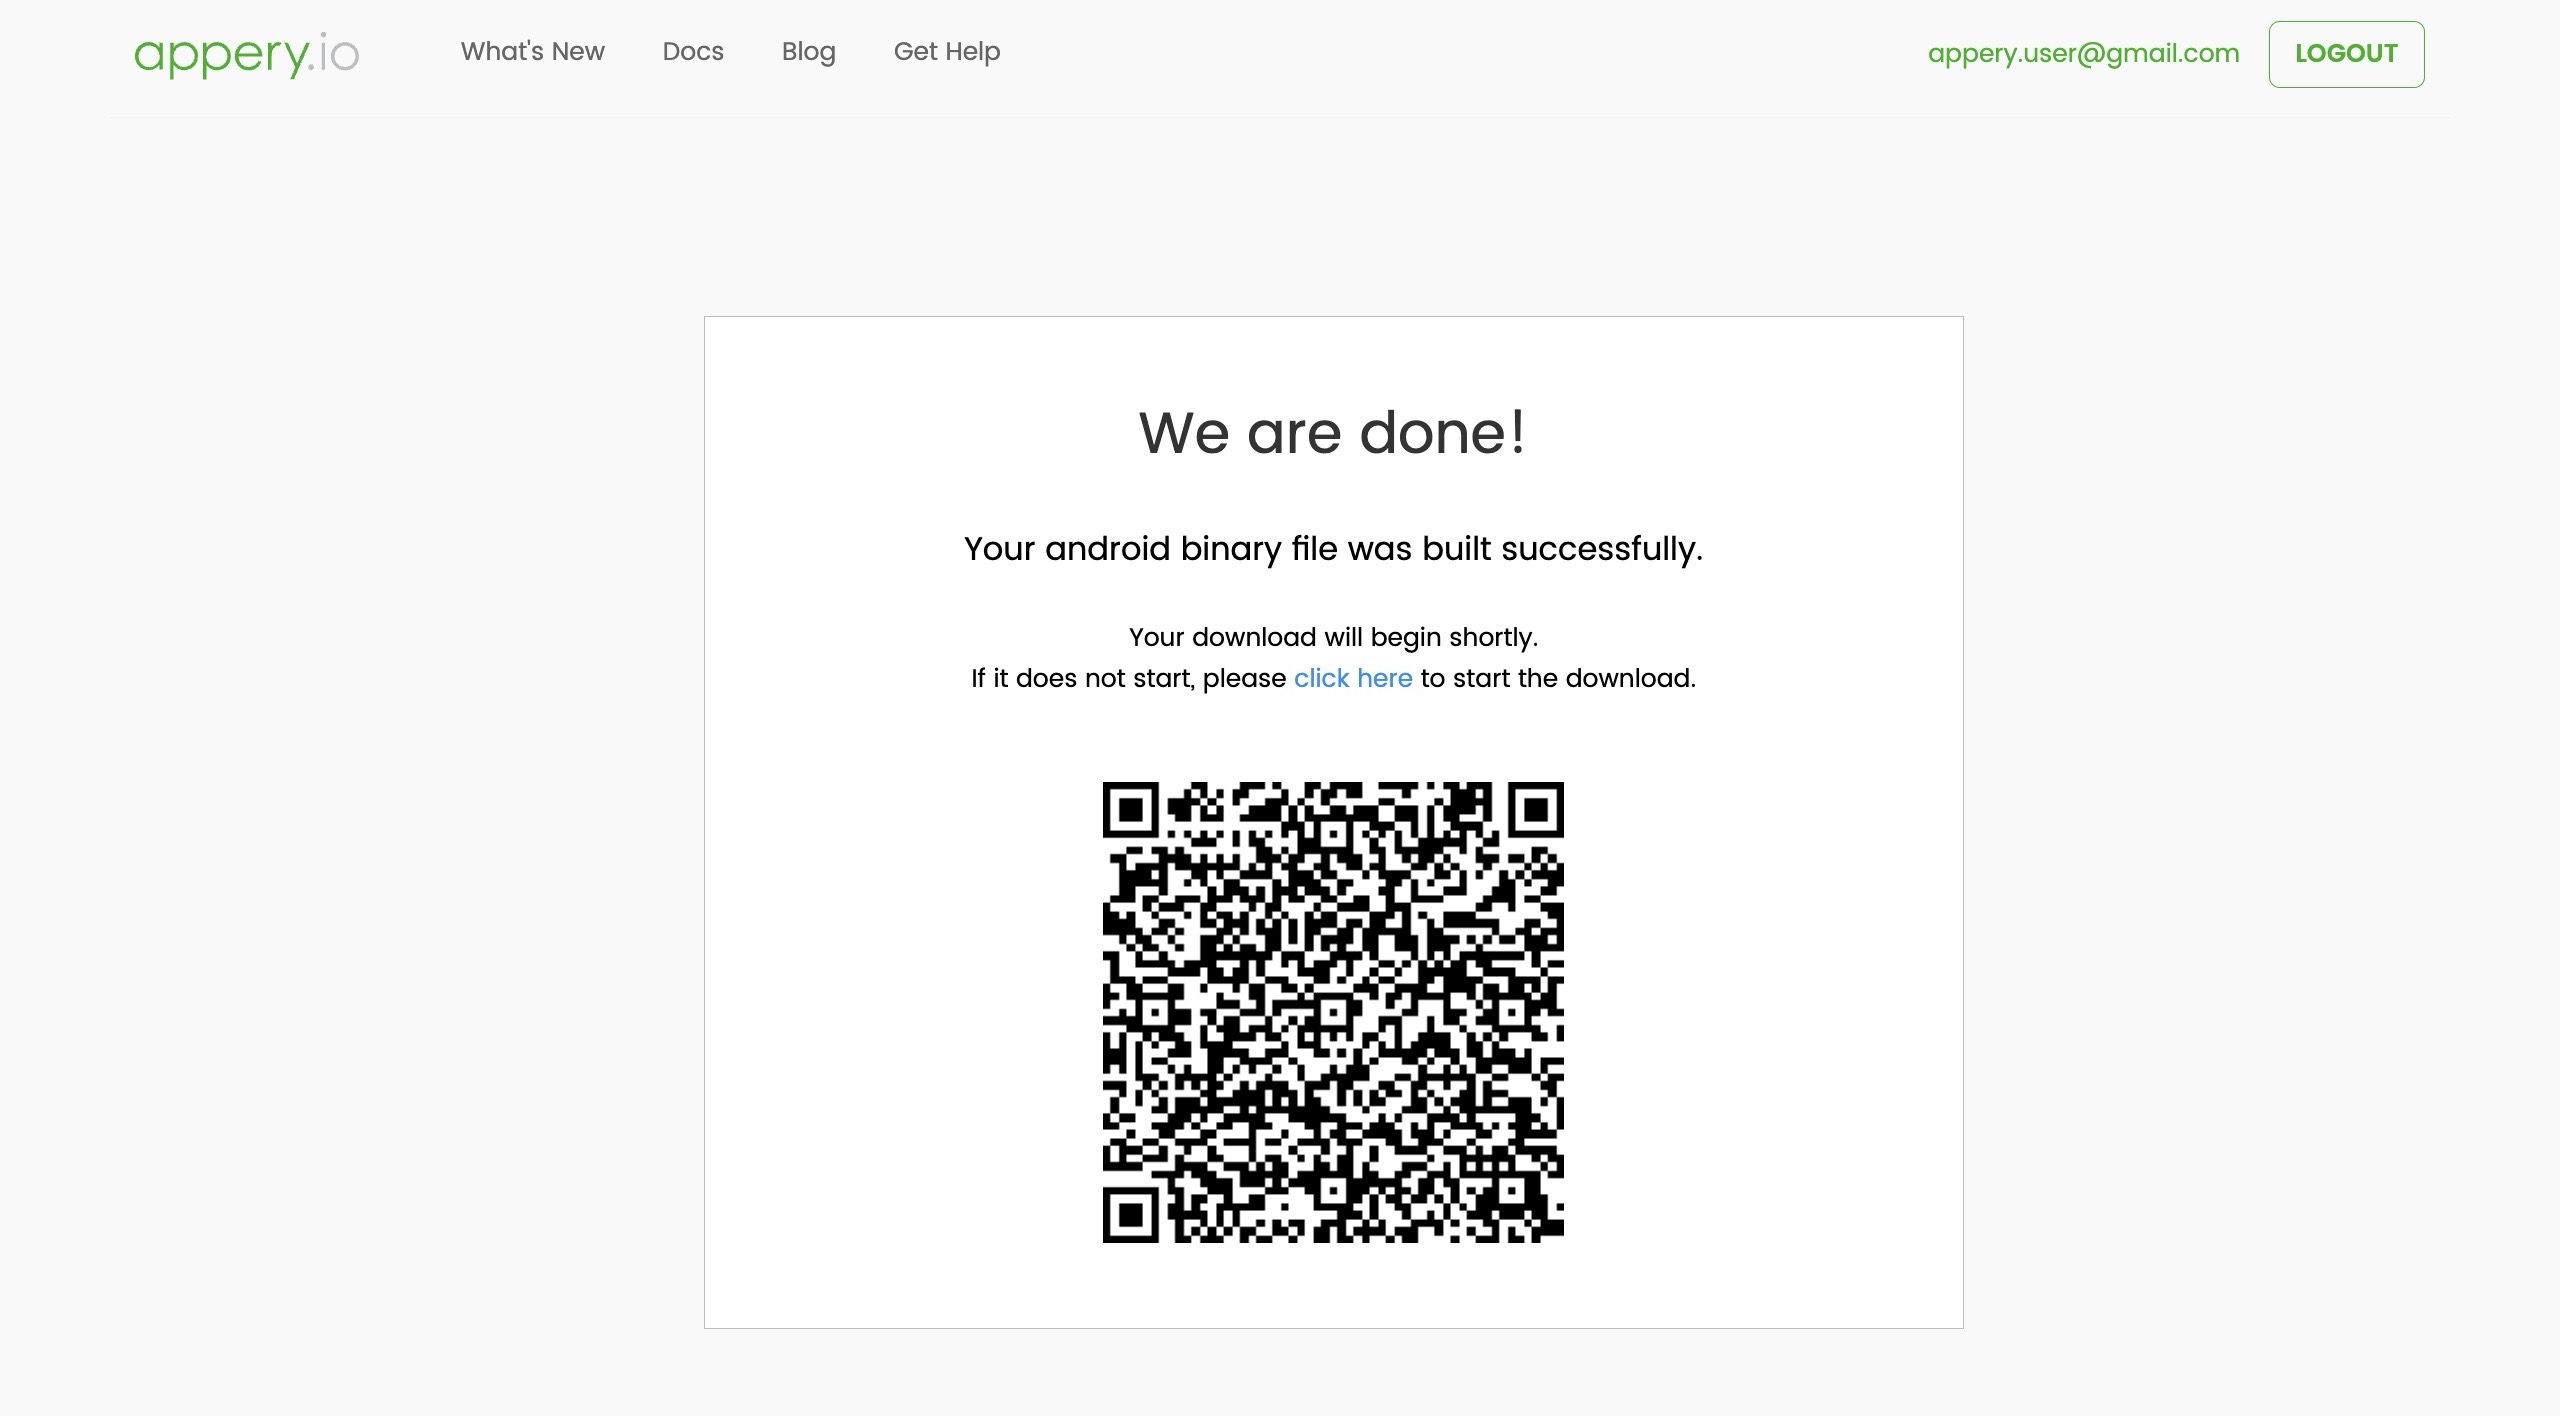
3️⃣ Once it’s done, scan the QR code to download and install the app on your phone.

Now, test it by asking the same questions you tried earlier. It works! 🎉


TRYING DIFFERENT AI CHATBOTS

Want to test a different chatbot? It’s easy!

1️⃣ Find a model you like, for example, DeepSeek.
2️⃣ Create an API key for it.
3️⃣ Update the model name in Appery.io, just like we did earlier.

That’s it! You’ve just built a working AI-powered chatbot app in minutes—without spending a dime!


If you found this helpful, don’t forget to like, subscribe, and hit the notification bell for more awesome AI and no-code tutorials! See you in the next one! 🚀


Mind-Blowing! Build a Mobile App in MINUTES Using ChatGPT (No Code Needed!)

Have you ever wanted to build a mobile app but don’t know how to code? Now, with ChatGPT and Appery.io, you can create an app in minutes—no coding required! This guide will show you how to design, customize, and launch an app with AI-powered tools.

🎥 Want the full step-by-step guide? Watch this tutorial or follow the steps below:

Getting Started with Appery.io

First, open Appery.io and create a new app. If you don’t have an account, sign up—it’s free and easy! Once inside, your app is empty, but you can already preview how it looks on Android and iOS devices.

Generating App Screens with ChatGPT

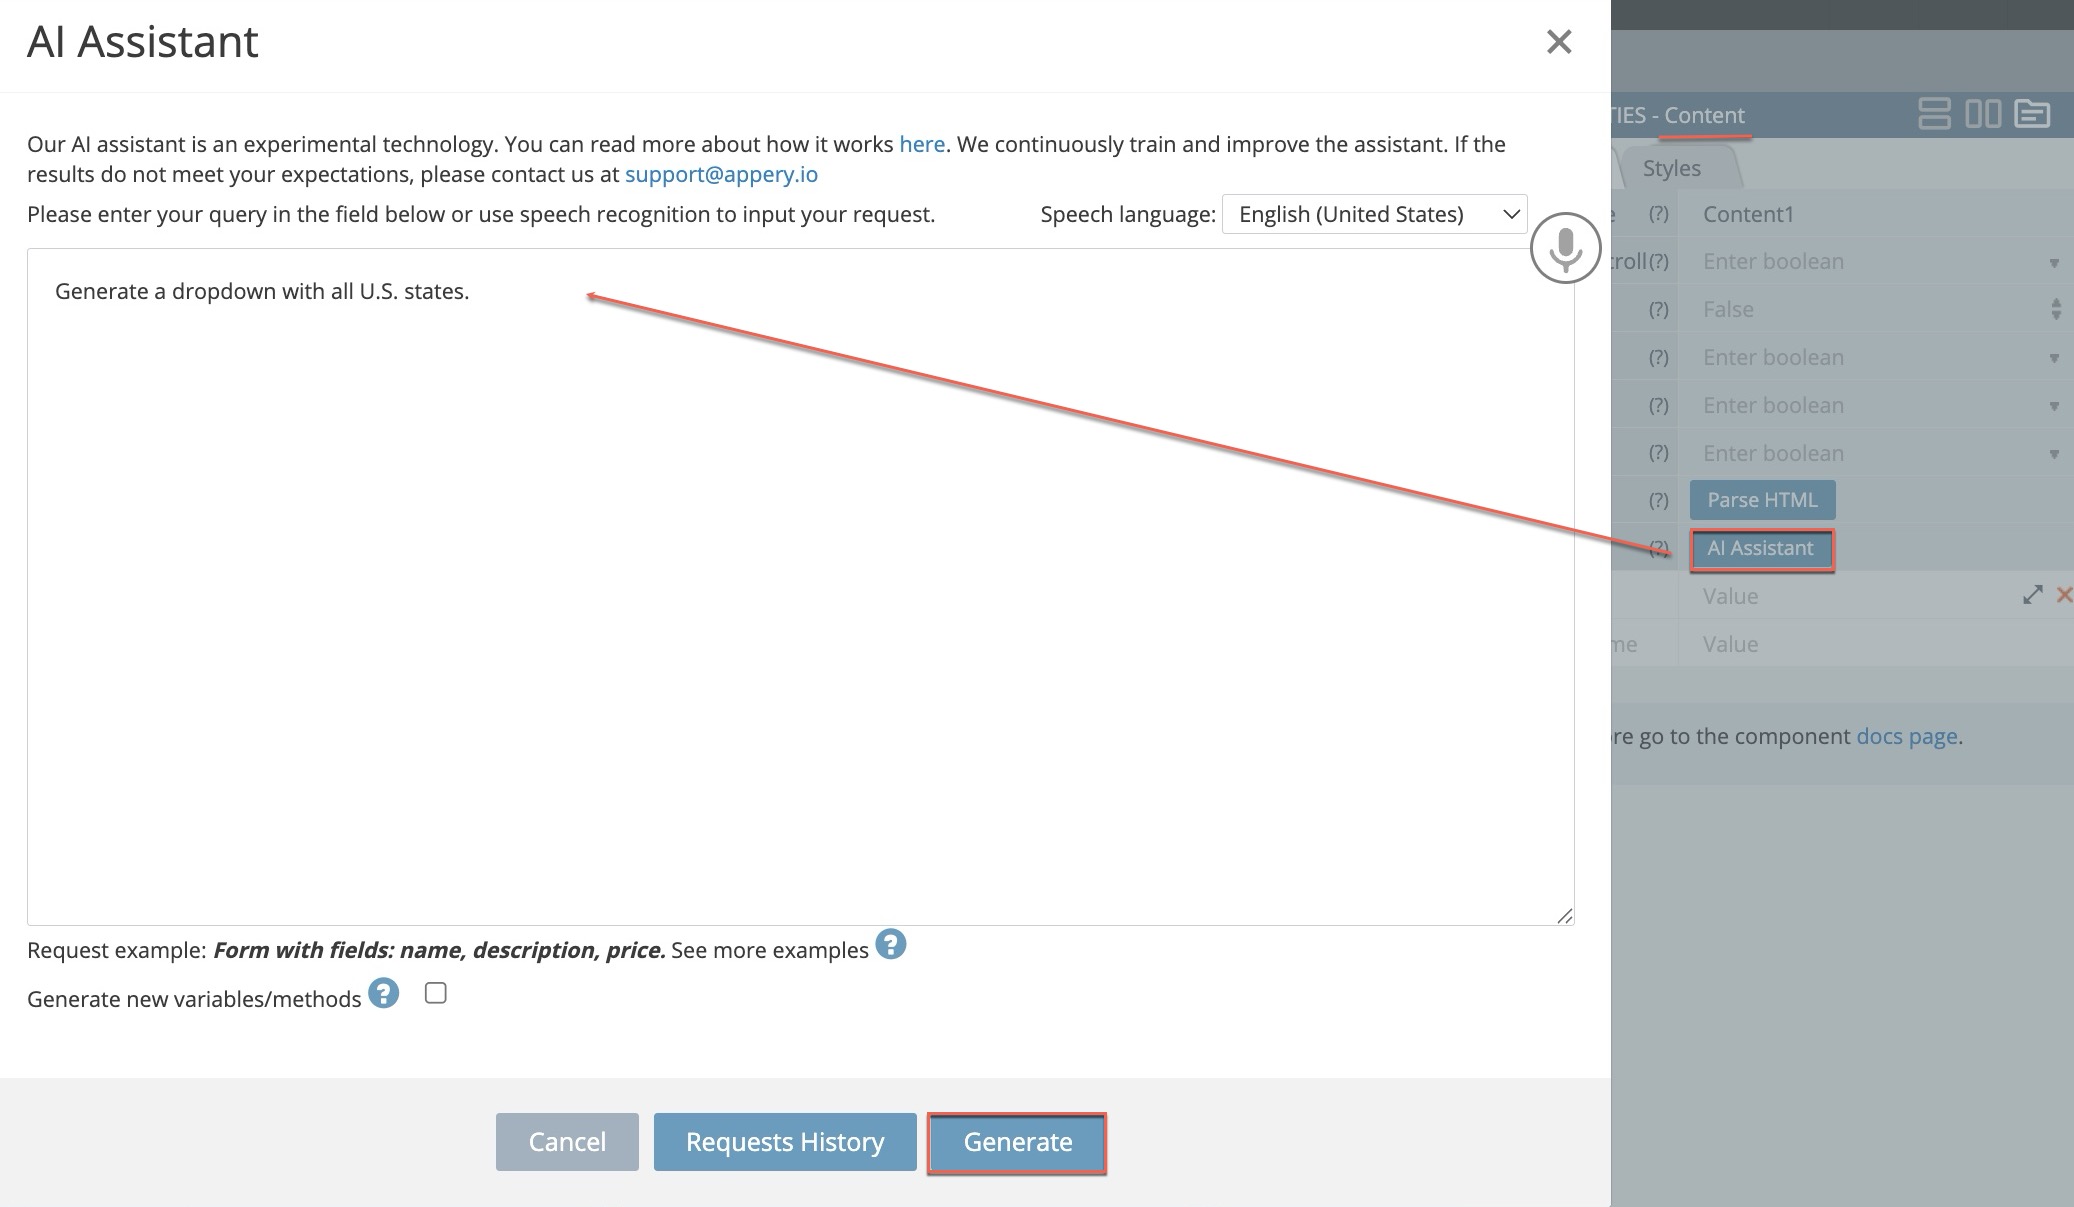
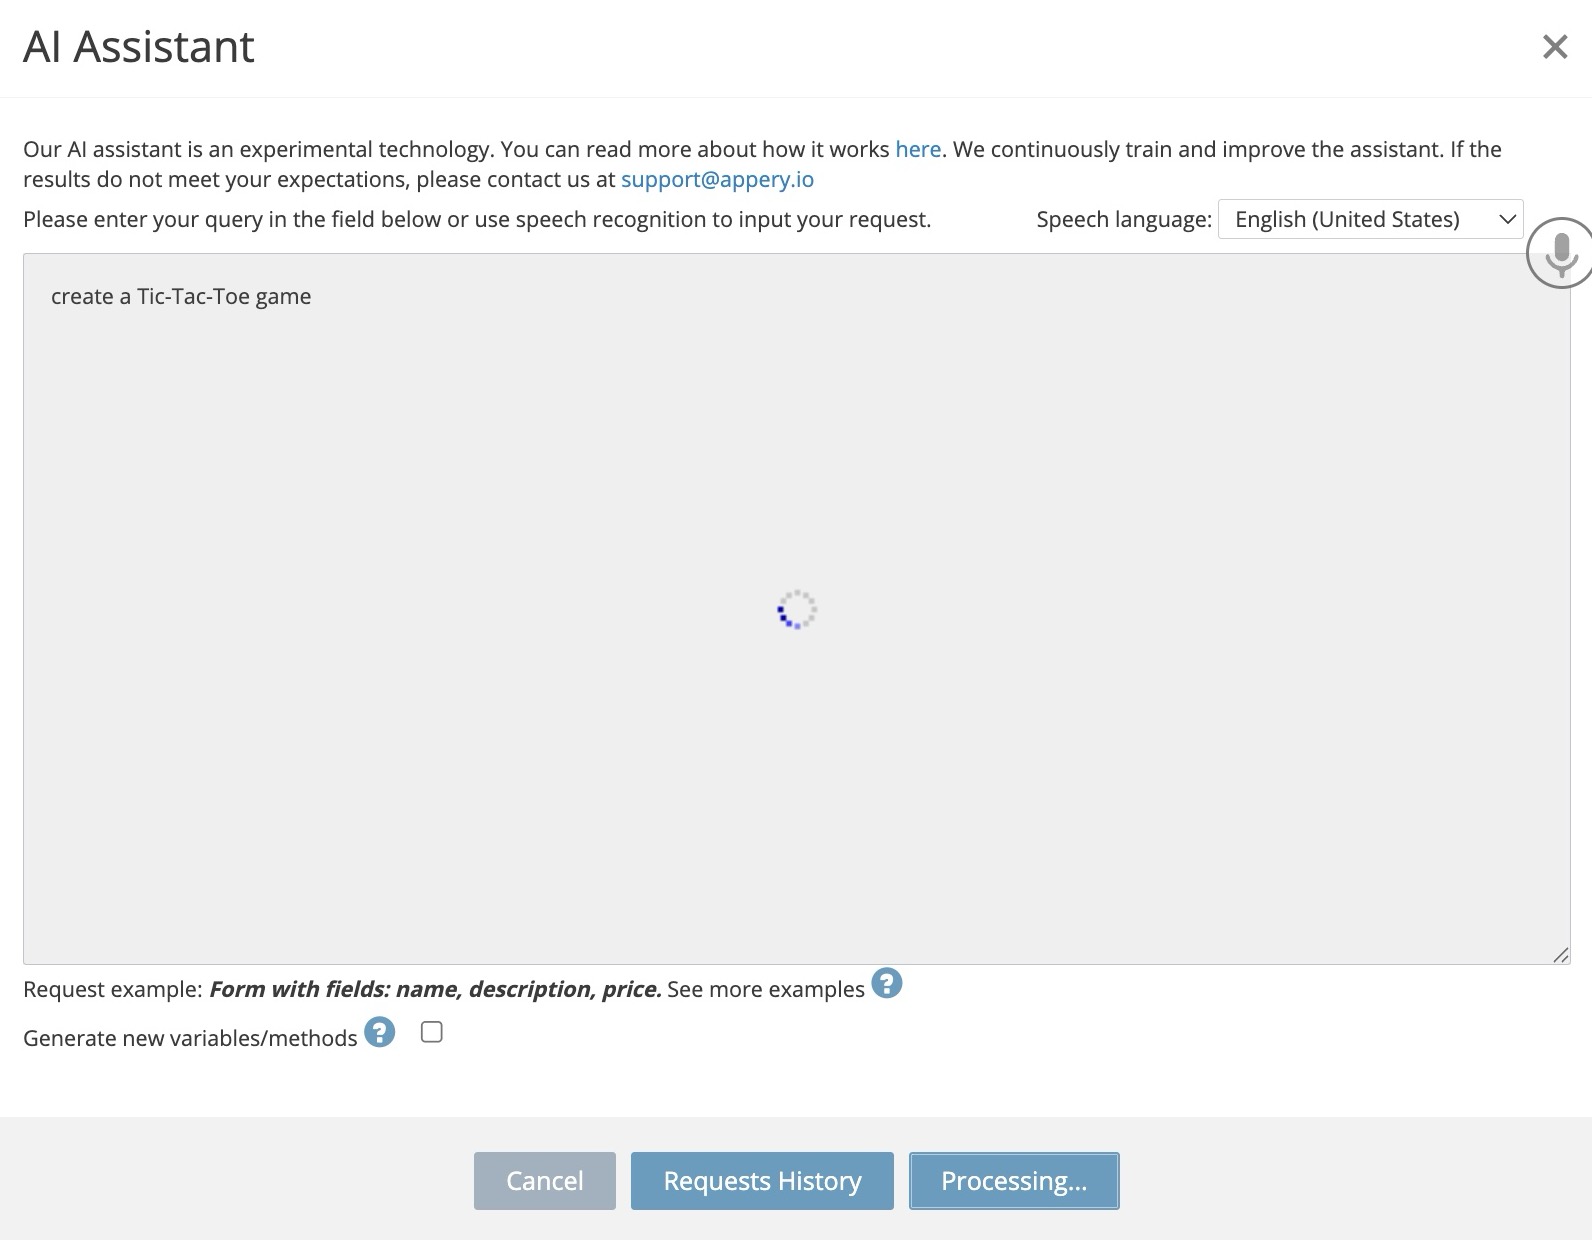
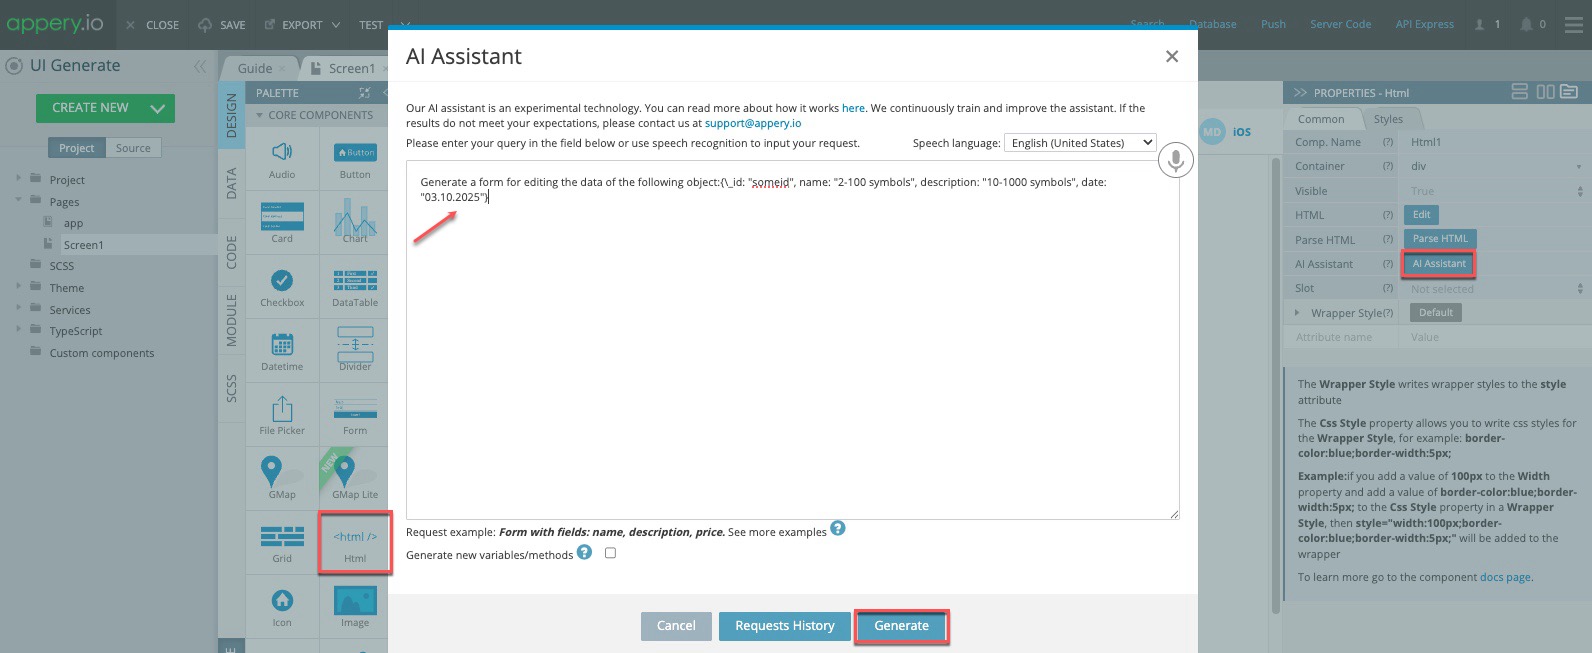
To create an app screen, go to the Pages folder. Select a Content element and click the AI Assistant button. You can type a request or use voice input. Let’s try:

“Generate a dropdown with all U.S. states.”

AI Assistant screenshot

AI Assistant

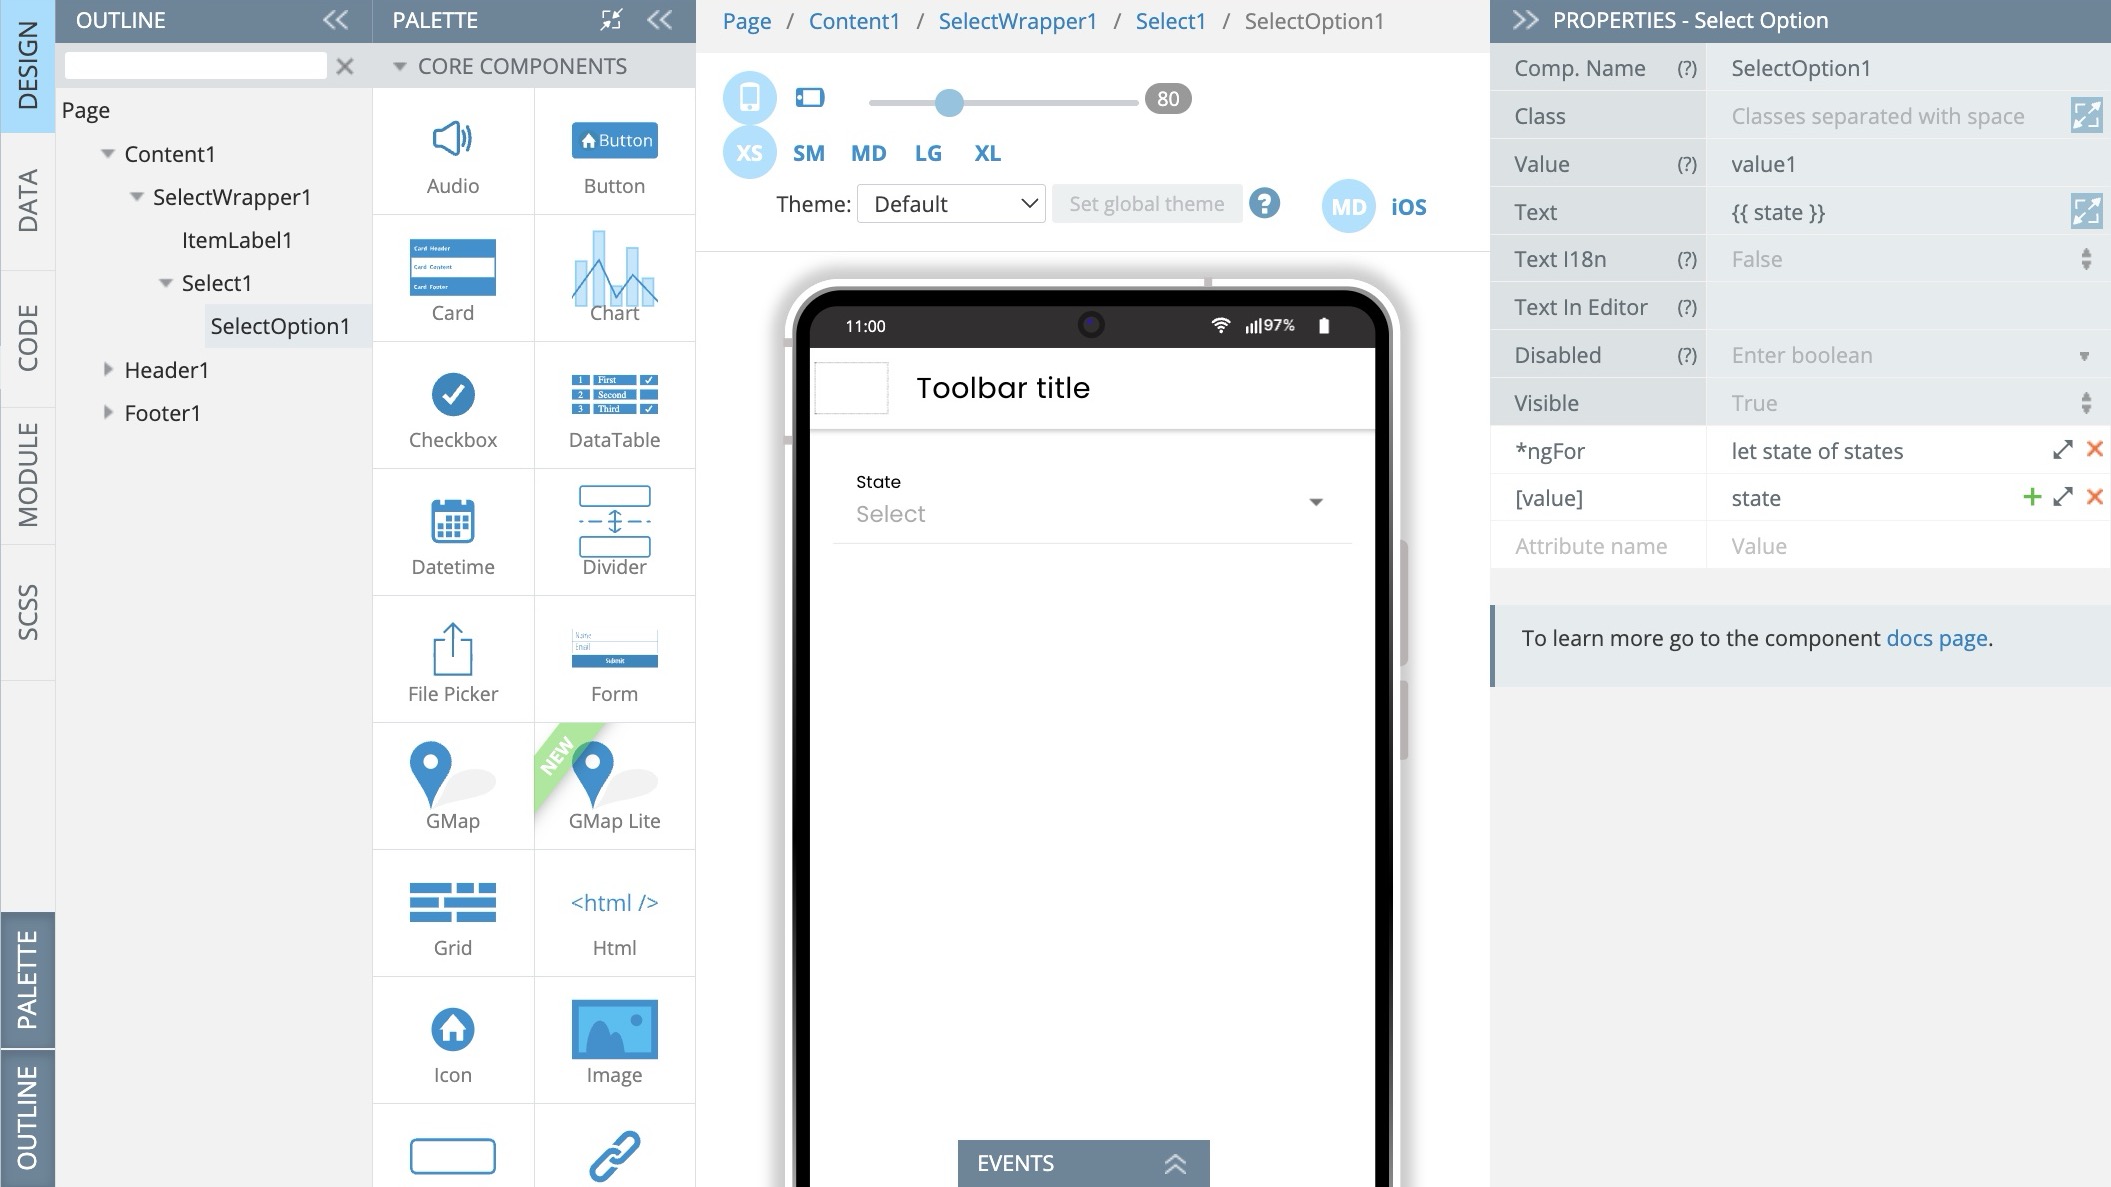
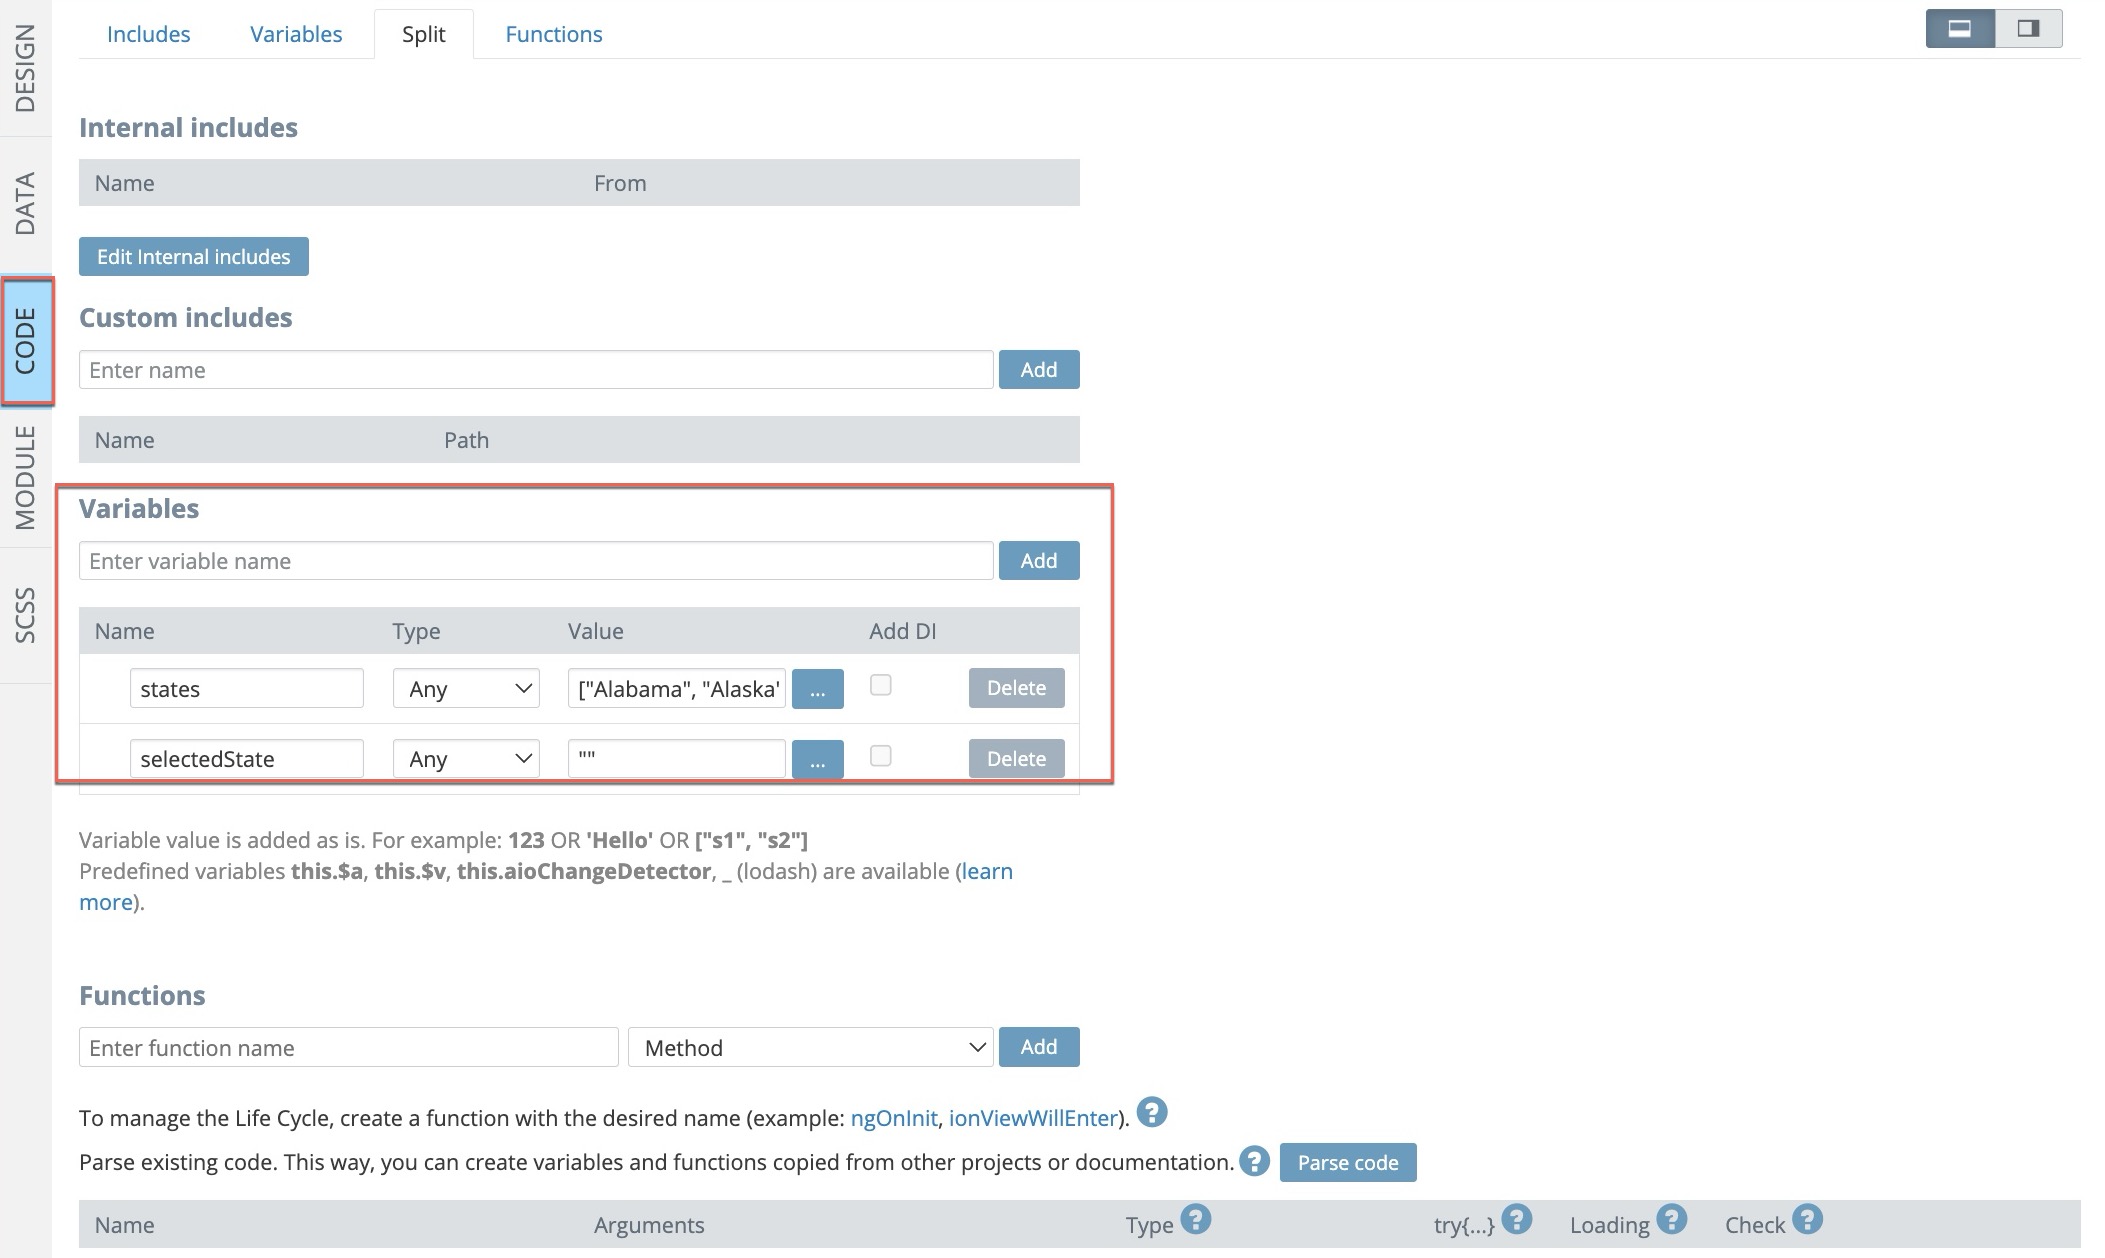
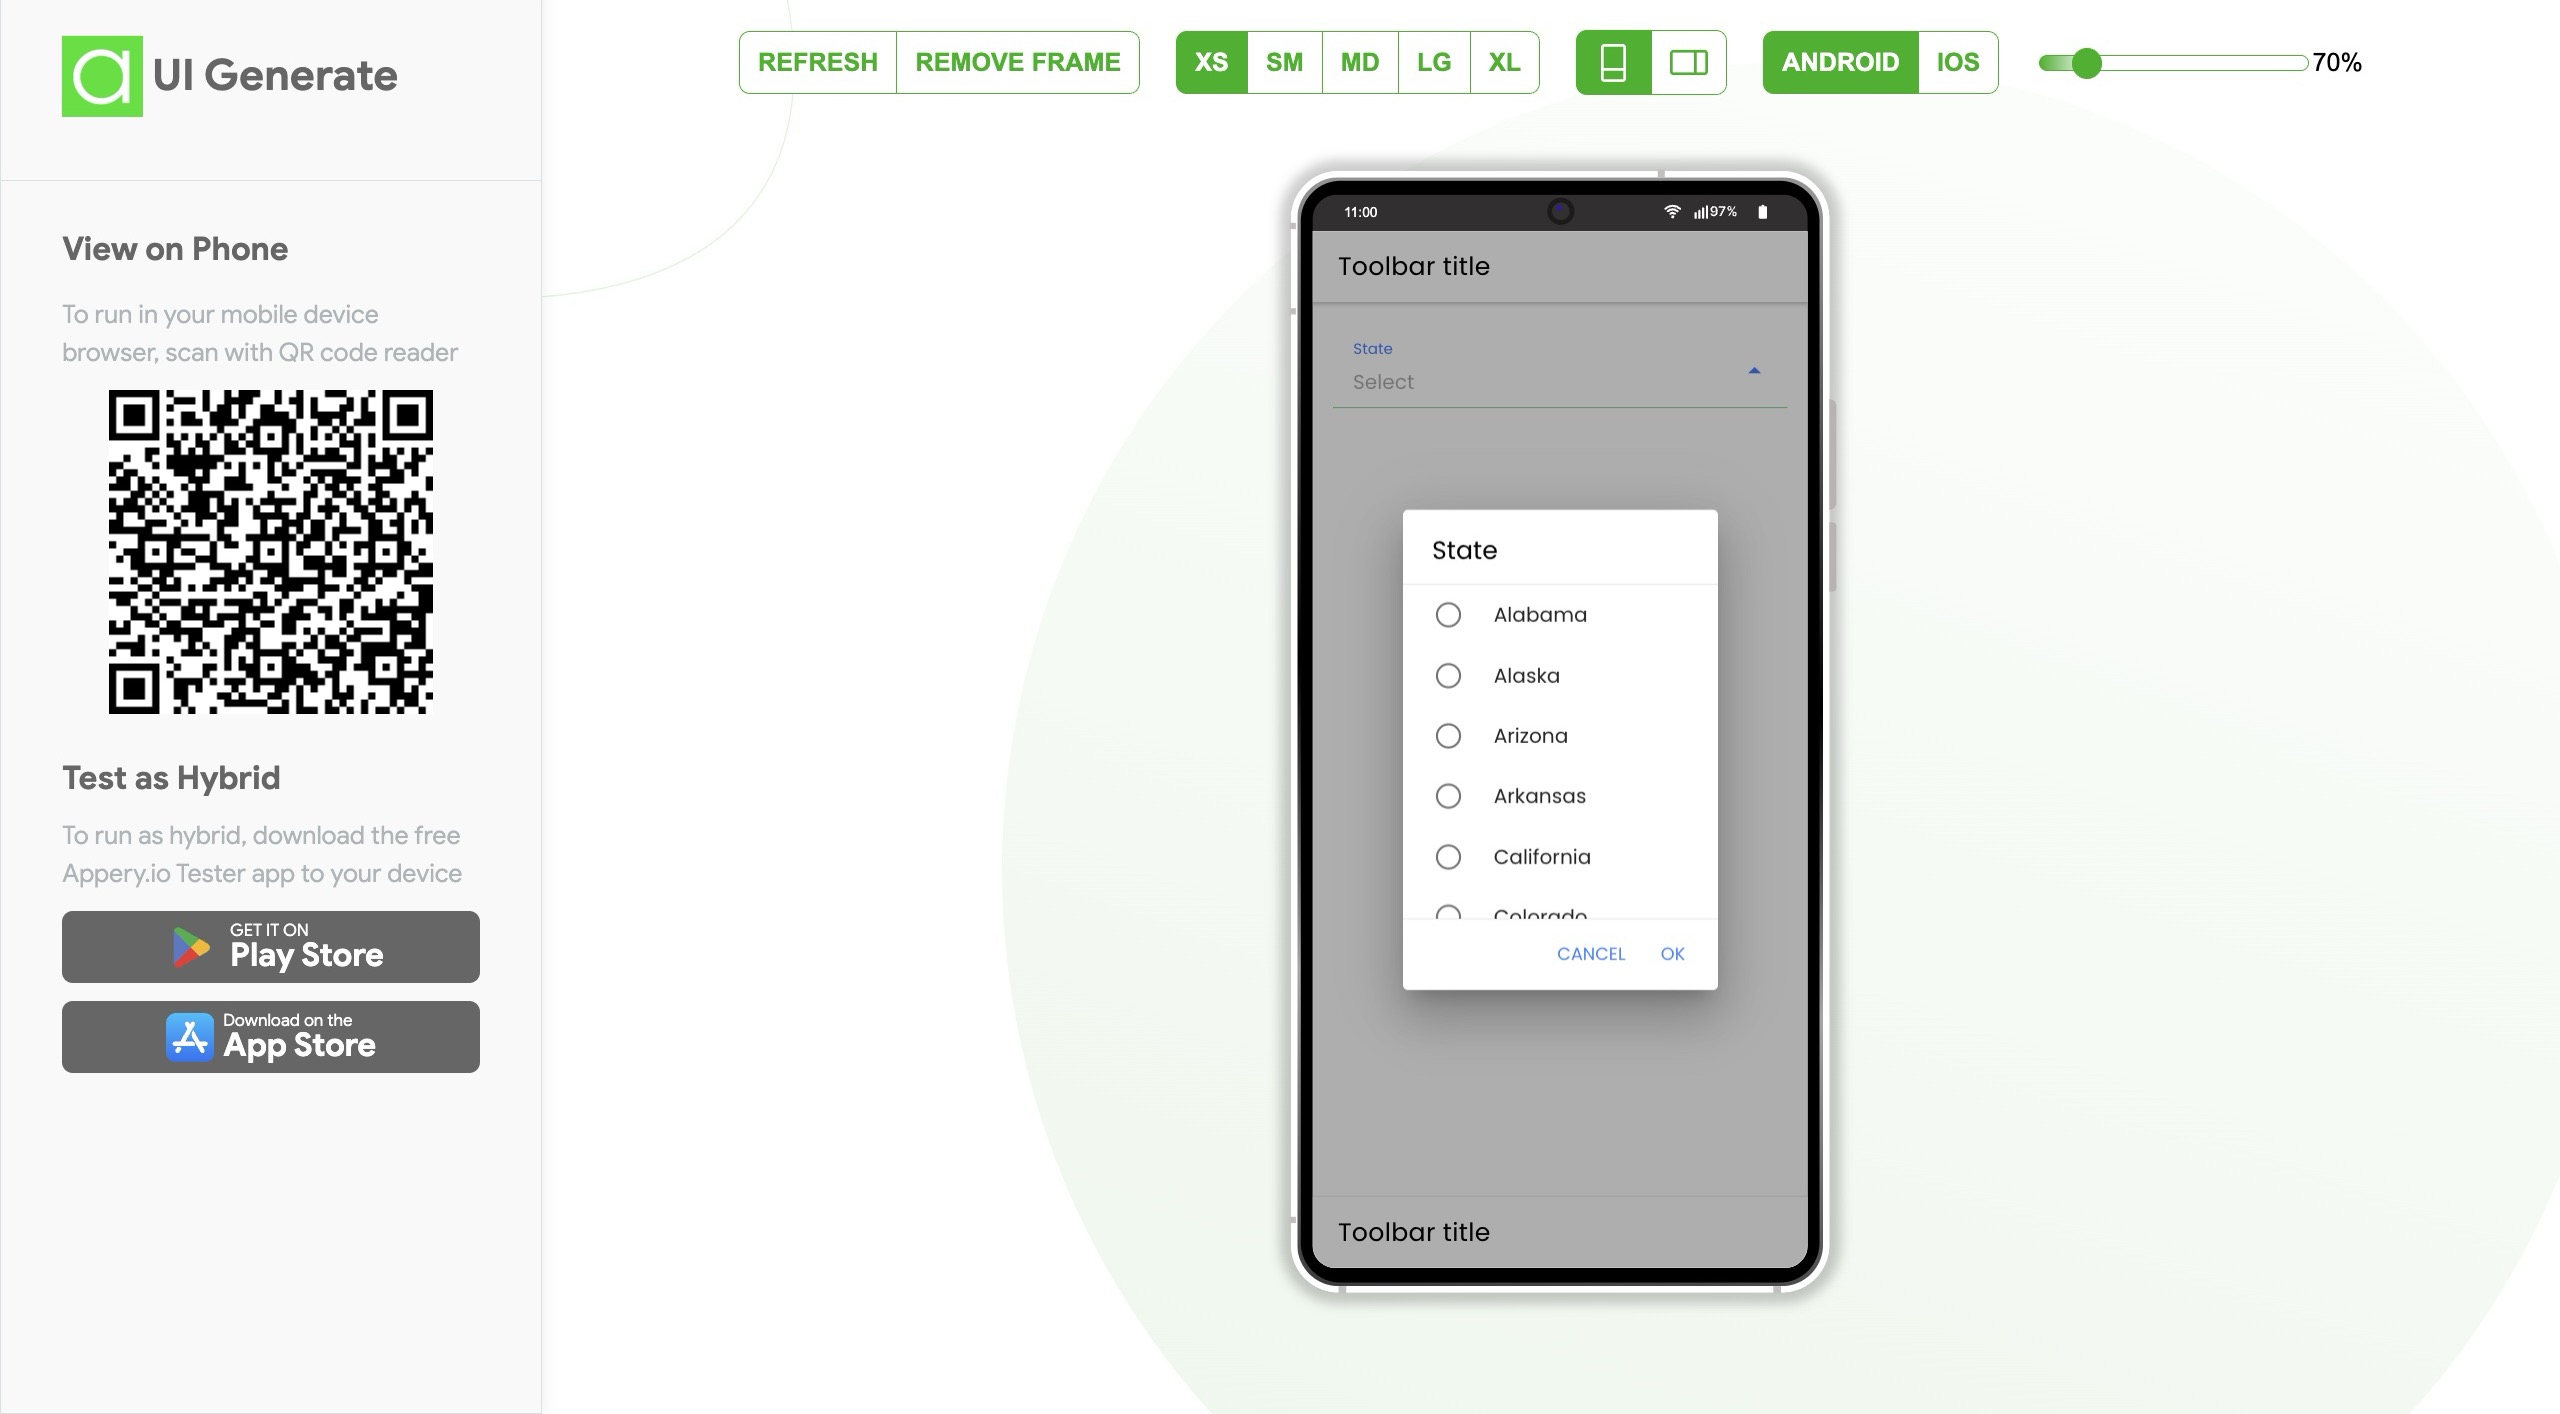
Click Generate, and within seconds, the dropdown appears! Double-clicking it shows an array of states. Appery.io automatically loops through them to create the list.

You can find these states under the CODE tab in the Variables section.

Test it—and it works perfectly!

Creating a Dynamic Form with AI

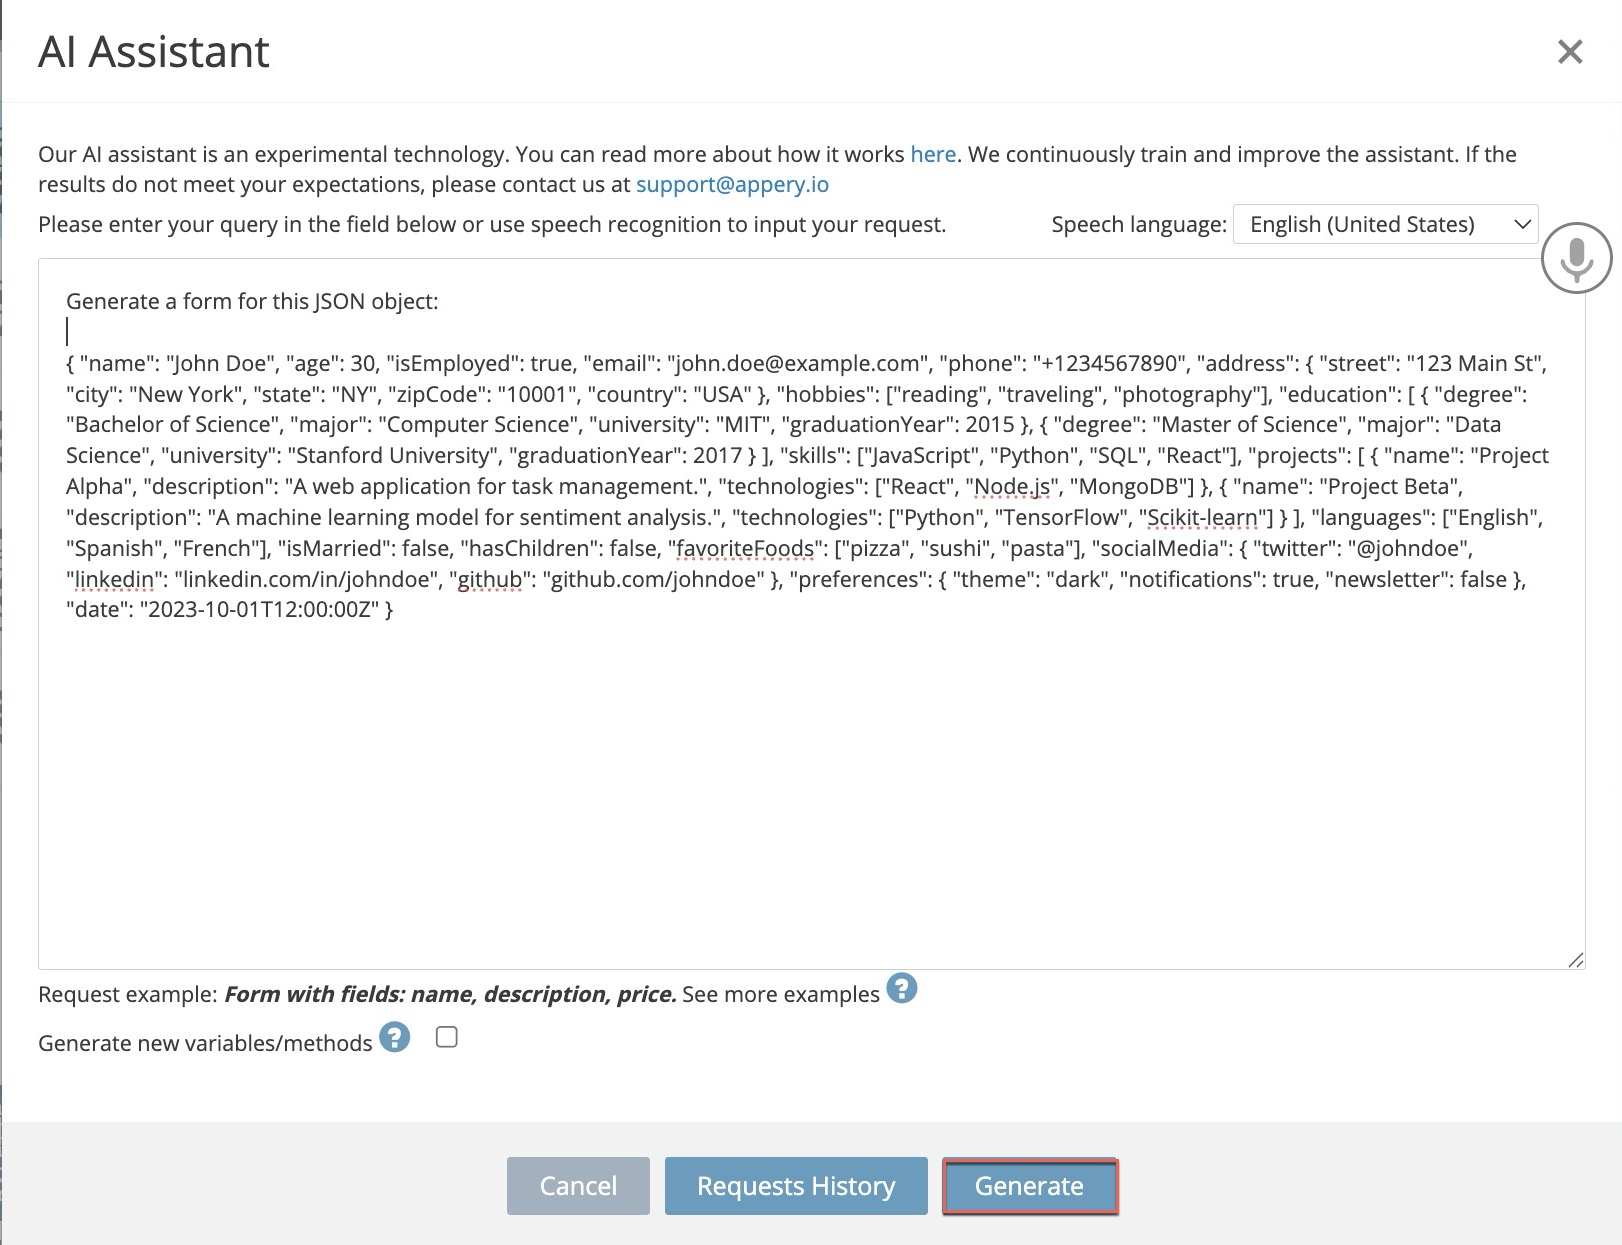
Now, let’s build a more complex feature: a dynamic form. Again, select Content, click AI Assistant, and enter this prompt:

“Generate a form for this JSON object.”

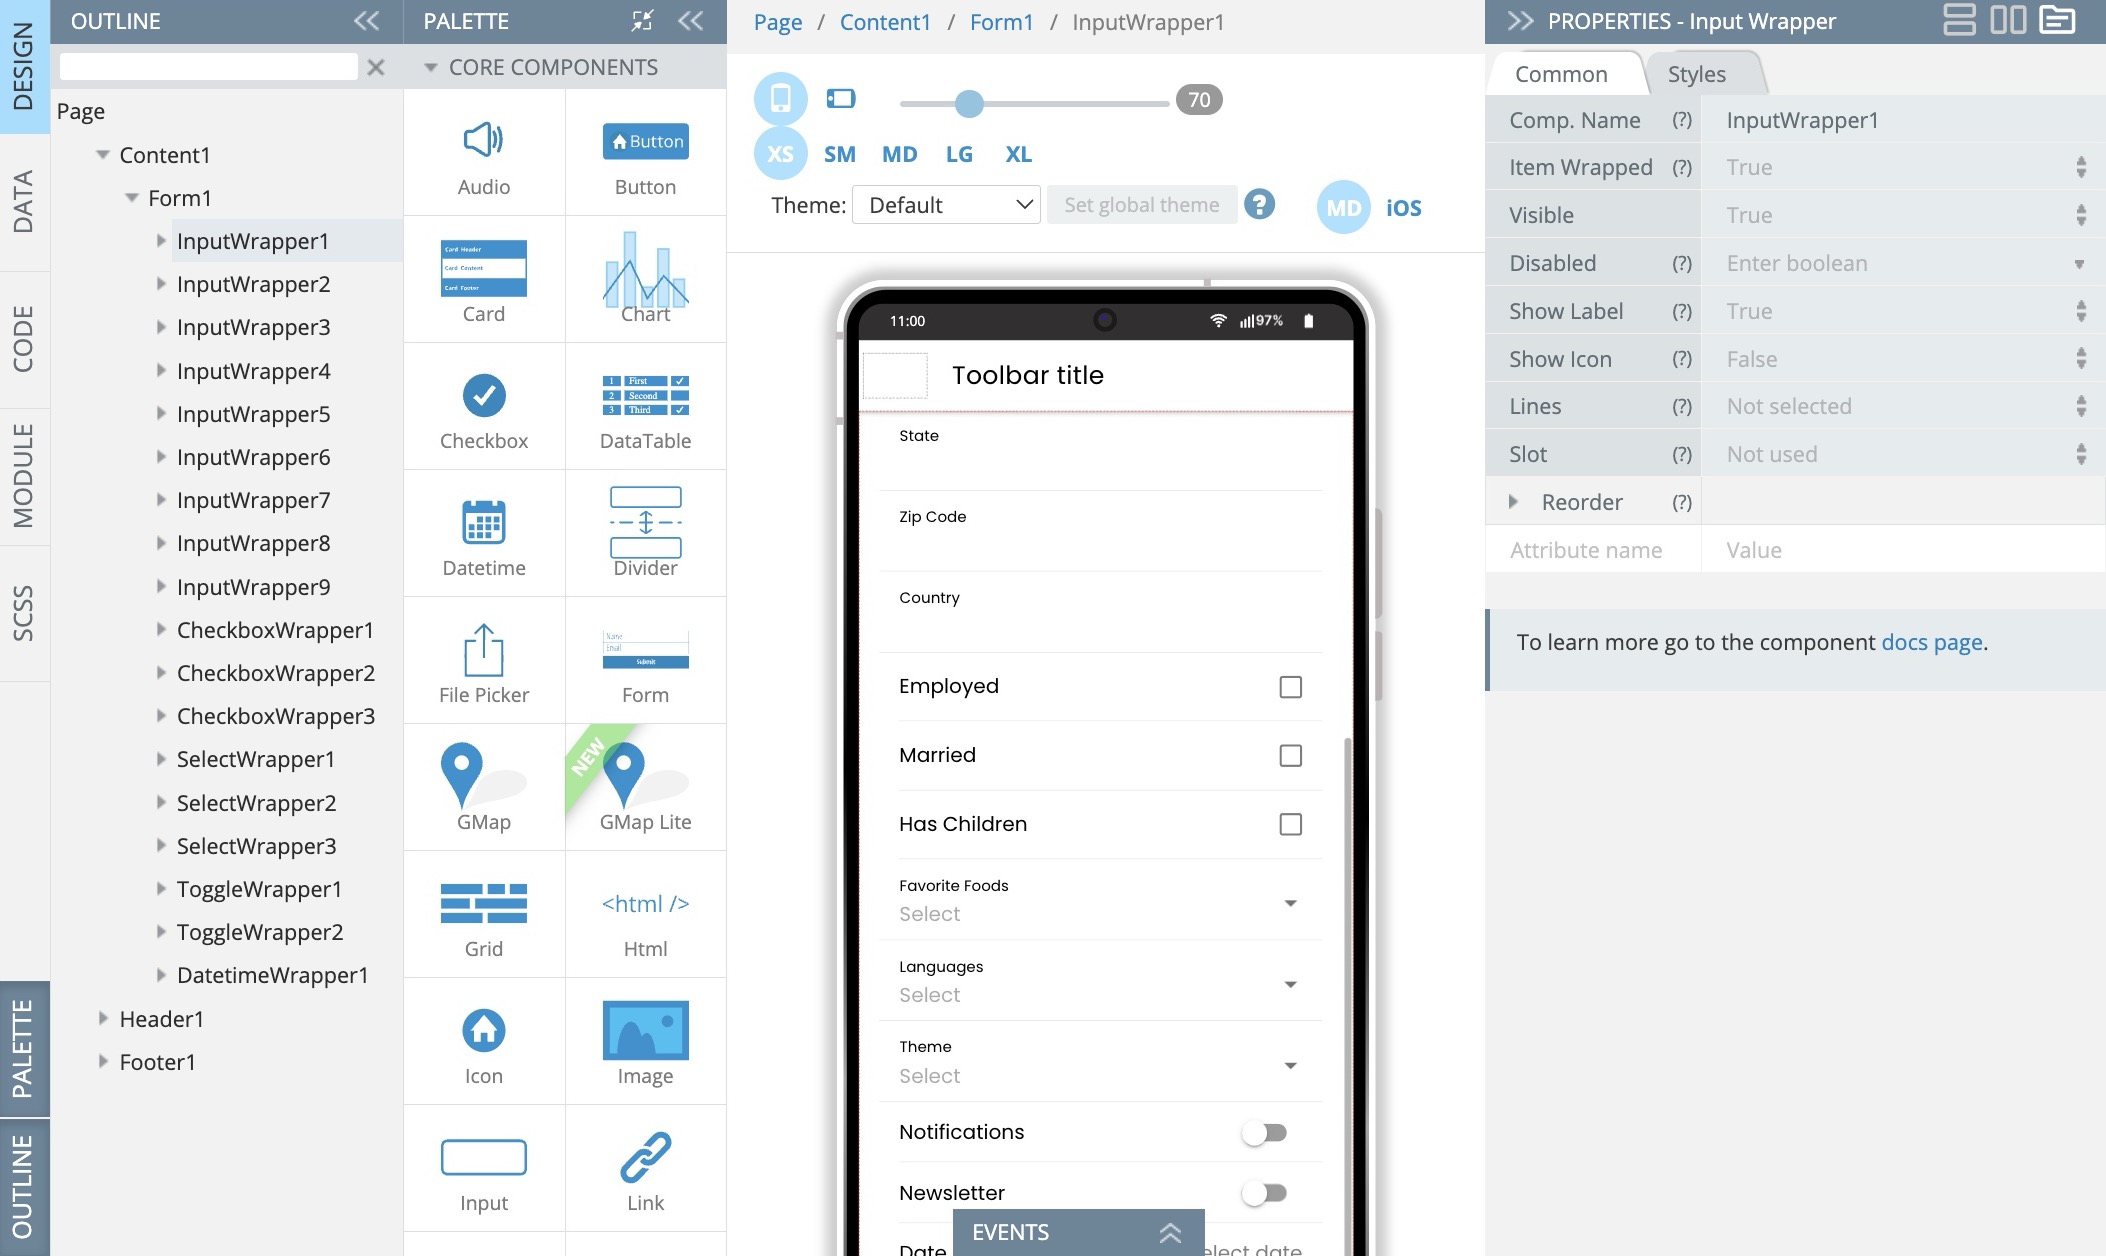
Just like that, the form is ready!

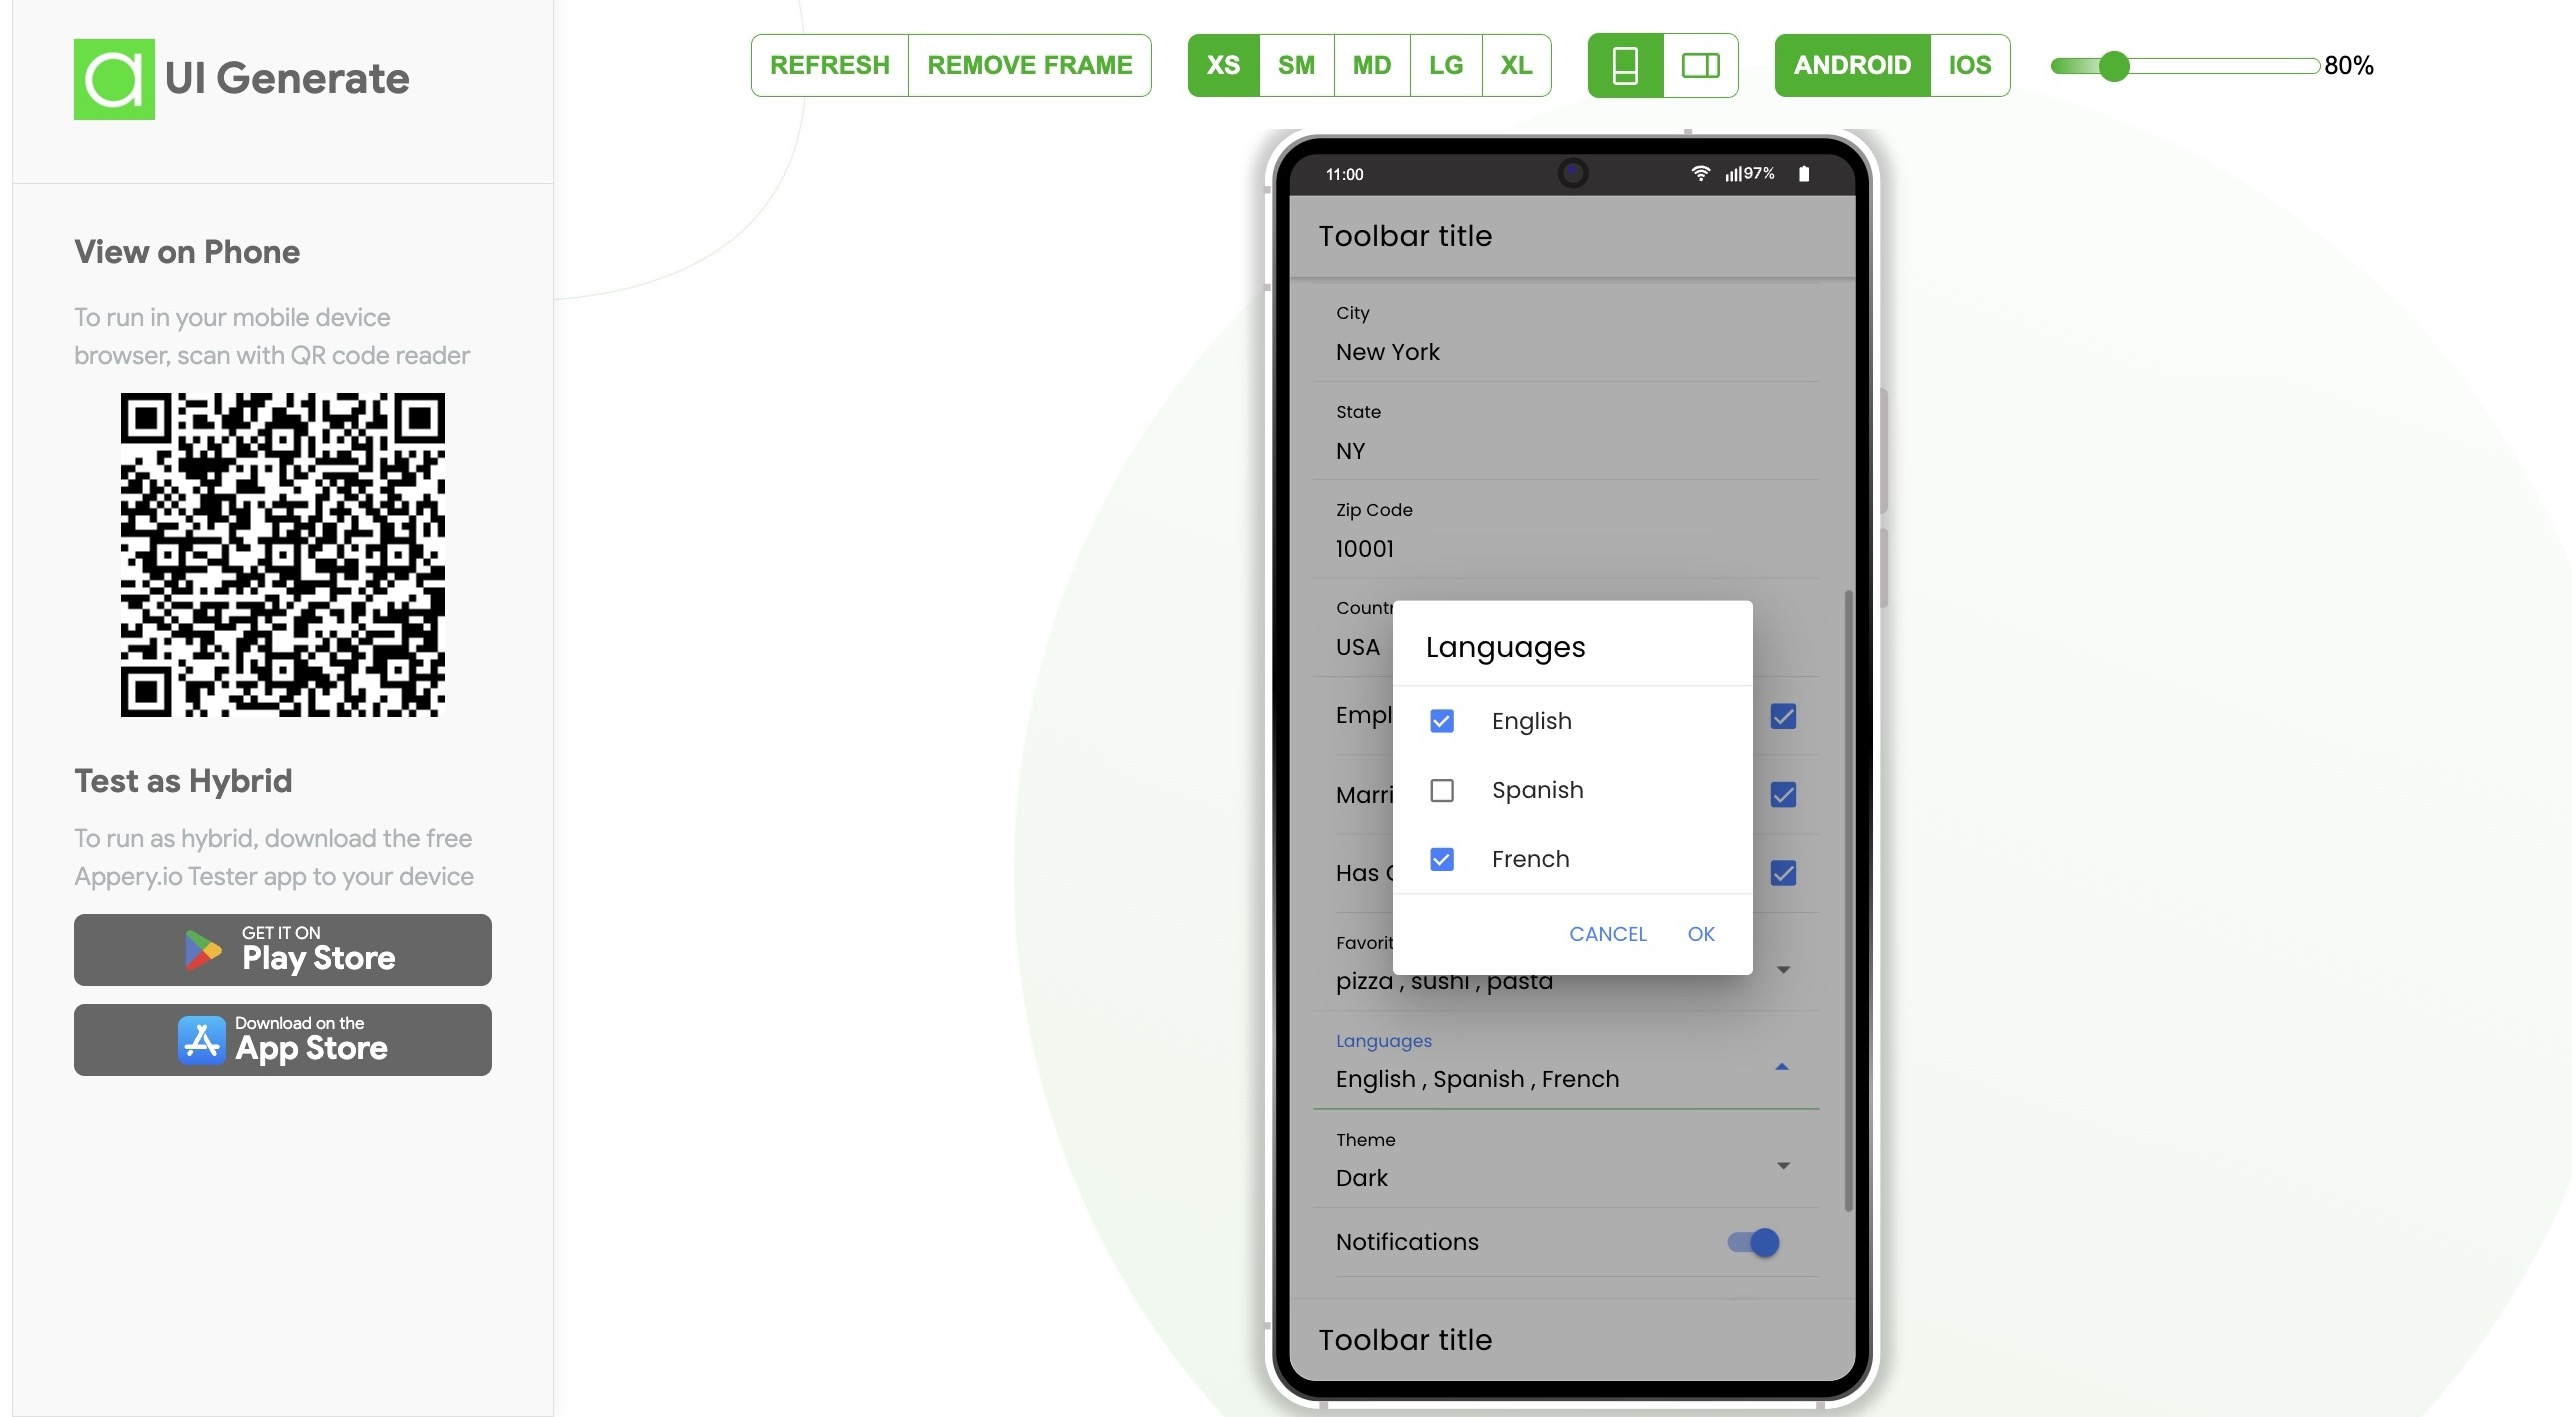
When tested, all elements display correctly. Checkboxes appear for Boolean properties, dropdowns are generated, and there’s even a date-time picker!


Everything is structured neatly—perfect!

Adding a Fun Feature: A Tic-Tac-Toe Game

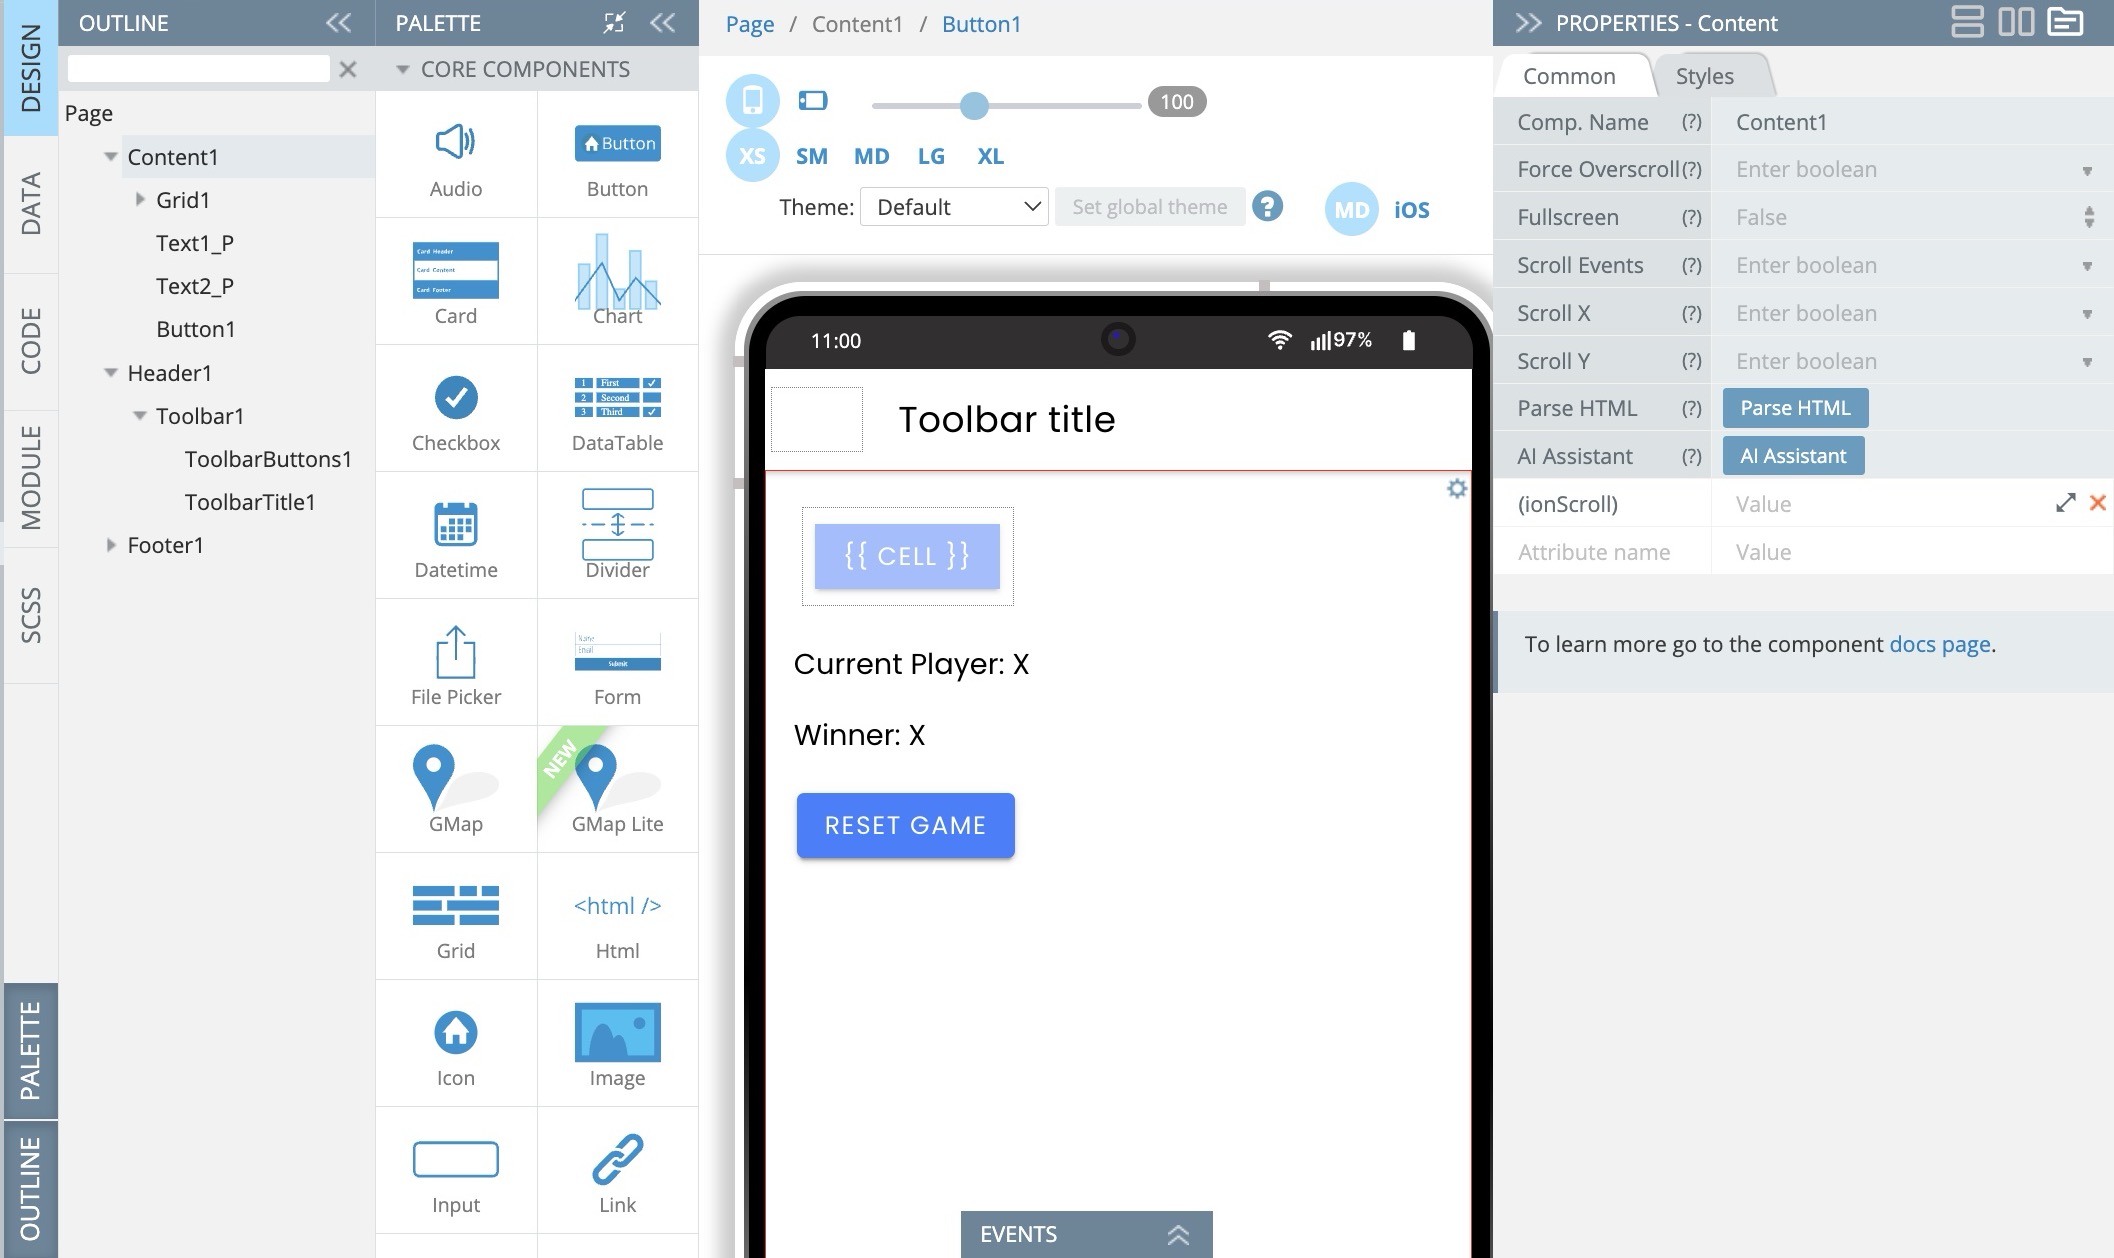
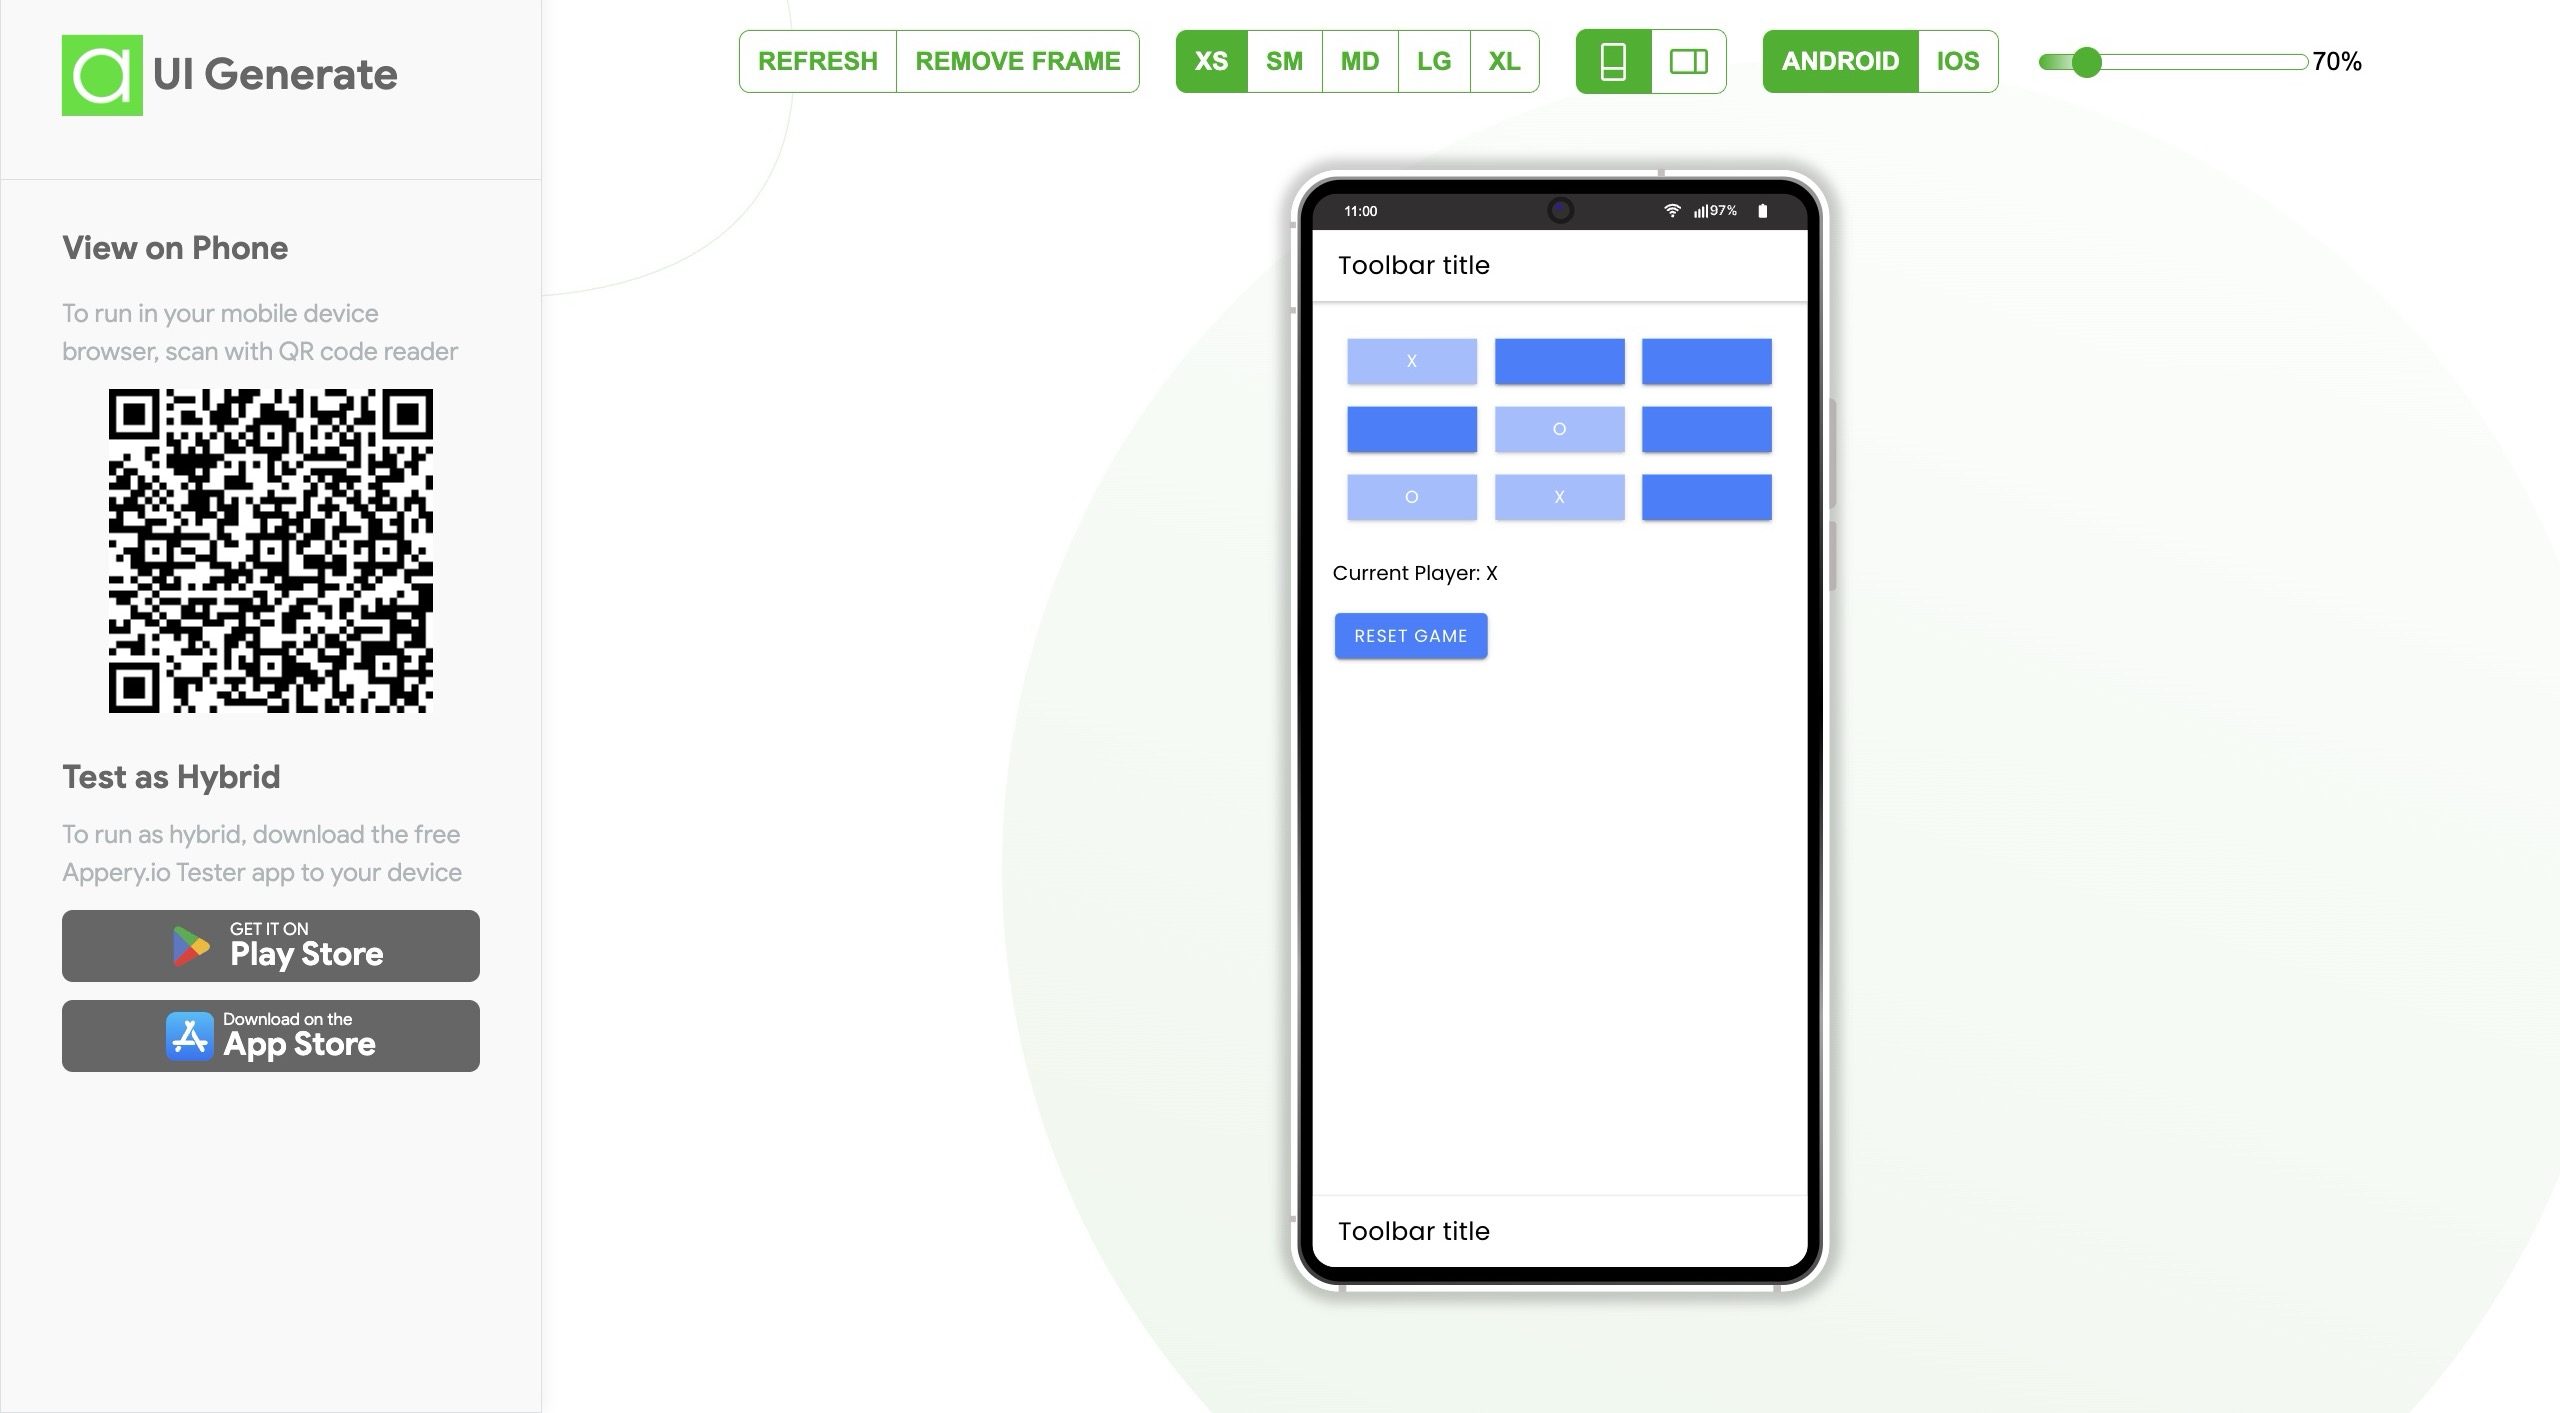
Let’s take it a step further and create a Tic-Tac-Toe game. Open a new screen and ask ChatGPT to generate the game.

And just like that, it’s done!

The AI builds the logic, and the game works instantly. Click Reset, and you can play again.

One of the biggest benefits of using Appery.io with ChatGPT is that AI doesn’t just generate UI elements—it also writes functional logic! Plus, you can customize the design however you like.

Exporting Your Mobile App

Now, let’s turn this project into a real mobile app.

  • Select Export.
  • Choose Binary APK / AAB.

  • And boom—the Android app is ready!

Scan the QR code, download, install, and open it. In just minutes, you have a fully functional mobile app, created without writing a single line of code!

Final Thoughts

With ChatGPT and Appery.io, anyone can build a mobile app—no coding needed! Whether you want to create forms, games, or dynamic screens, AI makes it easy.

If you found this guide helpful, don’t forget to like, subscribe to our YouTube channel, and hit the notification bell for more exciting tutorials! 🚀

🚀 Exciting New Appery.io Features to Boost Your App Development

Great news, Appery.io community!

We’ve rolled out some game-changing updates to make app development faster, smarter, and more intuitive. Whether you’re designing stunning UIs or integrating complex code, these new features will take your projects to the next level. Let’s dive into new Appery.io features!

✨ AI Assistant for Effortless UI Generation

The most exciting update? The AI Assistant property! This revolutionary feature helps you adapt any HTML code into your Ionic apps with just a few clicks. No coding headaches—just a smooth, AI-powered experience.

🔹 Instant UI Creation: Generate beautiful user interfaces in seconds.
🔹 Smart Code Integration: The AI automatically adds necessary variables and functions.
🔹 Seamless Adaptation: Works with Content and HTML components to enhance your app-building workflow.

Want to see it in action? Check out our Ionic Property: AI Assistant page and start building amazing UIs for free!

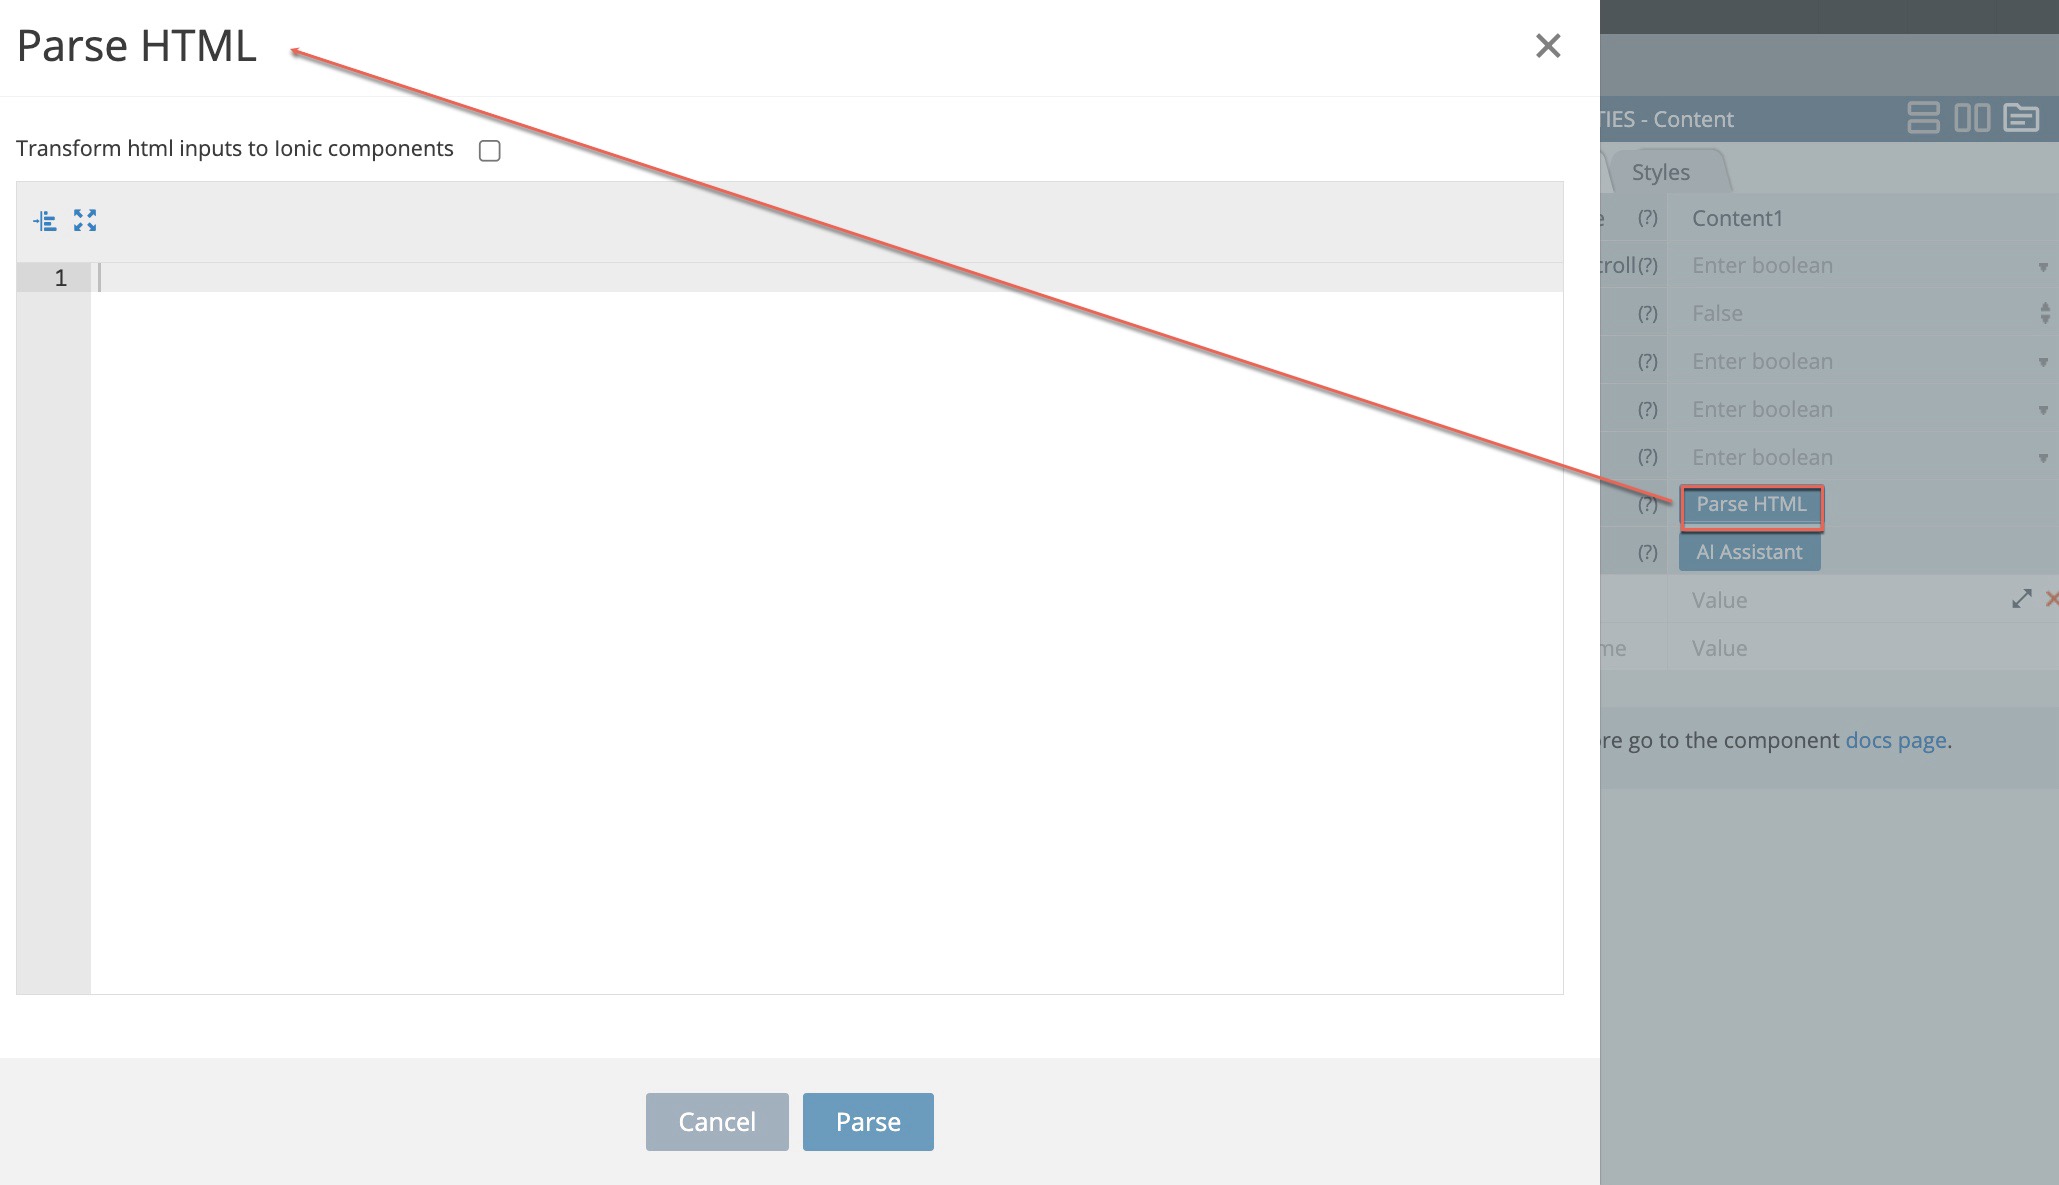
📝 Parse HTML Property for Content Components

We know how important flexibility is when working with content. That’s why we’ve introduced the Parse HTML property for the Content component. Now, you can easily handle HTML content without extra hassle.


📌 Need a step-by-step guide? Our Ionic Property: Parse HTML documentation has all the details you need.

🔧 Parse Code for Faster Code Migration

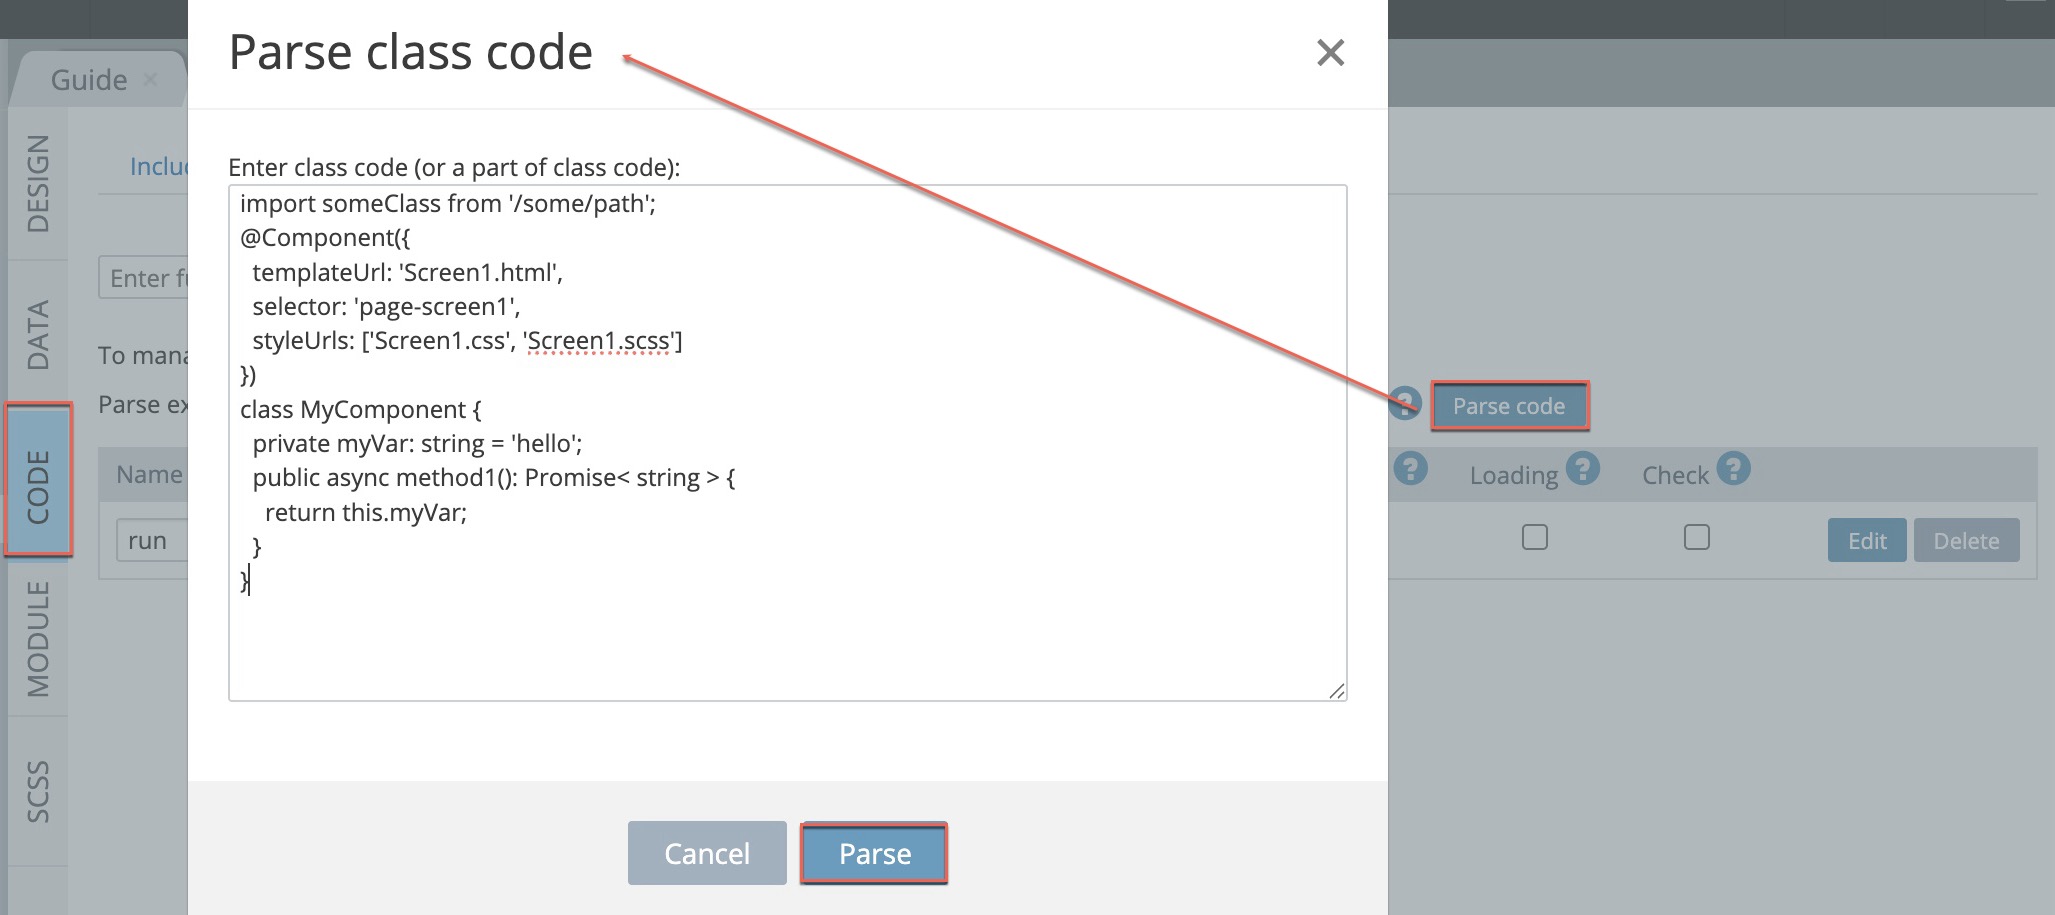
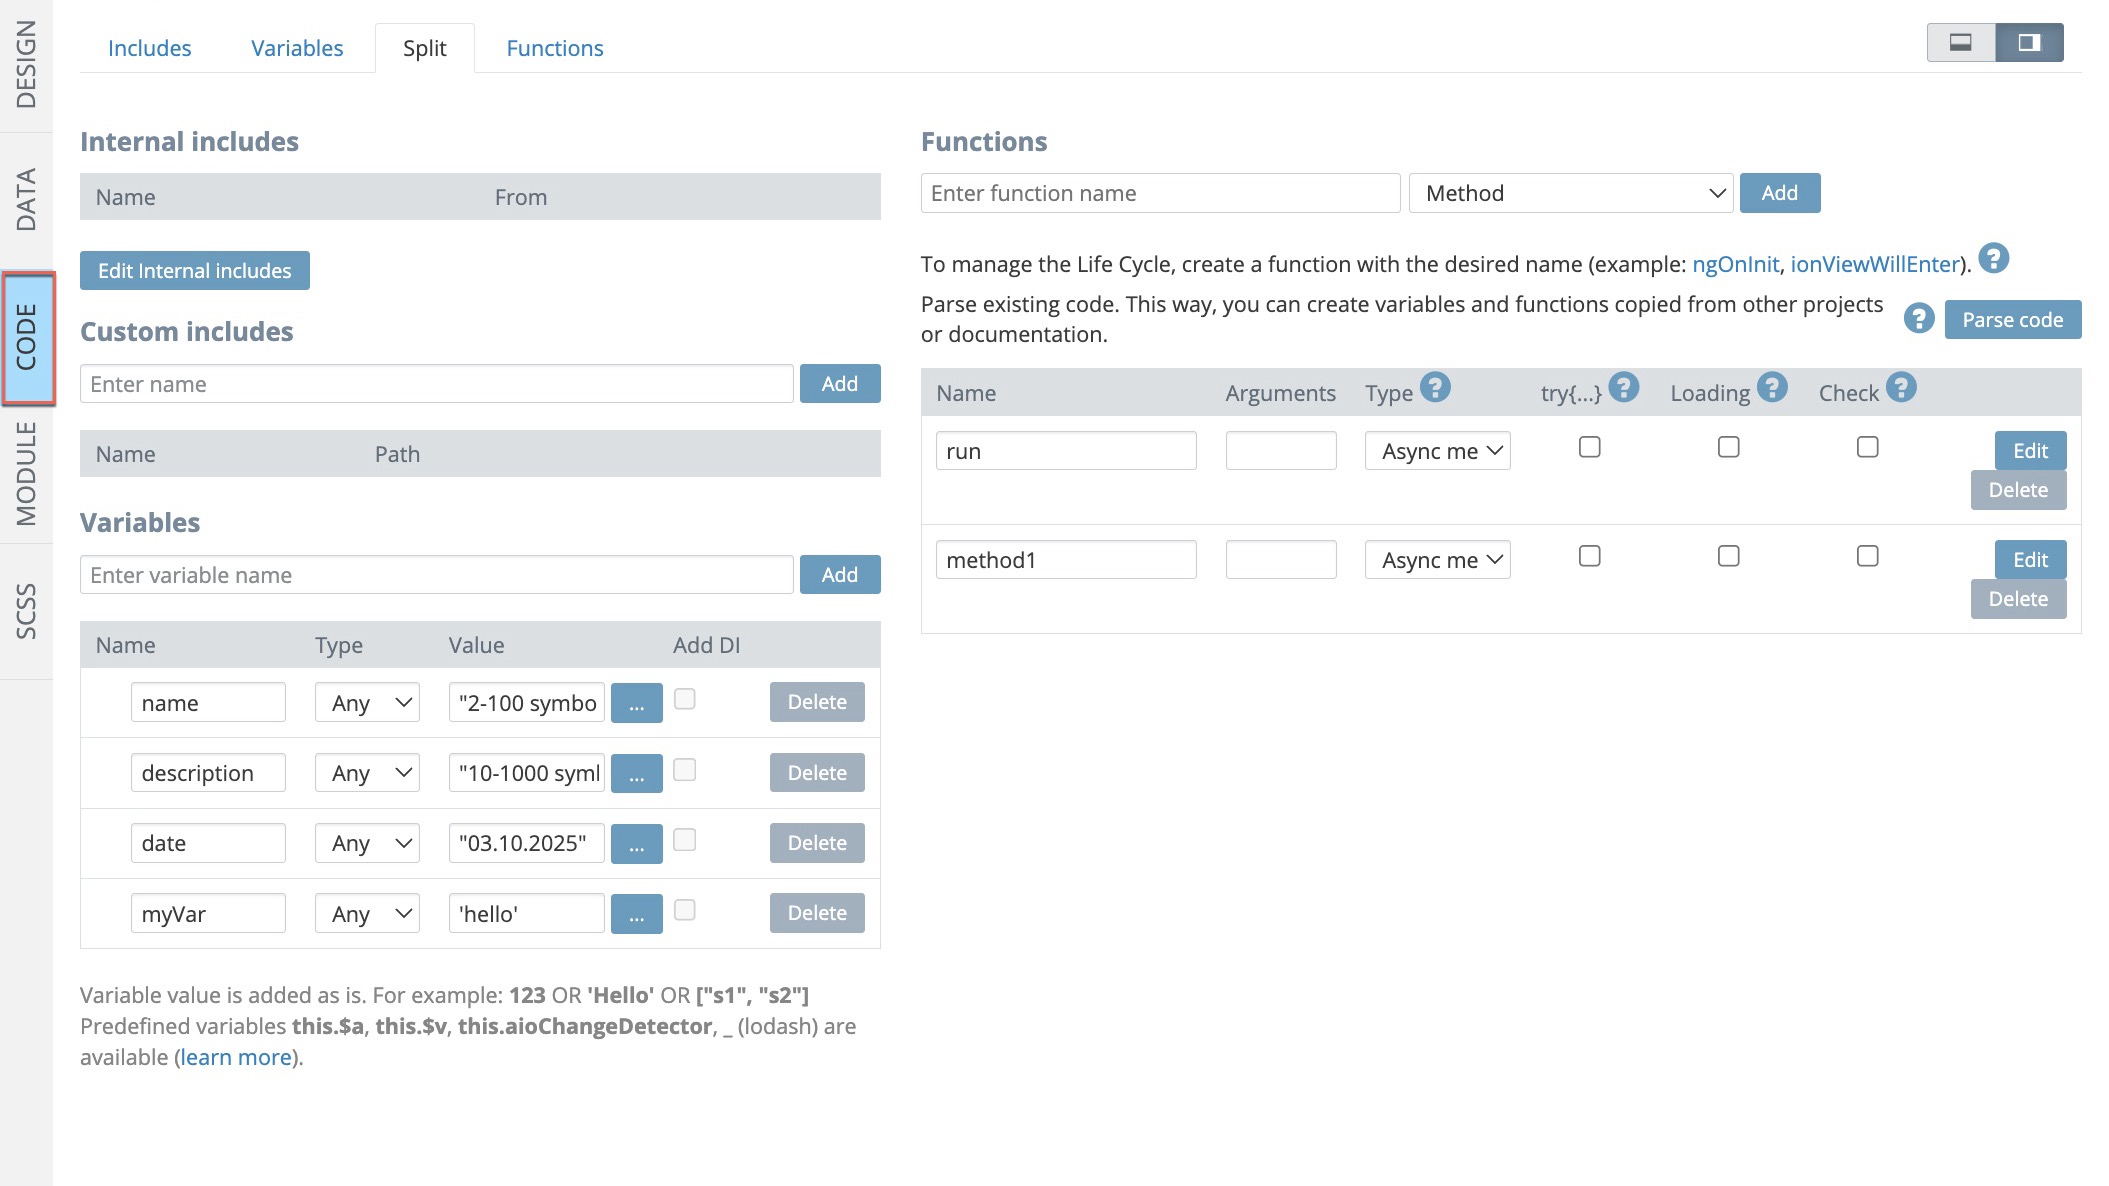
Migrating code from Angular or Ionic projects? We’ve got you covered with our Parse code feature in the CODE panel!

✅ Saves time: Automatically generates variables and functions when copying code.
✅ Effortless migration: Move code from other projects or documentation seamlessly.

With this update, integrating external code into your Appery.io apps is easier than ever!


That’s all for now! We hope these updates make your app development journey smoother and more exciting.

💡 Need help? Have questions? Our team is always here to assist you. Contact us anytime—we’re happy to help!

Thank you for being a part of the Appery.io community. Happy coding!

Your Appery.io Team

Website to App: Make Any Site a Mobile App for Free

Want to know a cool trick? You can turn any website into a mobile app. Yes, really! Let’s use Google Sites as an example. First, you need a website. So, make one! Use our WebsiteToApp template and add your stuff. Once it looks good, publish it and copy the link.

Now, here’s where the magic happens. We’ll use a tool called Appery.io. If you don’t have an account, sign up. It’s free and quick. Create a new app using the “Website to App” template. Then, put your website’s link into Appery.io.

Next, you can test your app. Appery has a Tester App. Just scan a QR code, and you can see how your app looks on a phone. It’s that easy!

Sometimes, there might be things on your website you don’t want in your app. No problem. You can remove them. Appery.io lets you do this, even if you don’t know code.

So, how do you make it a real app? In Appery.io, you can export your app. You get a QR code. Scan it, download the app, and install it on your phone. That’s it!

In just a few minutes, you’ve made a mobile app from a website. Isn’t that amazing? If you liked this, share it!

And if you want more details, watch our short instructional video tutorial below and make your website to a mobile magic in a couple of minutes!

BTW, if you missed our previous video where we show how to turn your Wix website into a mobile app and then fine tune it, check this link.


App Store Screenshots: Make Your App Stand Out Fast

Your app might be amazing, but without eye-catching App Store screenshots, it won’t get the attention it deserves. Screenshots are the first thing users see, and they can make or break your download rates.

Creating professional App Store screenshots doesn’t have to be complicated. With Appery.io, a powerful no-code app builder, and the right design tools, you can quickly generate stunning images that showcase your app’s features.

Why App Store Screenshots Matter

Screenshots aren’t just images; they’re your app’s first impression. High-quality, well-designed screenshots:
✅ Grab attention in a crowded marketplace
✅ Highlight your app’s best features
✅ Boost downloads and conversions

A No-Code Approach with Appery.io

Not a developer? No problem! Appery.io, makes mobile app development easy. This no-code platform lets you build, test, and launch apps without programming knowledge. Combine it with design tools like Figma, and you can create stunning App Store screenshots in no time.

Watch the Step-by-Step Tutorial

Want to see the process in action? Our latest YouTube video walks you through capturing, editing, and exporting App Store screenshots like a pro. Get all the details and follow along to make your app stand out!

📌 Watch now: 

Build, Design, and Succeed with Appery.io

With Appery.io,, app development has never been easier. Whether you’re a startup or an experienced entrepreneur, this no-code platform helps you bring your ideas to life—fast.

Ready to take your app to the next level? Subscribe to our channel for more expert tutorials! 🚀

Build a Super Bowl Party Countdown App with Appery.io

Are you ready for the ultimate Super Bowl party? What better way to get the excitement going than with a custom app that shows exactly how many days, hours, minutes, and seconds are left until the big game?

In this new YouTube tutorial, we show you how to quickly build a Super Bowl party countdown app using Appery.io, a no-code mobile app development platform. Whether you’re a developer or a beginner, Appery.io makes app creation simple, without writing a single line of code. And the best part? You don’t need any technical skills to get started!

Create a Countdown for Any Event

While this tutorial focuses on the Super Bowl, the app can be used for any special event, from birthdays to New Year’s celebrations. Using Appery.io’s Flip Down plugin, you can easily integrate countdown timers and make your app visually appealing, all while showcasing how to use JavaScript libraries to enhance its functionality.

Why Appery.io?

Appery.io is a powerful, hybrid app builder that lets you use JavaScript libraries in your mobile apps. With a huge selection of pre-built components, Appery.io saves you time and effort by offering plug-and-play solutions. In the video, you’ll see how to use libraries like moment.js for accurate time tracking and a simple yet effective countdown.

Watch and Learn

In this tutorial, we walk you through the process of creating a countdown app from scratch. You’ll learn how to:

  • Set up your app with one simple screen
  • Add a countdown timer to track the Super Bowl (or any event)
  • Use third-party HTML and JavaScript code
  • Export your app for iOS and Android

It’s all about making the process as simple and user-friendly as possible. And for those who want even more convenience, Appery.io’s plugin library offers easy-to-integrate solutions to save even more time.

Ready to Start?

Watch the full YouTube tutorial for all the details, and get inspired to create your own Super Bowl party app. Don’t forget to like and subscribe for more tutorials on app development with Appery.io.

Start building your countdown today—and let the Super Bowl excitement begin!

New Appery.io Release: App Building Power with Appery.io’s Latest Features

When it comes to creating mobile apps, Appery.io is a name you need to know. In this article, discover how our latest features can transform your app development process. Appery.io is all about making app building easier and faster.

Enjoy our Search

First, let’s talk about our new search functionality. This tool lets you find anything in your project, whether it’s code, styles, or components. With a quick search, you save time and avoid frustration. You can focus on the creative aspects of your project.

Use our latest feature, Search, all over the project.

Methods ngOnInit and ionViewWillEnter are now at Hand

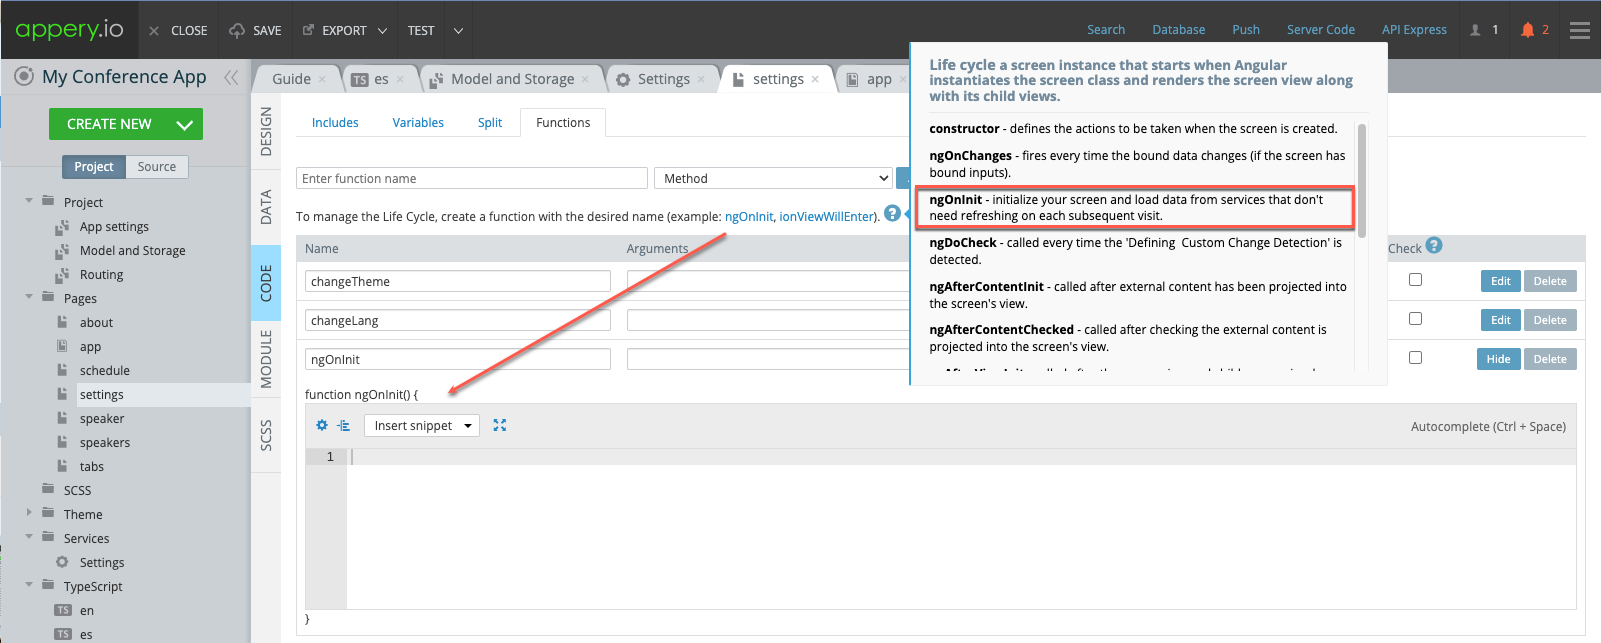
Next, our editor now includes hot adding of the methods that are common in app development: ngOnInit and ionViewWillEnter. Previously, setting them up took time. Now, Appery.io has automated this. You can set up your project with one click on the needed method. This means less manual work for you.

Add the 'ngOnInit' and 'ionViewWillEnter' methods with one click.

Using Alerts is Simpler Now

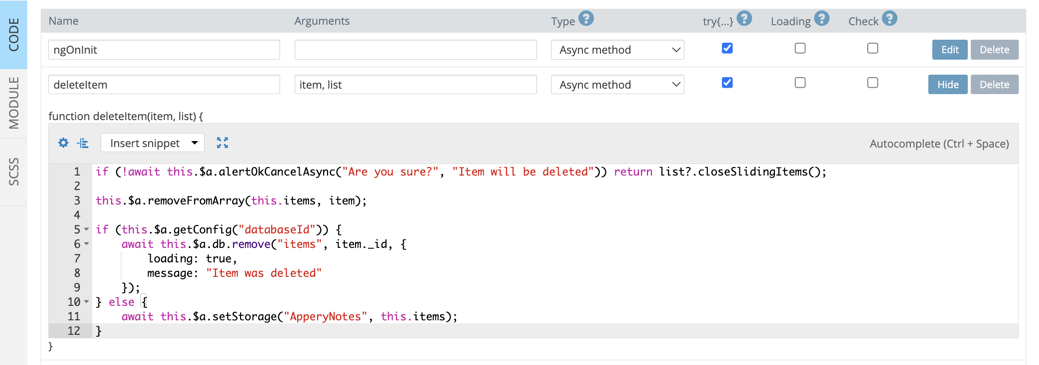
Another exciting update is in user alerts. Handling these interactions used to be tricky. Now, our system streamlines the process. The code is clear and easy to read. Managing user prompts is now a breeze, enhancing your app’s user experience.

The updated code with Alert: smart, elegant, and easy to understand.

DB Queries Caching is Here Too

Performance is key in any app. That’s why our caching feature is a game-changer. For this, two new parameters have been added to our arsenal: cache and saveInCache.

This feature stores database queries so apps run smoothly, online or offline. It improves speed and ensures data is always there, even when the internet connection isn’t.

Add our new database caching functionality to your projects by using 'cache' and saveInCache' parameters.

With these tools, Appery.io empowers developers at every level. You’re free to focus on what matters. The platform is evolving. Our commitment is to support your creative journey. We provide the tools you need to build apps that stand out.

To learn more about these new features, see our detailed Youtube video:

You’re not alone. Join the Appery.io community. Together, let’s bring your app ideas to life. Explore our tutorials, templates, and intuitive editor. We’re excited to see what you will create!

Create an Offline Map App Without Knowing How to Code!

Are you ready to turn your mobile device into an offline map powerhouse?

Imagine exploring new places with no need for data connections. With Appery.io’s Offline Map app template, you can create a fully functional map app — no coding experience required. Here’s how you can get started today.

To make sure creating this app takes minimum of your time and efforts, you can watch our YouTube video:

Also, you are free to follow our detailed tutorial on using our customizable Offline Map app template. 

In short, the process can be described in the following simple steps:

Step 1: Build Your Offline Map App with Appery.io

Creating your app with Appery.io is a breeze. Simply:

  1. Go to the Apps tab in Appery.io.
  2. Click Create new app and choose the Offline Map template.
  3. Give your app a name, click Create, and your project will be ready in seconds.

This template includes predefined data and settings to make the setup seamless. You’ll see everything organized in the Project view section, with all essential elements already in place.

Step 2: Get a Mapbox Access Token

To activate your maps, you’ll need a Mapbox access token:

  1. Visit the Mapbox’s website and generate your unique access token.
  2. In Appery.io, navigate to Services > Settings and enter your token.

This token enables the map features and gives you access to interactive, high-quality mapping.

Step 3: Test Your App on a Device

Testing in a browser won’t work due to the native APIs. To test, click to export the app as an APK (Android) or IPA (iOS), or use the Appery.io Tester app for quick previews.

Exploring the Offline Map App

Launch the app, and you’ll see a default map of San Francisco. Test the different view modes, like Streets or Outdoors, to see what suits you best.

Pro Tip: Use the Appery.io Tester app (available for free on iOS and Android) to preview your map instantly before exporting.

Want a full-screen experience? Hide the controls while using the Appery.io Tester.

To go fully offline, follow these steps:

  1. Enable online mode on your device.
  2. Click Maps to open the preloaded maps page.
  3. Download one of the maps — this is what allows offline access later.

Now you’re set to navigate without an internet connection!

Customize Your App

You’re free to modify the template to fit your specific needs. The template documentation provides insights on how to use free maps from resources like MapTiler. Whether you choose free or paid maps, you’ll find options to match your adventure.

Export Your App

When done, take your app on the road! With Appery.io, exporting is easy. For Android and iOS, follow the export guides linked in the template documentation.

Start Navigating — No Connection Required!

With Appery.io’s Offline Map app template, your mobile device becomes a robust, customizable navigation tool. Perfect for travel, hikes, and exploring remote areas, this template takes your app ideas offline with ease.

Happy navigating!

Unlock App Potential: 5 Essential, Innovative Tools for Success

As we approach the exciting innovations of 2024, mobile app development is brimming with new possibilities.

Appery.io, a no-code platform, offers 5 essential app building features that can simplify your development process and bring your creative ideas to life more efficiently.

Appery.io is perfect for those looking to innovate without the steep learning curve of traditional coding. Whether you’re a novice or an experienced developer, these features empower you to focus on what truly matters: building exceptional apps. Our latest YouTube tutorial explores these features and how they can transform your project workflows.

Why Focus on These 5 Features?

1. Bulk Image Replacement: Seamlessly update app visuals without manual repetition. More details can be found here.

2. Effortless Error Handling: Navigate debugging with user-friendly error handling tools.

3. Enhanced Loading Management (CODE panel): Organize and streamline your code using advanced loading integration options.

4. Added Form Validation Check (CODE panel): Integrate form validation checks to ensure data integrity.

More information on the CODE panel new features can be found here.

5. Automatic Variable Addition (CODE panel): Reduce time spent on repetitive tasks with automated variable handling.

These capabilities are designed to help developers prioritize creativity and user experience, significantly reducing technical barriers.

Why Watch the Video?

Our YouTube video tutorial offers a closer look at each feature, demonstrating their practical benefits and applications. This video is an excellent resource for anyone looking to elevate their app development skills using Appery.io‘s no-code platform.

For a detailed exploration of these features, check out our video. You’ll gain valuable insights and tips that can enhance your approach to app building.

Stay Connected with Appery.io

Subscribe to our YouTube channel for ongoing tutorials, updates, and innovations in app development. Appery.io is here to support you on your journey to mastering mobile app development as we step out of 2024 and beyond.


Watch the full video now to explore these 5 essential app building features and start creating amazing apps with ease!

Unlock Real-Time Communication with WebSockets on Appery.io

Introduction to WebSockets with Appery.io

Have you ever wondered how apps send updates in real-time? The magic happens with WebSockets. Today, we’ll show you how to add WebSockets to your apps using Appery.io. This low-code app-building platform makes it easy to create complex apps quickly. Note that this post supports our comprehensive video tutorial and if you are interested in details, you are welcome to watch it.

By following the steps below, you can easily enhance your app with real-time communication features using WebSockets and Appery.io. Exciting, right? Let’s get started!

Setting Up Your App

First, create an empty app in Appery.io. Then, go to the Catalog of Appery.io plugins and select the WebSocket Example plugin.

Before importing it, you can click the link to open its documentation page. You’ll see it contains the code for the WebSocket server. This server needs to be run somewhere. While real applications may use Amazon or Azure, we’ll use CodeSandbox for testing.

Using CodeSandbox

1. Create a new Devbox.

2. Select Node.js Server from the list of backend frameworks.

3. Name your Devbox and set its visibility to “Public”.

4. Install two npm modules: `express` and `socket.io`.

Now, let’s move to the next step.

Setting Up Your WebSocket Server

Copy the server code from the documentation page and paste it into your `index.js` file in CodeSandbox. If everything is correct, the server should start successfully.

Back to Appery.io

Return to the Appery.io project and click Import selected plugins with the WebSocket Example plugin checked. This plugin helps you integrate WebSockets into your app. But first, let’s test it.

Testing Your App

Go to the Project > Routing section and set “WebSocketScreen” as the default page.

Next, navigate to TypeScript > WebSocket and specify the URL of your WebSocket server obtained from CodeSandbox.

Now, run your app in different browsers like Google Chrome, Firefox, and Edge. Enter a test message and click the “Send” button.

Ready! The message should be delivered to all clients in real-time.

Conclusion

Now you’ve seen how to add Websockets to your apps using Appery.io. This post is a companion piece to our detailed video tutorial. The demo app isn’t a finished product but provides a solid template for building your own real-time communication features. Give it a try and unlock powerful networking capabilities in your applications!