New Appery.io Release: App Building Power with Appery.io’s Latest Features
When it comes to creating mobile apps, Appery.io is a name you need to know. In this article, discover how our latest features can transform your app development process. Appery.io is all about making app building easier and faster.
Enjoy our Search
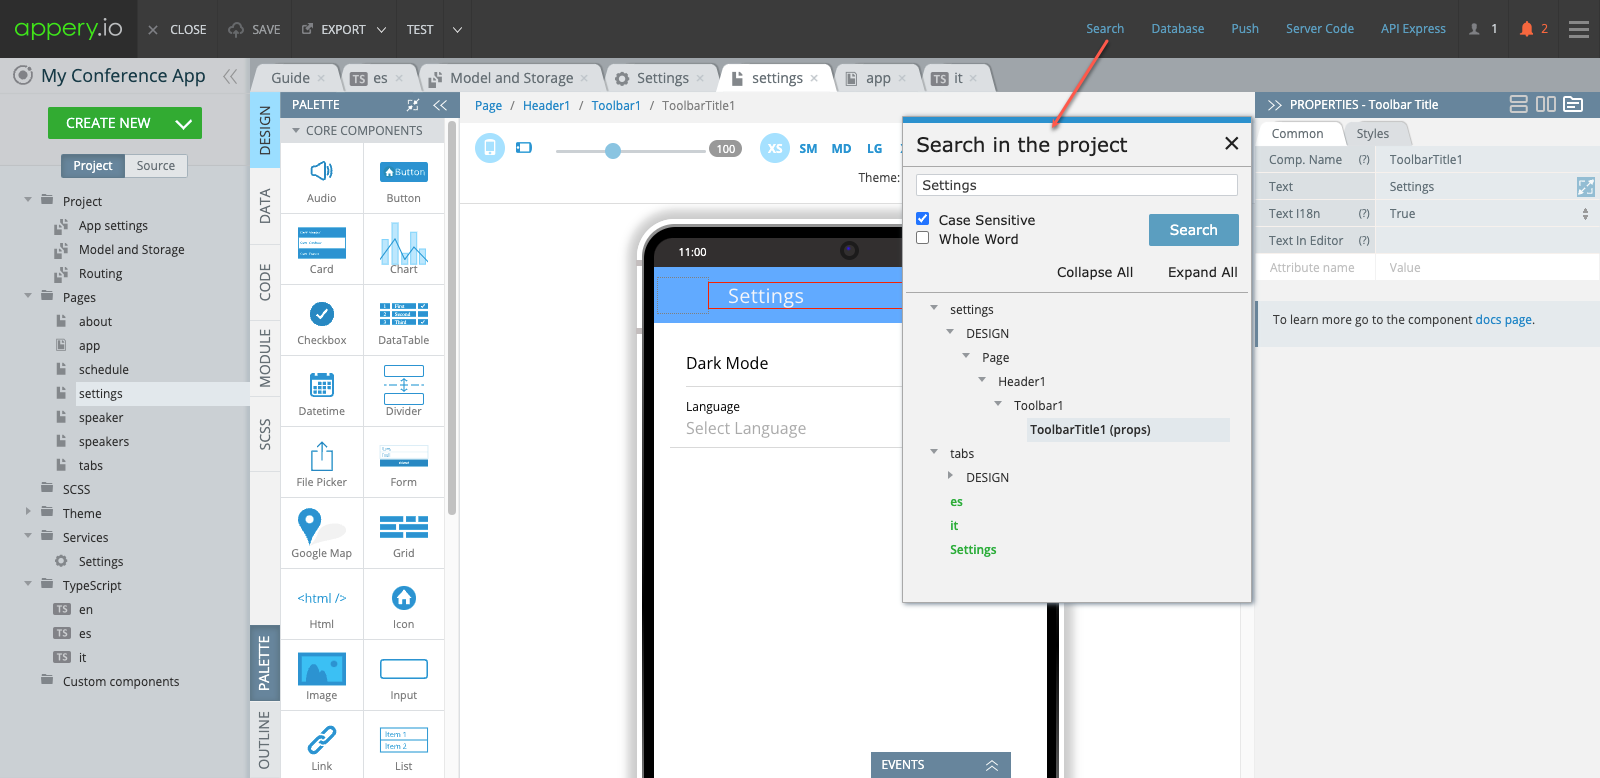
First, let’s talk about our new search functionality. This tool lets you find anything in your project, whether it’s code, styles, or components. With a quick search, you save time and avoid frustration. You can focus on the creative aspects of your project.
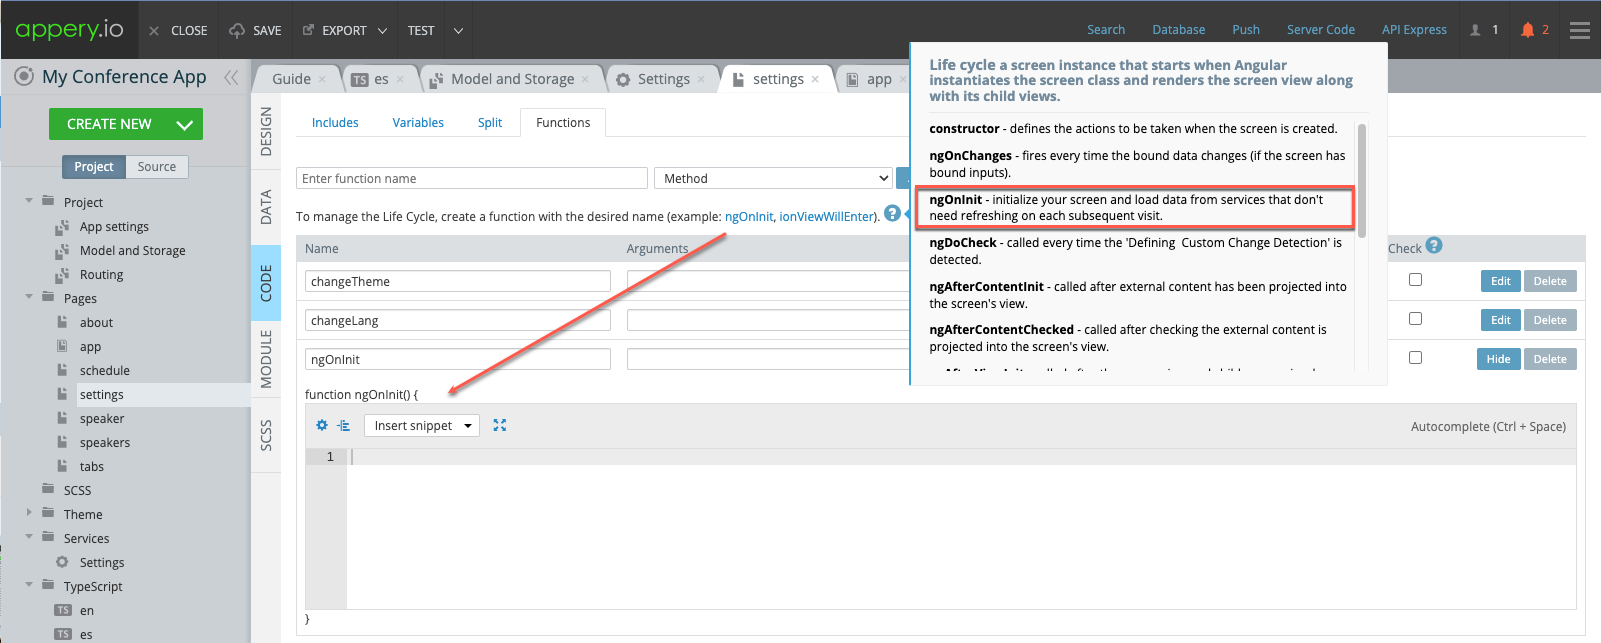
Methods ngOnInit and ionViewWillEnter are now at Hand
Next, our editor now includes hot adding of the methods that are common in app development: ngOnInit and ionViewWillEnter. Previously, setting them up took time. Now, Appery.io has automated this. You can set up your project with one click on the needed method. This means less manual work for you.
Using Alerts is Simpler Now
Another exciting update is in user alerts. Handling these interactions used to be tricky. Now, our system streamlines the process. The code is clear and easy to read. Managing user prompts is now a breeze, enhancing your app’s user experience.

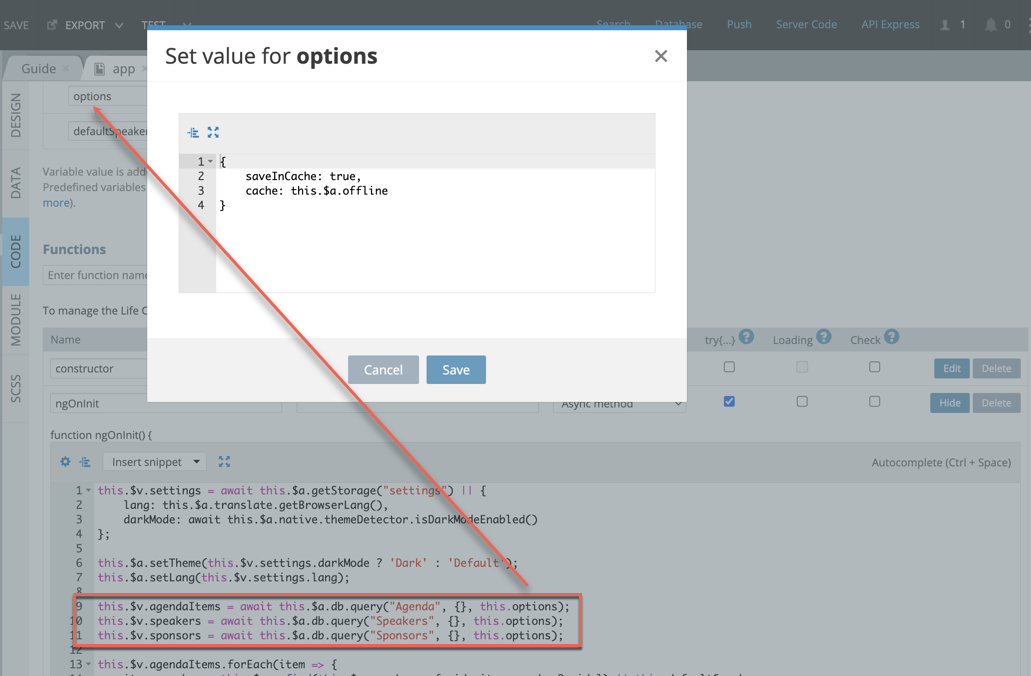
DB Queries Caching is Here Too
Performance is key in any app. That’s why our caching feature is a game-changer. For this, two new parameters have been added to our arsenal: cache and saveInCache.
This feature stores database queries so apps run smoothly, online or offline. It improves speed and ensures data is always there, even when the internet connection isn’t.
With these tools, Appery.io empowers developers at every level. You’re free to focus on what matters. The platform is evolving. Our commitment is to support your creative journey. We provide the tools you need to build apps that stand out.
To learn more about these new features, see our detailed Youtube video:
You’re not alone. Join the Appery.io community. Together, let’s bring your app ideas to life. Explore our tutorials, templates, and intuitive editor. We’re excited to see what you will create!