New Tutorials on Building Mobile Apps with Appery.io Backend Services
Try our new tutorials:
Try our new tutorials:

Guest Post by Ambika Pajjuri from KidSenz
Hello fellow Appery.io developers. I am founder of KidSenz, a company that delivers news videos and blogs in a kid safe environment, and wanted to share my experience with Appery.io
I was looking for a product that let me bring my app to life fast and in the most cost effective way. Instead of learning native programming languages and environments, I wanted to use HTML5. The idea was to build a Beta product as soon as possible to help figure out what works and doesn’t so we could pivot and iterate fast, before launching into production.
I tried a few tools including Sencha, Brightcove and Appery.io that enable the use of HTML5 for mobile app development. As a novice to mobile apps, I found Appery.io to be the easiest and most user friendly development environment.
The features I found very useful include:
The KidSenz app I created delivers a number of educational videos in various categories along with associated blogs and a simple quiz (more details when we launch since we are currently in Beta trials).
Working with Appery.io has been a great experience. The documentation has been good with plenty of examples. What I like best is the availability of examples to work with various backends. Last but not the least, support from Appery.io has been outstanding. They respond quickly to issues and helped ease qualms about working with a cloud based system.

Appery.io new HTML5 app builder has been the default builder for the past couple of weeks and we continue to update it with new features. One such feature is new Windows 8 support. In addition to jQuery Mobile/PhoneGap apps, you can now build Windows 8 apps with native support such as Snap View, Search Charm, Share Charm, and Live Tile.
To create a new Windows 8 app, click the “More create options” link from the Apps page and then select Windows 8 App as the app type. Try our Windows 8 app tutorial.
We also upgraded to a much better jQuery Mobile version 1.2.
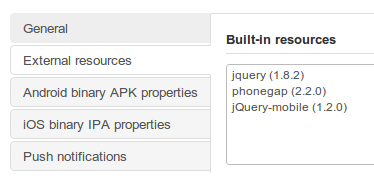
We also upgraded PhoneGap to version 2.2. This means Appery.io cloud build has also been upgraded to PhoneGap 1.2.
If you use Appery.io Mobile App Tester for Android – go and grab an update so it also uses the latest PhoneGap version.
A long requested feature – Push Notifications feature has been added to Appery.io Backend Services.
![]()
Want to try it? Try our new Push tutorial.
Build this app and learn how the app builder is fully integrated with backend services.
TechCrunch coverage of Appery.io new Windows 8 support: http://techcrunch.com/2012/12/14/cross-platform-drag-and-drop-app-maker-tiggzi-launches-windows-8-support/

We’ve just made the ESPN Headlines API and Sample App plug-in available. The API allows you to interact with ESPN’s various news stories. ESPN publishes hundreds of unique pieces of text content each day, covering dozens of sports and hundreds of athletes and teams. To make it easier to use the API to make mobile apps in Appery.io, we created a plug-in with some ready-made services (interfaces) to use the ESPN API.
To add this plug-in to an app, you just need to follow these steps in Appery.io:
Once you’ve created a new app based on this plug-in, you actually have a simple ready-to-run demo app. Just click the “Test” button in the right upper corner of the screen to see it work. In this tutorial, we’ll first walk through the sample app included with the plug-in. Then, we’ll show you, “under the hood,” some of how to the API is used in developing the app.
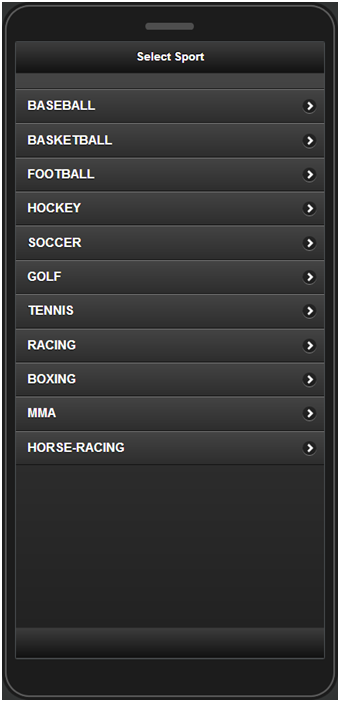
To find news you are interested in via the app, follow these steps:

Now that we’ve walked through the app, let’s take a peek under the hood.
Services from the plug-in are linked to UI components as part of the design of the app. The following REST services that are defined in the ESPN API plug-in are used in the app.
The ESPN_SportsList service is used for getting the list of available sports. REST Service Properties displays the URL, main settings, and whether a proxy is used, as shown below:

Request parameters contains the parameter sent to the ESPN service:

The service can be instantly tested and the response created automatically based on the returned response (JSON):

Response parameters:

The other services are set in the same way with their own parameters.
This service is used to get a list of leagues for a given sport:

The {sportName} value is substituted in mapping when the service is running based on the selected sport:
This service is used to get the headlines for that sports league.

{sportName}, and {abbreveationName} are set when the service is running:

This service is used for getting the details for each news item:

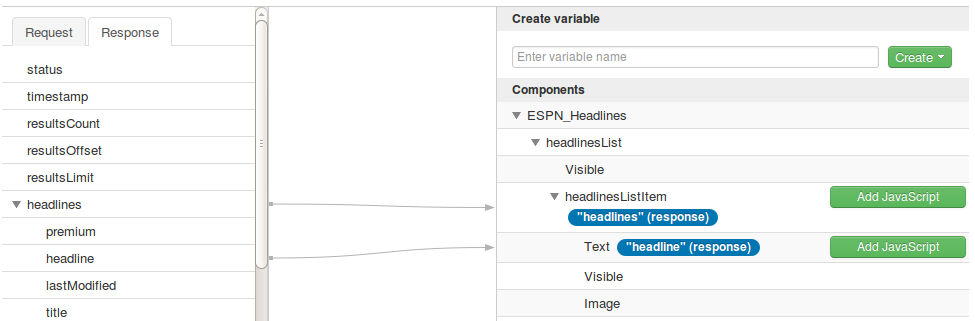
The final part in the app design is mapping the service parameters to the UI components. Here’s an example of this in action, showing the response parameters being mapped to output components:
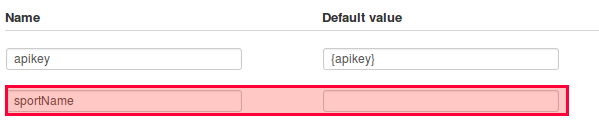
There is a known issue where the apikey parameter isn’t accepted, even if it’s specified:
![]()
This parameter is stored in ESPN_Settings. To resolve this problem, go to ESPN_Settings and create a new parameter apikey (now you have two identical parameters):

Remove the first one parameter (that was generated automatically) and launch the app. apikey should now be taken into account.
")
The latest Appery.io mobile app platform allows you to build Windows 8 apps for tablets and desktops with native Windows 8 support. This support includes special Windows 8 capabilities such as Snap View, Search Charm, Share Charm, and Live Tile! Join our webinar to learn how build Windows 8 apps with Appery.io.
When: Thursday, December 13, 11am Pacific Time
Register: https://www1.gotomeeting.com/register/611432329.
You might have noticed this but since Tuesday, November 13 when you create a new project, it opens in our new HTML5/JavaScript builder.

Our new HTML5/JavaScript builder:

We are just a few weeks from official GA and want to get as much feedback as possible from you.
Any projects created before November 13, will continue to open in the old builder (Flash). You are probably wondering what’s going to happen to your old projects? At some point very soon they will be converted and will start opening in the new builder.
We are also in the process of launching a new docs site at http://docs.appery.io.
Lastly, if you really still want to create a project in the old builder (although we don’t recommend it at this point), click on Create more options link.
Here is a great post by Andrew Trice on how to get your PhoneGap app approved by Apple. As Appery.io uses PhoneGap, exactly the same guidelines apply.
Last week we put posted Building a Mobile Search App with Appery.io Database tutorial that shows you how to search a database for a particular search term. The way the search worked, is that the entire word has to be matched. For example, you could enter ‘Apple’ but not ‘Ap’ to search. In this post we are going to show you how to use a regular expression to get all objects that start with a particular letter. As for our data, are going to use US States.
To start, the UI that we need looks like this:

That’s all we need for the UI. Let’s now create the database.

That’s it for the database. Let’s now add a REST service to search this collection.
{"States":{"$regex":"^C", "$options":"i"}}
The above will return all states that start with letter C or c. “$options”:”i” is what specifies the query to ignore the case.
We are done with the service. Let’s move on to mapping.
The input mapping looks like this:

This is JavaScript mapping:
return '{"States":{"$regex":"^'+value+'", "$options":"i"}}';
This is output mapping:

The last thing we need to do is to invoke the service. Select the input search field, then Events > Add Event > Search. Add Action > Invoke Service, select the service instance.
To test the app, enter any letter, for example ‘n’ and click the magnifying glass inside the search input:

This tutorial will show you how to build an app that searches data stored in Appery.io database.
Let’s start with building the mobile UI.
Using Appery.io app builder, create a page named Phones and build the following UI:


Open the service and then open Request Parameter panel. It should look like this:

Click Test. As we didn’t specify anything for where parameter, you should get all the phones in the collection.
Let’s now test the where parameter. Enter the value of {“Maker”:”Samsung”}, then click Test. You should now get only records where the maker is Apple.
Note that we don’t need to create the response parameters as the response was automatically created when we imported the services.

return '{"Maker":"'+value+'"}';
this means any value entered from the page will be used to search the database.


Appery("no_records").hide();
That’s to hide the label on every new search.
if (jqXHR.responseText == "[]"){
   Appery("no_records").text("Nothing found");
   Appery("no_records").show();
}
If nothing is returned, show the message.
