Below is a practical solution on how we can use customer external sites in Appery.io apps where events & scripts are defined with InAppBrowser Cordova plug-in.
Let’s say your client has a mobile site with lots of pages and different features, but lacks some mobile features like push notifications and he decides to give Appery.io a try. But to migrate all pages and all codes, the effort can be quite large. Perhaps this can be done, but at a later stage. So we made a decision to render the client’s site through the InAppBrowser component, which is a kind of a browser that can be used inside Appery.io apps. But the control over this component is quite limited, much less than what you have for pages in an Appery.io project.
Of course, the client’s site is protected by login and password. This solution will describe the case where a user logs into an Appery.io app with the same credentials used to bypass the site’s login screen.
The Appery.io project described in this article can be downloaded under this link.
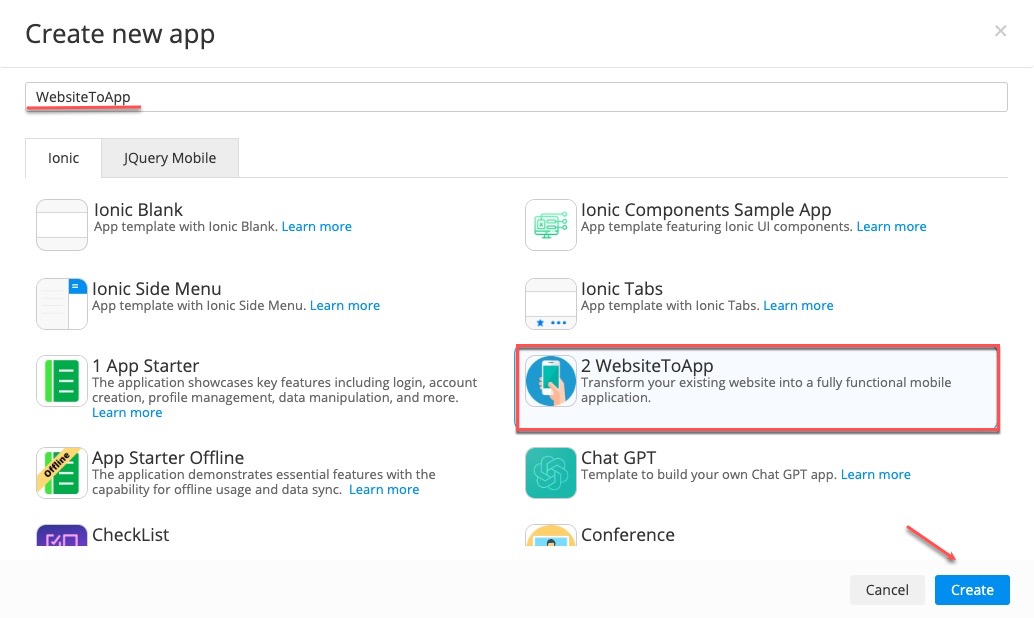
To open it in Appery, choose Create new app > From Backup, then select the downloaded zip file, click Create, and wait a moment while Appery creates the project for you from the backup.
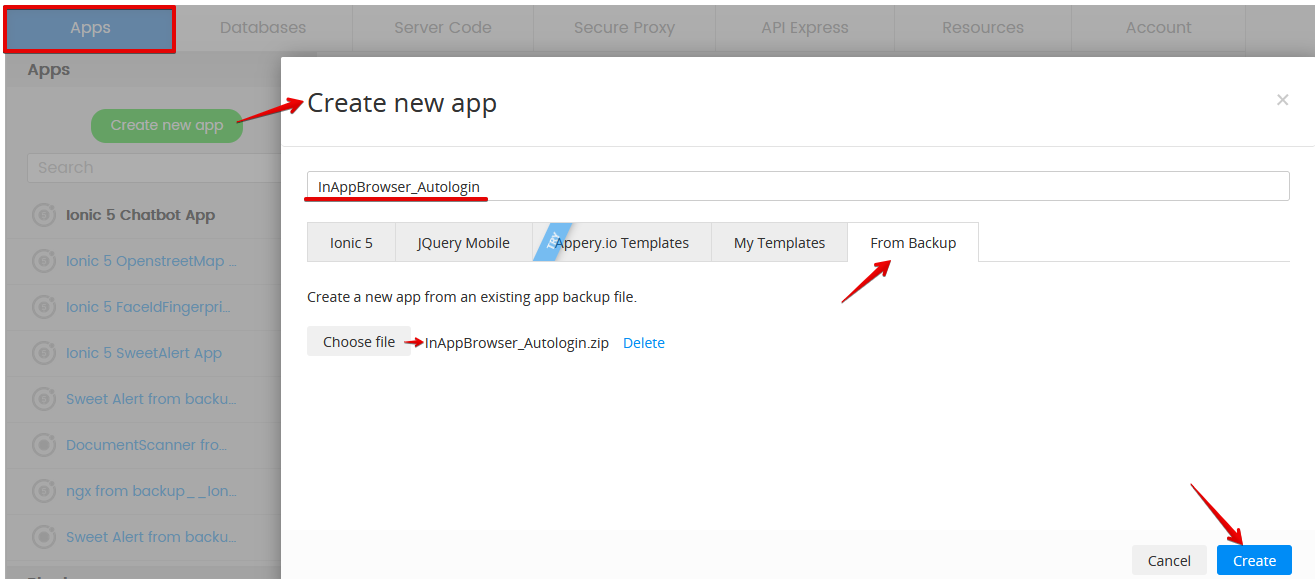
When finished, you’ll have the InAppBrowser_Autologin project created in your Appery workspace. Assuming you can already do basic operations in Appery, such as creating pages and dragging and dropping UI components from the palette, we’ll just walk you through the highlights of how this project was built, focusing on issues related to InAppBrowser.
To demonstrate these techniques, we have created a multi-page site on Heroku.com. Please click here to visit it. All the site pages except for the Login page are protected by login/password.
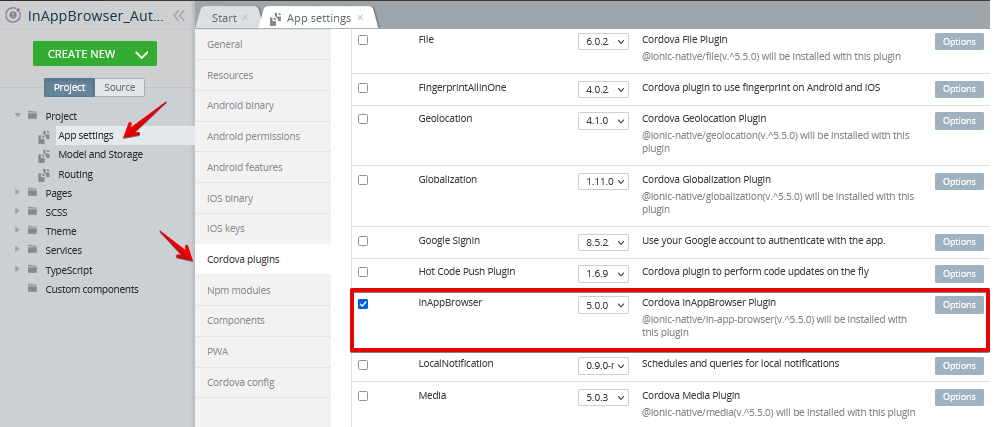
We will be accessing this site using InAppBrowser, so we need to have this Cordova plug-in enabled in App settings > Cordova plugins:
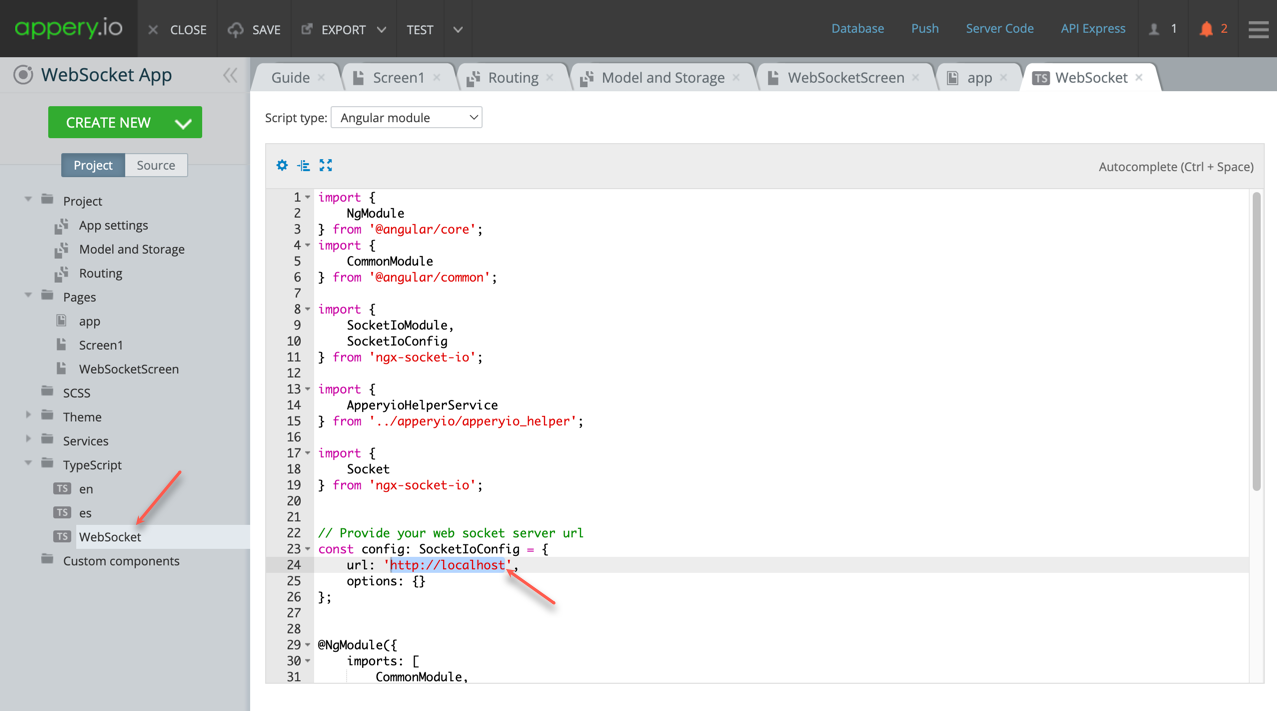
Let’s review how all of our InAppBrowser related activities are wrapped in an Angular service that can be used to share variables and code between the app pages. (To create this service in Appery, we performed Create New > TypeScript and named it BrowserService, with the type set to Angular service.) You can check that now we have an initial template ready to be gradually replaced with our functions:
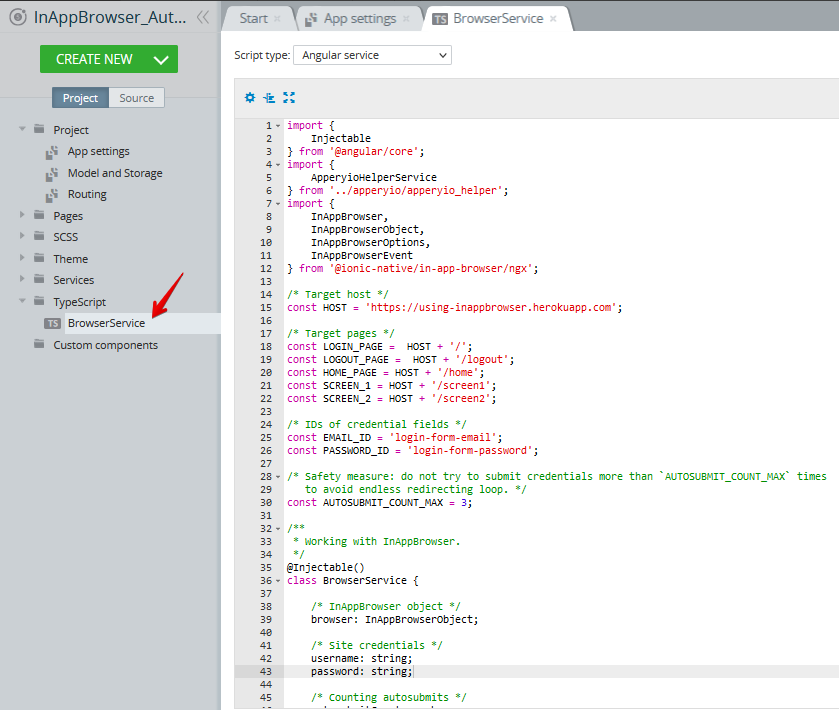
Let’s first check how the constants are defined for our site; these are: the target host, target pages, and IDs of the credential fields on the login page:
/* Target host */

const HOST = 'https://using-inappbrowser.herokuapp.com';
/* Target pages */

const LOGIN_PAGE =  HOST + '/';

const LOGOUT_PAGE =  HOST + '/logout';

const HOME_PAGE = HOST + '/home';

const SCREEN_1 = HOST + '/screen1';

const SCREEN_2 = HOST + '/screen2';
/* IDs of credential fields */

const EMAIL_ID = 'login-form-email';

const PASSWORD_ID = 'login-form-password';
We would like to access Screen1 and Screen2 directly, bypassing the credentials on the Login page. To do this, we use the InAppBrowser ability to track the loaded pages and insert scripts into them.
To see how BrowserService is used on he Menu page of the app, go to the CODE panel and switch to Includes at the top of the page. Here, we added BrowserService to the Internal includes section. We then switched to the Variables section at the top of the page and added the browser variable of type Browser; also, we enabled the Add DI checkbox. This checkbox stands for “dependency injection”, which means that all Angular services in the app are called “dependencies” and can be “injected” into pages:
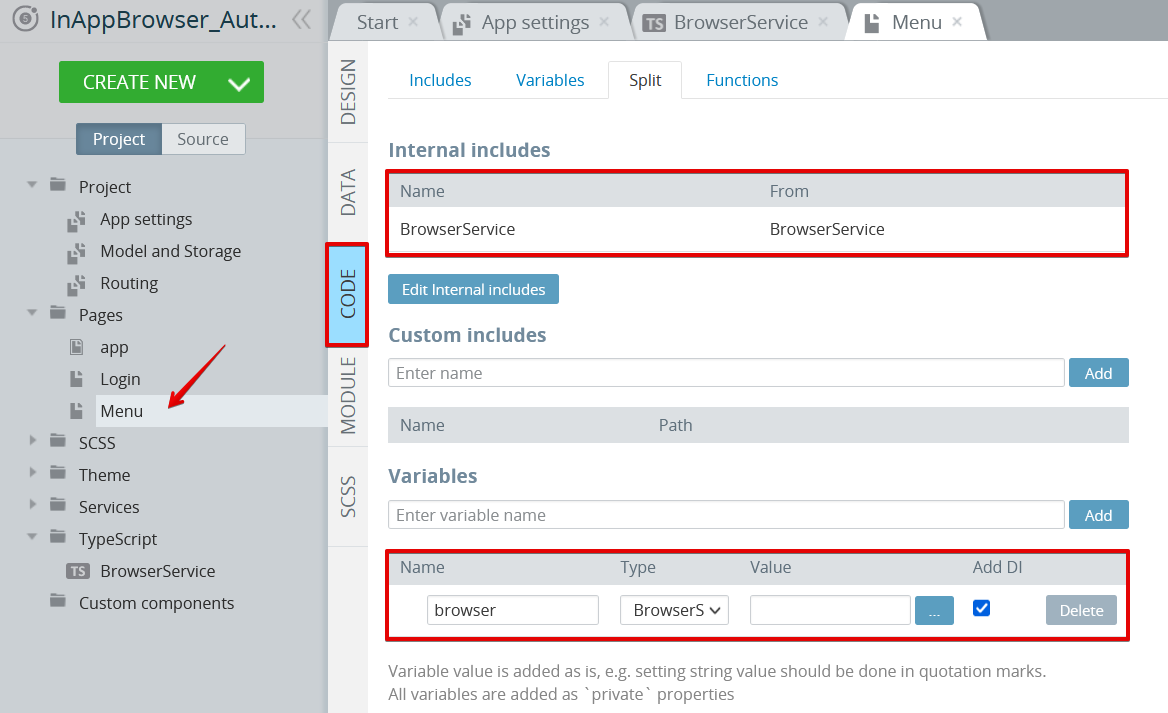
Everything looks good as we now have a browser variable on the Menu page for our BrowserService, so it can be called by binding TypeScript events to the buttons on the page:
These functions are implemented in BrowserService as:
public openFirstPage() {

    this.open(SCREEN_1);

}
public openSecondPage() {

    this.open(SCREEN_2);

}
It points us to the open(targetURL: string) method, where we created the InAppBrowser object:
this.browser = this.iab.create(targetURL, '_blank', this.getBrowserOptions());
Next, we subscribed to the following InAppBrowser events:
loadstart when our browser starts to load a URL.loadstop when our browser finishes loading a URL.loaderror when there is an error when loading a URL.
We get notified of these events as the user navigates through the pages on the site, so that we could take the needed action. One thing that we can do when we are on the Login page is to fill in the username and password fields on the site to automatically submit the form:
this.browser.executeScript({

    code: `

        document.getElementById('${EMAIL_ID}').value = '${this.username}';

        document.getElementById('${PASSWORD_ID}').value = '${this.password}';

        document.forms[0].submit();

    `

});
Here, we are using the InAppBrowser’s executeScript() function, which allows us to call JavaScript on an already loaded page.
Let’s go back to the options we used to create InAppBrowser.
private getBrowserOptions(): InAppBrowserOptions {

    return {

        'location': 'no',

        'hidden': 'yes',

        'beforeload': 'get'

    }

}
Here, we selected to hide the location bar with the URL of the page. We also set the browser to a hidden state to be shown only when the page is loaded.
Note the beforeload event: it is a bit special here. This is a pretty useful event to prevent certain pages from loading or replace the current URL with a different one. This can be useful, for example, if your site contains PDF documentation on the page. iOS devices have no problem opening PDFs, but this is not the case on Android devices with no direct PDF support. So, we can use a workaround to display PDF using a 3rd party service:
this.iab.create("https://docs.google.com/gview?embedded=true&url=" + event.url, "_system");
Also, one should be careful with the beforeload event, as the beforeload=yes option causes POST requests to stop working in InAppBrowser on iOS due to some existing issue, see here for more details. So we are setting beforeload=get to check only GET requests.
Basically that’s all. We took a look at the InAppBrowser events like loadstart, loadstop, loaderror and beforeload and added an autologin script to the site.
Check out the code in the attached Appery.io project and let us know if you have any questions, and happy coding in Appery.io!

