API Express: Transforming Mobile App Development Made Simple

In today’s fast-paced digital era, the essence of mobile applications is not just in their functionality but in the seamless integration with dynamic data sources. API Express, an integral feature of Appery.io, a leading low-code app-building platform, simplifies this aspect by connecting your app with relational databases effortlessly. For a deeper dive, we’ve crafted a comprehensive video that walks you through every step of this transformative process.

Bringing API Express and Relational Databases Together

API Express acts as the bridge between your mobile app and a relational database. But what’s a relational database, you ask? Imagine a vast warehouse of tables filled with connected data. With API Express, accessing this warehouse becomes as simple as tapping a button on your app. Our video tutorial, available on Appery.io, showcases this with clarity and detail, ensuring you grasp every aspect of the process.

A Video Guide That Makes Integration Easy

Why sift through complicated documents when you can watch a step-by-step video? Our tutorial breaks down everything from setting up PostgreSQL on Amazon Web Services (AWS) to crafting data services within your app through API Express. Here’s a sneak peek at what the video covers:

  1. Starting Your Database: Create and configure a PostgreSQL database on AWS. It’s the first step towards building a data-driven app.

  2. Managing Data with Ease: Use pgAdmin to manage your database—creating tables, organizing data, and preparing everything for your app.

  3. Seamless Connection via Appery.io: Step into the world of Appery.io and begin a new API Express project. This part of the video vividly shows how you can connect your database to your app without breaking a sweat.

  4. Customizing Your Data Service: Our video tutorial goes beyond basics, teaching you how to design a data service that tailors your app to utilize database information efficiently.

  5. Live Testing: The final step involves testing your setup within Appery.io, providing live feedback on how your app interacts with the database, all demonstrated in the video.

Why Watch the Video?

While this article outlines the steps, the video brings them to life. Visual learners will appreciate the detailed walkthrough, and even experienced developers might discover a tip or two. It emphasizes practical steps, visual cues, and expert advice to ensure your path from a database newbie to a mobile app developer is as smooth as possible.

Dive Deep with Our Video Tutorial

We invite you to watch our video on API Express and Appery.io. Whether you’re developing an app that captures user input, displays real-time data, or manages inventory, integrating with a relational database has never been easier. This video isn’t just a tutorial; it’s your gateway to mastering mobile app development.

Curious about building an app with this setup? Stay tuned. The next video will guide you through creating an app using the service we just crafted.

How to Send a Fax Using Twilio Fax API

twilio_fax

Last week Twilio launched a new API that allows to send faxes. From the very start Appery.io platform made it very simple to connect to any external REST API. We love Twilio API and have an example and video on how to use the SMS API. The Fax API is as elegant and simple to use. In this blog post you will learn how to send a fax using the Twilio Fax API from a Server Code script.

Create a new Server Code script and copy the following script:

var url = "https://fax.twilio.com/v1/Faxes";
var accountSid = "AC3526fbeed7...............";
var token = "8703513246d3f445e............";
var to = "To number";
var from = "Your Twilio number"
var mediaUrl = "https://www.twilio.com/docs/documents/25/justthefaxmaam.pdf";

var XHRResponse = XHR2.send("POST", url, {
   "body": "To=" + encodeURIComponent(to) + "&From=" + encodeURIComponent(from) + "&MediaUrl="+mediaUrl,
   "headers": {
      Authorization: "Basic " + encodeBase64(accountSid + ":" + token),
      "Content-Type": "application/x-www-form-urlencoded"
   }
});

Apperyio.response.success(XHRResponse.body, "application/json");

The script is simple and does a POST request to the Twilio Fax API.

Line 1 is the Twilio Fax API endpoint.

Line 2 and 3 are Twilio Account SID and Auth Token. You can get both from the console dashboard.

Line 4 is where to send the fax (number).

Line 5 is your Twilio number.

Line 6 is a link to a document you want to fax. You can set it to any PDF file accessible via a direct link (or use the sample one provided by Twilio).

Line 8 is where the POST request is invoked with all the information.

Twilio Fax API uses Basic Authentication so the Account SID and Auth Token need to be encoded as Base64. There is an out-of-the-box plug-in that you can add to your account. The plug-in has a function to encode a string as Base64.

  1. Open the dropdown list (on the left) and select Back to list.
  2. Open the Plugins tab.
  3. Find the EncodeBase64 plugin and click insert to add it to your account. The plugin will be listed in the Library section. You can now use it in any other script.
  4. One more step is to add this library as a dependency for your script. Open that script you created. Go to Dependencies tab and click on EncodeBase64_Library.

You are ready to test the script.

Go back to the Script tab and open the Run tab (on the right). Click on Save and run button to invoke the API and send the fax.

The response should look like this:

{
   "date_updated": "2017-04-06T13:13:40Z",
   "date_created": "2017-04-06T13:13:40Z",
   "num_pages": null,
   "api_version": "v1",
   "media_url": null,
   "url": "https://fax.twilio.com/v1/Faxes/FX225bab5034cb8a335c45...............",
   "sid": "FX225bab5034cb8a335c45...............",
   "quality": "fine",
   "duration": null,
   "price_unit": null,
   "price": null,
   "account_sid": "AC3526fbeed7...............",
   "from": "+1415xxxxxxx",
   "to": "+1925xxxxxxx",
   "status": "queued",
   "direction": "outbound"
}

You can navigate to the URL set in the url attribute – there you will be able to see the status of the sent fax (the browser will ask you to login, use the Account SID and Auth Token values).

It can take a few minutes for the fax to be delivered, keep that in mind when testing.

To learn more about Server Code check out our YouTube playlist. Happy faxing.


Convert Phone Numbers Into Real Business Intelligence with EveryoneAPI

old_telephone

EveryoneAPI by Telo allows to convert a phone number into real business intelligence with a simple API request. The complete reverse phone append product is simple to use, yet powerful and built for developers by developers. As you probably already know, integrating with any 3rd party REST API using the Appery.io Server Code is also simple. In this blog post, I will show you how to invoke a test a script that calls the Everyone API.

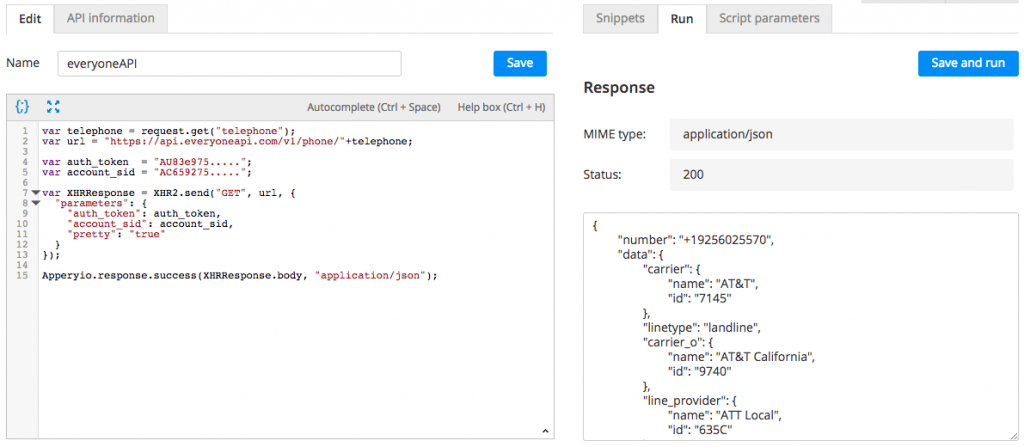
To start, create a new Server Code script with the following code:

var telephone = request.get("telephone");
var url = "https://api.everyoneapi.com/v1/phone/"+telephone;
var auth_token  = "AU83e975.....";
var account_sid = "AC659275.....";

var XHRResponse = XHR2.send("GET", url, {
   "parameters": {
      "auth_token": auth_token,
      "account_sid": account_sid, 
      "pretty": "true"
   }
});
Apperyio.response.success(XHRResponse.body, "application/json");

The only thing you need to do, is to replace the auth_token and account_sid with values from your account. Sign up for an account here. It’s fast and simple.

The phone number for which you want to get information is passed as a parameter to the script (line 1). To test the script, switch to Script parameter tab (on the right side), enter a parameter called telephone and then set it to a test value. Here is an example testing the API using the Appery.io telephone number:

Testing EveryoneAPI

Testing EveryoneAPI

Once you finished and tested the script, you easily import into your app. This video shows how to do that.

Looking for more APIs by Telo? Check out the CallerID Server Code plug-in:

callerid_servercode_plugin

OpenCNAM plug-in

This plug-in creates a Server Code script that integrates with OpenCNAM API. The OpenCNAM API allows you to get caller ID information for phone number provided.

Learn How to Quickly Upload, Display, and Customize Images from the Database with the Built-in Files Collection

Upload image files

Virtually any mobile app needs to store data. The Appery.io platform offers an integrated cloud-based database for storing any app data. Every database that you create comes with a number of collections predefined. The collections are:

  • Users – for user management.
  • Files – for storing binary data such as images and other files.
  • Devices – for sending targeted push messages.
  • Customer collection – any number of custom collections that you need in your app.

Read the rest of this entry »

Learn about Appery.io Platform APIs: Database, Push, and Server Code

Over the last two weeks, the Appery.io team has updated a number of docs related to the Database, Server Code and Push Notifications APIs. The new format is more user-friendly, making it easier to read and find information. The overview docs and API reference are now separated. This post summarizes what Appery.io Backend Services APIs are available and how to use them.

apperyio_apis

Read the rest of this entry »

How to Build Mobile Apps Fast with Appery.io and Instant API

Instant API Logo

Instant API is a true API-as-a-Service which makes it easy and cost-effective to build an API. Instant API has simplified all of the key areas of an API’s lifecycle, covering API creation, hosting, management, discovery, monetization, and documentation.

For example, let’s say you have information and services or data and services you want to expose through an API that can be used internally for BYOD initiatives or externally by developers or your business partners. With the API deployed, you still don’t have a mobile app. That’s where the Appery.io platform comes in. Appery.io makes it very easy to build mobile apps with any API. Combine the Instant API exposed APIs with the Appery.io cloud-based development platform, and you get a fast way to build a complete solution and deploy the mobile app.

In this post, we are going to show you an example of how to do that, but first here’s the info for an upcoming webinar in which Appery.io and Instant API will demo this process in action. Read the rest of this entry »

StackMob API Plug-in in Appery.io App Builder

Last weekend we participated in the AT&T Mobile Hacktathon hosted by StackMob. Just before the event we published StackMob API plug-in in Appery.io app builder so that it would be very simple to connect to StackMob. Here is how easy it is to connect to StackMob.

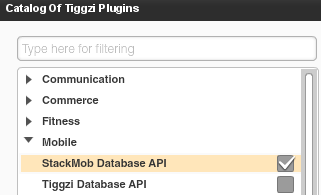
In Appery.io app builder, select Create New > From Plug-in, then select the StackMob plug-in:

When you click to import the plug-in, you will be asked to enter StackMob key that identifies your app:

If you won’t enter the key right away, you can always set it by going to Services/StackMobDatabseSettings file.

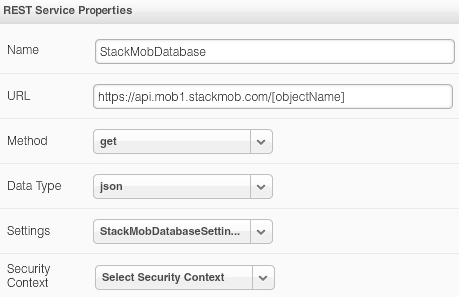
The StackMob service looks like this:

You will notice that the URL has [objectName] in it. Simple set it to the object schema name defined in StackMob. My object is called messages so the updated URL would be this:

https://api.mob1.stackmob.com/messages

The service does a GET by default but you can set it to do any other action.

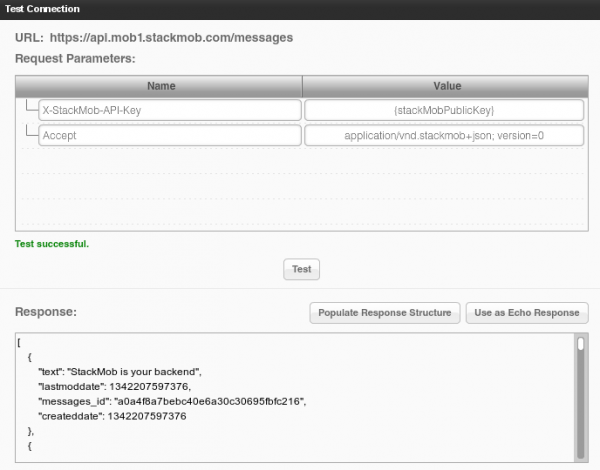
We can now instantly test the service. Open Request Parameters panel and click Test Connection:

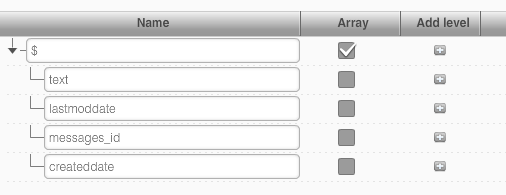
We get result back which means our service works (you should create a few sample objects in StackMob before testing). The service input is defined, we now need to define the service output. That can be done automatically by clicking Populate Response Structure button.

Once the service is ready, add it to the page, and bind the service to the UI:

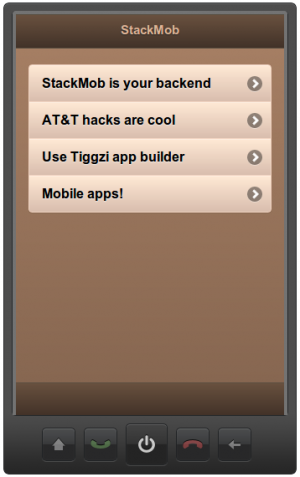
and finally run the app:

Appery.io Database API Plug-in and Documentation

In case you missed we just launched Appery.io Database – a cloud database for your mobile app. It’s the first feature as part of our mobile backend services. We are working on really cool stuff such as Push and more!

Database API Plug-in

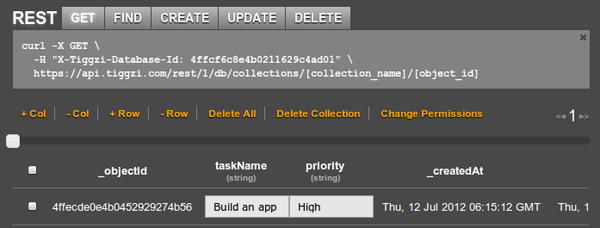
Creating a new service based on Appery.io Database is very simple as each collection comes with a nice REST API hints:

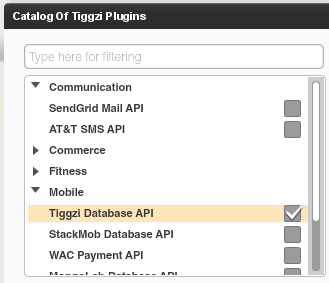
But there is even easier way to add a service by using Appery.io Database API plug-in. From Project tab, click Create New > From Plug-in and select Appery.io Database API plug-in:

When you import the plug-in, you will be asked to enter the Appery.io Database Id you can get from the REST API hint section (or from Dashboard tab). If you don’t set it during import, you can always set in Services/ApperyDatabaseSettings file.

As you can see the URL is already set. Just set the collection and you will be ready to go. The service defaults to GET but you can change it to any method as shown. You can switch to Request Parameters, enter any request parameters and click Test. From Test, you can automatically define the service’s response structure.

The database key is also set in Request Parameters panel:

The {apperyDatabaseId} is resolved from Services/ApperyDatabaseSettings file.

We got some really awesome integration planned very soon. Right from Appery.io app builder you will be able to browser and create new collections.

Documentation

Looking for docs? View Appery.io Database docs. We are also working on some really nice tutorials. If you have any questions, you can always email us or post on our forum.

Building jQuery Mobile Apps with Kinvey Backend

Kinvey is one of those services that makes building mobile backend way too simple. If you combine Kinvey with a cloud-based app builder Appery.io, you get everything you need to build an awesome mobile app using cloud services. Let me show you what I mean.

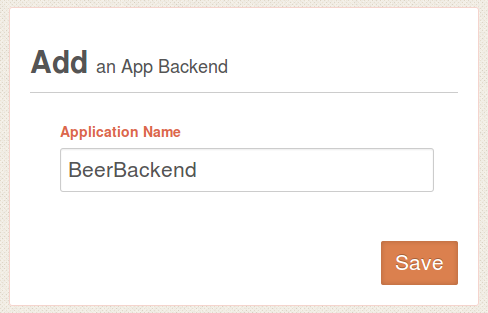
To start, sign up for Kinvey, it’s free and then create your first app backend. We re going to create a backend for beers(!).

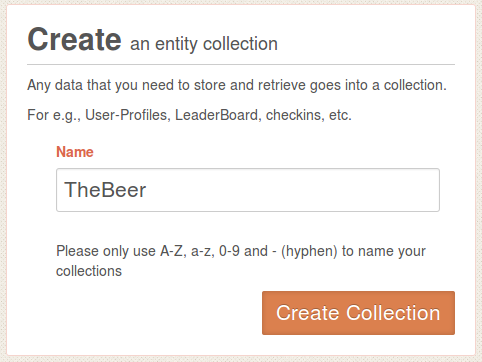
Next, create a new collection where we are going to store names of beer we like:

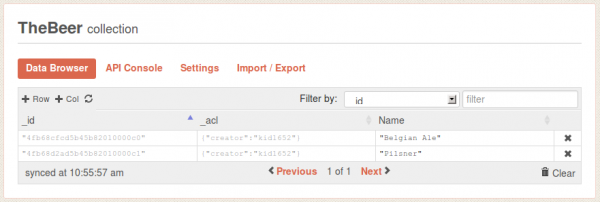
Open the collection. When you open it for the first time it will be empty so we need to define at least one column and enter some data. Click on +Col, and add Name column. Then add a few sample entries by clicking +Row. You can simply double click in Name column to enter values (you don’t need to enter anything for _id or _acl).

That’s pretty much all you need to do. Simple, right?

Let’s now go to Appery.io app builder and create a jQuery Mobile app.

Read More >>

Building jQuery Mobile App with StackMob API [New tutorial]

We just published a very nice hands-one tutorial on how to build HTML5/jQuery Mobile app connected to StackMob API. StackMob is super easy to use service for creating a mobile back-end for your app. Everything you create is instantly exposed as REST.

Give it a try!