Development Tip: Use Server Code Plug-ins and Snippets for Quicker Coding

snippets

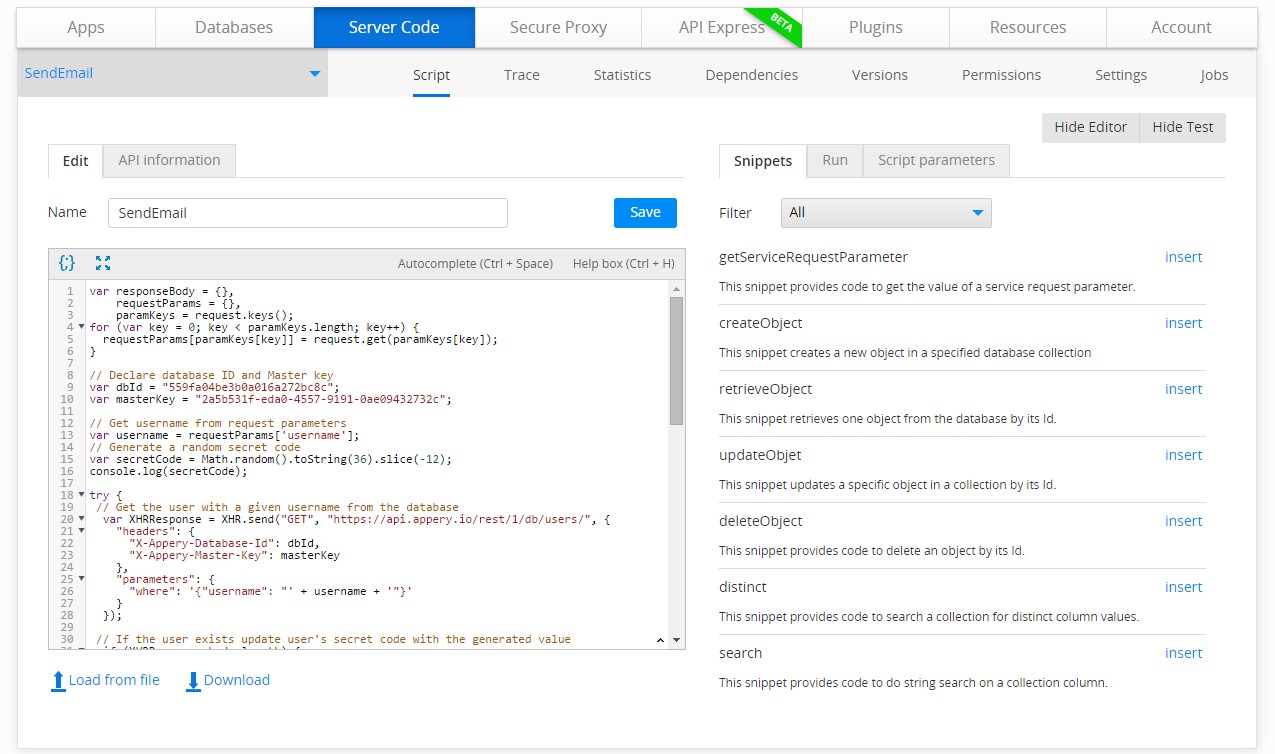
Using Server Code snippets and plug-ins are a great way to save time when making server scripts. Instead of digging through the Server Code documentation, you can simply choose one of the snippets located on the right side of the screen in script editor mode. The set of snippets provided by the Server Code API are the most common, but if you think of other useful snippets, let us know and we’ll add them to the list.

Server Code plug-ins are another way to save time when implementing your logic. To find Server Code plug-ins, go to the Server Code page and then to the Plugins tab. For now, there are two plug-ins. With them, you can quickly integrate with the Twilio or SendGrid API via XHR (XMLHTTPRequest). Simply click “Import” to create the server script based on the plug-in selected, and then customize it by specifying your API keys.

Make sure you check out all of our mobile development tips.

Do you want to build apps fast? Start developing with our trial plan!

Development Tip: Using Snippets and Shortcuts for Quicker Code Editing

apperyio_snippets

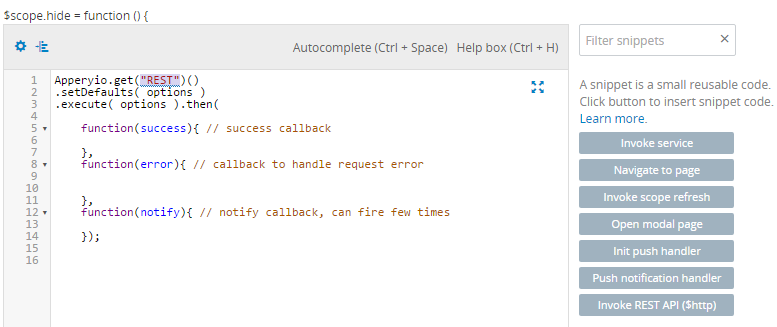
Snippet to invoke a REST API

A snippet is a pre-made and reusable section of code that can be quickly inserted into your own code. It is a convenient and time-saving way to pull frequently used Appery.io functions.

A recent update has introduced a new snippet – Invoke REST API ($http).  Invoke REST API ($http) is a wrapper for Angular’s($http) and can be used to send AJAX requests. This snippet is described in more detail here.

Shortcuts, like snippets, can save you time. A shortcut allows you to type a few characters that expand into the corresponding code. For example, type $Cg and then press Ctrl+Space or Cmd+Space to quickly add the Config.get function. The shortcut will be translated into:

Apperyio.Config.get( expression/*, default*/ );

You can find the whole list of shortcuts here.

Make sure to check out all of our mobile development tips. Do you want to build apps fast?

Start developing with our trial plan!

Development Tip: How to Add Native Device Features in an AngularJS App with Cordova

native_features

When building AngularJS apps (with Ionic or Bootstrap frameworks) using Appery.io, you can easily extend app functionality by adding native device features. Features such as push, geolocation, camera, etc., can be added by importing the appropriate plug-ins. To do this, go to CREATE NEW > From plug-in and select the appropriate plug-in. The native features come from the Cordova library, which is automatically installed in every app.

For each plug-in we have documentation as well as detailed tutorials on native device features. You can find the docs here.

Make sure to check out all of our mobile development tips.

Do you want to build apps fast? Start developing with our trial plan!

Development Tip: Custom Icon for Push Notifications

One way to customize your app is to use a custom push notification icon. By the default, the push notification icon is your app icon.

Setting a custom icon for incoming push notifications is available only for Android OS and only for version 3 libraries (jQuery Mobile).

To set a custom push notification image:

  1. Upload your custom image (for example: icon.png) into the ANDROID/project_name/res/drawable/ folder to set it as a push image. If there is no drawable folder, simply create it:
    icon
  2. On the Source tab, open the WEB_RESOURCES > app > startScreen.js file.
  3. Find the PushNotification.init function and add an icon property with 'icon' value:
    code
  4. Now your app has a custom push notification icon!

Read more about Appery.io push notifications in our documentation and make sure to check out all of our mobile development tips.

Do you want to build apps fast? Start developing with our trial plan!

Development Tip: Creating App Routing for an AngularJS Apps

routingConfiguring your app routing is really easy with the Appery.io Routing tab. You can find it under Project > Routing. When creating a new page, a route for it will be created automatically. You can then change its name or select needed dependencies, which is really convenient.

Then, in your code, you can get to that page using Route name this way:

Apperyio.navigateTo("Screen2");

Routes with dynamic parameters are available as well. You can find out more about it (and, generally, about the Appery.io routing feature) in our documentation.

Make sure to check out all of our mobile development tips.

Do you want to build apps fast? Start developing with our trial plan!

Development Tip: Managing Your App Images With Media Manager

media_manager

The Media Manager allows you to work with image files in the App Builder. You can upload, rename, and delete images, as well as select them as assets for the Image component. You can open the Media Manager by clicking “additional menu” (the “three lines” button) in the upper-right corner of the builder and select “Media Manager”:

media_manager_icon

Opening the Media Manager

For example, you can upload your image through the Media Manager and use it as a custom page background via CSS (don’t forget to add the appropriate CSS class to the page):

.background
{
    background-image: url('../files/images/background.png');
}

Learn more in our documentation, and make sure to check out all of our mobile development tips.

Do you want to build apps fast? Start developing with our trial plan!

Development Tip: Displaying and Centering a Spinner in an Ionic App

With Appery.io and Ionic, you can easily add a spinner to a page:

  1. Drag’n’drop the spinner component to a page.
  2. Provide an expression for ng-show in the properties panel. It could be a variable that returns true or false.
  3. To vertically and horizontally center the spinner do the following:
    1. Add a centered-spinner class to Class in the properties panel.
    2. Create new CSS by going to CREATE NEW > CSS > Create CSS.
    3. Add the following code to create the CSS file:
.centered-spinner {
    width: 28px;
    height: 28px;
    position: absolute;
    top: 50%;
    left: 50%;
    margin-top: -14px;
    margin-left: -14px;
}

.scroll
{
    height:100%;
}
spinner
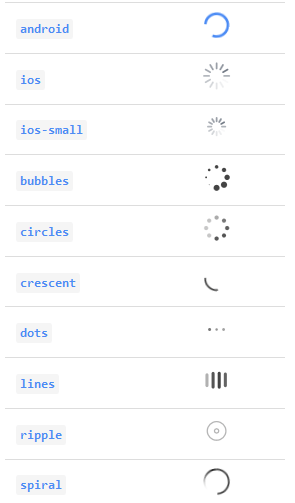
Ionic spinners

Your spinner is ready to use! Don’t forget to change the variable provided for ng-show to true when you need to show the spinner, and to false when you need to hide it.

You can find related information here or here.

Make sure to check out all of our mobile development tips.

Do you want to build apps fast? Start developing with our trial plan!

Development Tip: Coding Less With Function Snippets

snippets

There’s a set of time-saving snippets available to you when you’re writing app logic in AngularJS. They are located on the right side of the function editor window.

For example, you can generate REST service-invoking code by clicking on “Invoke service” snippet. Then, all you need to do is change the "service_name" to your actual service name.

Another popular snippet is “Open modal page” – the snippet will generate code to open the modal and modalOptions object as well.  As with the “Invoke service” snippet, you’ll have to change modal_name to your modal name. Then you can execute this function when needed (on button click, for example) and the modal will be opened.

Make sure to check out all of our mobile development tips.

Do you want to build apps fast? Start developing with our trial plan!

Development Tip: Managing Device Contacts with an Appery.io Plug-in

icon-contactsBy using the Appery.io Contacts plug-in, you can conveniently manage contacts on a user’s device. The plug-in is based on the Cordova API and can be imported into your Appery.io app like any other plug-in. Just click CREATE NEW > From plugin, select Apperyio Contacts Service and click “Import selected plugins.” There is a set of services you can use to perform the operations, such as find, remove, create, edit and more.

We’ve also prepared a detailed tutorial on how to use this plug-in, as well as a simple demo app (you can create it from the attached backup), that allows you to find, create and save contacts. Find it here.

Make sure to check out all of our mobile development tips.

Do you want to build apps fast? Start developing with our trial plan!

Mobile Tip: Dynamic REST API URLs in AngularJS Apps

dynamic_urls

Dynamic URLs are very common in any mobile app. When building AngularJS apps with Appery.io there are few ways to make parts of the URL (or even the entire URL) dynamic. We’ll use this URL for our example: http://mywebsite.com/name/{id}/edit , where the {id} part should be dynamic.

  1. First of all, you can use the Settings service to perform dynamic substitutions:
    1.  Create a new Settings service (if you don’t have one yet) by going to CREATE NEW > Service > Settings (REST settings).
    2. Then, create a new id parameter in the newly-created Settings and provide a value for it.
    3. Now, go to your REST service, and change the dynamic part of your URL to {MySettings.id} where MySettings is the settings service name, and id is the name of the parameter. Your URL should look like:           http://mywebsite.com/name/{MySettings.id}/edit
  2. Alternatively, you can create request parameters directly in the REST service. They will be automatically substituted if names coincide. You can use this approach if you need visual Mapping for dynamic parameters:
    1. Go to your REST service Request > Query String.
    2. Create the new id parameter and provide a value for it.
    3. Change the REST service URL to http://mywebsite.com/name/{id}/edit.
    4. Because the value of the id parameter will be automatically inserted to the {id} placeholder, it won’t be added to the end of the URL as a query string.

Read more about the REST and Settings services in AngularJS.

Make sure to check out all of our mobile development tips.

Do you want to build apps fast? Start developing with our trial plan!