Unlock the Magic of ChatGPT-4o: Effortless Low-Code Transformation for Your Text App!

We have an exciting news for you today! In our last video (you can find more details in this post), we showed you how to integrate an app with ChatGPT-4o using our platform as a no-code editor. Now, we’ll take it a step further. In out new video tutorial, we are demonstrating a similar integration, but this time using a low-code approach.

This means that only a minimum amount of code will be needed to implement the ChatGPT functionality for more complex integrations. Intrigued? Let’s dive in!

For your convenience, we are also providing the step-by-step instructions below.

Getting Started: Create a New App

First, let’s go to the Appery.io platform and traditionally create a new app.

You’ll need to add the necessary OpenAI Key that you can get from the OpenAI portal. Navigate to the Settings service and enter this key.

Just like before, any application will automatically get access to the OpenAI object once the OpenAI API key is specified. You can find more details in our documentation if you need further guidance.

Setting Up the User Interface

Before we start creating our UI, we need to decide how the code will access the input and display the output. We can use either local or global variables. For this demo, let’s use global variables.

So, open Screen1 in your new app, drag the following UI components onto the page and define them as follows:

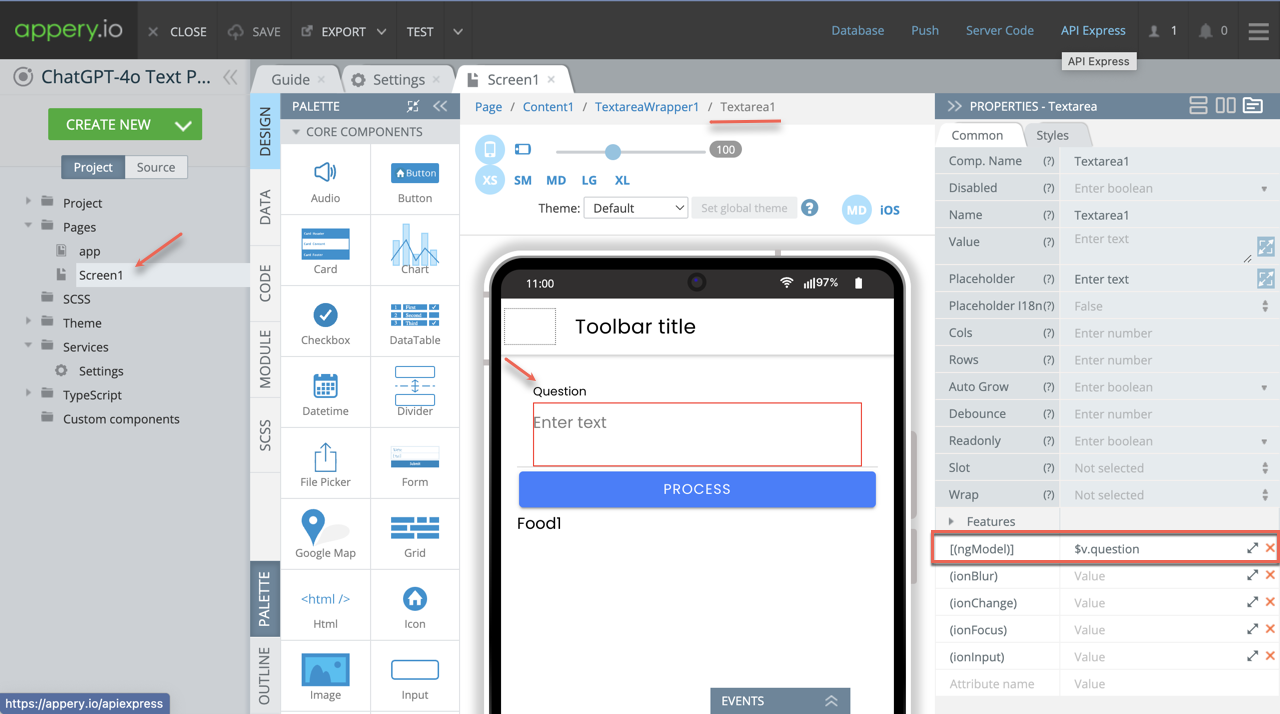
Textarea (this is where you’ll enter questions):

  • Label = Question
  • [(ngModel)] = $v.question (Global variables are accessed with the $v variable) 

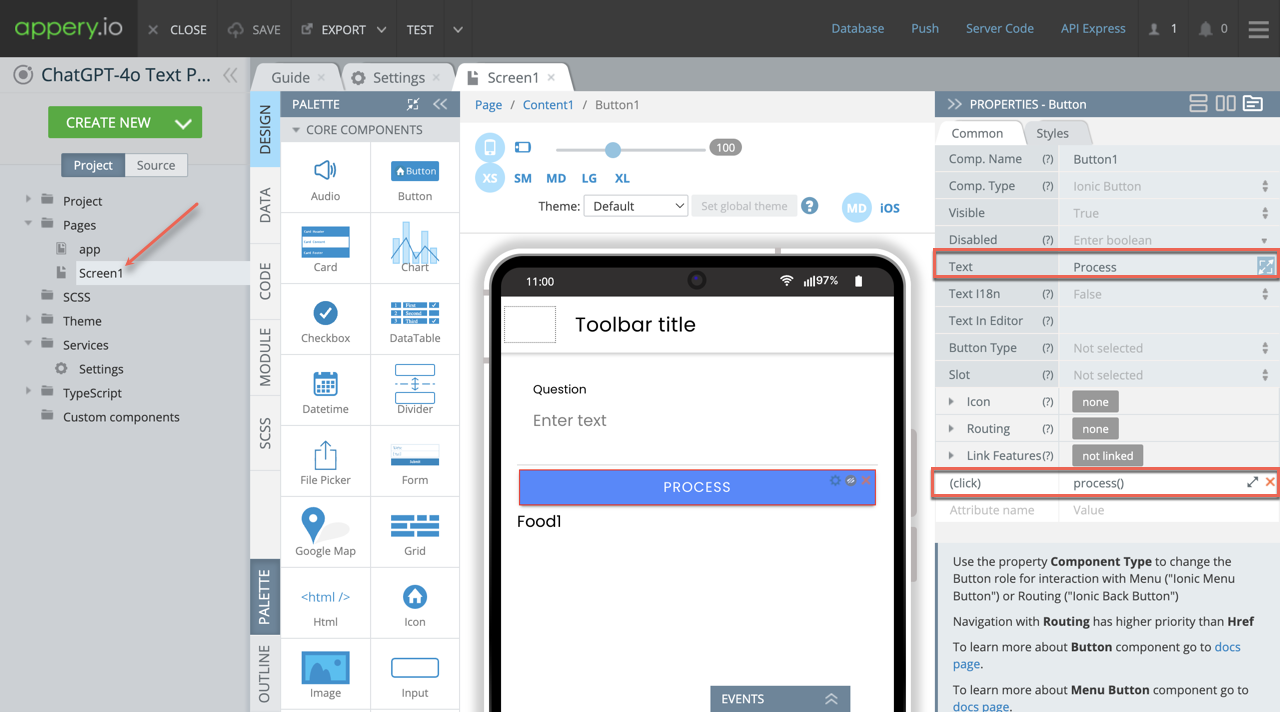
Button: (this will trigger the function named process() to handle the questions):

  • Text = Process
  • (click) = process()

Text: (this will display the responses from ChatGPT):

  • Text = {{obj}}
  •  Text in Editor = Food1 (to make page appear appealing in the editor without breaking the app’s UI)
  • *ngFor = let obj of $v.arr

We configured our no-code app to receive output as an array, not a string. For this low-code app, we’ll do the same. Let’s assume that ChatGPT will return an array of entities which we will iterate over and display.

Setting Up the Process Function

It’s time to configure the process function:

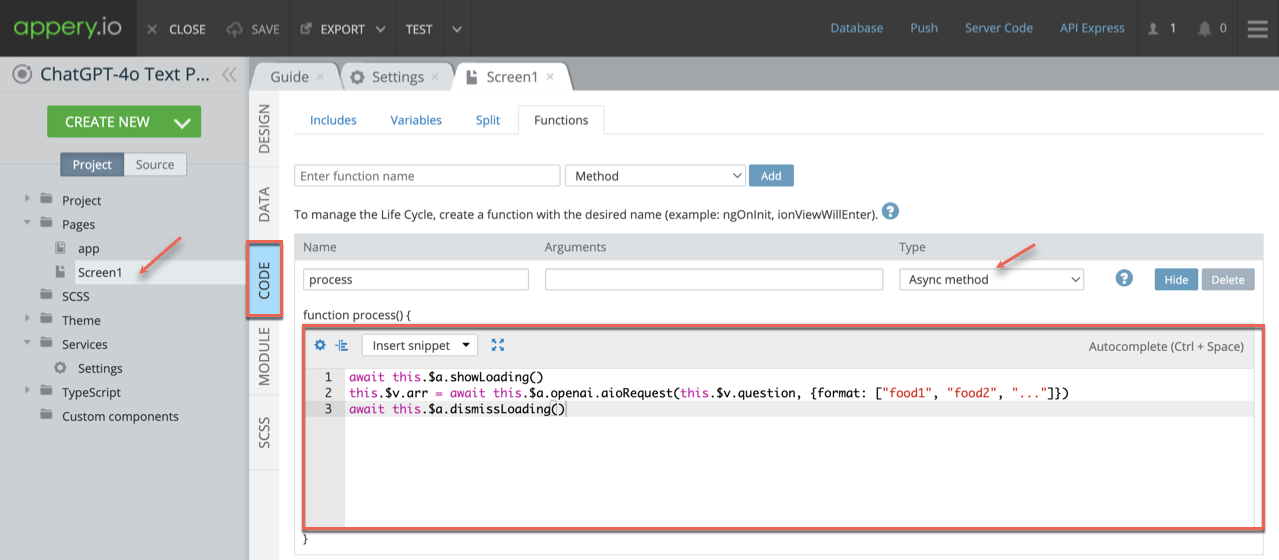
1. Open CODE > Functions, enter process for the function name and make sure it’s set as an async method.

2. Define the process method with the following code:

this.$v.arr = await this.$a.openai.aioRequest(this.$v.question, {format: ["food1", "food2", "..."]})

In this code, we’ll use the OpenAI object to send requests and receive an array of strings as responses. The first parameter is our question, represented by $v.question.

We also need the response to be an array of strings, so we’ll define the format for the second parameter in our code.

To enhance user experience, add a loading indicator before sending the request and remove it once the response is received.

await this.$a.showLoading()

await this.$a.dismissLoading()

All Set! Testing the App

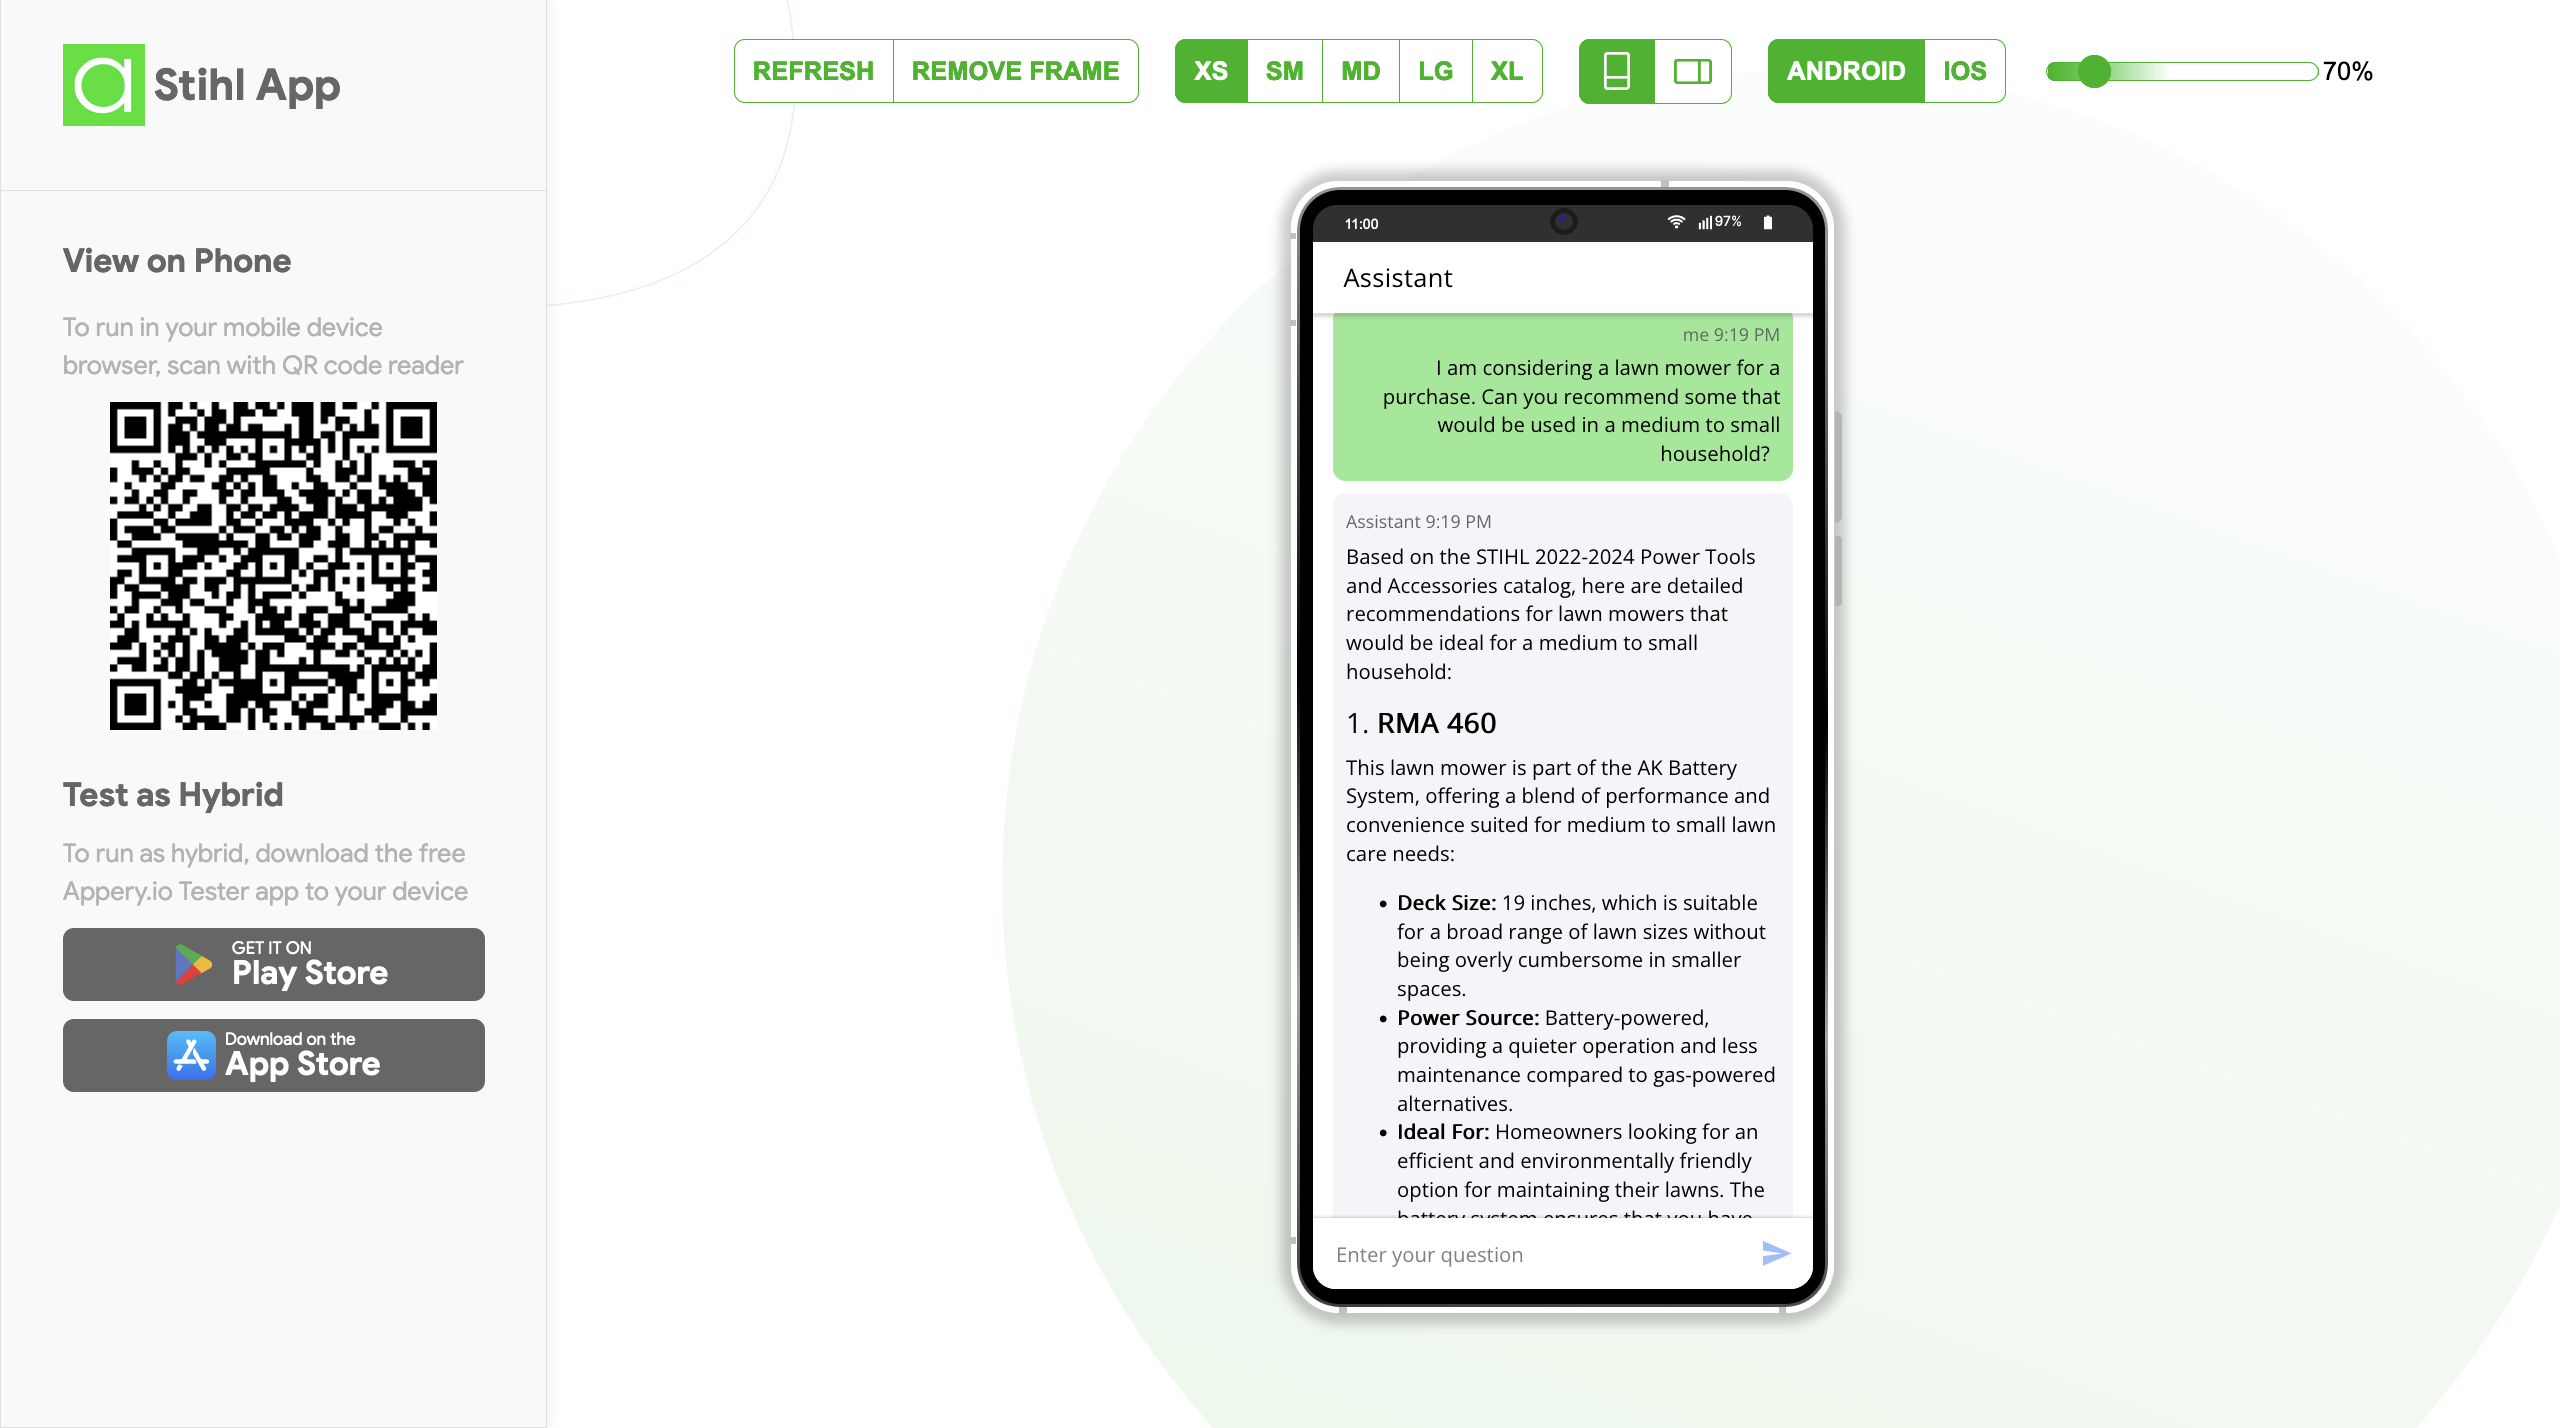
Your app is ready for testing! Enter a query, press the button, and see the output from ChatGPT-4o:

Thank you for keeping up with us! We hope you found this video helpful.

Don’t forget to subscribe to our channel for more insightful content. Stay tuned and happy coding!

Unlock Real-Time Communication with WebSockets on Appery.io

Introduction to WebSockets with Appery.io

Have you ever wondered how apps send updates in real-time? The magic happens with WebSockets. Today, we’ll show you how to add WebSockets to your apps using Appery.io. This low-code app-building platform makes it easy to create complex apps quickly. Note that this post supports our comprehensive video tutorial and if you are interested in details, you are welcome to watch it.

By following the steps below, you can easily enhance your app with real-time communication features using WebSockets and Appery.io. Exciting, right? Let’s get started!

Setting Up Your App

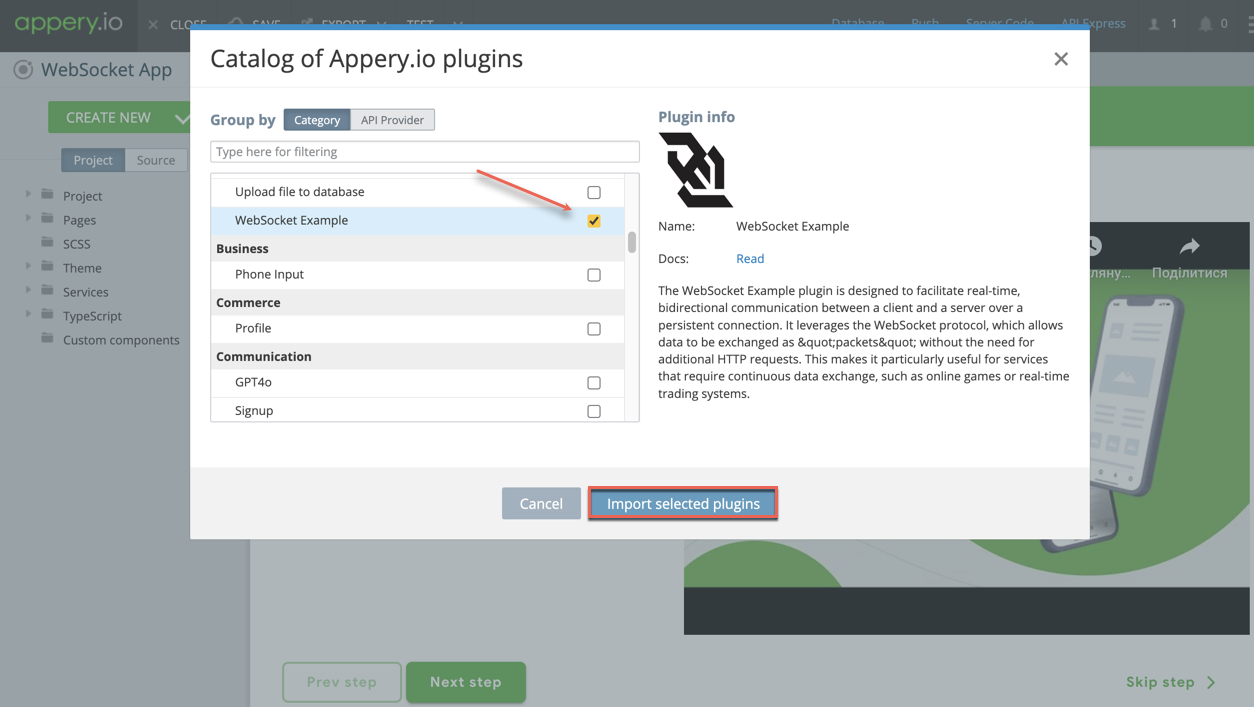
First, create an empty app in Appery.io. Then, go to the Catalog of Appery.io plugins and select the WebSocket Example plugin.

Before importing it, you can click the link to open its documentation page. You’ll see it contains the code for the WebSocket server. This server needs to be run somewhere. While real applications may use Amazon or Azure, we’ll use CodeSandbox for testing.

Using CodeSandbox

1. Create a new Devbox.

2. Select Node.js Server from the list of backend frameworks.

3. Name your Devbox and set its visibility to “Public”.

4. Install two npm modules: `express` and `socket.io`.

Now, let’s move to the next step.

Setting Up Your WebSocket Server

Copy the server code from the documentation page and paste it into your `index.js` file in CodeSandbox. If everything is correct, the server should start successfully.

Back to Appery.io

Return to the Appery.io project and click Import selected plugins with the WebSocket Example plugin checked. This plugin helps you integrate WebSockets into your app. But first, let’s test it.

Testing Your App

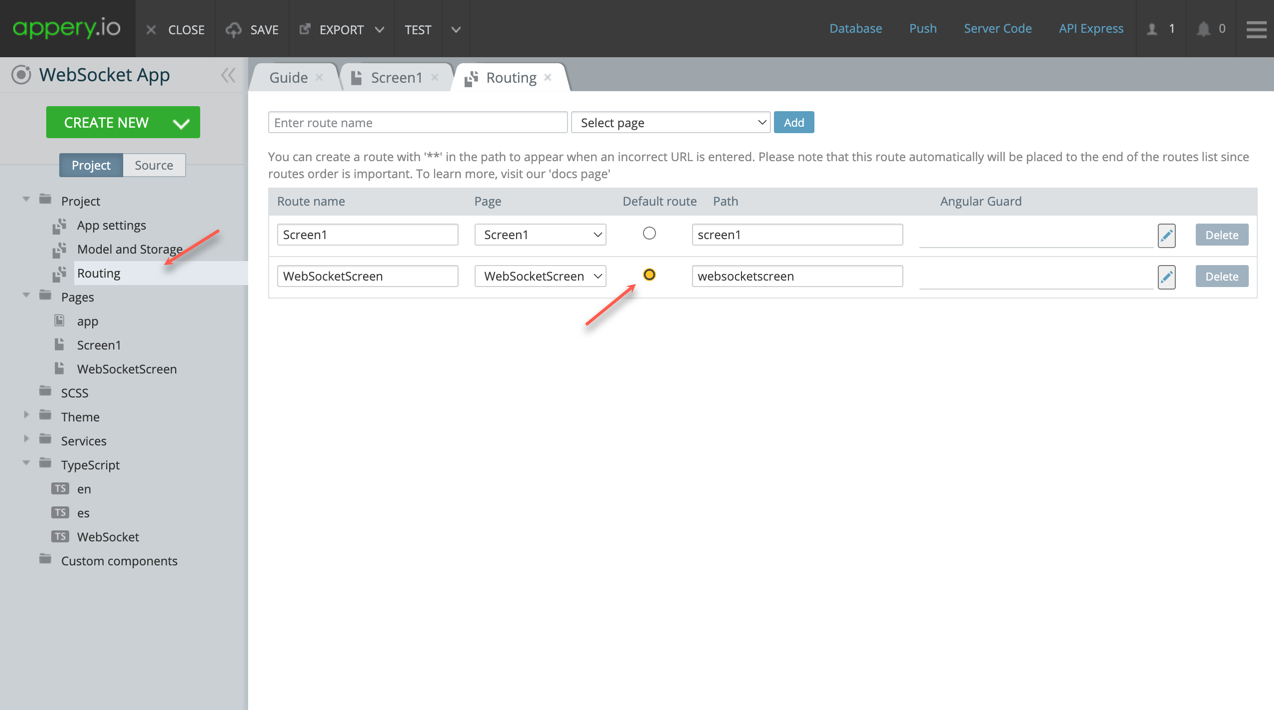
Go to the Project > Routing section and set “WebSocketScreen” as the default page.

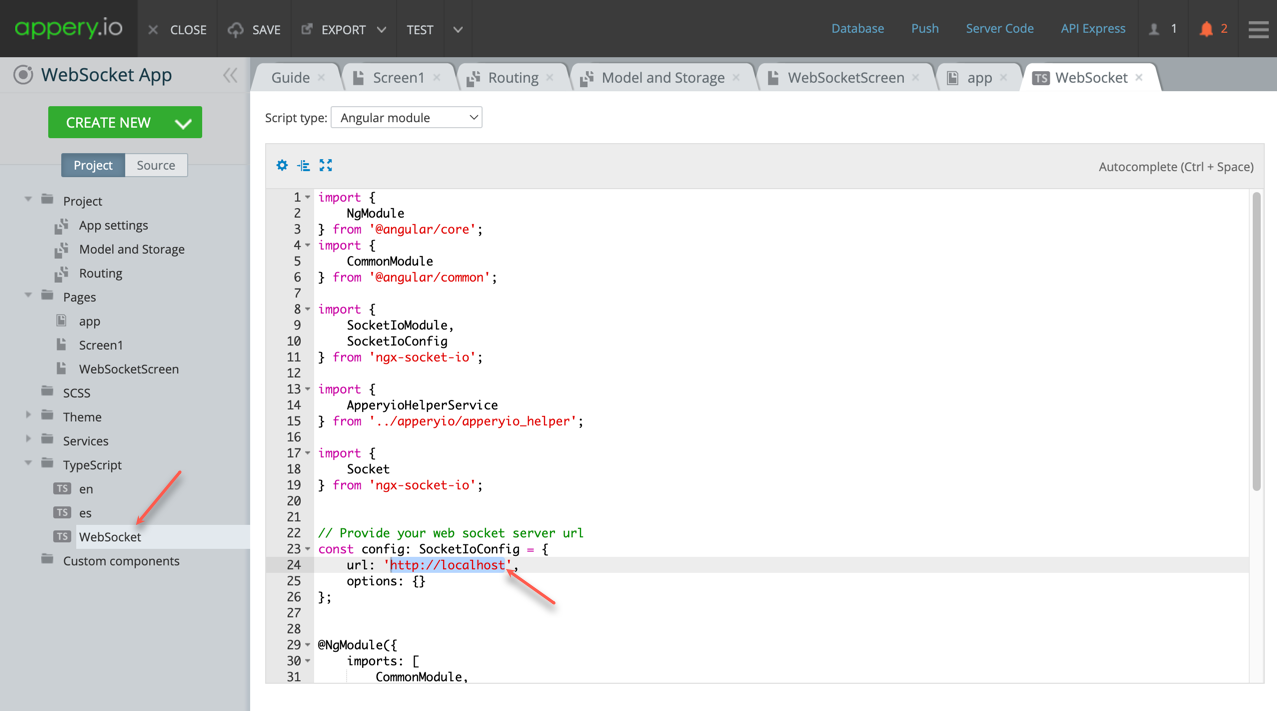
Next, navigate to TypeScript > WebSocket and specify the URL of your WebSocket server obtained from CodeSandbox.

Now, run your app in different browsers like Google Chrome, Firefox, and Edge. Enter a test message and click the “Send” button.

Ready! The message should be delivered to all clients in real-time.

Conclusion

Now you’ve seen how to add Websockets to your apps using Appery.io. This post is a companion piece to our detailed video tutorial. The demo app isn’t a finished product but provides a solid template for building your own real-time communication features. Give it a try and unlock powerful networking capabilities in your applications!

How to Build a ChatGPT App with Appery.io’s OpenAI Assistant Chat Plugin

Creating an app with advanced AI chat capabilities might sound challenging, but it’s surprisingly easy with Appery.io. Let’s walk through the process of utilizing the OpenAI Assistant Chat plugin to bring AI to life in your next app.

Here is our new how-to video that illustrates the power of AI combined with Appery.io possibilities:

But if you’d rather read to follow the instructions step-by-step, please check below.

1. Start Your Appery.io Project

First things first, you need a home for your new AI creation:

  • Sign In to Appery.io: Head over to Appery.io, sign in, or set up a new account if you’re stepping in for the first time.
  • Create Your App: Click Create new app. Choose your app type—like Ionic blank—name it, and hit Create. Now, you’re set up.

2. Add the Magic Ingredient: OpenAI Assistant Chat Plugin

This plugin is your key to easy AI integration:

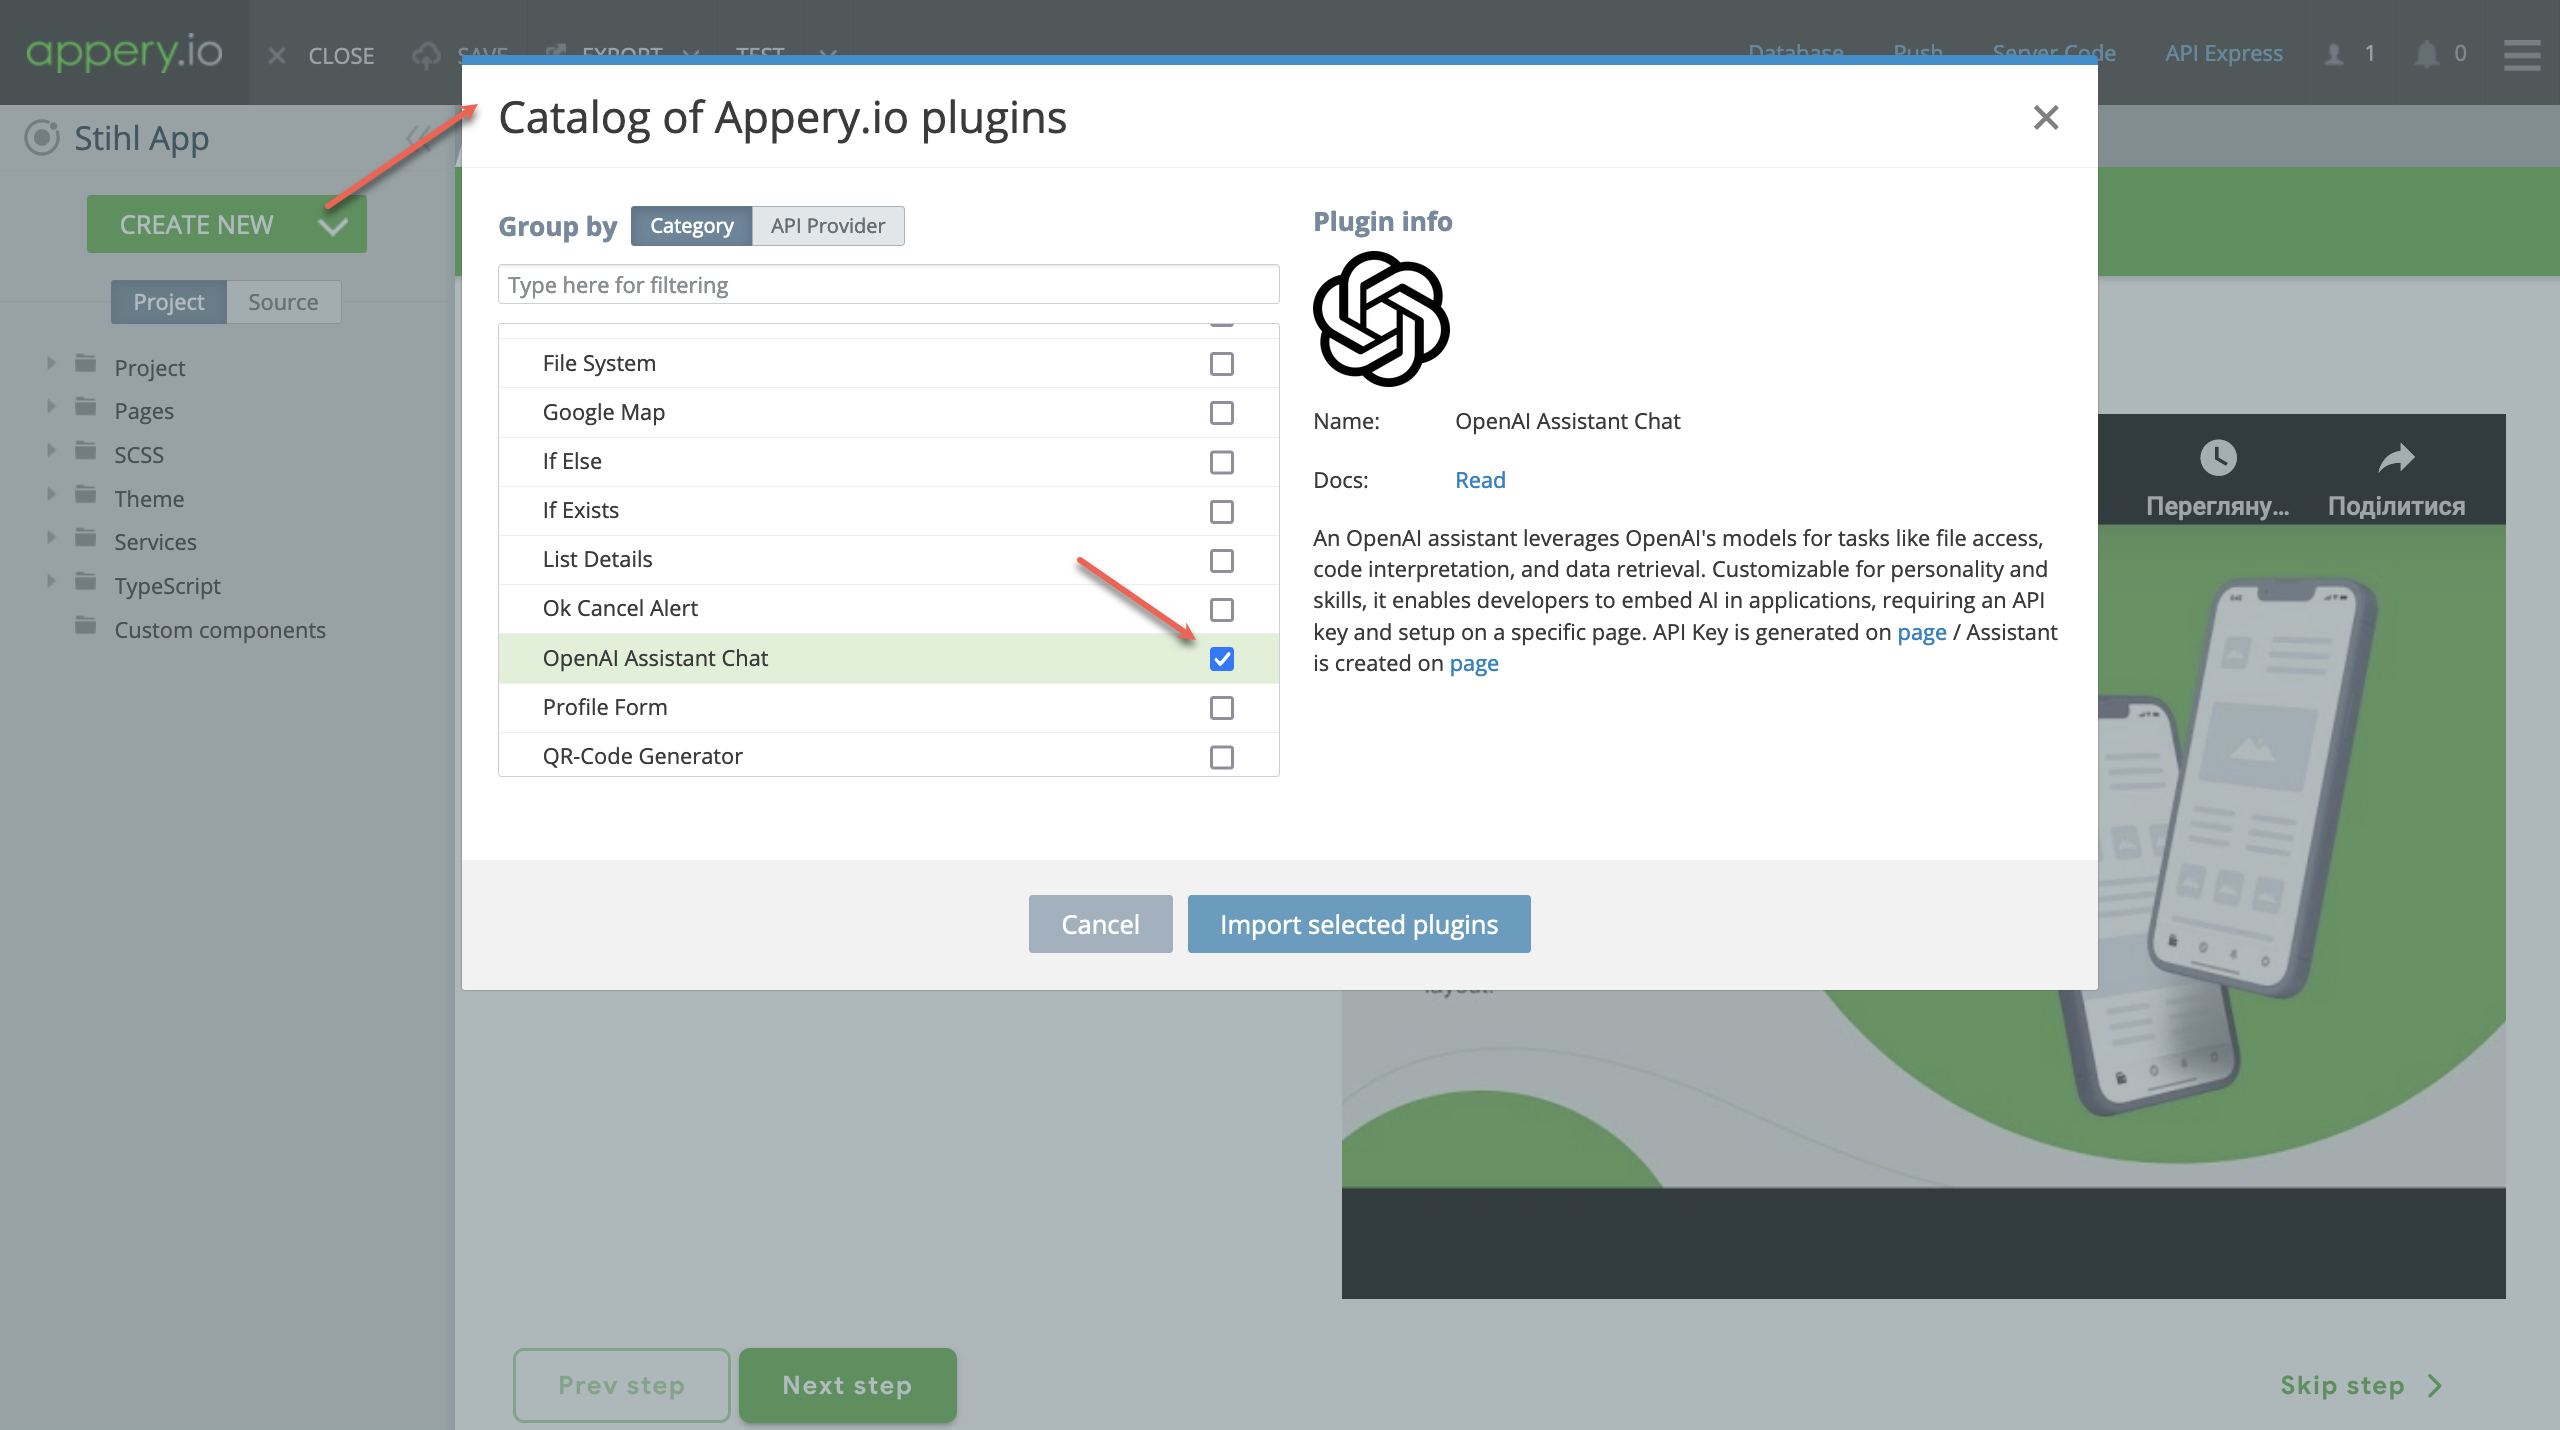
  • Go to Plugins: Inside your project, click CREATE NEW > From Plugin to open the Catalog of Appery.io plugins.
  • Find and Add the Plugin: Search for the OpenAI Assistant Chat plugin. Click Import selected plugins to add it to your app.

3. Key Configurations: API Key and Assistant ID

These essentials connect your app with OpenAI’s brainpower:

  • Secure an API Key from OpenAI: Visit the OpenAI site, sign up or log in, and navigate to obtain your API key. This key is your app’s passport to AI land.
  • Create Your AI Assistant: This step is integral. Creating an assistant on OpenAI provides you with an Assistant ID – think of this as giving your app its own AI personality.
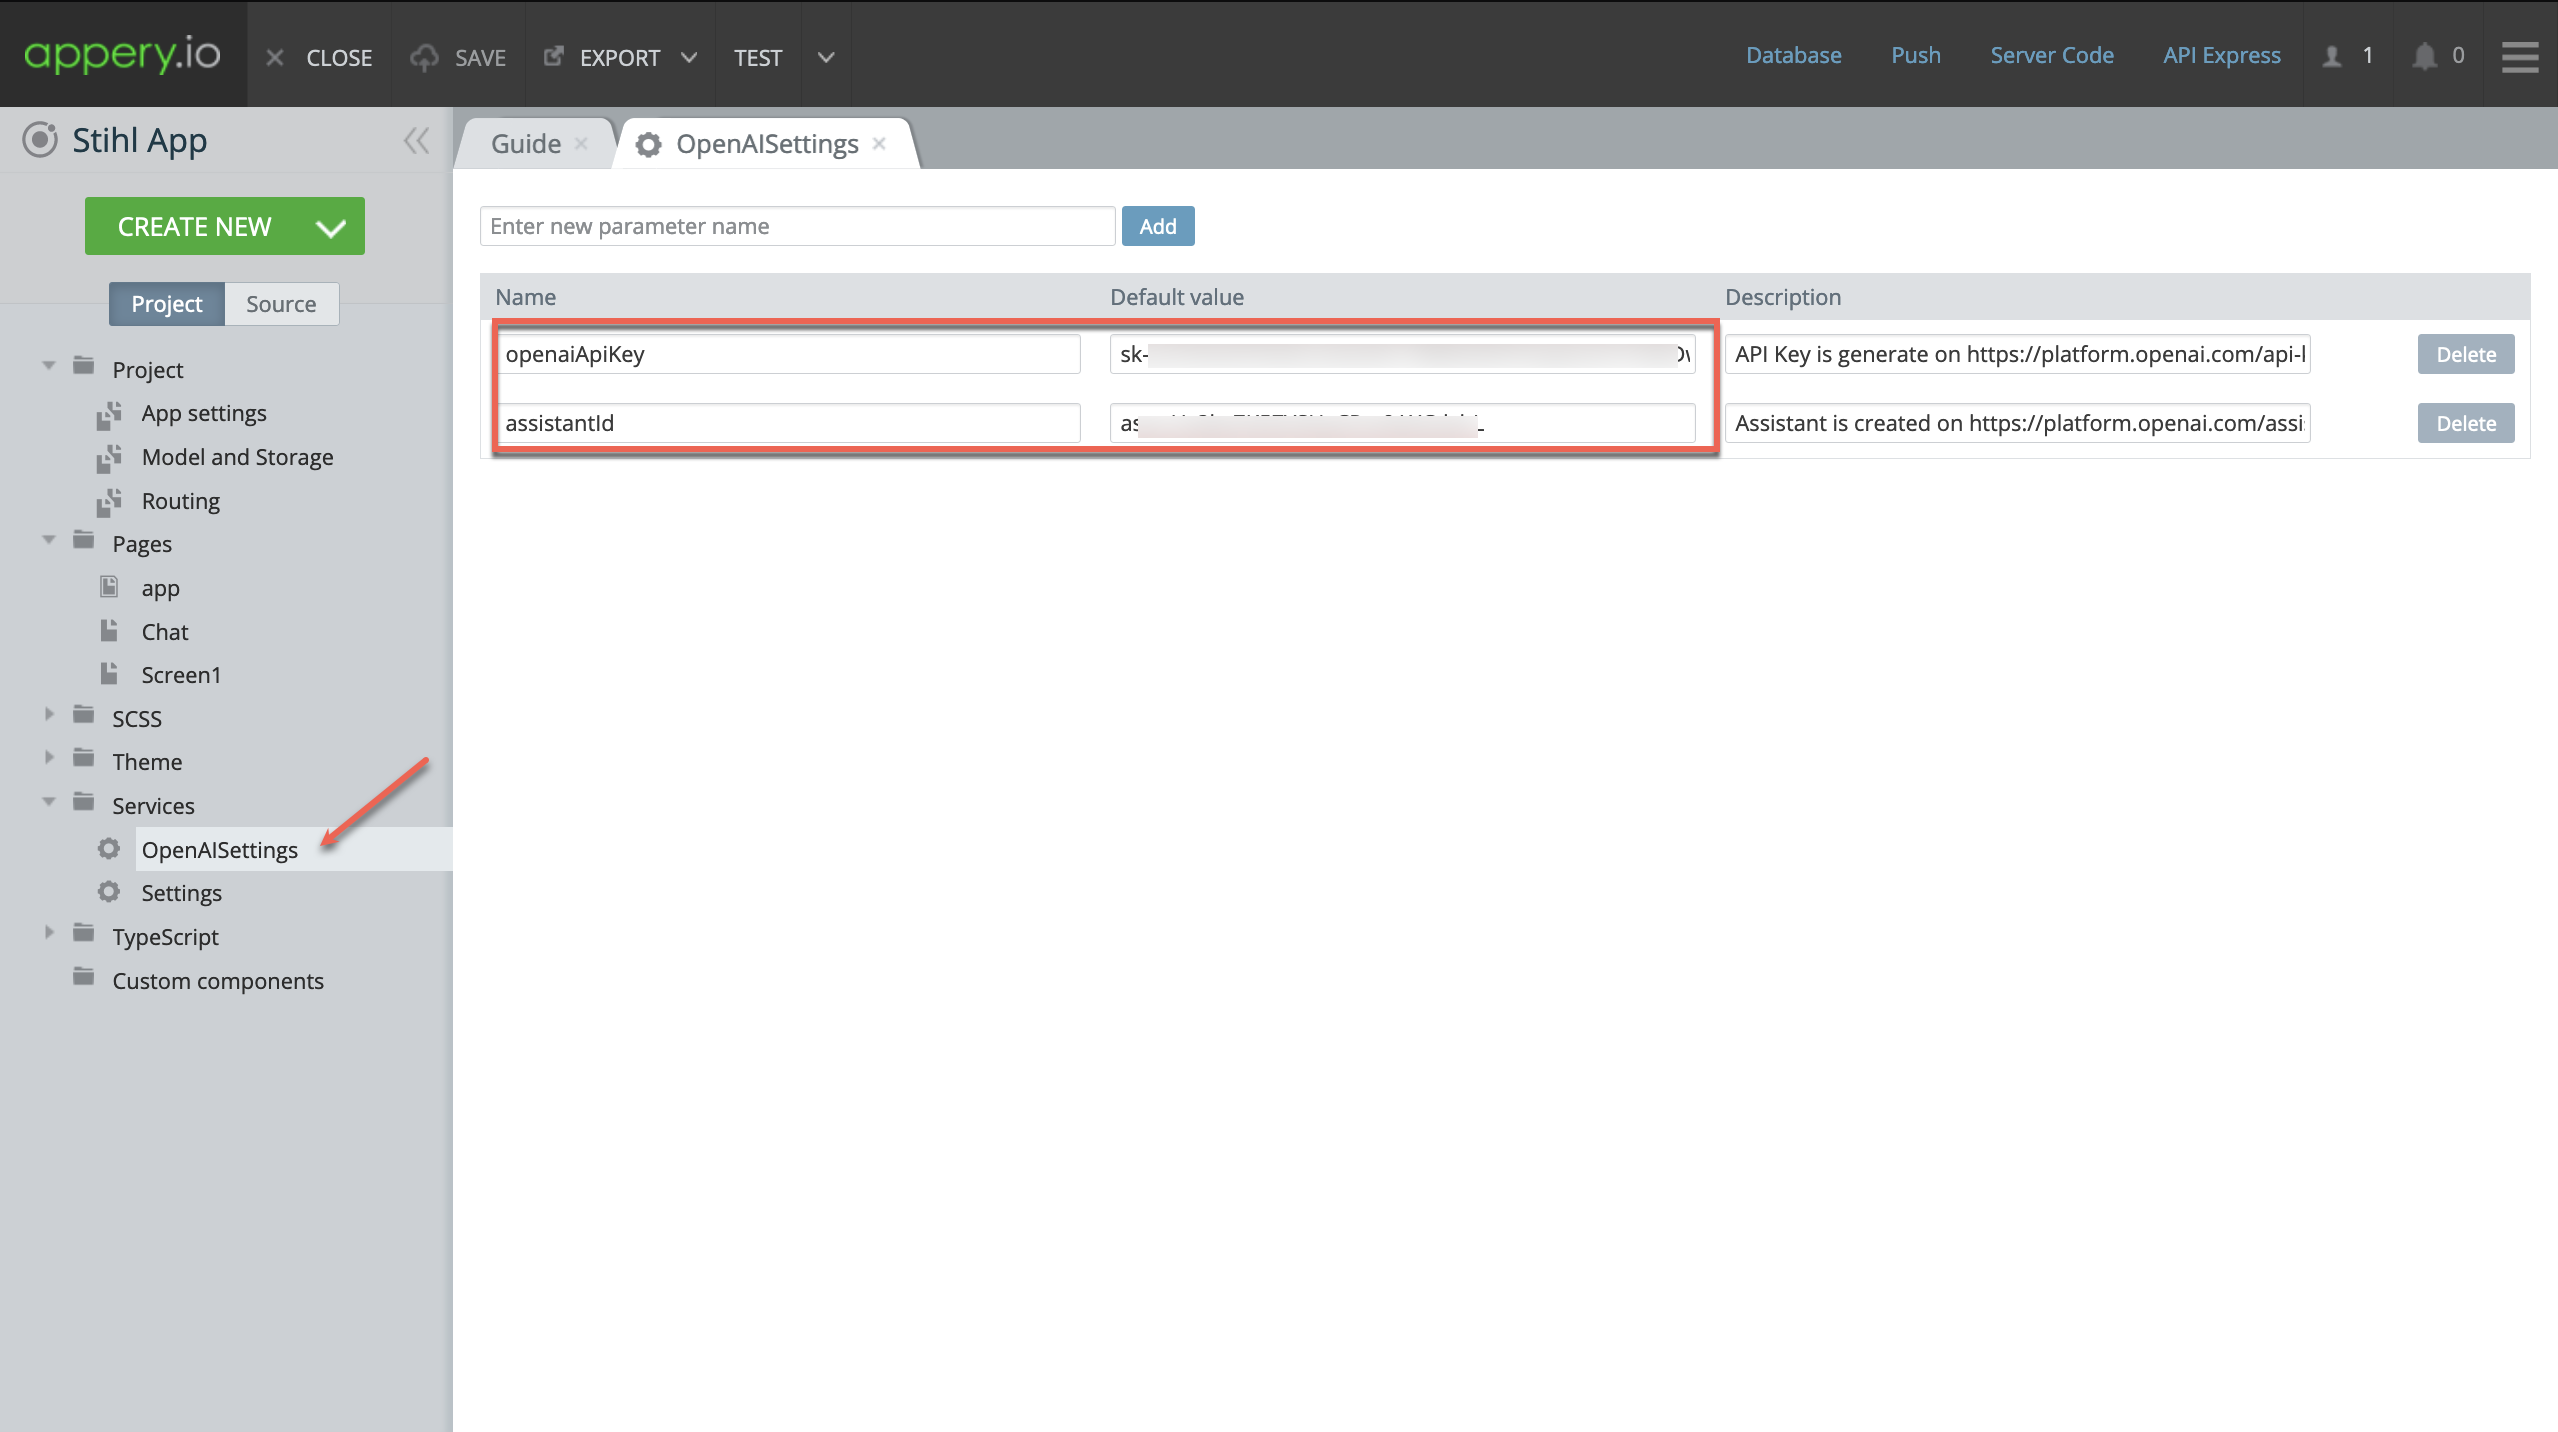
  • Input Your Credentials in Appery.io: Back in Appery.io, within the plugin settings, there’s a spot waiting for your API key and that shiny new Assistant ID. Fill these in to forge the link between your app and OpenAI’s capabilities.

4. Make It Yours

Now for the fun part. Tailor the plugin to fit your app’s vibe:

  • Adjust the Looks: With Appery.io‘s easy drag-and-drop, you can tweak the plugin’s appearance so it meshes well with your app.
  • Set Up AI Functions: Decide what your AI should do. This could be answering customer queries, giving recommendations, or having a chat. Configure away to align with your vision.

5. Test Your Creation

Before releasing your app into the wild, you need to see it in action:

  • Run a Test: Appery.io has built-in testing to trial how the AI responds and integrates with your app.

  • Tweak if Needed: Testing might reveal some tweaks are in order. No problem. Adjust and test again until it’s just right.

6. Launch Time

Your AI chat app is ready to meet its audience:

  • Deploy It: With a few clicks in Appery.io, you can deploy your app across the preferred platforms.
  • Iterate Based on Feedback: Once your app is out there, listen to how users find the AI and refine it further based on their insights.

Why Appery.io?

Bringing AI into your app shouldn’t be daunting. With Appery.io and its OpenAI Assistant Chat plugin, it’s not just easy but also fun. This combo lets you leap into the future of app development, focusing on creating unforgettable user experiences rather than fretting over-complicated code.

So, why wait? Dive into Appery.io today, and start crafting the kind of AI-powered app that users will love.


By simplifying the process into manageable steps, this guide is designed to promote an approachable and enjoyable foray into AI-powered app development for creators at any skill level, focusing on the practical application of Appery.io`s OpenAI Assistant Chat plugin.

Get Ready To Build Better Apps With Appery.io’s Latest Release: A Sneak Peek Inside!

Greetings, Appery.io users!

We have some fantastic news to share with you – our latest release is now live, and it’s packed with exciting new features to enhance your App Builder experience! Here’s what’s in store for you:

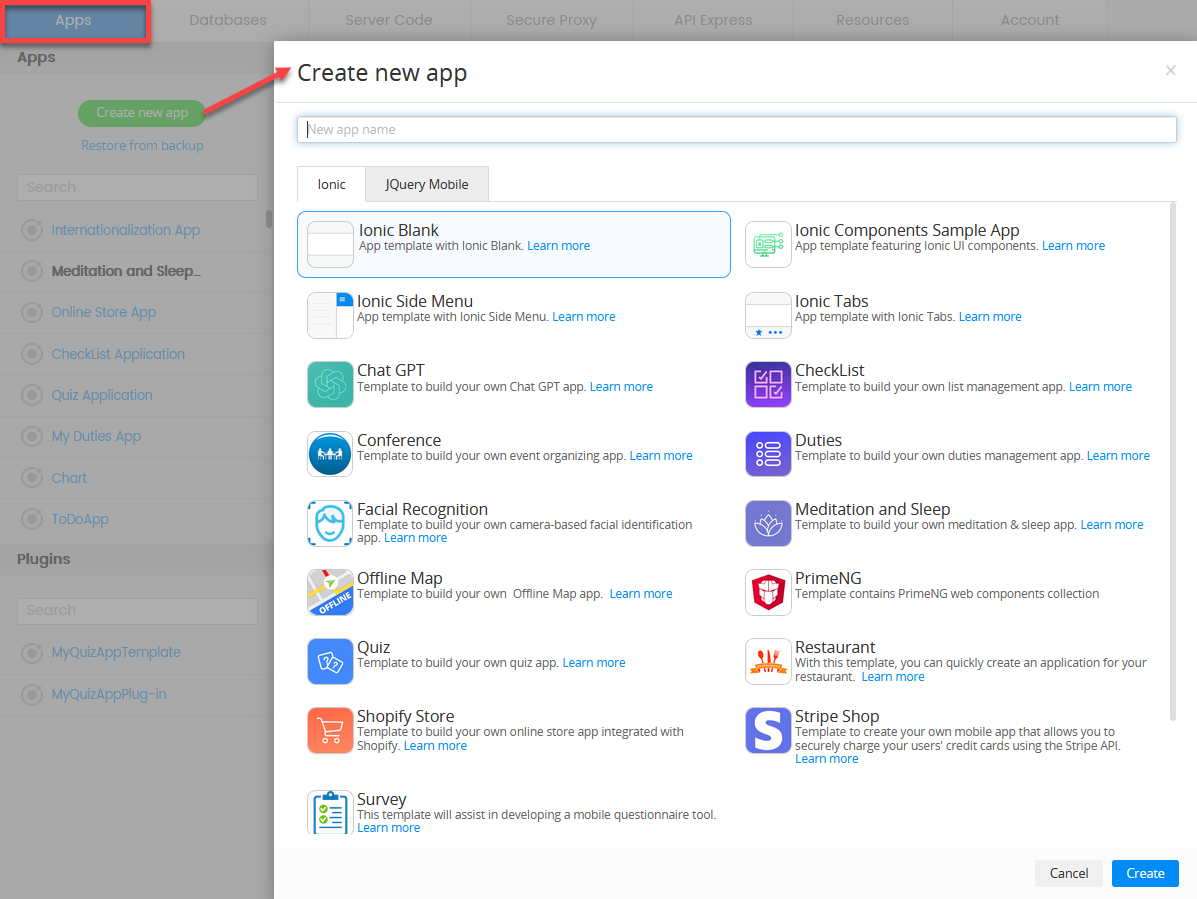
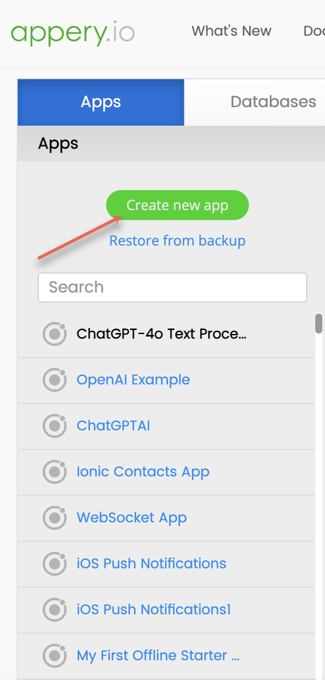
Creating a new app has never been easier! With updated app creation options all in one place, new users can now quickly and easily decide what type of app they want to create. Plus, for added convenience, we’ve moved the link for restoring from backup right under the Create new app button:

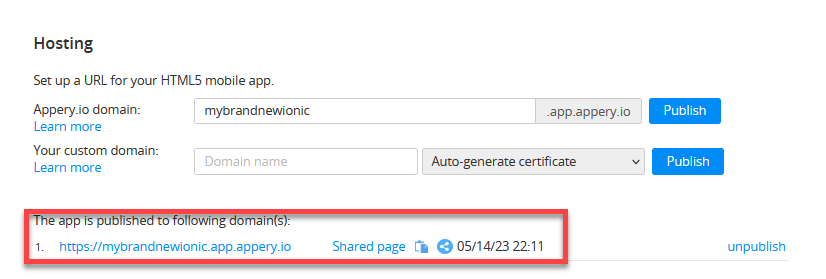
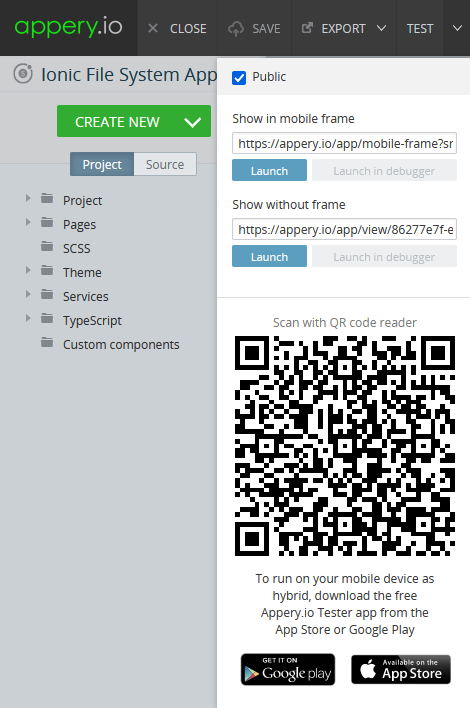
Say goodbye to the hassle of certificate generation when publishing your apps to custom domains. Appery.io now automatically generates certificates, and when you’re done, you can share your app by copying the link or selecting from several social sharing options:


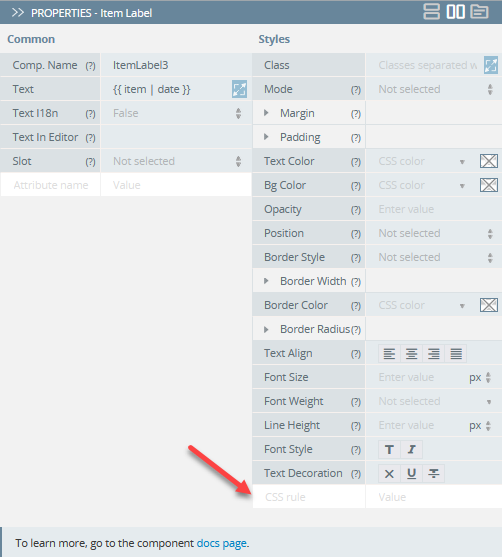
Save time and effort by adding necessary styles directly under the PROPERTIES > Styles tab, making styling your app easier than ever before:


Our improved modal window experience means you can now create responsive apps that automatically resize their modal windows. This is especially beneficial for tablet and desktop apps.

Writing custom code is a breeze with our new code snippets. We’ve added more snippets, including Navigate forward, Navigate back, Navigate root, and Get query parameter, to streamline your coding process.

We’ve also introduced a new action called Mark all as touch, which will allow you to fine-tune the validation flow:


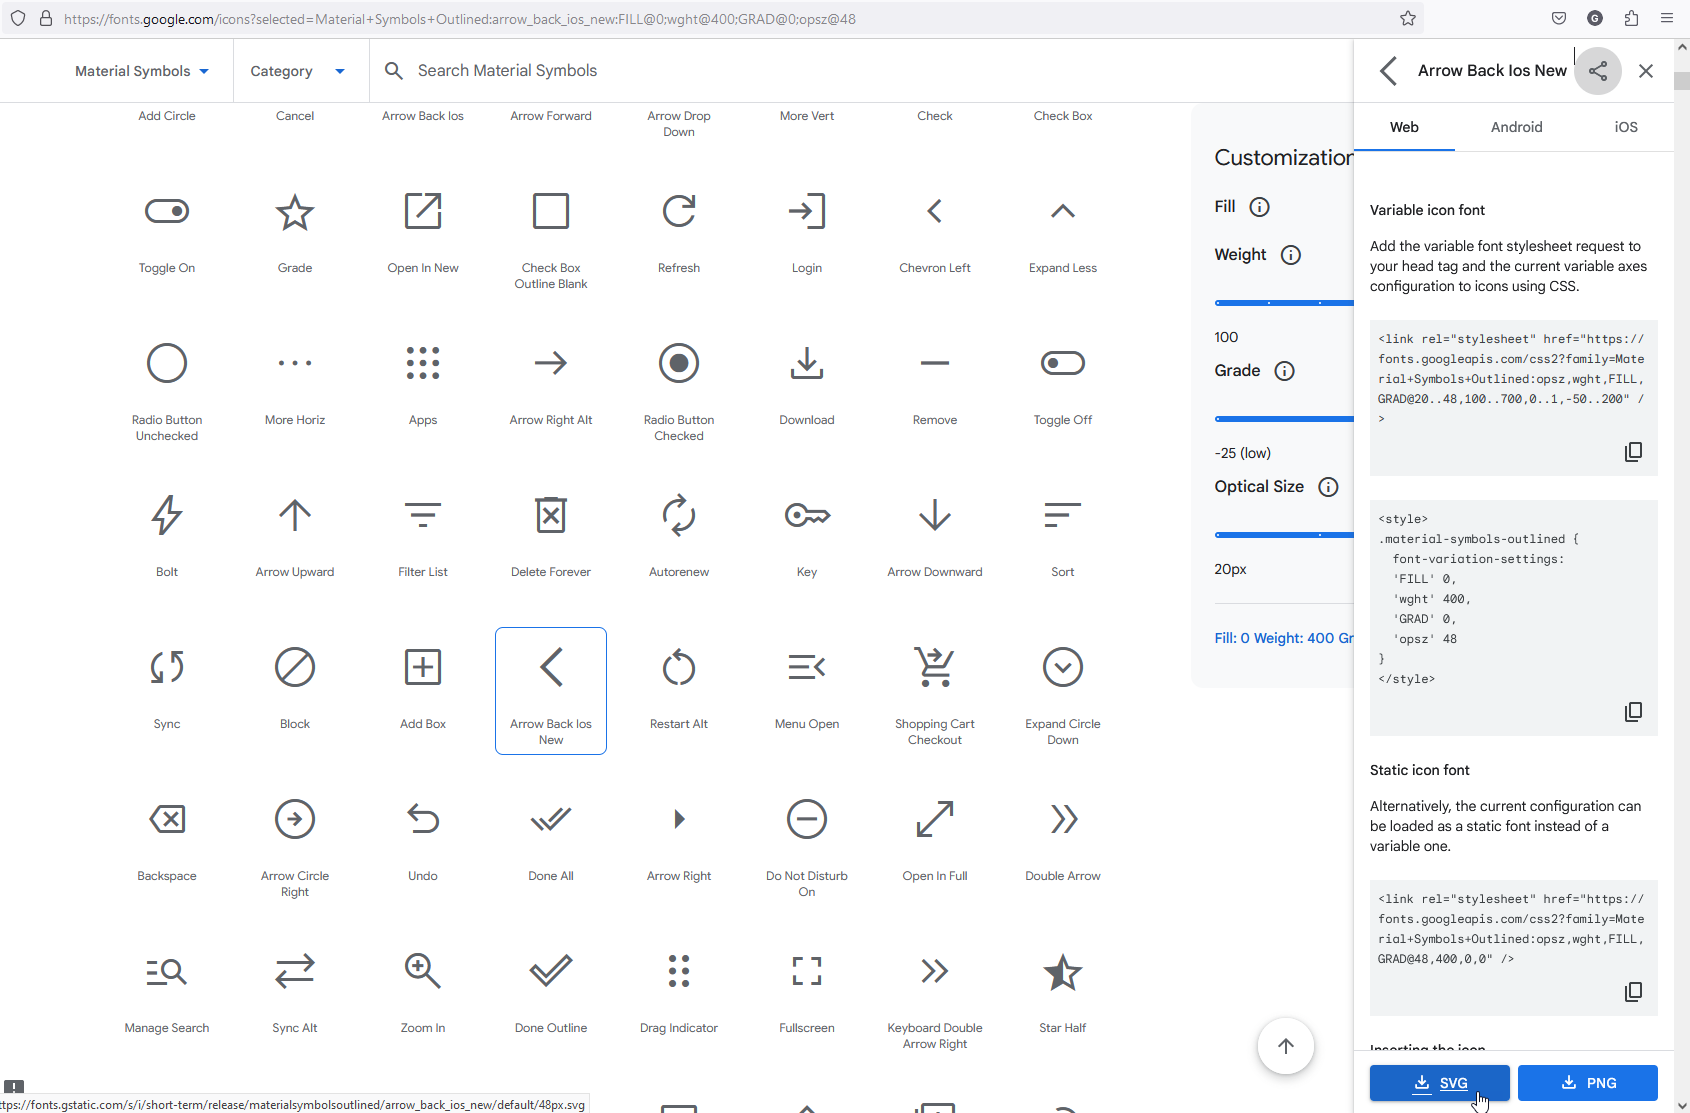
Our expanded UI components arsenal now includes more properties like Truncate and Vertical Align, making them even more useful. Plus, you can now independently edit child components’ properties for wrapping components like Input and Checkbox, giving you more flexibility when designing your app’s UI. One of the added app styling options is expanding our standard icon toolset selection with Material Symbols library from Google with over 2,875 glyphs in a single font file with a wide range of design variants:


Finally, this release is all about helpers! We’ve added a CODE tab helper to assist you in adding necessary functions, and a helper under the Databases tab to simplify working with binary data. Check out the Files collection CREATE tab to see how quickly you can create binary files and pass your data as Base64.

We are thrilled to bring you these new features and hope that they make your Appery.io experience even better. Thank you for choosing Appery.io – Happy developing!

Your Appery.io Team

File System Plug-in: a Great Tool to Manage Your Device Files

Take a moment to check out our File System plug-in that contains a number of services based on the file API and provides the simplest way to work with the device’s file system.

We have a step-by-step tutorial to make getting to know the plug-in more engaging. Please feel free to check it out here.

Tip!

A great option to quickly test the app on the device is to use our Appery.io Tester app.
The app is free and available for both iOS and Android.
You can check out this page to learn more about using the Appery.io Tester app.

Appery.io Recognized in Multiple G2 Spring 2021 Grid Reports

We are pleased to share that Appery.io has been recognized in the following G2 Spring 2021 Grid Reports

Per G2, products shown in the above Grid Reports have received a minimum of 10 reviews/ratings in data gathered by March 02, 2021. 

G2 is a peer-to-peer business solutions review website, leveraging customer feedback to rank the best business software and services. The Spring 2021 Grid Reports are based on G2’s unique algorithm, which calculates customer satisfaction and market presence scores in real-time. This is the first time Appery.io has been recognized in a G2 Grid Report. 

“Thank you to all of our amazing customers who left positive reviews of Appery.io on G2,” said Eldar Chernitsky, Head of Product at Appery.io. “It means the world to us that our customers take the time to leave their honest feedback on a reputable and trusted site like G2. We take the positives and negatives to heart and hope to continue to delight our customers as we deliver new features and updates.” 

If you would like to leave a review of Appery.io on G2, please go to https://www.g2.com/products/appery-io/reviews

To get started with Appery.io, please visit appery.io.