Supercharge Your App: Unveil the Magic of QR & Barcode Features with Appery.io

Unlock the full potential of your app development skills with our latest video guide! Dive into the world of QR and barcode technology with Appery.io and discover how easy it is to integrate these powerful features into your mobile and web applications. Our step-by-step tutorial will walk you through the process of creating, scanning, and managing codes while seamlessly connecting with a backend database. This video is packed with insights and practical tips to elevate your app projects. Watch now and transform the way you build apps!

Step into the Future of App Development

Why is QR and barcode integration a hot trend? Simple. It enhances user interaction and streamlines data processes. With Appery.io, developing these features becomes an enjoyable journey, even for beginners.

Building Blocks: Your QR and Barcode App Foundation

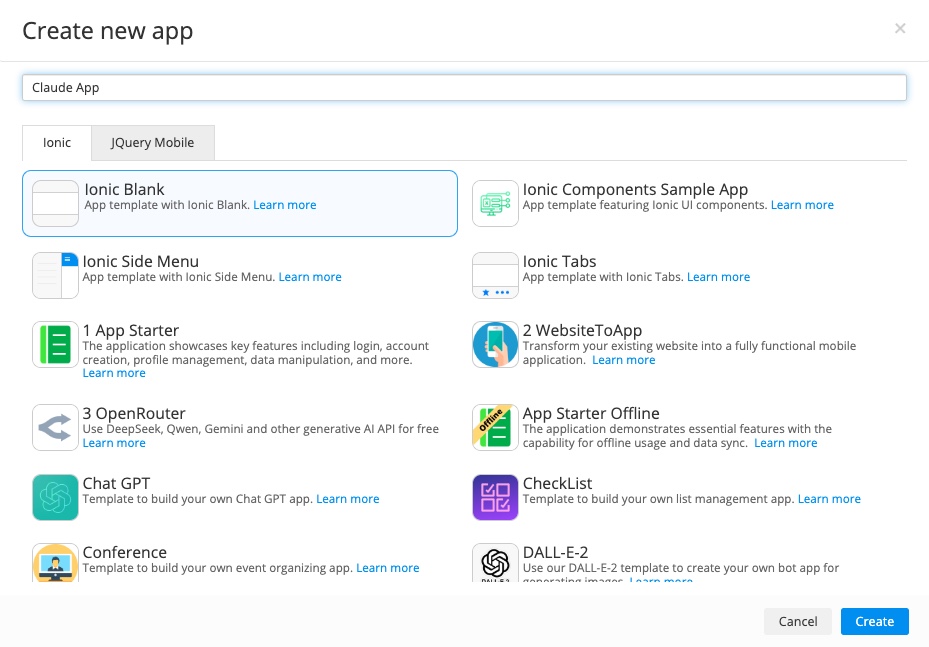
Start by creating a new app with Appery.io’s blank Ionic template. The goal? Add products with specific codes to your database and scan these codes for detailed information retrieval.

Step 1: Code Creation

Use Appery.io’s versatile “QR Code Generator.” Don’t let the name fool you—it handles all code types! Customizing your code is a breeze: adjust size, color, and format to suit your needs. QR codes are popular, so we’ll start there.

Step 2: Database Integration

Harness the power of Appery.io’s “List Details” plugin to manage product info linked to your QR codes. Create a database, add a collection for items, and include fields like “name” and “description.” Importing this plugin adds two powerful pages to your app, ready for data entry and editing.

Scanning and Display: Bringing It All Together

The final step? Scanning codes to display corresponding information. Appery.io offers a “QR and Barcode Scanner” plugin, adding seamless scanning capability. This integration works beautifully across mobile, web, and PWA environments.

Test and Optimize

For real-world effectiveness, use Appery.io’s Tester app on your device. It’s free and straightforward: scan your generated QR code and your app is instantly mobile-ready. Play around with different code formats, test your database connectivity, and refine your user interface for the best results.

Elevate Your App Experience

Integrate navigation tabs for a polished user experience. Appery.io’s simplicity lets you focus on creativity, not complexity.

Conclusion: Become an App Maestro

With Appery.io, creating a complex app with QR and barcode features has never been simpler. It’s an exciting time to explore the possibilities, test your creations, and ultimately produce an efficient and engaging application.

Keep exploring, keep innovating, and let Appery.io guide you through the remarkable process of app development. Dive into this opportunity, and soon, you’ll be coding like a pro.

Happy coding!

Boost Your App with ChatGPT-4 Plugin and Appery.io’s No-Code Power

With the advent of Appery.io—a powerful no-code app-building platform—coupled with the cutting-edge ChatGPT-4 plugin, creating advanced, feature-rich applications has never been simpler.

Discover how to harness the full potential of these tools in our latest YouTube tutorial.

Why Choose the Appery ChatGPT-4 Plugin?

The Appery ChatGPT plugin is a revolutionary tool that enables your app to process file uploads and deliver human-like responses. This plugin integrates seamlessly with Appery.io, leveraging OpenAI’s robust capabilities to bring unprecedented interactivity and intelligence to your mobile applications.

Simplified Integration with Appery.io

One of the standout features of Appery.io is its ability to simplify complex tasks. No need to struggle with extensive coding; instead, you can easily add the ChatGPT plugin, set up your app, and start processing images in no time.

The entire process is user-friendly, ensuring that even those unfamiliar with technical jargon can follow along effortlessly.

ChatGPT-4 Plugin Integration

Create Engaging User Interfaces

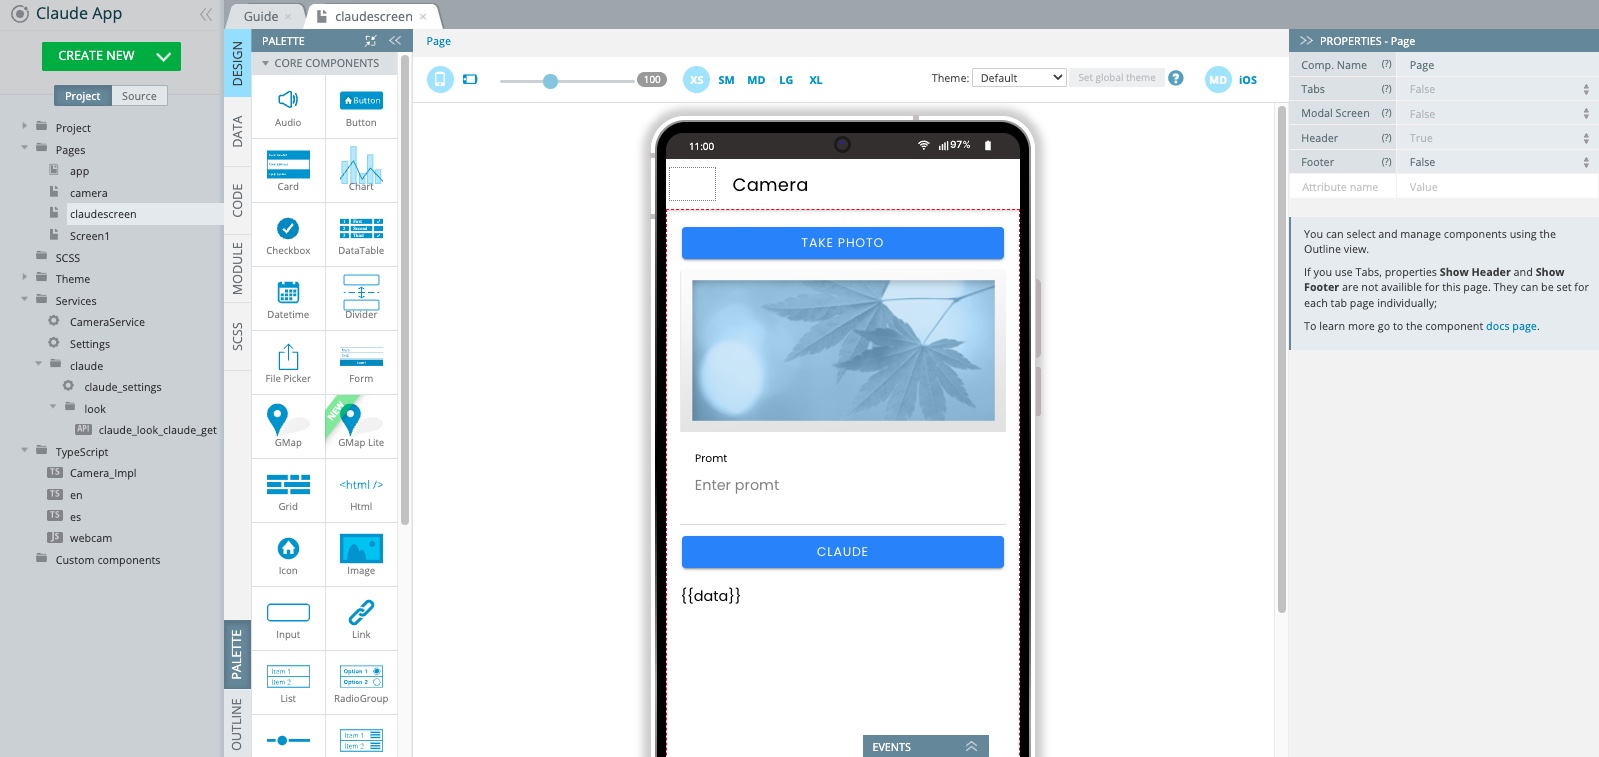
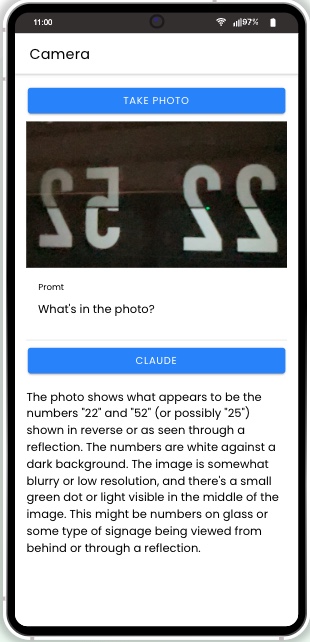
Using Appery.io, developers can create intuitive and engaging user interfaces. With drag-and-drop functionality, you can quickly design a UI where users can upload images, enter queries, and receive intelligent responses from ChatGPT-4o.

Enhance User Experience

Adding components like file pickers and text input areas enhances the user experience. These features allow users to select and upload photos directly within the app, making the interaction smooth and enjoyable. The ChatGPT plugin then processes these images, delivering impressive, human-like responses.

Seamless and Efficient Testing

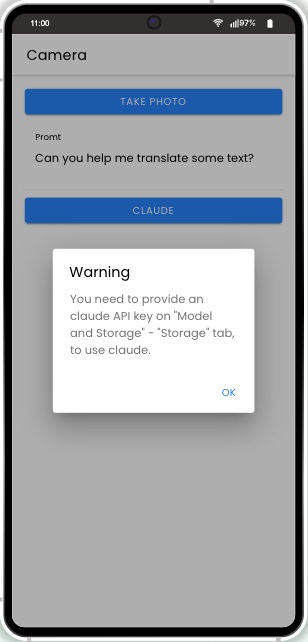
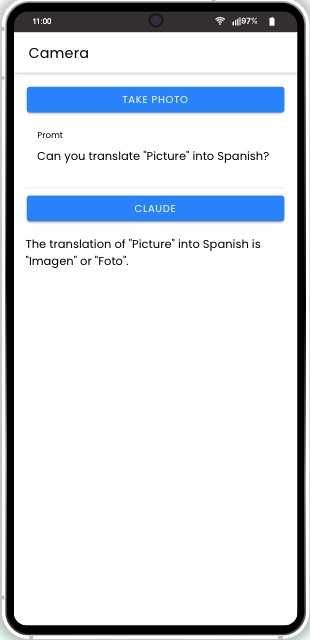
Before launching, testing your app is crucial to ensure a flawless user experience. With Appery.io, you can easily test the image upload, query submission, and ChatGPT-4o response features, fine-tuning your app for optimal performance.

Thorough testing guarantees a seamless user experience

Watch Our YouTube Tutorial

Curious about the detailed steps? Our YouTube tutorial covers everything you need to know about integrating the ChatGPT plugin with Appery.io. From setting up your app to designing the user interface and testing functionalities, we guide you through each stage.

For a comprehensive guide, make sure to watch the full video.

Discover the Power of Appery.io

Appery.io empowers you to create powerful, intelligent apps effortlessly. Its no-code platform, combined with the ChatGPT plugin, opens up a world of possibilities.

Don’t miss out—head over to our channel, watch the video, and see how you can transform your mobile app development process today!


Maximize your app’s potential with the ChatGPT-4o plugin and Appery.io. Watch our YouTube tutorial now for a step-by-step guide to creating intelligent, interactive mobile apps with ease. Whether you’re a seasoned developer or just starting out, Appery.io has the tools to help you succeed. Subscribe to our channel for more exciting tutorials and updates.

Effortlessly Create Amazing AI Apps with ChatGPT and Appery.io

Hello everyone and welcome! Today, we have something exciting to share with you. Our latest YouTube video will walk you through the process of integrating the Chat GPT-4o image generation feature into your mobile app.

Watch Our Step-by-Step Video Guide

In this video, we will show you how to add this powerful AI functionality to your app without writing any code. Yes, you heard that right—no coding required!

Follow along to transform your app with incredible AI capabilities using Appery.io’s no-code platform and our new Chat GPT plugin.

Integrating advanced AI features into your mobile app may sound challenging, but with Appery.io, it’s surprisingly simple. Whether you’re a seasoned developer or new to app building, Appery.io provides a low-code platform that lets you integrate powerful AI tools like ChatGPT without writing any code.


Why Choose ChatGPT?

ChatGPT, developed by OpenAI, is a cutting-edge language model that brings intelligent, human-like interactions to your app. With ChatGPT, you can add features like image generation, text processing, and more, all with a few clicks. These capabilities can elevate your app, making it more interactive, engaging, and efficient.

How Appery.io Simplifies ChatGPT Integration

Appery.io is a low-code platform designed to make app development accessible to everyone. It offers a visual interface where you can drag and drop components, configure services, and deploy apps—all without diving into complex coding.

Here’s how you can integrate ChatGPT into your app using Appery.io:

  1. Start a New Project: Log in to Appery.io and create a new project. Choose the Ionic framework, which works seamlessly with Appery.io.
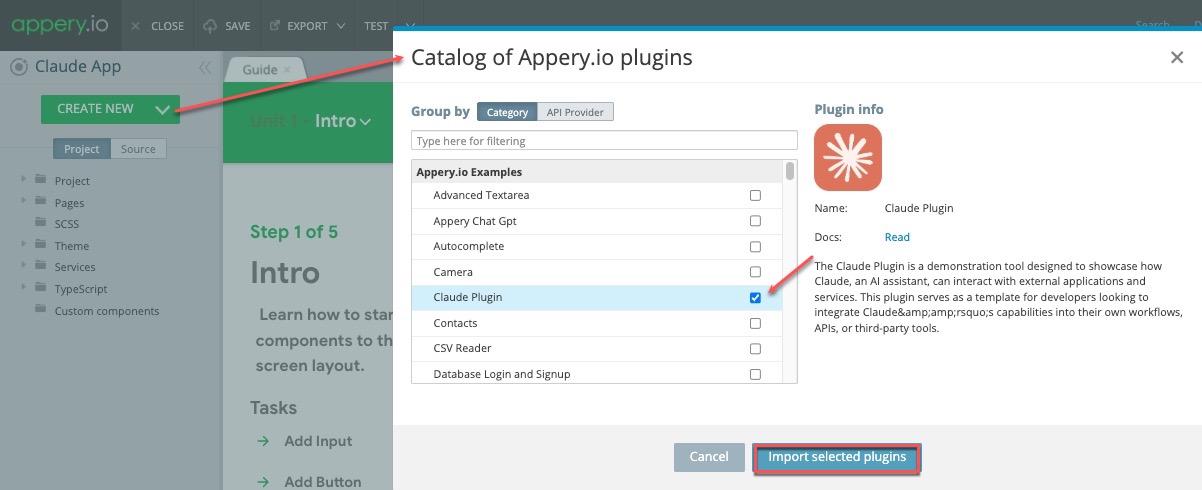
  2. Add the ChatGPT Plugin: Search for the ChatGPT plugin in Appery.io’s plugin catalog and add it to your project. This plugin is pre-configured, saving you from the hassle of manual setup.
  3. Get Your API Key: To use ChatGPT, you’ll need an API key from OpenAI. Generate or retrieve your key from the OpenAI portal.
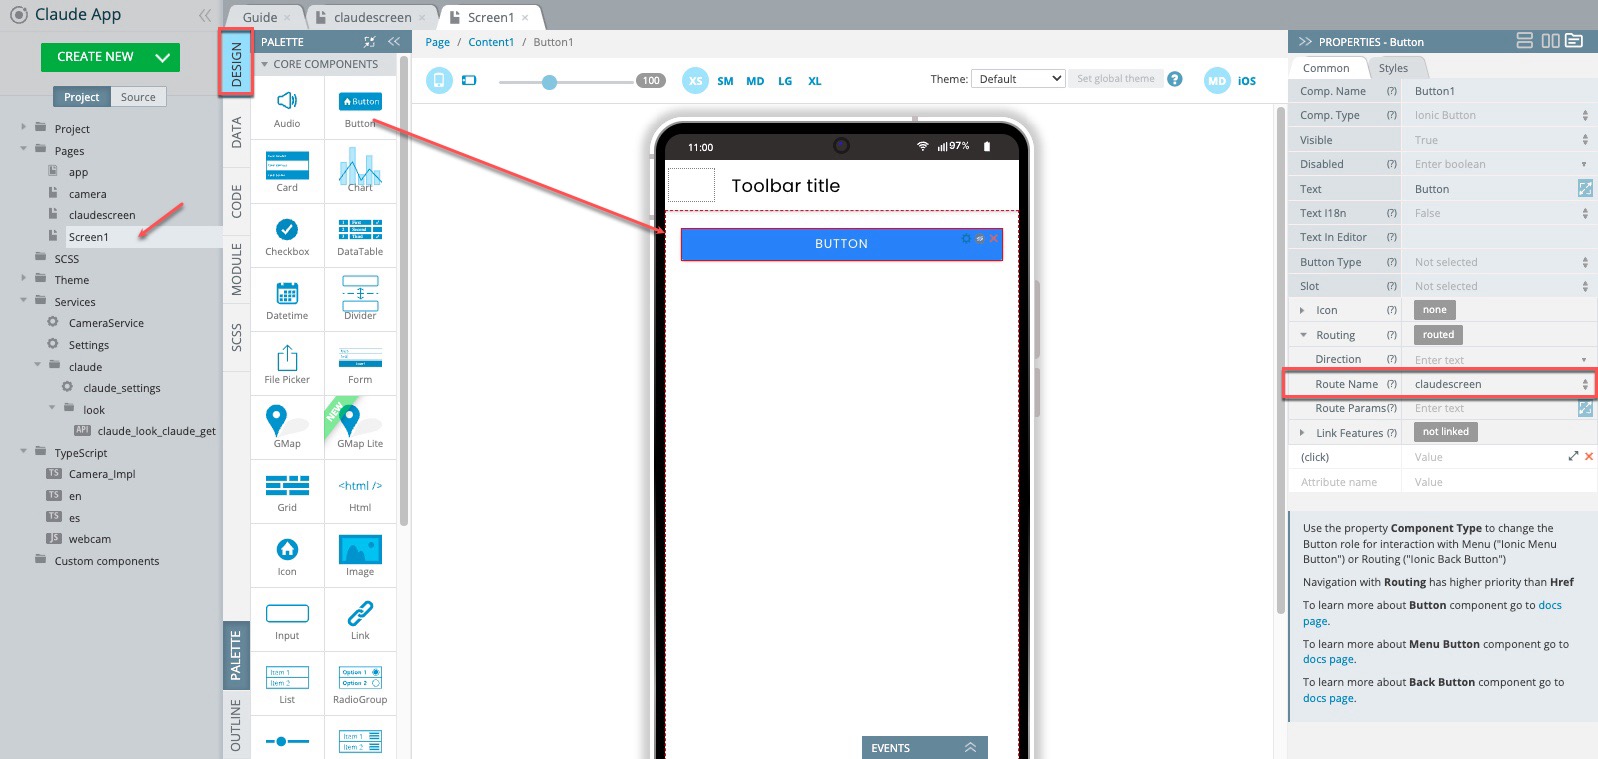
  4. Configure Your App: Use Appery.io’s intuitive interface to link your app’s UI components—like text areas and buttons—with the ChatGPT services. This step is straightforward, requiring no coding knowledge.
  5. Test Your App: After setting up, test your app within Appery.io. Make sure everything functions smoothly before you deploy.
  6. Deploy Your App: Once satisfied, deploy your app to your chosen platform, whether iOS, Android, or the web.

The Benefits of Using Appery.io

Appery.io offers a powerful yet simple way to bring AI into your apps. With its low-code approach, you can focus on creativity and user experience rather than getting bogged down by technical challenges. The platform’s flexibility and ease of use make it ideal for developers at any level, from beginners to experts.

Conclusion

Integrating ChatGPT into your mobile app has never been easier. With Appery.io, you can quickly build AI-powered apps that stand out, all without writing a single line of code. If you’re ready to take your app to the next level, give Appery.io a try and see how simple it can be to bring AI into your projects.

How to Get Access to the List of Contacts in an Ionic App

Have you ever wondered how to make you Ionic app access the list of contacts of your device?

This blog post walks you through the steps of creating an Ionic app that can do that. Also, if you prefer watching video guides, you can follow this YouTube tutorial to create such an app:

Getting Started with Your Ionic App

First, we need to create a brand-new Ionic app. For this tutorial, we’re using the Appery.io platform, which makes the development process straightforward and efficient.

1. Create a New App:

Open Appery.io and click Create new app.

Name your app and confirm. This action creates a blank Ionic app with a predefined screen layout named Contacts.

2. Adding the Contacts Page:

Add this Contacts page layout to your app and adjust the routing to make sure it points correctly to this page.

Reviewing & Testing Your App

Your app is now ready to display contacts. This page will show names, phone numbers, and pictures of contacts. Let’s click TEST to quickly preview the app.

You can also preview what the app looks like and how it functions by using the Appery.io Tester, a native app for testing. It’s user-friendly and works perfectly!

How It Works Behind the Scenes

Now, let’s go deeper into the technical step-by-step process to understand how everything works:

Cordova Plugins:

Under the Project > App settings > Cordova plugins tab, you’ll see that the app uses the Cordova Contacts plugin, which has been automatically imported. This plugin helps fetch the contacts.

Ionic Contacts Wrapper

We utilize the Ionic Contacts wrapper for better integration. You can check its detailed documentation page if you wish to dive deeper into this.

Setting Up Variables

Open the Contacts page’s CODE tab to see the variables that were added automatically:

– `contacts`: Returns the contact list.

– `keyword`: Enables filtering.

– `SAMPLE_AVATAR`: Displays a sample picture. You can upload your custom one by using the Media Manager, if needed.

– `SAMPLE_CONTACTS`: Provides a sample list for testing in the browser.

Displaying Contacts List in the App

Now, let’s scroll to the Functions section to see how the contacts list is added in our code.

If the app runs in a browser, it uses the sample contacts from the variable above. But if the app is run on a real device, it accesses the actual contacts list via the predefined `contacts` variable.

Creating a User-Friendly UI

Here’s how to make the contacts list visually appealing and easy to navigate:

List Component:

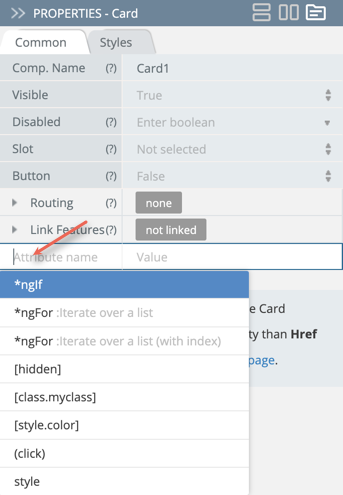
Uses ListItem with the *ngFor attribute to iterate through the contact list and display each contact’s information.

Filtering Contacts:

The *ngModel keyword in the Search component allows users to filter contacts by name.

Using Selections:

The app lets users select contacts easily. Selected contacts have the selected property set to true.

Conclusion

And that’s how to get access to the list of contacts in an Ionic app! This straightforward guide aimed to simplify the technical aspects and provide a clear path for even beginners. Now you can easily fetch and display contacts in your Ionic apps.

Happy coding!

Add Text Recognition to Your Mobile App Easily

Hello everyone!

Welcome to an exciting journey where we’ll show you how to add text recognition to your mobile app using the Appery.io Text Recognition plugin. Our new step-by-step video guide is designed to make everything simple and clear, even if you’re new to this technology.

In this video, you will be guided on how to:

  1. Import the Text Recognition plugin to your app
  2. Update default routing
  3. Test your app

Also, you will learn what modes come with the plugin:

Static Text Recognition:

  • Echo mode
  • Camera mode
  • Gallery mode

Real-Time Text Recognition: 

  • 10-second recognition
  • Continuous recognition

After watching the video guide, you will understand the app structure and also get the code breakdown to see the full picture of what’s behind the plugin.

Ready to Add Text Recognition to Your App?

To implement this feature, activate the Appery.io Text Recognition Cordova plugin in your project and you are ready to go!

And that’s it for now! Thanks for following along. We hope this guide helps you add robust text recognition to your mobile app.

Happy coding!

Unlock Real-Time Communication with WebSockets on Appery.io

Introduction to WebSockets with Appery.io

Have you ever wondered how apps send updates in real-time? The magic happens with WebSockets. Today, we’ll show you how to add WebSockets to your apps using Appery.io. This low-code app-building platform makes it easy to create complex apps quickly. Note that this post supports our comprehensive video tutorial and if you are interested in details, you are welcome to watch it.

By following the steps below, you can easily enhance your app with real-time communication features using WebSockets and Appery.io. Exciting, right? Let’s get started!

Setting Up Your App

First, create an empty app in Appery.io. Then, go to the Catalog of Appery.io plugins and select the WebSocket Example plugin.

Before importing it, you can click the link to open its documentation page. You’ll see it contains the code for the WebSocket server. This server needs to be run somewhere. While real applications may use Amazon or Azure, we’ll use CodeSandbox for testing.

Using CodeSandbox

1. Create a new Devbox.

2. Select Node.js Server from the list of backend frameworks.

3. Name your Devbox and set its visibility to “Public”.

4. Install two npm modules: `express` and `socket.io`.

Now, let’s move to the next step.

Setting Up Your WebSocket Server

Copy the server code from the documentation page and paste it into your `index.js` file in CodeSandbox. If everything is correct, the server should start successfully.

Back to Appery.io

Return to the Appery.io project and click Import selected plugins with the WebSocket Example plugin checked. This plugin helps you integrate WebSockets into your app. But first, let’s test it.

Testing Your App

Go to the Project > Routing section and set “WebSocketScreen” as the default page.

Next, navigate to TypeScript > WebSocket and specify the URL of your WebSocket server obtained from CodeSandbox.

Now, run your app in different browsers like Google Chrome, Firefox, and Edge. Enter a test message and click the “Send” button.

Ready! The message should be delivered to all clients in real-time.

Conclusion

Now you’ve seen how to add Websockets to your apps using Appery.io. This post is a companion piece to our detailed video tutorial. The demo app isn’t a finished product but provides a solid template for building your own real-time communication features. Give it a try and unlock powerful networking capabilities in your applications!

Unlock Game-Changing QR and Barcode Features in Your App with Appery.io

App development continually evolves, and integrating QR and barcode scanning has become a game-changer for many apps. Appery.io, a low-code platform, has simplified the integration process significantly. In our recent YouTube video, we share how you can easily build a mobile app with robust scanning functionality using Appery.io.

Watch this detailed video guide for a visual and interactive learning experience:

The steps below aim to supplement the video instructions and provide additional clarity as you work through the integration process.

Getting Started with Appery.io

First, create an account on Appery.io; it’s free. Once logged in, you begin by creating a new project. Click on ‘Create new app’, name it, and you are ready to begin.

Approach 1: Using Predefined Page Layout

Appery.io offers predefined layouts that simplify your work. To integrate a QR Code Scanner:

  1. From the main menu, select CREATE NEW,  then Page, and choose QR Code Scanner from the available page layouts.
  2. Confirm the selection, and just like that, you add a fully functional scan page to your app.

Testing is straightforward. Set the newly created page as the home page from the Project > Routing settings. This setup ensures it loads first upon opening the app. Use the Appery.io Tester app available on both iOS and Android to simulate real-device testing. Instantly, your app can handle QR codes and barcodes, making it incredibly versatile.

Approach 2: Adding Plugins to Existing Apps

If you wish to add scanning functions to an existing app without disrupting its structure:

  1. Start by creating a new app and under CREATE NEW, select From Plugin.
  2. Import the QR and Barcode Scanner service.
  3. Enable the necessary plugins like BarcodeScanner under Project > App settings > Cordova Plugins.
  4. On your app’s page, add a Button and a Text. The button triggers the scanner, and the text field displays the scanned data.
  5. Set an event for the button that invokes the scanner service when clicked.

This method embeds the scanning function into your app just as seamlessly, providing a web scanning option during preview and flawless operation on devices.

Approach 3: Low-Code Method

Perhaps the most innovative approach is adding scanning functionality without any server-side actions:

  1. Simply remove any services from your page.
  2. In the CODE panel, create a variable, for instance, ‘text‘.
  3. In the DESIGN panel, link this variable to display in a Text field.
  4. Add a new attribute to the Button component to trigger a ‘scan()‘ function when clicked.

Define this `scan()` function to handle the scanning operation. This method is not only straightforward but also modular, allowing adjustments and additions without deep dives into complex coding.

Why Choose Appery.io?

What makes Appery.io stand out is its simplicity and efficiency. Whether you are a novice or an expert, these tools are designed to streamline the creation process. Additionally, the platform supports a wide range of functionalities that can be integrated with just a few clicks.

We have plenty of detailed video guides available to walk you through each step, ensuring you have all the support you need. These resources are perfect for both visual learners and those who prefer to follow along at their own pace.

Wrap-Up

Embracing Appery.io for your mobile app development not only simplifies the entire development process but also opens up a realm of possibilities with QR and barcode scanning functionalities. Start experimenting today by signing up for a free two-week trial on Appery.io and join us on this innovative journey to transforming your applications.

Enjoy the journey, and here’s to developing apps that truly stand out! If you’ve enjoyed this tutorial, don’t forget to subscribe to our YouTube channel for more updates and tips. Thank you for reading, and see you in our next post!

How to Build a ChatGPT App with Appery.io’s OpenAI Assistant Chat Plugin

Creating an app with advanced AI chat capabilities might sound challenging, but it’s surprisingly easy with Appery.io. Let’s walk through the process of utilizing the OpenAI Assistant Chat plugin to bring AI to life in your next app.

Here is our new how-to video that illustrates the power of AI combined with Appery.io possibilities:

But if you’d rather read to follow the instructions step-by-step, please check below.

1. Start Your Appery.io Project

First things first, you need a home for your new AI creation:

  • Sign In to Appery.io: Head over to Appery.io, sign in, or set up a new account if you’re stepping in for the first time.
  • Create Your App: Click Create new app. Choose your app type—like Ionic blank—name it, and hit Create. Now, you’re set up.

2. Add the Magic Ingredient: OpenAI Assistant Chat Plugin

This plugin is your key to easy AI integration:

  • Go to Plugins: Inside your project, click CREATE NEW > From Plugin to open the Catalog of Appery.io plugins.
  • Find and Add the Plugin: Search for the OpenAI Assistant Chat plugin. Click Import selected plugins to add it to your app.

3. Key Configurations: API Key and Assistant ID

These essentials connect your app with OpenAI’s brainpower:

  • Secure an API Key from OpenAI: Visit the OpenAI site, sign up or log in, and navigate to obtain your API key. This key is your app’s passport to AI land.
  • Create Your AI Assistant: This step is integral. Creating an assistant on OpenAI provides you with an Assistant ID – think of this as giving your app its own AI personality.
  • Input Your Credentials in Appery.io: Back in Appery.io, within the plugin settings, there’s a spot waiting for your API key and that shiny new Assistant ID. Fill these in to forge the link between your app and OpenAI’s capabilities.

4. Make It Yours

Now for the fun part. Tailor the plugin to fit your app’s vibe:

  • Adjust the Looks: With Appery.io‘s easy drag-and-drop, you can tweak the plugin’s appearance so it meshes well with your app.
  • Set Up AI Functions: Decide what your AI should do. This could be answering customer queries, giving recommendations, or having a chat. Configure away to align with your vision.

5. Test Your Creation

Before releasing your app into the wild, you need to see it in action:

  • Run a Test: Appery.io has built-in testing to trial how the AI responds and integrates with your app.

  • Tweak if Needed: Testing might reveal some tweaks are in order. No problem. Adjust and test again until it’s just right.

6. Launch Time

Your AI chat app is ready to meet its audience:

  • Deploy It: With a few clicks in Appery.io, you can deploy your app across the preferred platforms.
  • Iterate Based on Feedback: Once your app is out there, listen to how users find the AI and refine it further based on their insights.

Why Appery.io?

Bringing AI into your app shouldn’t be daunting. With Appery.io and its OpenAI Assistant Chat plugin, it’s not just easy but also fun. This combo lets you leap into the future of app development, focusing on creating unforgettable user experiences rather than fretting over-complicated code.

So, why wait? Dive into Appery.io today, and start crafting the kind of AI-powered app that users will love.


By simplifying the process into manageable steps, this guide is designed to promote an approachable and enjoyable foray into AI-powered app development for creators at any skill level, focusing on the practical application of Appery.io`s OpenAI Assistant Chat plugin.

Great News: “Autoupdate” Plug-in is added to Appery.io Apps

There is another great news we are happy to share with you today: the Autoupdate plug-in has been added to all Appery.io apps and is ready to be used.

Adding this plug-in is simple and requires zero effort on your part to set it up. But when added, it just gets the job done. 

The idea behind it is as simple as it can possibly be:

  • You add the plug-in to your app and publish it so that your users can install it on their devices.
  • Next time you need to make changes to your app you just make them and push the app updates.
  • With the next app run on the device, the plug-in automatically detects there is a new update on the server and lets the end user make decisions on whether to download it from the server and then install it on their device or postpone this action:
Autoupdate plug-in

Autoupdate plug-in on the device

Please check out our document here to learn how to work with the Autoupdate plug-in.

File System Plug-in: a Great Tool to Manage Your Device Files

Take a moment to check out our File System plug-in that contains a number of services based on the file API and provides the simplest way to work with the device’s file system.

We have a step-by-step tutorial to make getting to know the plug-in more engaging. Please feel free to check it out here.

Tip!

A great option to quickly test the app on the device is to use our Appery.io Tester app.
The app is free and available for both iOS and Android.
You can check out this page to learn more about using the Appery.io Tester app.