The Appery.io Database provides storage for your mobile app data. You can store data such as users, orders, purchases, products or anything else. The Appery.io Database is a cloud NoSQL database and provides a very simple and elegant REST API to work with the database.
One of the most common cases for an enterprise mobile app is to create/save a new item/record and then redisplay the list in the app with the newly created item.
Accessing the database directly from the client is fine but requires two requests to the database.
- A request to save the new item/record into the database.
- Once the 1st request completes, on its success, a request to get the updated list to display in the app.
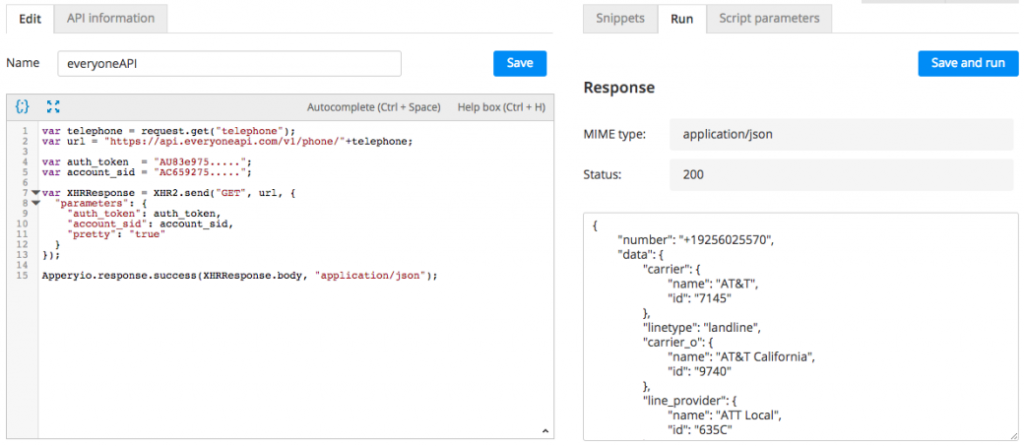
A better approach is to do both the create and list in a single request from the app. This is very simple to do from Appery.io Server Code script. The following script shows how to create a new record and then get the updated list:
var dbId = "cdaec951....d8";
var collectionName = "People"

var newName = request.get("name");
var newTitle = request.get("title");

// Save new object into the collection
Collection.createObject(dbId, collectionName, {
   "name": newName,
   "title": newTitle
});

// Retrieve updated data from the collection
var result = Collection.query(dbId, collectionName);
// Return the updated list (including the new object)
Apperyio.response.success(result, "application/json");
In this simple script you first create a new Person object (line 8) and then do another query to get the updated list of people (line 14). The script response returns the updated list of people. This script automatically has a REST API which is the invoked from the app.
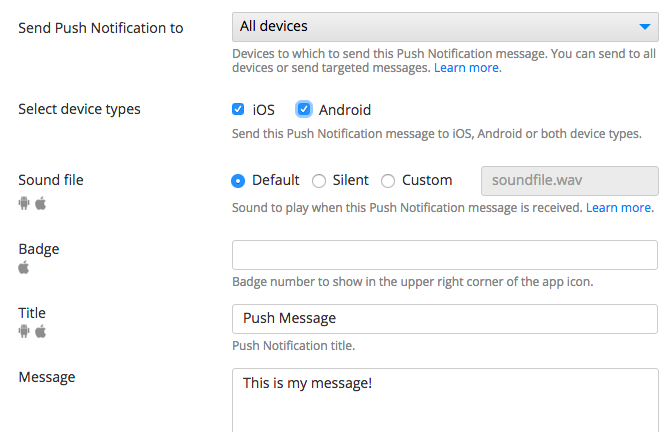
What’s most important, there is only a single request from the app to the Server Code script. A single request is usually better than two requests. Also, you can add additional logic to the script without impacting the app. For example, you can send an email when a new person is added. Or, you can send Push Notification when a new person is added. All this can be done without impacting the app. That’s nice.
If you want to learn more about Server Code, check out our YouTube channel Server Code playlist.


 is a hospitality platform that transforms the traditional paper menu into a digital marketing channel")