Revolutionary OpenAI o1-preview Reviewed: Must-Watch Guide!

Have you heard about OpenAi o1-preview? This revolutionary model is making waves in the tech world, and we’ve discovered how to harness its power using Appery.io, the leading no-code app-building platform.

OpenAi o1-preview, the early release of the OpenAi o1 model family, boasts enhanced reasoning abilities in mathematics, coding, and science. It outperforms previous models by using reinforcement learning to perform complex reasoning tasks, making it a game-changer for app development.

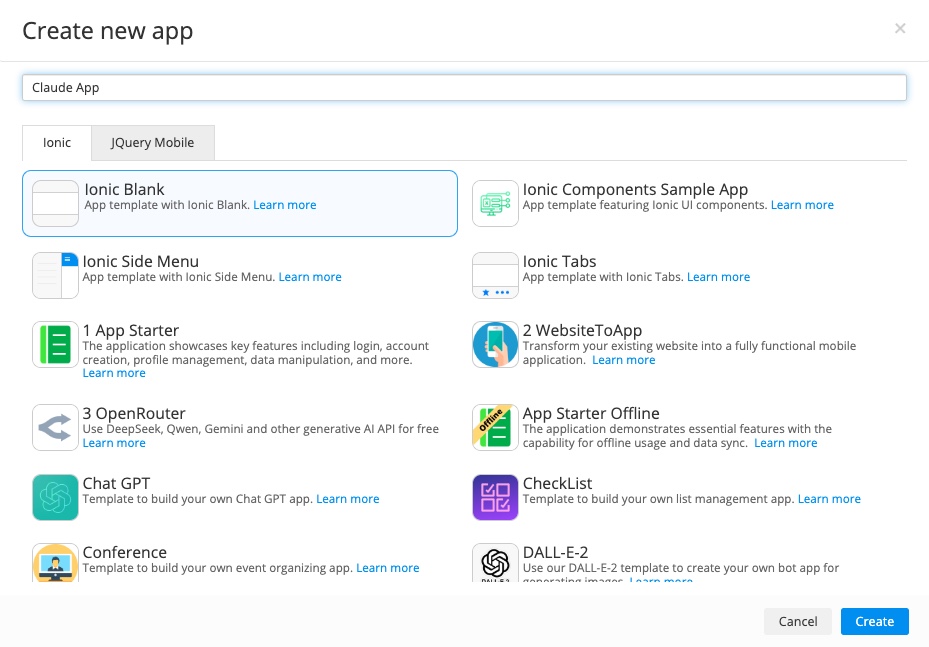
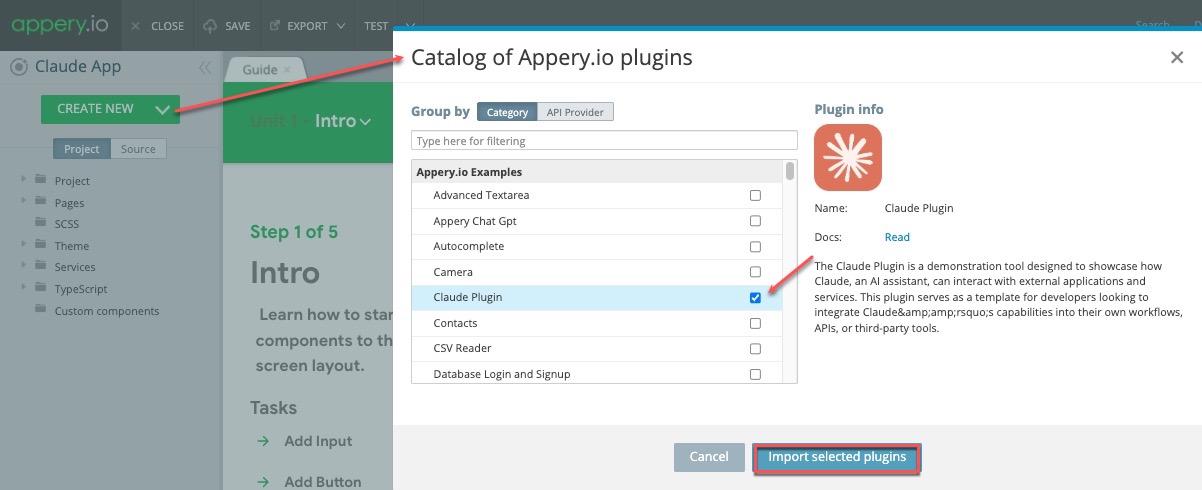
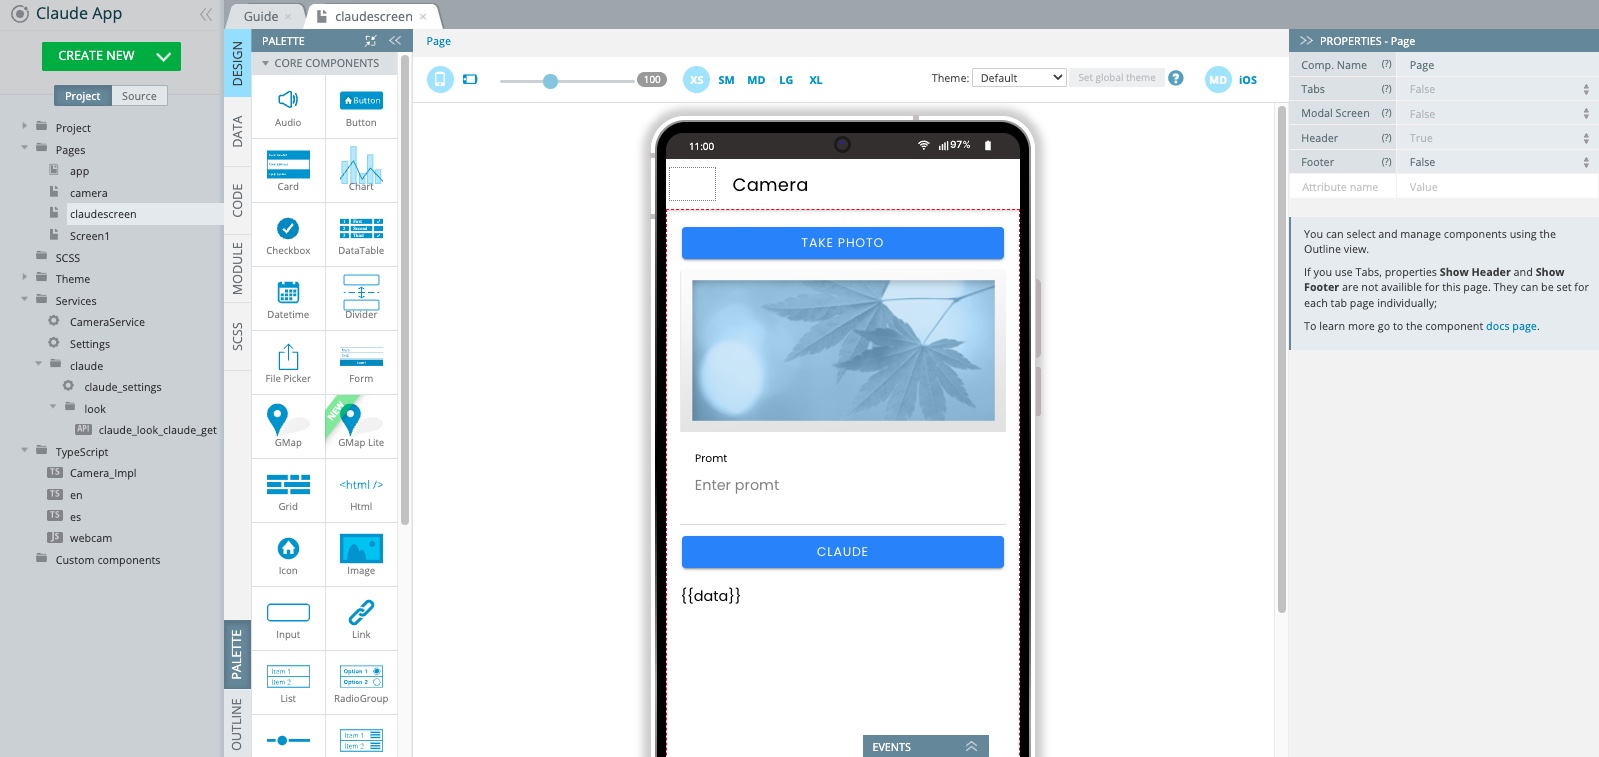
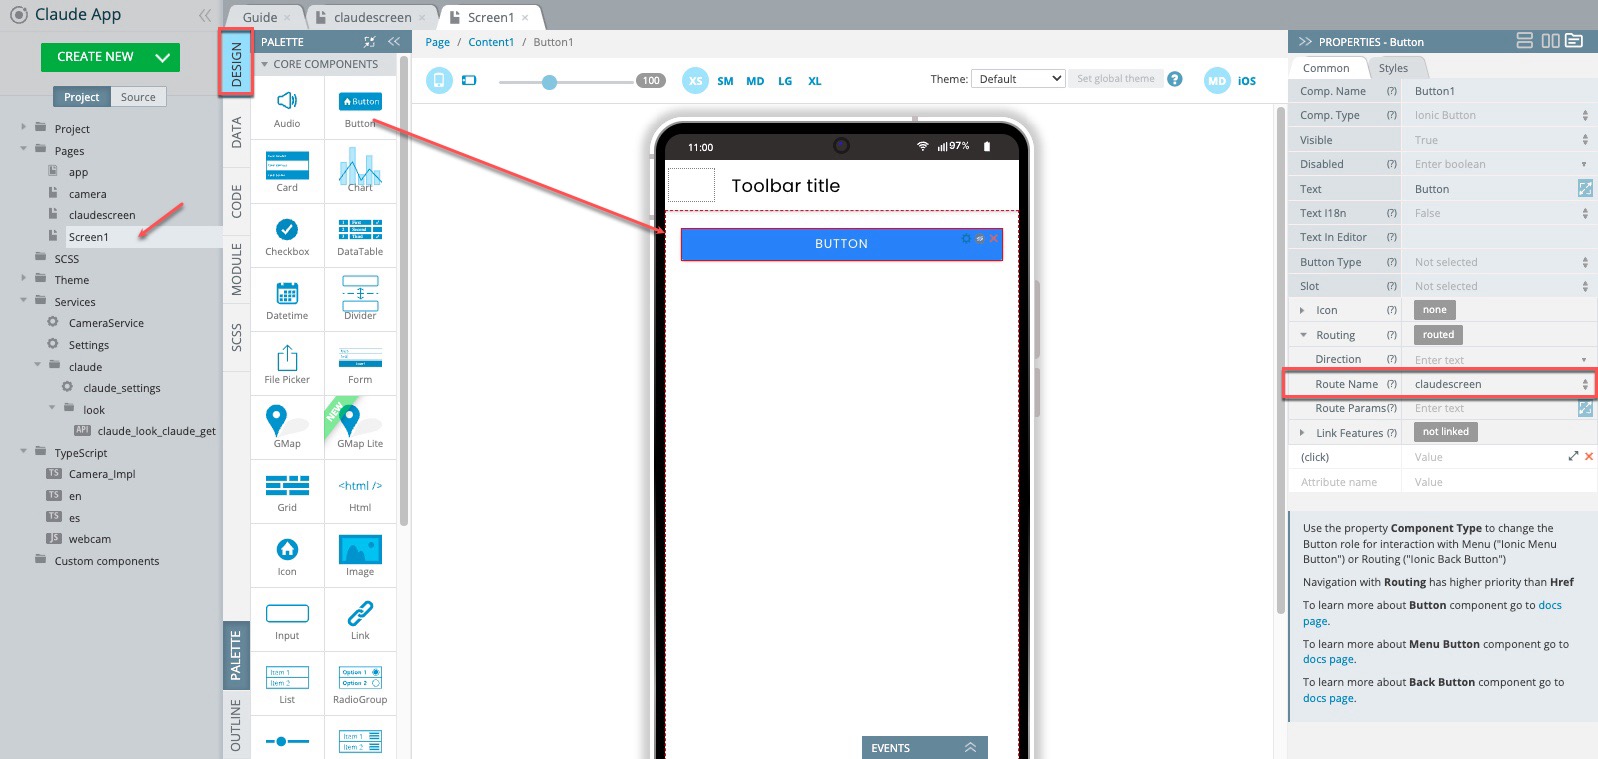
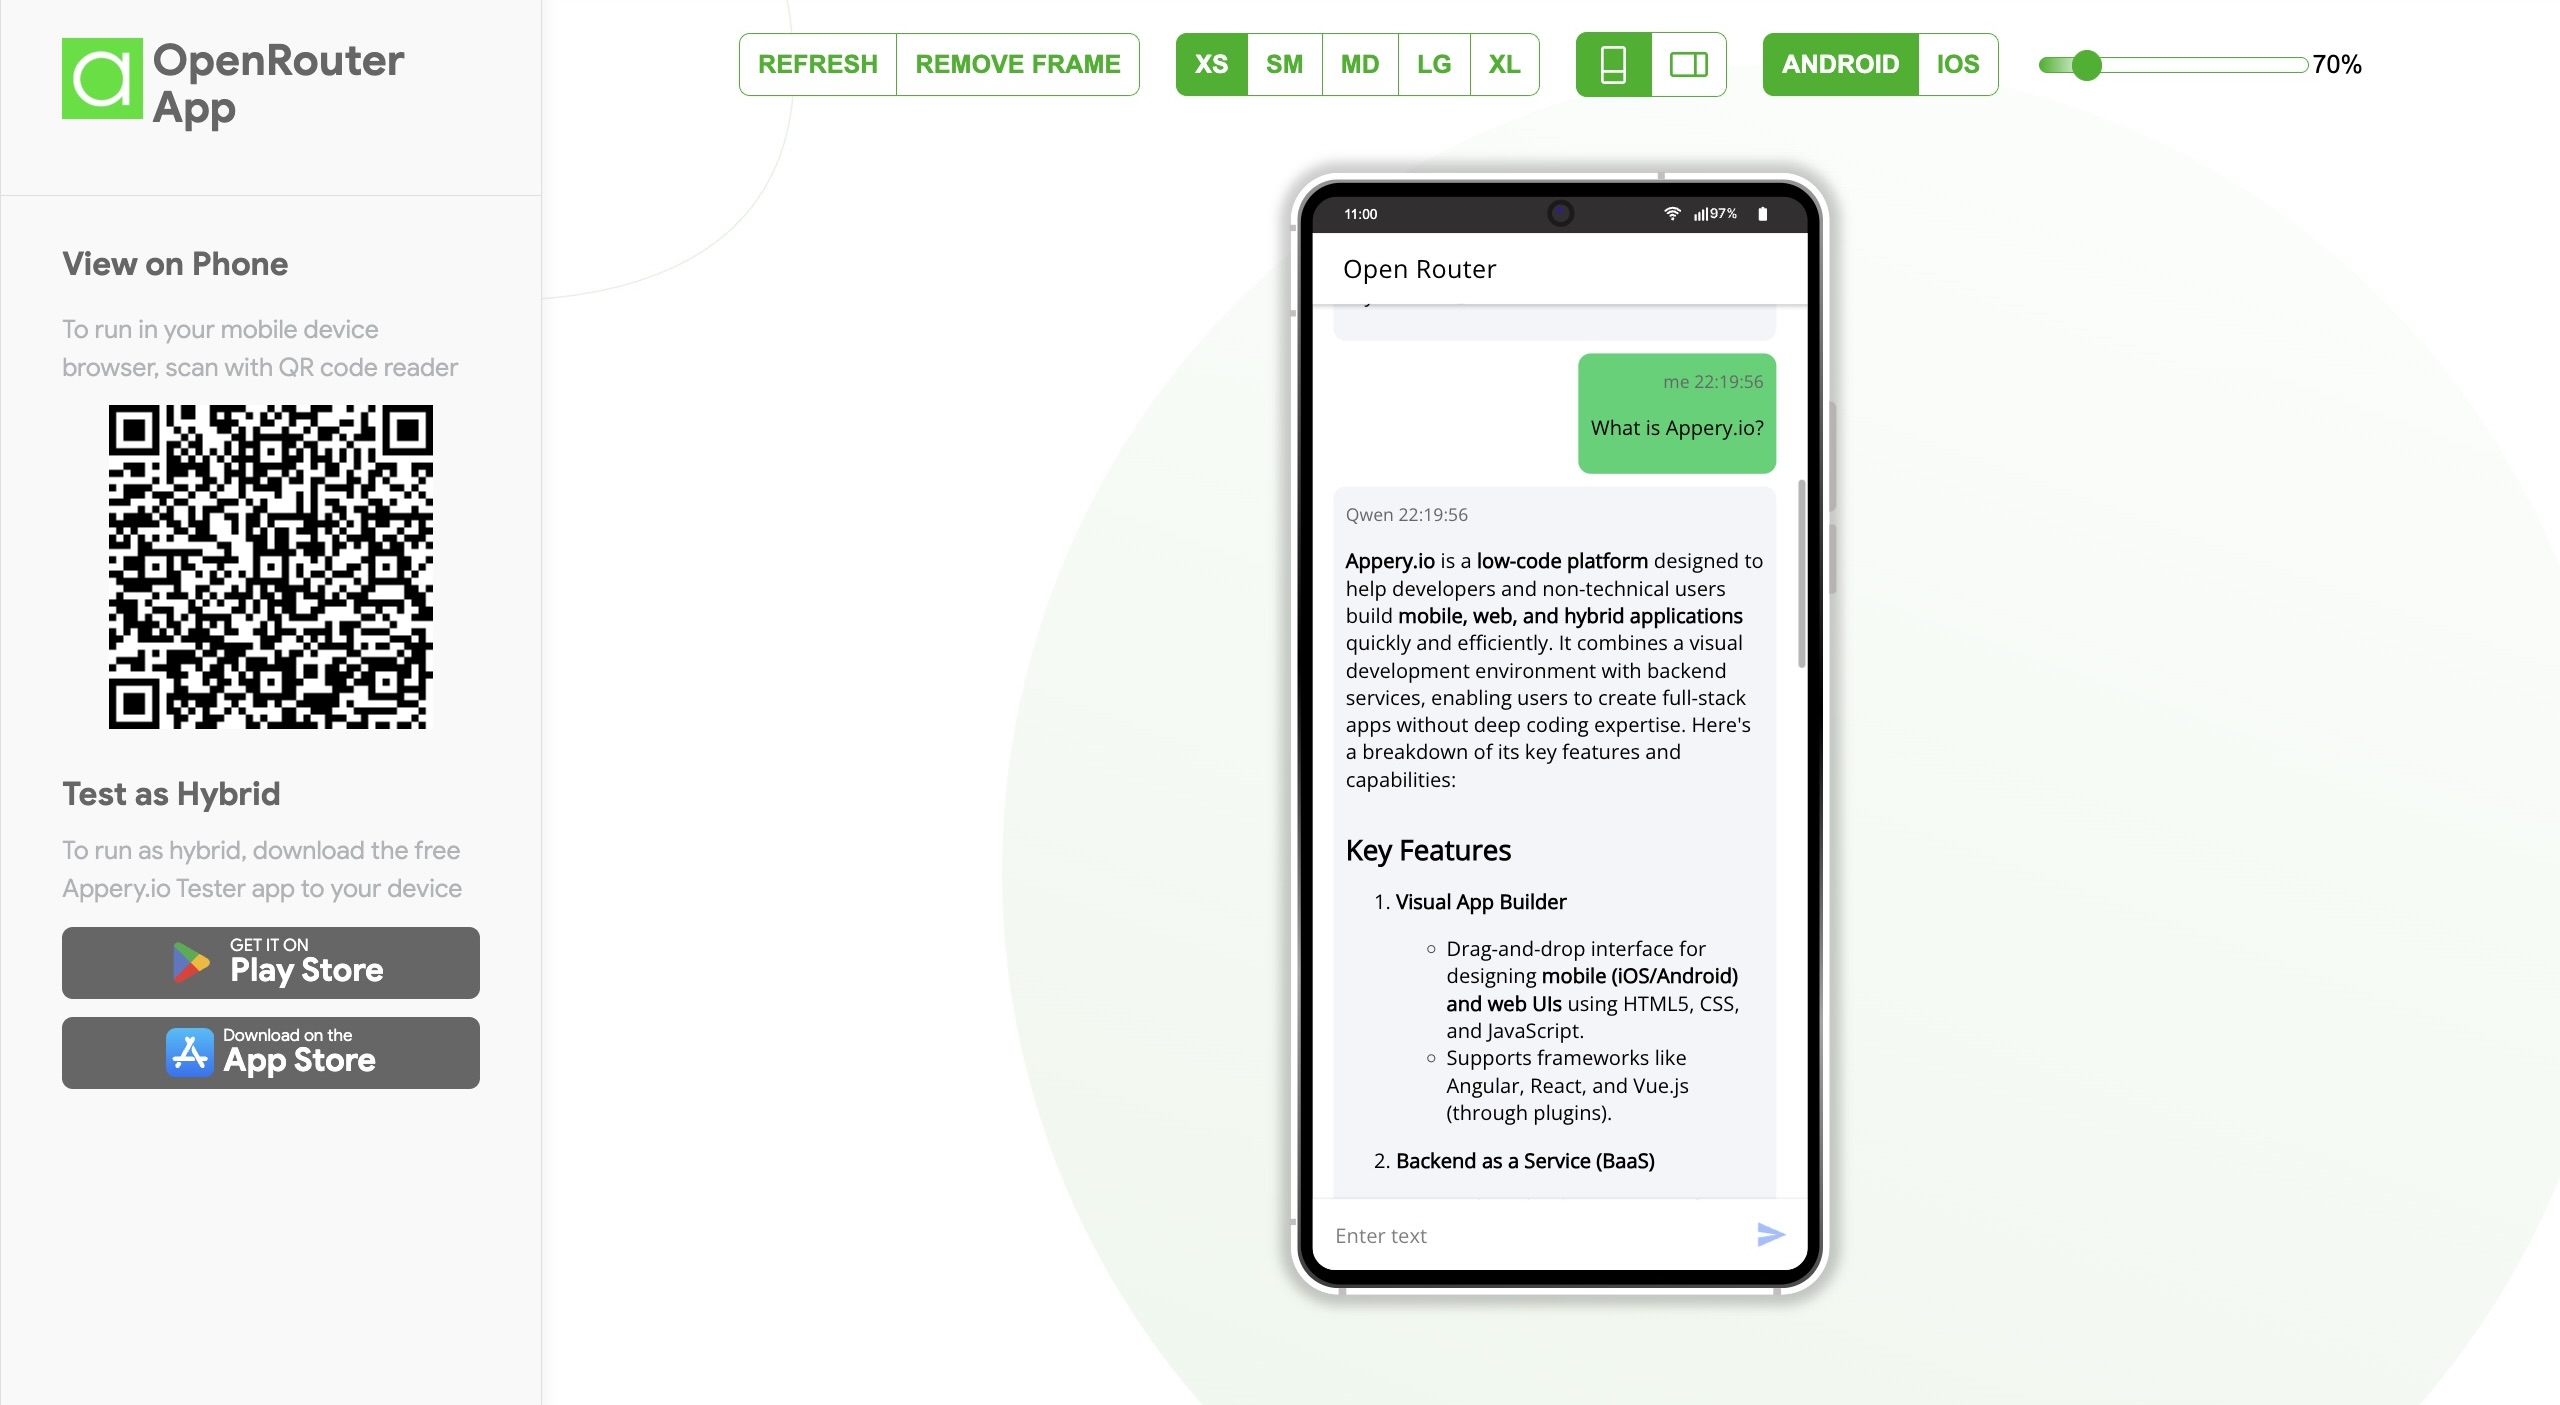
In our latest YouTube video, we demonstrate how to combine OpenAi o1-preview with Appery.io to create a mobile app that tests and compares this new model’s capabilities with the well-known ChatGPT-4o. The results are astonishing!

Imagine building powerful apps without writing a single line of code. With Appery.io, it’s possible! Our video showcases how we set up an app to compare the reasoning skills of OpenAi o1-preview and ChatGPT-4o. You’ll be intrigued to see which model comes out on top.

But we won’t spoil it for you here. To get all the exciting details and see the models in action, head over to our YouTube channel and watch the full tutorial. You’ll discover how OpenAi o1-preview can transform your approach to app development and why Appery.io is the perfect platform to bring your ideas to life.

Don’t miss out on this opportunity to explore the future of app development. OpenAi o1-preview and Appery.io are paving the way, and you can be at the forefront.

Watch our video, subscribe to our channel, and join us on this innovative journey!

Enhance Your App Now: Simplify Powerful Cloud Database Integration!

Diving into mobile app development? Enhance your app’s capacity effortlessly by integrating it with a cloud database. In our new video guide, we take you through an easy-to-follow guide on setting this up using Appery.io, making your app more dynamic and robust.

Why Cloud Databases?

Cloud databases provide a scalable, secure, and efficient way to manage app data. Whether it’s Amazon RDS, SQL Server, or PostgreSQL, these platforms help you handle large volumes of data without compromising on performance. The best part? Appery.io supports various databases, opening a realm of possibilities for your applications.

Getting Started with Database Connection

First, log into the Appery.io App Builder. Go to the API Express tab and create a new database connection. This process is user-friendly and supports different database types. For instance, connecting to a PostgreSQL database is as straightforward as inputting credentials and testing the connection for viability.

Exposing Database Data via REST Service

Once your database is connected, the next step is to expose your data. This involves creating an API Express project that allows your app to communicate with the database via RESTful services. You’ll find this feature particularly useful as it forms the backbone for data interaction within your app.

Building and Testing Your Mobile App

The final step is the most exciting—building your mobile app. Appery.io simplifies this with features that accommodate both no-code and low-code development approaches. Start by creating a new app and dragging the necessary components like Lists or Buttons onto your app’s screens. Then, integrate the services you’ve created to fetch or input data into your cloud database.

Real-World Application: Dynamic Data Handling

To illustrate, imagine your app displays a list of data entries from a cloud PostgreSQL database. You can enhance this by adding functionalities like creating new data entries through the app. This not only makes your app interactive but also practical for real-world use. Testing these functions within Appery.io is straightforward and gives you a firsthand look at your app’s performance.

Conclusion: Embrace the Power of Integration

By integrating cloud databases into your mobile apps, you unlock new layers of functionality and efficiency. As demonstrated in our video guide, the process can be surprisingly simple yet incredibly impactful. Whether you want to improve an existing app or start a new project, cloud database integration is a gateway to more sophisticated and responsive app solutions.

Ready to enhance your mobile app? Dive into cloud database integration and watch your app’s potential unfold!

Check Out These Brand New Ionic 4 Tutorials and Guides

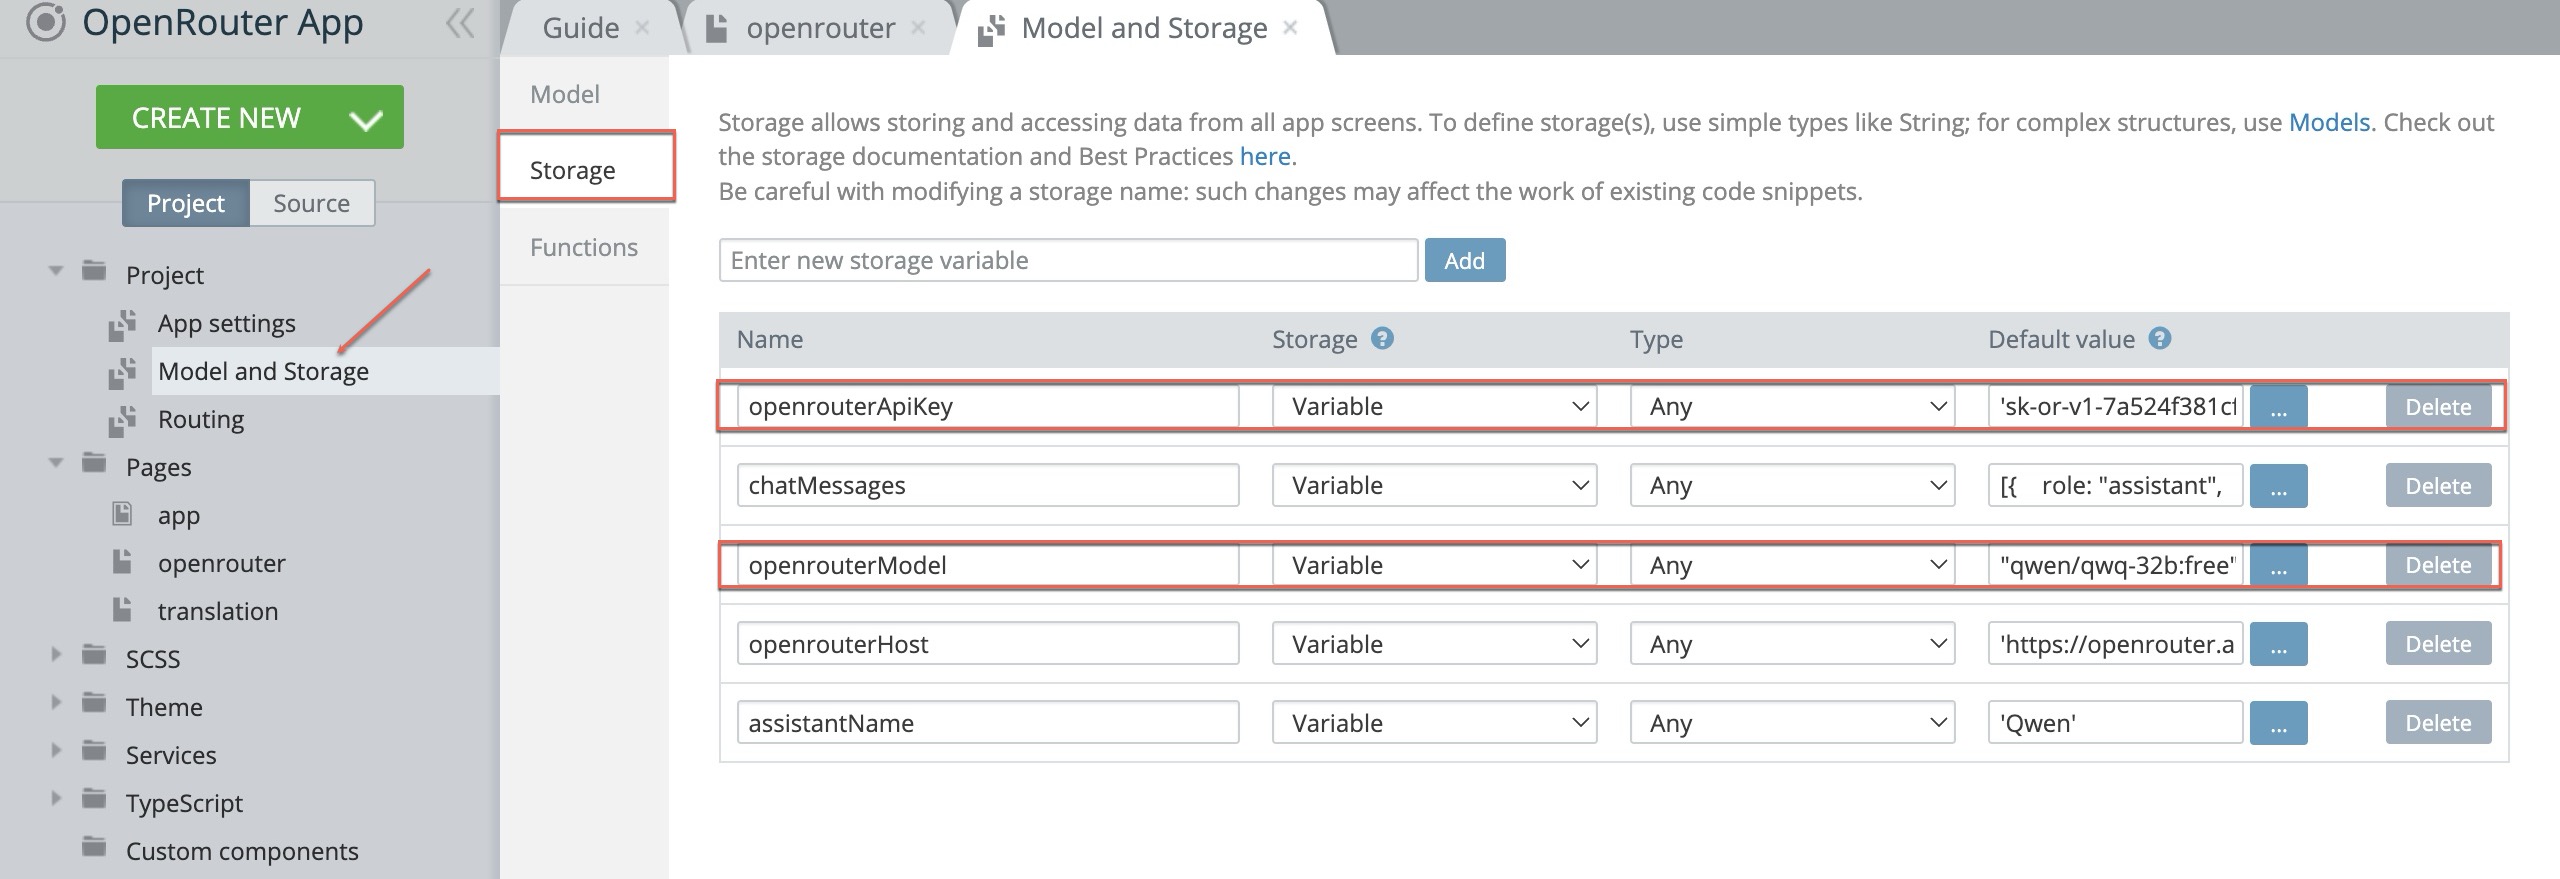
New Ionic 4 tutorials and guides are out! They focus on the most in-demand features of Ionic 4 like push notifications and linking Appery.io projects to databases of different types, so these should be of great interest to our user community.

Check out these six resources:

  • Ionic 4 Todo List Tutorial
  • Working with Appery.io Database and Server Code
  • Ionic 4 File Upload App Using Cordova Plug-ins
  • Ionic 4 Two-factor Authentication
  • Push Notifications for Ionic 4 Apps
  • Creating a Development Environment for Ionic 4 Projects

Ionic 4 Todo List Tutorial

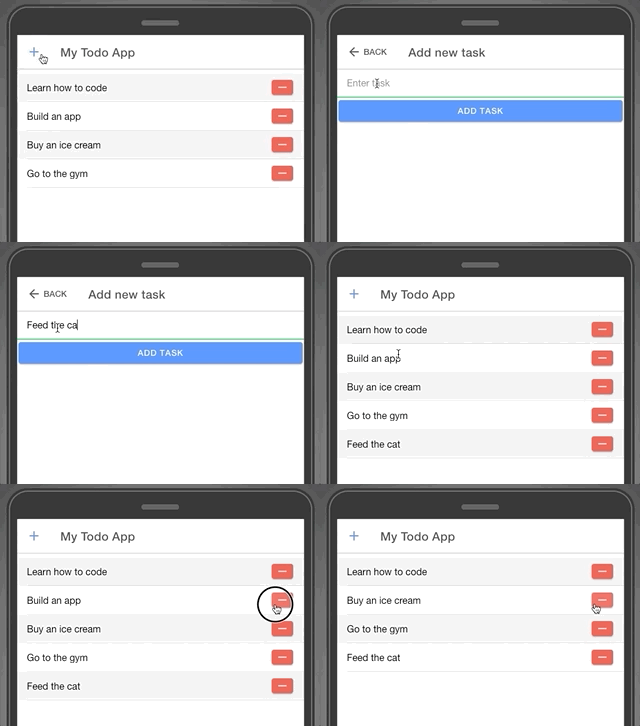
First on the list is an easy-to-follow and very detailed Ionic 4 Todo List Tutorial explaining how to build a mobile app that displays a list of data from a cloud database and communicates with the database via a REST API. (A nice name for a to-do-tutorial, don’t you think?) What’s really useful for those only starting their Appery.io experience is that this tutorial shows how to create an Appery.io database from scratch and integrate the database service into the project.

As a bonus feature, new users can also just follow the tutorial to create the app from a ready-to-go backup.
ToDo

Working with Appery.io Database and Server Code

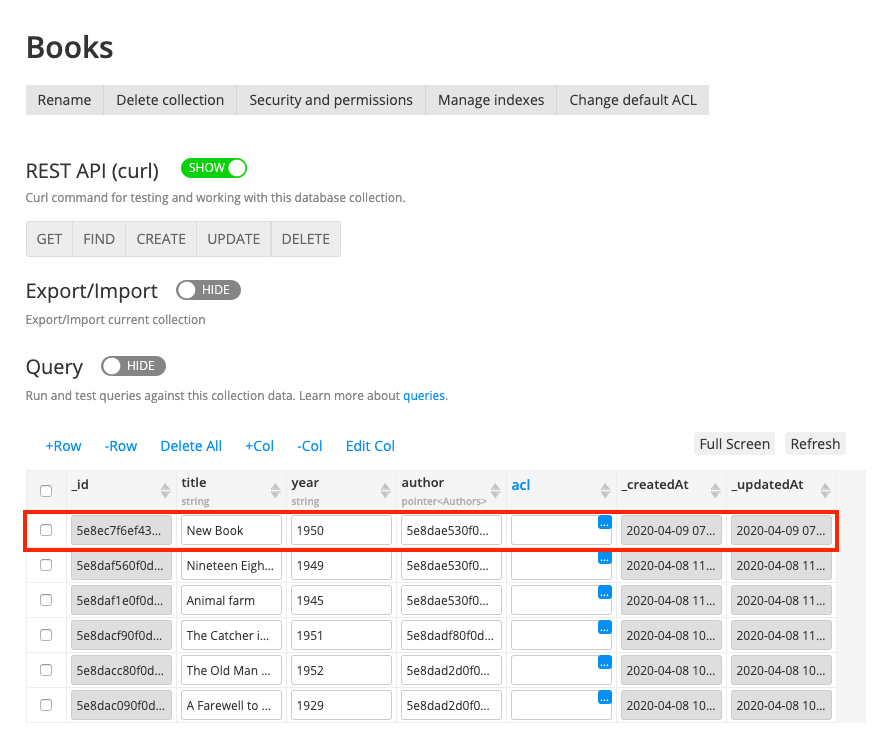
In yet another detailed guide, Working with Appery.io Database and Server Code, we show you how to work with the Appery.io NoSQL Database using Server Code scripts. This will be welcomed by more advanced users, but should also not be too difficult for those who have just joined Appery.io. You will learn how to access the database and perform all the basic CRUD operations on the data stored: creating, reading, editing, and deleting with the Server Code Collection API.
DatabaseSC

Ionic 4 File Upload App Using Cordova Plug-ins

Another tutorial describes how to create an Ionic 4 app that can upload files from the device to Firebase project storage using several Cordova plug-ins: Ionic 4 File Upload App Using Cordova Plug-ins.

FirebasePhotosUploaded

Ionic 4 Two-factor Authentication

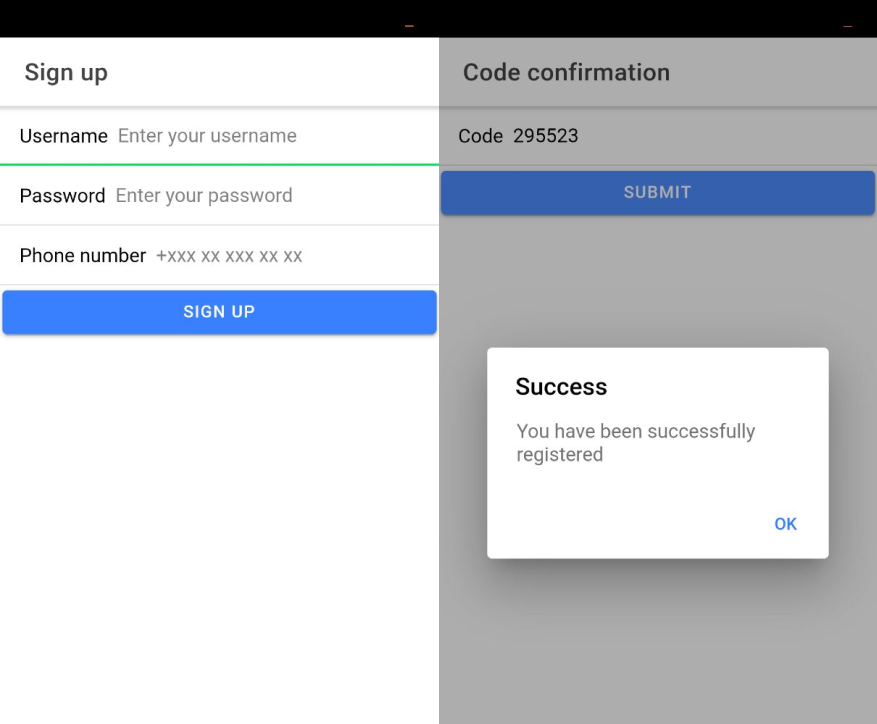
The next guide, a two-part guide, Ionic 4 Two-factor Authentication, will walk you through the process of adding two-factor authentication using Twilio and a user registration feature with phone binding to your Appery.io app. In the first part, you will learn how to add a user registration feature with phone binding. In the second part, you will learn how to automatically read verification codes on Android devices.
2FactorAuth

Push Notifications for Ionic 4 Apps

The following quickstart tutorial will undoubtedly be very popular as it describes how to set up sending push notifications for Ionic 4 projects: Push Notifications for Ionic 4 App.
PN

Creating a Development Environment for Ionic 4 Projects

And, last but not least, here’s the expert-level document that demonstrates how to create a development environment to be used for debugging the changes you have made for your app’s next release without interfering with the the app version in production: Creating Development Environment for Ionic 4 projects.

May 2020 Release: Small Things, Big Difference

The May release for Appery.io mobile app platform is coming this weekend. The main new additions are:

  • Default Proxy
  • Ionic 4 DateTime component

Default Proxy

Our current implementation only allows calling REST services via the API Express service. Many users find this feature to be convenient. But, not all user do.

Starting with this release, you will be able to connect your REST APIs via proxy. We had such a feature a long time ago, but now we are reintroducing  it—this time much faster and even more stable.

Ionic 4 DateTime Component

We are constantly improving on our most advanced framework, Ionic 4. In this release, we are adding the DateTime component:

DateTime presents a picker interface at the bottom of a page, making it easy for users to select dates and times.

Bug Fixes

We work hard every day on bug fixes, many of which are rolled into this release. We are really happy to have you using Appery.io, so we want to make the platform the smoothest, most comfortable, most reliable place to work in possible.

Learn How to Send an SMS with Twilio in 5 Minutes

Twilio is a wonderful communication as a service platform that allows sending SMS messages from your app via a REST API. In this blog post you will learn how to send an SMS message from the Appery.io Server Code in about 5 minutes.

  1. Sign into your Appery.io account (you will also need to have a Twilio account).
  2. Go to the Server Code page.
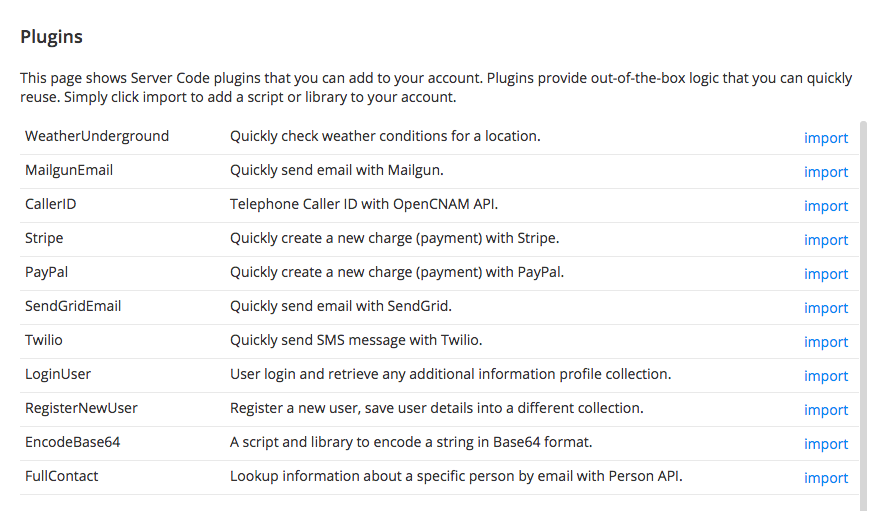
  3. Server Code has a built-in Twilio SMS plug-in. You just need to add it to your account. Go to the Plugins tab. You will see a list of Server Code plugins:

    Server Code plug-ins

    Server Code plug-ins

  4. Locate the Twilio plugin (Quickly send SMS message with Twilio) and click import. A script called Twilio_SendSMS that sends the SMS will be inserted in the Script panels. A library called Twilio_Base64_library that helps with authentication will also be inserted in the Library panel.
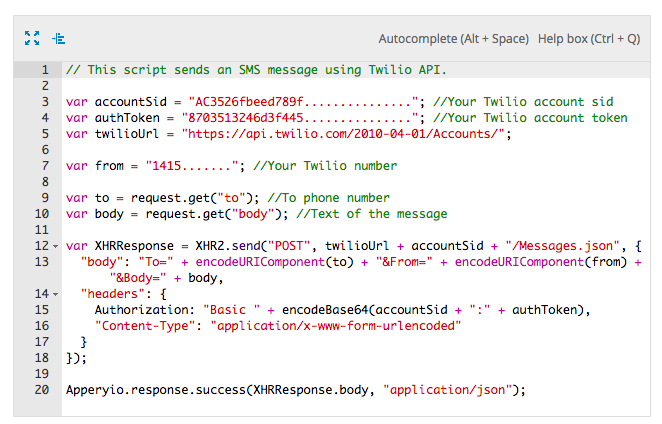
  5. Open the Twilio_SendSMS script:
    var accountSid = ""; //Your Twilio account sid
    var authToken = ""; //Your Twilio account token 
    var twilioUrl = "https://api.twilio.com/2010-04-01/Accounts/";
    
    var from = ""; //Your Twilio number
    
    var to = request.get("to"); //To phone number
    var body = request.get("body"); //Text of the message
    
    var XHRResponse = XHR2.send("POST", twilioUrl + accountSid + "/Messages.json", {
      "body": "To=" + encodeURIComponent(to) + "&From=" + encodeURIComponent(from) + "&Body=" + body,
      "headers": {
         Authorization: "Basic " + encodeBase64(accountSid + ":" + authToken),
         "Content-Type": "application/x-www-form-urlencoded"
      }
    });
    
    Apperyio.response.success(XHRResponse.body, "application/json");

    You need to set the accountSid, the authToken and your Twilio phone number. You can find this information in the Twilio console.

    Twilio SMS

    Twilio SMS

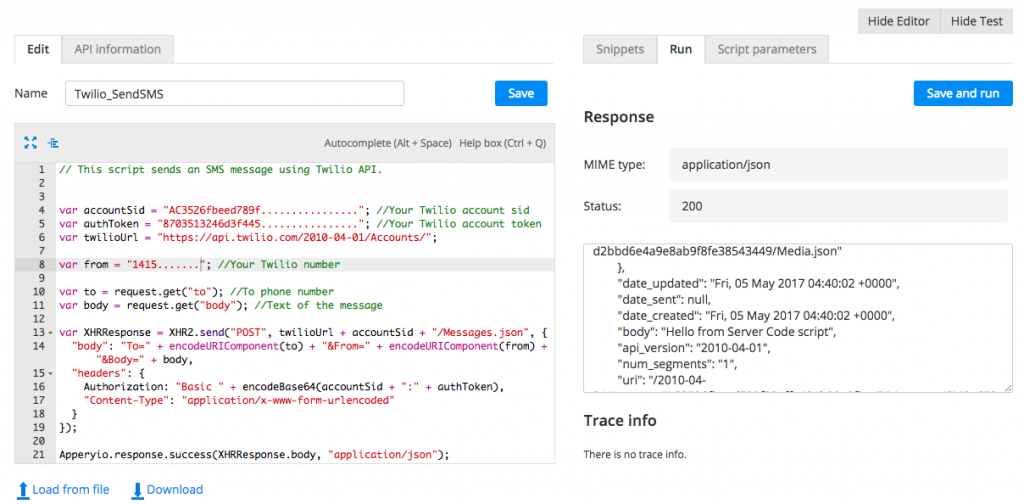
  6. Once you set those values you are ready to test the script. Switch to Script parameters tab.
  7. Add two parameters:
    1. to (that’s the number where the message will be sent)
    2. body (that’s the message)
      These are request parameters into the script (and the API) and are read on lines 9-10.
  8. Switch to Test tab and click the Save and run button.

Testing Twilio SMS API

Testing Twilio SMS API

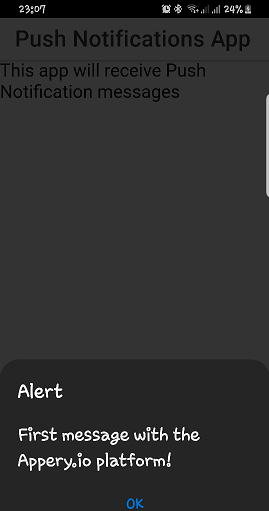
And this is how it looks on the phone:

SMS message

SMS message

Once you tested the Server Code script, it can be quickly added to your app. Here is a video that shows how to import services into an app. Every Server Code script is also an automatically a REST API. To see the endpoint for this script switch to API information tab. To learn more about Server Code, check our the Server Code YouTube playlist where you will find many short videos.

How to Convert Phone Numbers Into Real Business Data with EveryoneAPI

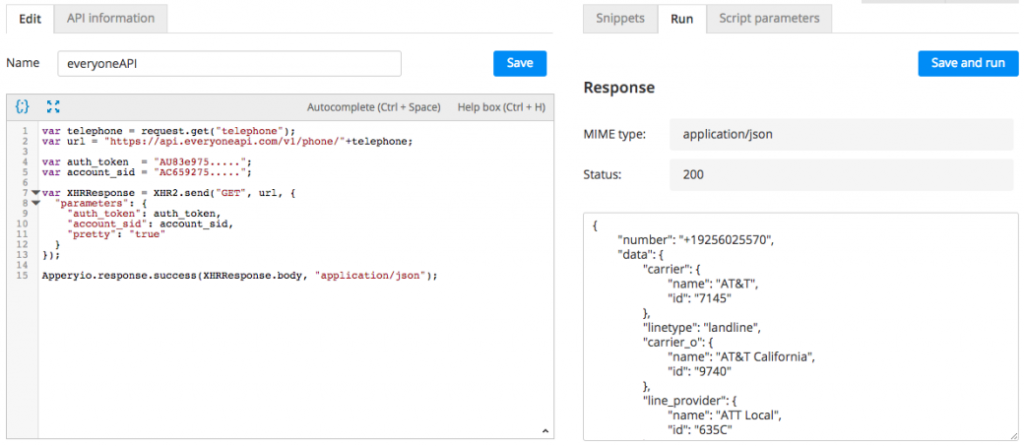
EveryoneAPI by Telo allows to convert a phone number into real business intelligence with a simple API request. The complete reverse phone append product is simple to use, yet powerful and built for developers by developers. As you probably already know, integrating with any 3rd party REST API using the Appery.io Server Code is also simple. In this blog post, I will show you how to invoke a test a script that calls the Everyone API.

To start, create a new Server Code script with the following code:

var telephone = request.get("telephone");
var url = "https://api.everyoneapi.com/v1/phone/"+telephone;
var auth_token = "AU83e975.....";
var account_sid = "AC659275.....";

var XHRResponse = XHR2.send("GET", url, {
"parameters": {
"auth_token": auth_token,
"account_sid": account_sid,
"pretty": "true"
}
});
Apperyio.response.success(XHRResponse.body, "application/json");

The only thing you need to do, is to replace the auth_token and account_sid with values from your account. Sign up for an account here. It’s fast and simple.

The phone number for which you want to get information is passed as a parameter to the script (line 1). To test the script, switch to Script parameter tab (on the right side), enter a parameter called telephone and then set it to a test value. Here is an example testing the API using the Appery.io telephone number:

Server Code script

Server Code script

Once you finished and tested the script, you easily import into your app. This video shows how to do that.

Looking for more APIs by Telo? Check out the CallerID Server Code plug-in:

Plug-ins

Plug-ins

This plug-in creates a Server Code script that integrates with OpenCNAM API. The OpenCNAM API allows you to get caller ID information for phone number provided.

Moving App Logic to the Server: How to Query the Database from a Server Code Script

The Appery.io Database provides storage for your mobile app data. You can store data such as users, orders, purchases, products or anything else. The Appery.io Database is a cloud NoSQL database and provides a very simple and elegant REST API to work with the database.

One of the most common cases for an enterprise mobile app is to create/save a new item/record and then redisplay the list in the app with the newly created item.

Accessing the database directly from the client is fine but requires two requests to the database.

  1. A request to save the new item/record into the database.
  2. Once the 1st request completes, on its success, a request to get the updated list to display in the app.

A better approach is to do both the create and list in a single request from the app. This is very simple to do from Appery.io Server Code script. The following script shows how to create a new record and then get the updated list:

var dbId = "cdaec951....d8";
var collectionName = "People"
 
var newName = request.get("name");
var newTitle = request.get("title");
 
// Save new object into the collection
Collection.createObject(dbId, collectionName, {
   "name": newName,
   "title": newTitle
});
 
// Retrieve updated data from the collection
var result = Collection.query(dbId, collectionName);
// Return the updated list (including the new object)
Apperyio.response.success(result, "application/json");

In this simple script you first create a new Person object (line 8) and then do another query to get the updated list of people (line 14). The script response returns the updated list of people. This script automatically has a REST API which is the invoked from the app.

What’s most important, there is only a single request from the app to the Server Code script. A single request is usually better than two requests. Also, you can add additional logic to the script without impacting the app. For example, you can send an email when a new person is added. Or, you can send  Push Notification when a new person is added. All this can be done without impacting the app. That’s nice.

If you want to learn more about Server Code, check out our YouTube channel Server Code playlist.

How to Expose a SOAP Service as a REST API

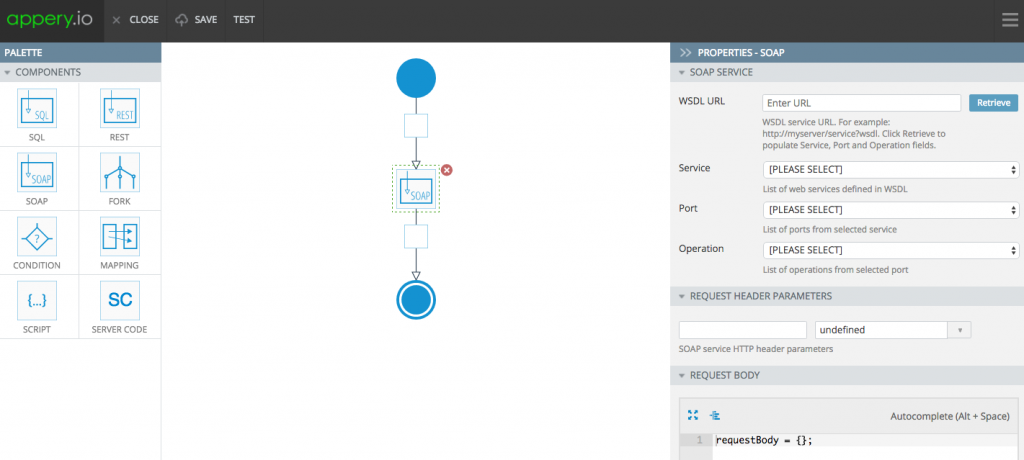
apiexpress-soap

Appery.io API Express make it fast and simple to connect to an enterprise data source and expose it via a REST API. With API Express you can quickly create an API for:

  • A relational database
  • A WSDL service (SOAP)
  • An existing REST API

In this tutorial, I’m going to show how to expose an existing WSDL service as a REST API and then build a mobile app using the API.

Read the rest of this entry »

Learn How to Send an SMS with Twilio in 5 Minutes

Twilio is a wonderful communication as a service platform that allows sending SMS messages from your app via a REST API. In this blog post you will learn how to send an SMS message from the Appery.io Server Code in about 5 minutes.

  1. Sign into your Appery.io account (you will also need to have a Twilio account).
  2. Go to the Server Code page.
  3. Server Code has a built-in Twilio SMS plug-in. You just need to add it to your account. Go to the Plugins tab. You will see a list of Server Code plugins:

    Server Code plug-ins

    Server Code plug-ins

  4. Locate the Twilio plugin (Quickly send SMS message with Twilio) and click import. A script called Twilio_SendSMS that sends the SMS will be inserted in the Script panels. A library called Twilio_Base64_library that helps with authentication will also be inserted in the Library panel.
  5. Open the Twilio_SendSMS script:
    var accountSid = ""; //Your Twilio account sid
    var authToken = ""; //Your Twilio account token 
    var twilioUrl = "https://api.twilio.com/2010-04-01/Accounts/";
    
    var from = ""; //Your Twilio number
    
    var to = request.get("to"); //To phone number
    var body = request.get("body"); //Text of the message
    
    var XHRResponse = XHR2.send("POST", twilioUrl + accountSid + "/Messages.json", {
      "body": "To=" + encodeURIComponent(to) + "&From=" + encodeURIComponent(from) + "&Body=" + body,
      "headers": {
         Authorization: "Basic " + encodeBase64(accountSid + ":" + authToken),
         "Content-Type": "application/x-www-form-urlencoded"
      }
    });
    
    Apperyio.response.success(XHRResponse.body, "application/json");

    You need to set the accountSid, the authToken and your Twilio phone number. You can find this information in the Twilio console.

    Twilio SMS

    Twilio SMS

  6. Once you set those values you are ready to test the script. Switch to Script parameters tab.
  7. Add two parameters:
    1. to (that’s the number where the message will be sent)
    2. body (that’s the message)
      These are request parameters into the script (and the API) and are read on lines 9-10.
  8. Switch to Test tab and click the Save and run button.

Testing Twilio SMS API

Testing Twilio SMS API

And this is how it looks on the phone:

SMS message

SMS message

Once you tested the Server Code script, it can be quickly added to your app. Here is a video that shows how to import services into an app. Every Server Code script is also an automatically a REST API. To see the endpoint for this script switch to API information tab. To learn more about Server Code, check our the Server Code YouTube playlist where you will find many short videos.

How to Send a Fax Using Twilio Fax API

twilio_fax

Last week Twilio launched a new API that allows to send faxes. From the very start Appery.io platform made it very simple to connect to any external REST API. We love Twilio API and have an example and video on how to use the SMS API. The Fax API is as elegant and simple to use. In this blog post you will learn how to send a fax using the Twilio Fax API from a Server Code script.

Create a new Server Code script and copy the following script:

var url = "https://fax.twilio.com/v1/Faxes";
var accountSid = "AC3526fbeed7...............";
var token = "8703513246d3f445e............";
var to = "To number";
var from = "Your Twilio number"
var mediaUrl = "https://www.twilio.com/docs/documents/25/justthefaxmaam.pdf";

var XHRResponse = XHR2.send("POST", url, {
   "body": "To=" + encodeURIComponent(to) + "&From=" + encodeURIComponent(from) + "&MediaUrl="+mediaUrl,
   "headers": {
      Authorization: "Basic " + encodeBase64(accountSid + ":" + token),
      "Content-Type": "application/x-www-form-urlencoded"
   }
});

Apperyio.response.success(XHRResponse.body, "application/json");

The script is simple and does a POST request to the Twilio Fax API.

Line 1 is the Twilio Fax API endpoint.

Line 2 and 3 are Twilio Account SID and Auth Token. You can get both from the console dashboard.

Line 4 is where to send the fax (number).

Line 5 is your Twilio number.

Line 6 is a link to a document you want to fax. You can set it to any PDF file accessible via a direct link (or use the sample one provided by Twilio).

Line 8 is where the POST request is invoked with all the information.

Twilio Fax API uses Basic Authentication so the Account SID and Auth Token need to be encoded as Base64. There is an out-of-the-box plug-in that you can add to your account. The plug-in has a function to encode a string as Base64.

  1. Open the dropdown list (on the left) and select Back to list.
  2. Open the Plugins tab.
  3. Find the EncodeBase64 plugin and click insert to add it to your account. The plugin will be listed in the Library section. You can now use it in any other script.
  4. One more step is to add this library as a dependency for your script. Open that script you created. Go to Dependencies tab and click on EncodeBase64_Library.

You are ready to test the script.

Go back to the Script tab and open the Run tab (on the right). Click on Save and run button to invoke the API and send the fax.

The response should look like this:

{
   "date_updated": "2017-04-06T13:13:40Z",
   "date_created": "2017-04-06T13:13:40Z",
   "num_pages": null,
   "api_version": "v1",
   "media_url": null,
   "url": "https://fax.twilio.com/v1/Faxes/FX225bab5034cb8a335c45...............",
   "sid": "FX225bab5034cb8a335c45...............",
   "quality": "fine",
   "duration": null,
   "price_unit": null,
   "price": null,
   "account_sid": "AC3526fbeed7...............",
   "from": "+1415xxxxxxx",
   "to": "+1925xxxxxxx",
   "status": "queued",
   "direction": "outbound"
}

You can navigate to the URL set in the url attribute – there you will be able to see the status of the sent fax (the browser will ask you to login, use the Account SID and Auth Token values).

It can take a few minutes for the fax to be delivered, keep that in mind when testing.

To learn more about Server Code check out our YouTube playlist. Happy faxing.