New Mobile Tutotial: Building Clickable List Mobile App with HTML5 Local Storage
New tutorial shows how to build an app with clickable list (master details) and uses HTML5 Local Storage.

New tutorial shows how to build an app with clickable list (master details) and uses HTML5 Local Storage.
Mapping mobile UI to service is one of the most basic tasks in any mobile app (or a standard Web application). Input data entered by the user is sent to the service (input), the service is invoked, returns data (result) is sent back to the app for displaying results. Appery.io Mobile Apps Builder makes it super easy to map UI to service. Let’s look at an example.
REST service settings:
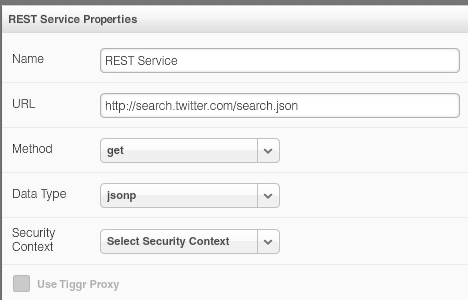
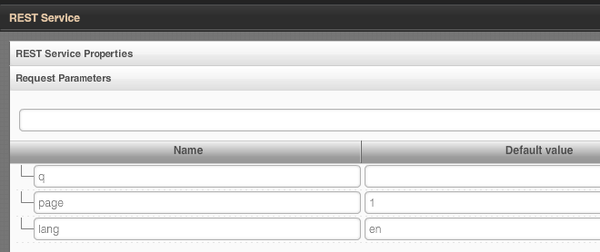
REST service input parameters:
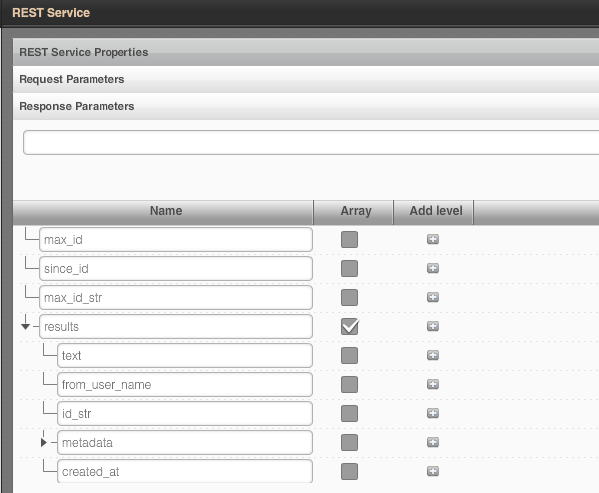
REST service output parameters:
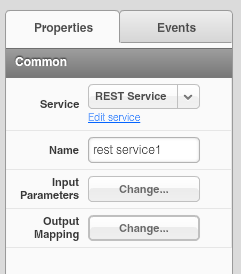
To open the standard mapping editor, there are two buttons in properties for a service:
Mapping UI to service look like this:

The service input parameters are on the left and are mapped to input components and properties on the right.
Mapping service back to UI for displaying the result looks like this:
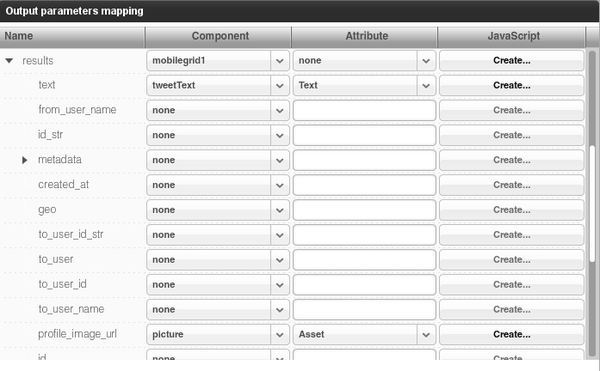
The service output parameters are on the left and are mapped to output components and properties on the right.
Now there is even a more visual way to do the same. There is a new Data Mapping tab in the main editor, clicking the tab will open a visual data mapping editor:
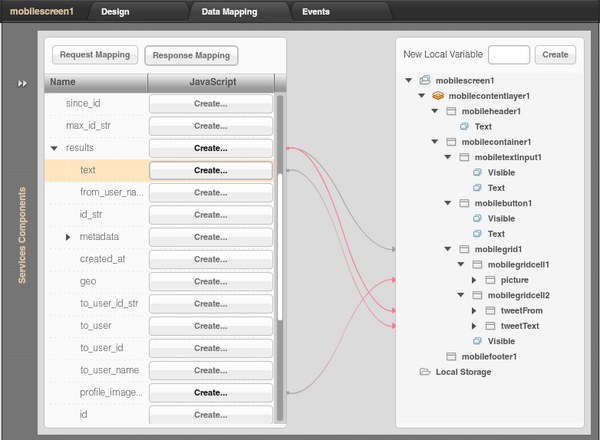
That’s a pretty cool way to do mobile UI to REST service mapping.
Appery.io Mobile Apps Builder recently added a number of new components: Contacts, Geolocation, and Google Map. Contacts and Getlocation are new native components and are located in Device palette:
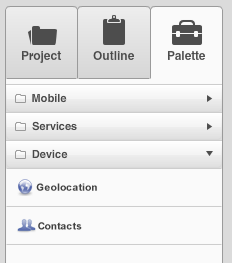
This post is going to show you how to use the Contacts component. Once a new mobile app project is created (make sure to select Blank Mobile App, from Native tab), simply drag and drop Palette > Device > Contacts component into the mobile screen. Once the component is added, it will be shown on the left-hand side.
To keep the example simple, we are only going to display name and phone number of a contact. To display the contacts, we are using a List component and placing two Labels inside it, one for name and one for phone number. It looks like this:
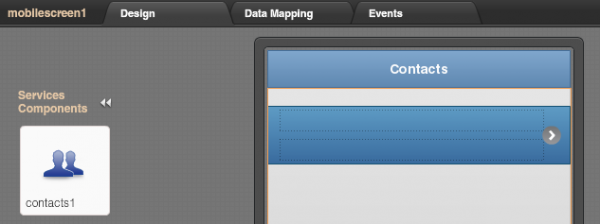
Notice that we also mapped the collection of all contacts (top most $) to the list component itself.
Next is we need to map the component output to the UI. Output mapping looks like this:
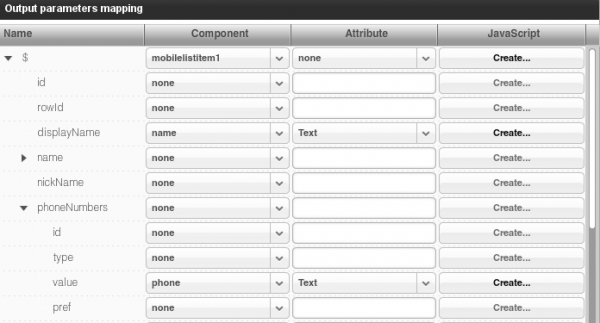
As you can see above, we are only mapping the contact name and contact email. Just a few more things left to do.
Add a button to load the contacts:
Add click event to the button and attach Invoke Service action, selecting the contacts service (contacts1).
We are ready to test. Because this is a device component, we would need to test the app on the actual device. But, there is an easier way to test this service. Open Project > Services > Contact service, then open Echo Service panel. You will see some sample date. Click Enable Echo.
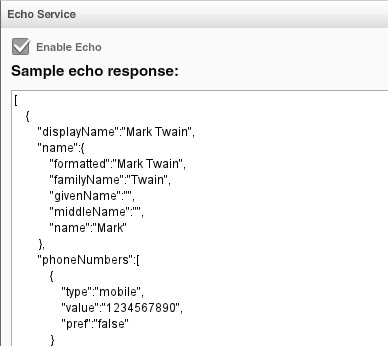
This is a sample contact data and a very simple way to test the app. Using this data we can now test this in the browser.
Click the big Test button to launch the app, the result will look like this:
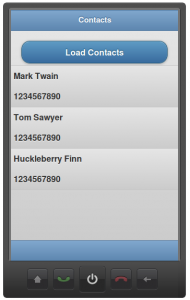
Now we are ready to try this using the contacts on the device. Simply turn off Enable Echo. Save. Now when you ran the app, it will load contacts from your device. The easiest way to run the app on the device is using Appery.io Mobile Tester.
We just added two new tutorial. Try them today:
As Appery.io Mobile Apps Builder continues to grow, we are getting more and more questions. I figured it would be a good time to summarise all the places and ways you can get help and also submit/vote for new features.
All Appery.io docs, getting started, videos, how-to’s, future plans and more are located at help.appery.io. If someone is not there, just let us know and we will add it!
The Appery.io forum can be found at http://getsatisfaction.com/apperyio. We recommend to use Appery.io forum as the place to ask questions. Why? Because using the forum other users can see and search for answers. Other Appery.io users maybe be able to help you as well. If you have a question on your account information or want to share a private REST service URL, don’t hesitate to use email (below).
Let’s say there is a new feature you would like us to add. Voting for new feature is very simple. Just go to Popular ideas section and enter your feature.
If you feel more comfortable with email, just send us your questions to support@appery.io
When you open a Appery.io project, at the bottom of the screen you will see the following field:

Just enter a short question and click Submit. We will get an email with your question and reply to it.
Twitter is a great way to get help, you can find us at @apperyio.
Facebook is also a great way to get help, you can find us at facebook.com/apperyio.
No matter which help option you select, we will try to answer your questions as soon as possible.
In the context of mobile apps, basic access authentication is way for a Web browser to provide user name and password when invoking a REST service. A REST service that requires basic access authentication will look like this:
https://username:password@www.host.com/products
As you can see we are using https: and passing the username and password to the service.
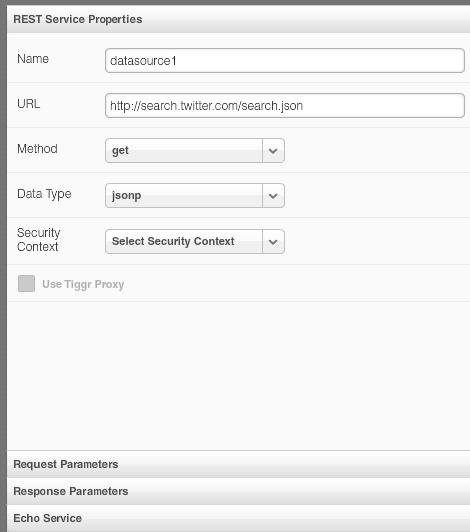
Working with REST services (that return JSON or XML) is very easy in Appery.io Mobile Apps Builder. Appery.io comes with a service editor where you define service settings such as URL, and data format type (JSON, JSON, or XML). Request Parameters – for defining service inputs. Response Parameters – for defining service outputs.
Service properties for Twitter Search REST API:
Another very important feature of the service editor is the ability to test the service right from Appery.io. Here is an example testing Twitter search service:
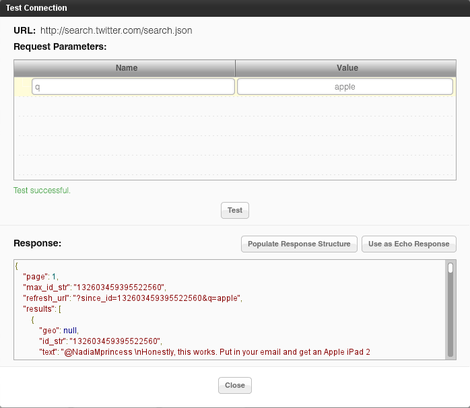
From this screen you can also automatically create the service’s response parameters by clicking Populate Response Structure button.
Now, if you have a service that requires basic access authentication, you would simply enter the URL in the service settings:
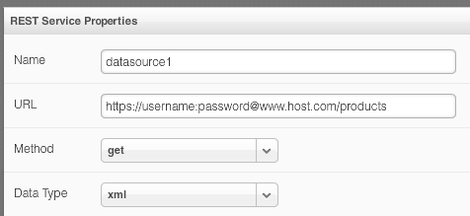
The next step is usually to enter service request parameters and then test the service. But, when you test the service, the service will fail with a message like this:
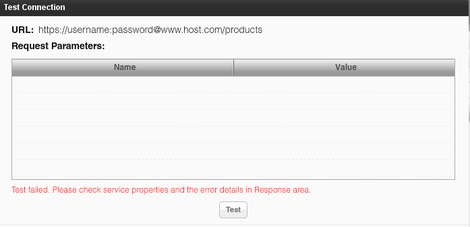
Why does it fail? When you use a URL such as: https://username:password@www.host.com/products, basic access authentication is only supported by the Web browser. When you test the URL inside Appery.io, it does a regular GET request, without the basic access authentication and the service fails. When you run the actual app, everything should work, as request will be coming from the Web browser. We are looking at how to update the test feature to support basic access authentication.
What if you still want to create the service response parameters automatically? That’s still pretty easy to do. Run the service in Web browser. Copy the output. Open Response Parameters panel in service editor. Click Populate from Sample Response. Paste the response. Click Populate Response Parameters. That’s it. Again, keep in mind that when running the mobile app, everything will be working.
Navigating between pages in Appery.io is very simple. You first add an HTML event to a component, such as click for a button, and then add Navigate To Page action where you select the page to navigate:
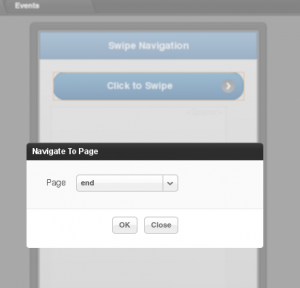
This works very well, but it will replace the entire page. An alternative way to navigate or transition between pages is to use jQuery swipe transition which in my opinion looks better. Here is how to do it. You use the same event, such as click for a button. Then, we add Run Custom JavaScript action with the following code:
navigateTo('end', 's');
The first argument is the page name. The second argument indicates that a swipe transition should be done. That’s it. You are probably wondering why not do this via Navigate To Page action? It will be possible soon. We are going to add a check box so you will be able to select what type of transition you would like, a page replace or swipe. For now, this is a very simple work around.
Just scan this QR code:
This video shows how to build a mobile app with Appery.io Mobile Apps Builder.
Appery.io Mobile Apps Builder just added Appery.io Proxy feature. Appery.io Proxy makes it very easy to use any REST service which doesn’t support JSONP. Learn how to use Appery.io Proxy.
HTML5’s local storage is undoubtedly one of the most interesting and most talked about features in the HTML5 technology stack. Local storage is part of Web Storage specification and is supported by all modern browsers (destkop and mobile). Although local storage (or Web Storage) sounds rather sophisticated, the functionality is very easy to use. You basically get a map as storage inside the browser (available to all browser windows). You can insert, delete or read key/value pairs. That’s it. Data stored in local storage (localStorage) will be there when you close and open the browser. There is also session storage (sessionStorage). As the name implies, it will be only available as long as the browser window is open, and will be cleared when browser window is closed.
The only other thing to know is that data saved by a page is only available for a pages from the same domain. In other words, a page loaded from abc.com, doesn’t have access to data saved by page from domain xyz.com.
We are going to going to build an app that looks like the screen shot below. In fact, you can try the app (scan the QR code). Try it on your mobile device as well.
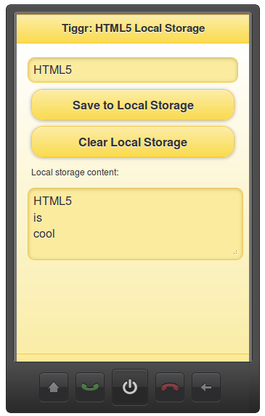
To build the app, I used Appery.io Mobile Apps Builder. If you are wondering why Appery.io? Well, because it’s incredibly simple and fast to create a project and build app. If you don’t have an account yet, quickly sign up here.
First build the UI by dragging and dropping jQuery Mobile components from the palette on to the phone. At any point, you can click Test to try the app in browser, or mobile browser.
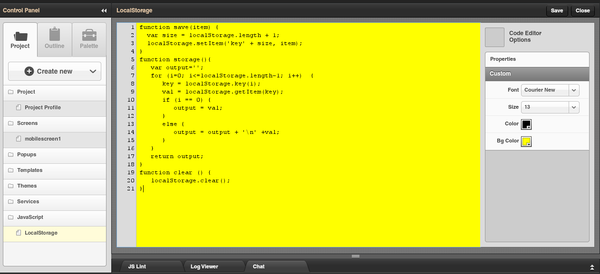
You can use Appery.io to build real mobile apps without writing any JavaScript. But, for more advanced cases (like ours), you can easily write any custom JavaScript. You can even import 3rd party JavaScript libraries. In our case, we are going to create a new JavaScript file (called asset) with the following content:
// save item
function save(item) {
  var size = localStorage.length + 1;
  localStorage.setItem('key' + size, item);
}
// get storage content
function storage(){
   var output='';
   for (i=0; i <= localStorage.length - 1; i++)  {
      key = localStorage.key(i);
      val = localStorage.getItem(key);
      if (i == 0) {
         output = val;
      }
      else {
         output = output + '\n' +val;
      }
   }
   return output;
}
// clear storage
function clear () {
   localStorage.clear();
}
There are three functions, one for saving a new item (save()), one for getting the current storage (storage()) and one for clearing the content (clear()). Local storage API is very simple. For example, to save an item:
localStorage.setItem('key', 'item');
then, to get a value from storage:
localStorage.getItem('key');
This is how the complete file looks inside Appery.io JavaScript editor:
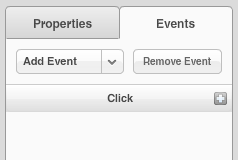
The last step is to invoke JavaScript when the buttons are clicked. We also want to load storage content when the screen is loaded for the first time. Let’s work on the buttons first. To invoke JavaScript on button click, we first add click HTML event to the button:
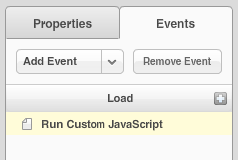
Then we add Run Custom JavaScript action by clicking the + button:
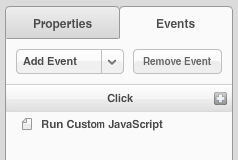
Click on the action to enter JavaScript code. The code for Save to Local Storage button looks like this:
var item =$('[dsid="input"]').val();
save(item);
var output='';
output = storage();
$('[dsid="storageContent"]').text(output);
We first find the input component using jQuery (it’s going to simpler to do that, once we introduce Appery.io JavaScript API, work in progress). Save the value from the input element, reload storage content so we can display it inside the textarea.
Clear Local Storage button looks like this:
clear();
$('[dsid="storageContent"]').text('');
alert('Local storage cleared.');
Lastly, we also add load event to the screen itself so that we can show storage content when the screen loads for the first time:
var output='';
output = storage();
$('[dsid="storageContent"]').text(output);
Try it yourself (it’s easy and fun!).