New Mapping
Update (May 27): links were unlinked as this content not currently available.
Appery.io developers: we just upgraded the mapping feature in Appery.io! It’s now a lot more powerful and flexible. This post is a quick overview of what has changed. The two links (Mapping, Model and Storage) provide more details on the new features. Read this post and then visit the links to learn more.
- Mapping
- Model and Storage
Old mapping
This is how the old mapping looked. This shows a data source (service) has been added to the page:
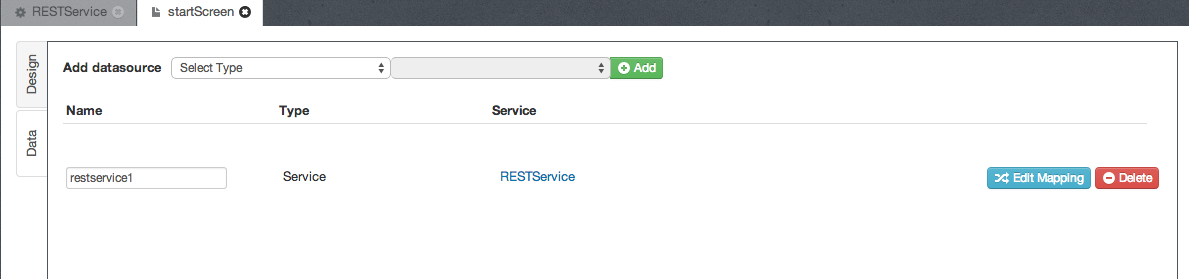
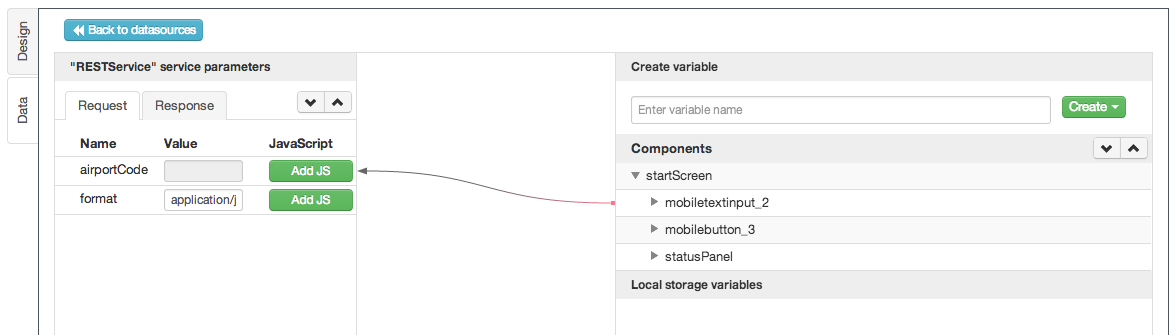
Clicking on Edit Mapping, would open the service request mapping:
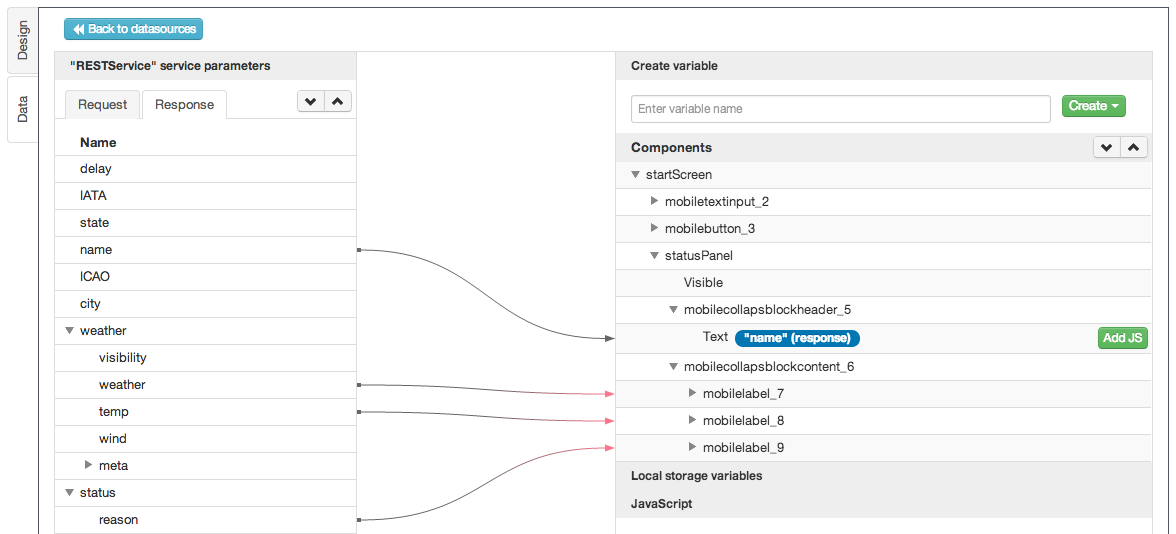
and this is service response mapping:
New service events and mapping
The new mapping is a lot more flexible and greatly simplifies building mobile apps in Appery.io. When you switch to Data view, a data source will now be shown like this. Make sure to click the expand arrow on the left to see the data source events:
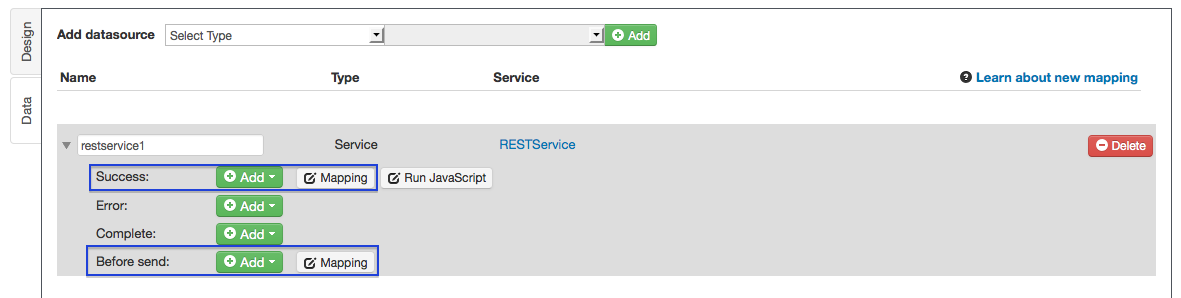
The mapping in Before send event and in Success event – that’s the exact the same old mapping Appery.io had before and the one you are used to. When a service was invoked, the request mapping would happen on Before send event and response mapping would happen on Success event.
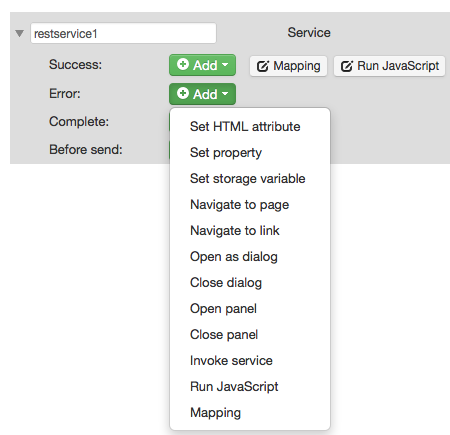
As you can see what we have now is a lot more flexible. In addition to doing mapping, you can now also run any other action (click +Add button to see the actions), plus Run JavaScript which allows you to run any custom script. Plus, you can invoke any action on Error and Complete events. You can even run the new Mapping action on those events!
New Mapping action
The new Mapping action allows you to invoke mapping on any event, not just on service invocation (last in the list):
The new Mapping action can also be invoked from the UI:
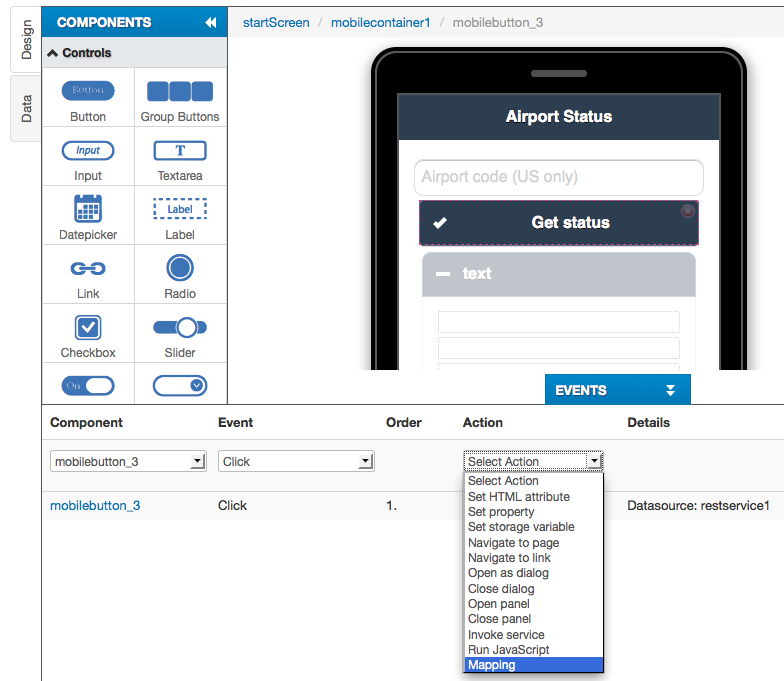
For example, on button click, you can move data from page to storage, or from storage to page:

Mapping: page, service, storage
The mapping is no longer limited to service-page mapping. You can now map data between page, service and storage. This is where the new Mapping actions comes into play. Before you could only map between page and service. Now you can map between page and storage (local storage, session storage). In other words, you can map data from page into storage, or move map data from storage to page. Here is how the new mapping looks:
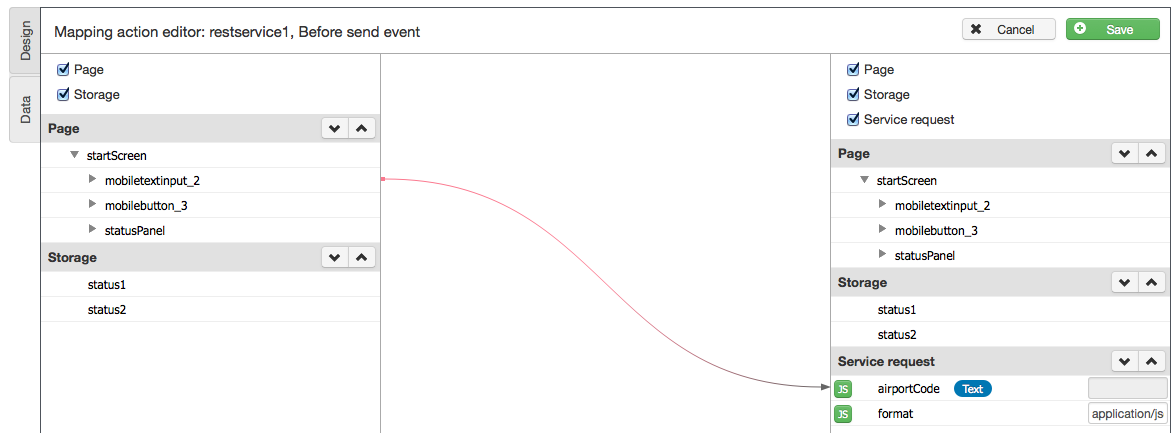
Notice that on the left side there are: Page and Storage. On the right side there are: Page, Storage, and Service Request. With the new mapping, we have simplified mapping between Page, Storage and Service.
Documentation
Please read the following pages that explain in more detail the new features:
- Mapping
- Model and Storage