Claude AI Integration: Quick Setup with Appery.io

Want to integrate Claude AI into your app? You don’t need to be a coding expert. With Appery.io, you can connect Claude AI’s Cloud API to your web or mobile app in just a few steps. This guide will show you how.

Also, if you are into video instructions, you can check our new YouTube tutorial for how to use our new Claude plugin:

Step 1: Create a New App

Start by making a new project in Appery.io. Choose the blank template to get a fresh start. Once created, test it. Right now, it only has one empty screen, but we’ll improve that soon.

Step 2: Add the Claude AI Plugin

To connect with Claude AI, add the Claude plugin to your app. This plugin lets you send text and image-based requests to Claude AI, allowing it to generate smart responses.

The app now has the Claude screen:

Step 3: Add a Button to Access Claude AI

Next, let’s open Screen1 and add a Button component to it. Set it up so that pressing the button will take users to the Claude screen.

Now, save the app and click to test it. Click the button, enter a prompt, and see what happens. You’ll get an API key warning, but don’t worry—we’ll fix it next.

Step 4: Enter Your API Key

To use Claude AI, you need to obtain an API key from them. Go to the Model and Storage > Storage section in Appery.io, paste your key, and save the app.

Test again. This time, Claude AI should respond correctly!

Step 5: Test Image Processing

Want Claude AI to analyze images? Click the TAKE PHOTO button. If you have more than one camera, select one. Then, ask Claude AI: What’s in the photo? It should process the image and give a response.

Step 6: How the App Works

Let’s break it down. In Appery.io, you can:

  • ✅ Store API details in the storage section.

  • ✅ Use the Claude AI screen to interact with the API.

  • ✅ Invoke the Take Photo function to access the camera.

  • ✅ Run the app as a mobile or web version and take photos accordingly.

When you hit the CLAUDE button, the claude request function sends the prompt and image to Claude AI for processing.

Step 7: Claude AI’s API Request Code

The request code is in the Functions section of Appery.io. Here, the app checks if an API key is present, builds a request body, and sends it to the API. 

That’s it! Your app is now integrated with Claude AI.

Final Thoughts

As you can see, integrating Claude AI with Appery.io is quick and easy. No advanced coding is needed! Follow these steps, and you’ll have AI-powered features in your app in no time.

If you found this guide helpful, 👍 like, subscribe, and share to stay updated for more tutorials!


Transform Your Google Sheets into a Fully Functional App Today!

Are you looking for a simple and effective way to manage data for your mobile app? Google Sheets can be your solution. With Appery.io, a powerful no-code app-building platform, you can easily integrate Google Sheets into your app development process, turning your data into dynamic and interactive elements in your mobile app.

In the video tutorial, you’ll see how to use Google Sheets as a database for your mobile app without writing any code. Whether you need to store product information, customer data, or any other kind of content, Google Sheets serves as a flexible and user-friendly database. With Appery.io, integrating this data into your app becomes seamless and straightforward.

Want to see how it works in action?

Check the video below to learn how to connect Google Sheets to an app, manage data, and build a working system—all without coding! This step-by-step YouTube guide walks you through setting up the Google Sheets API, integrating it into Appery.io apps by using the List Details and the Server Code GoogleSheetCRUD plugins, and making a real-time app with CRUD operations.

This combination of Google Sheets and Appery.io  gives you a simple yet powerful toolset for mobile app development.

If you’re ready, start building now and take your app to the next level! 

PS If you found this helpful, don’t forget to like, comment, and subscribe for more tech tutorials!

Build an AI Chatbot App for Free – No Coding!

Did you know you can create a mobile app that uses popular AI chatbots like DeepSeek, Qwen, Gemini, and more—completely free? If not, don’t worry! In this video, we’ll walk you through it step by step.

We’ll be using Appery.io to build the app, and you can sign up for free to follow along.


SETUP

  1. Once you’ve created an Appery account, start by creating a new app using the OpenRouter template.

2. Next, head over to OpenRouter.AI and sign up. In the top-left corner, you’ll see a list of model APIs. To find free models, type “free” in the search bar to filter out paid options.

For this example, I’ll select Qwen:QwQ 32B as the chatbot model.

3. After selecting the model:
✅ Create an API key (just give it a name).
✅ Copy the key once it’s generated.

4. Now, go back to Appery.io, navigate to Model & Storage, and paste the API key into the OpenRouter API Key field.

You’ll also need to update the model name:

5. Copy it from the OpenRouter API tab and paste it as the value for OpenRouter Model.

6. Hit the Test button—and after a few seconds, your app is ready! 🎉

Try asking: “What is Appery.io?” 💡
And just like that, the chatbot responds!


UNDERSTANDING THE APP

Now, let’s take a look under the hood to see how the app works.

1️⃣ Go to the Pages section in Appery.io and open the OpenRouter screen.

  • The green box displays your messages.
  • The gray box contains chatbot replies.
  • The input field at the bottom is where you type your questions.
  • Press Send, and the Send Message function is triggered.

2️⃣ Check the app’s code:

  • Open the CODE tab and go to Functions.
  • Here, you’ll see a chatMessages array that keeps track of conversations.
  • When you send a message, the app creates a new screen and updates it with the chatbot’s response.


BONUS FEATURE: TRANSLATION SCREEN

This template also includes a Translation screen! 🌍

  • Type a sentence in English, and the chatbot will translate it into Spanish.
  • To see how it works, open the CODE tab and check out the Translate function.
  • It’s super simple—it sends your text to the chatbot and returns the translated result.

Let’s test it:
✅ Type “Home” → Press TRANSLATE → You’ll get “Casa” in Spanish.

If you want this feature in other languages, you can easily modify the chatbot prompt!


EXPORTING TO ANDROID

Finally, let’s turn this into a real mobile app! 📱

1️⃣ Select EXPORT
2️⃣ Choose Binary APK/AAB

3️⃣ Once it’s done, scan the QR code to download and install the app on your phone.

Now, test it by asking the same questions you tried earlier. It works! 🎉


TRYING DIFFERENT AI CHATBOTS

Want to test a different chatbot? It’s easy!

1️⃣ Find a model you like, for example, DeepSeek.
2️⃣ Create an API key for it.
3️⃣ Update the model name in Appery.io, just like we did earlier.

That’s it! You’ve just built a working AI-powered chatbot app in minutes—without spending a dime!


If you found this helpful, don’t forget to like, subscribe, and hit the notification bell for more awesome AI and no-code tutorials! See you in the next one! 🚀


Build Your First AI-Powered Mobile App in Minutes with Appery.io

Building a mobile app doesn’t need to be hard. With Appery.io, a powerful low-code platform, you can create an AI-powered app in just a few minutes. In this easy-to-follow guide, we’ll show you how to use DeepSeek AI to build an app that can process text and even translate it from one language to another—no coding required! Plus, you can follow along with our full video tutorial for clear, step-by-step instructions.


Step 1: Setting Up Appery.io

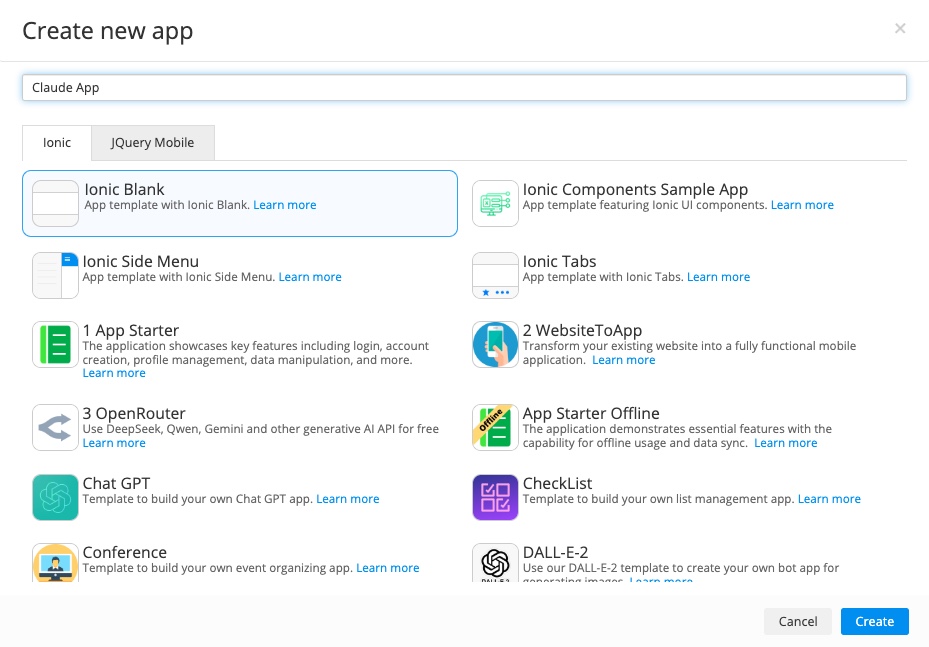
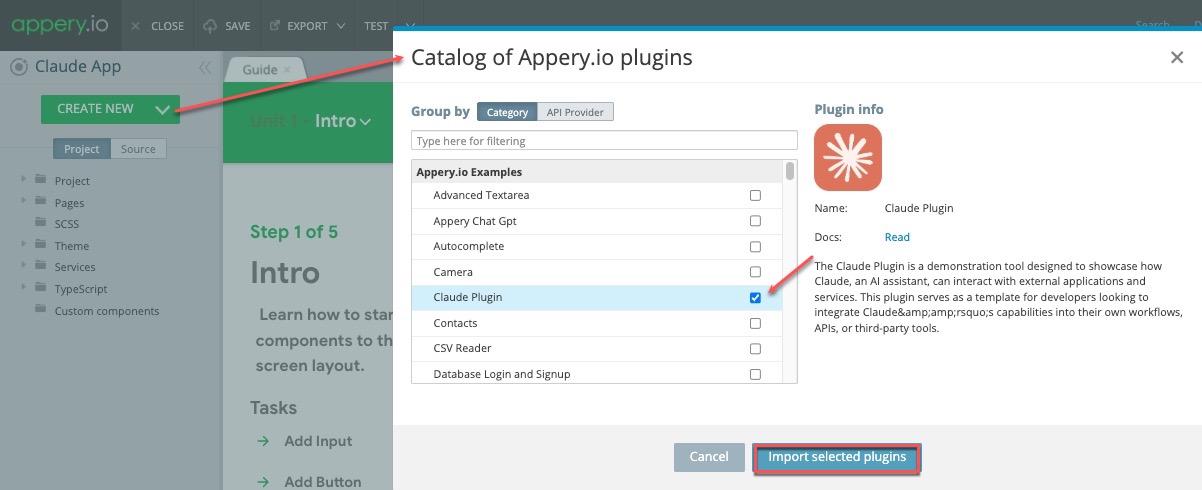
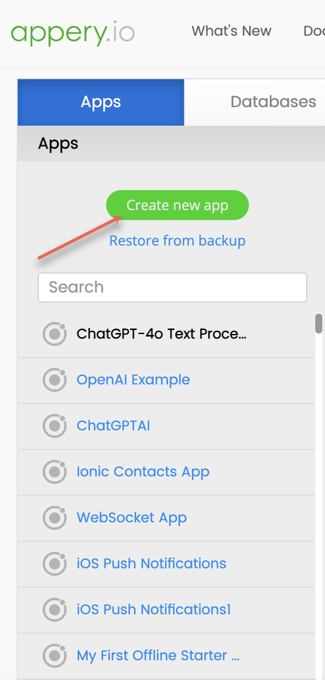
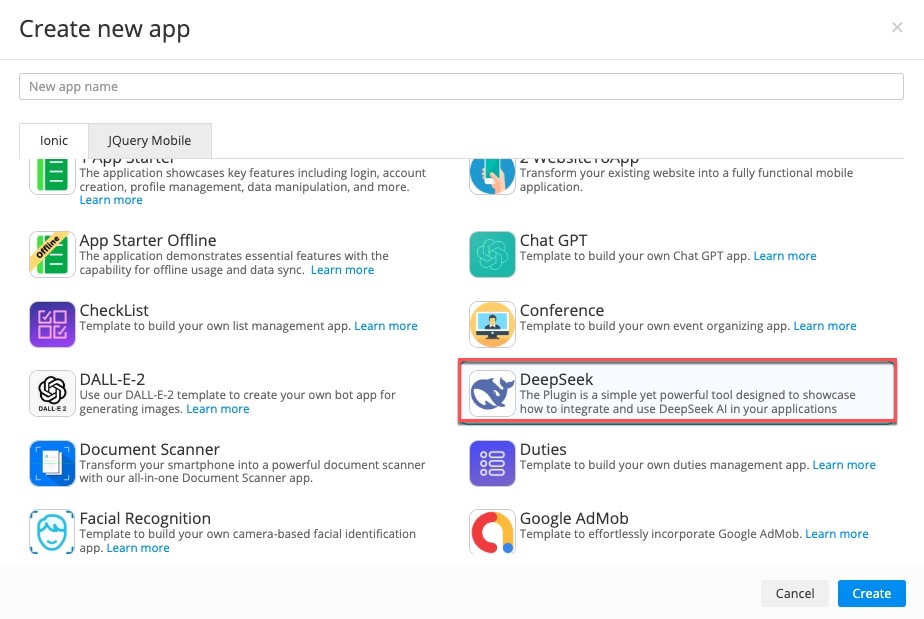
To begin, log in to your Appery.io account and create a new application. From there, select the DeepSeek template, which is built specifically to integrate with DeepSeek AI. This template will give you everything you need to get started quickly.


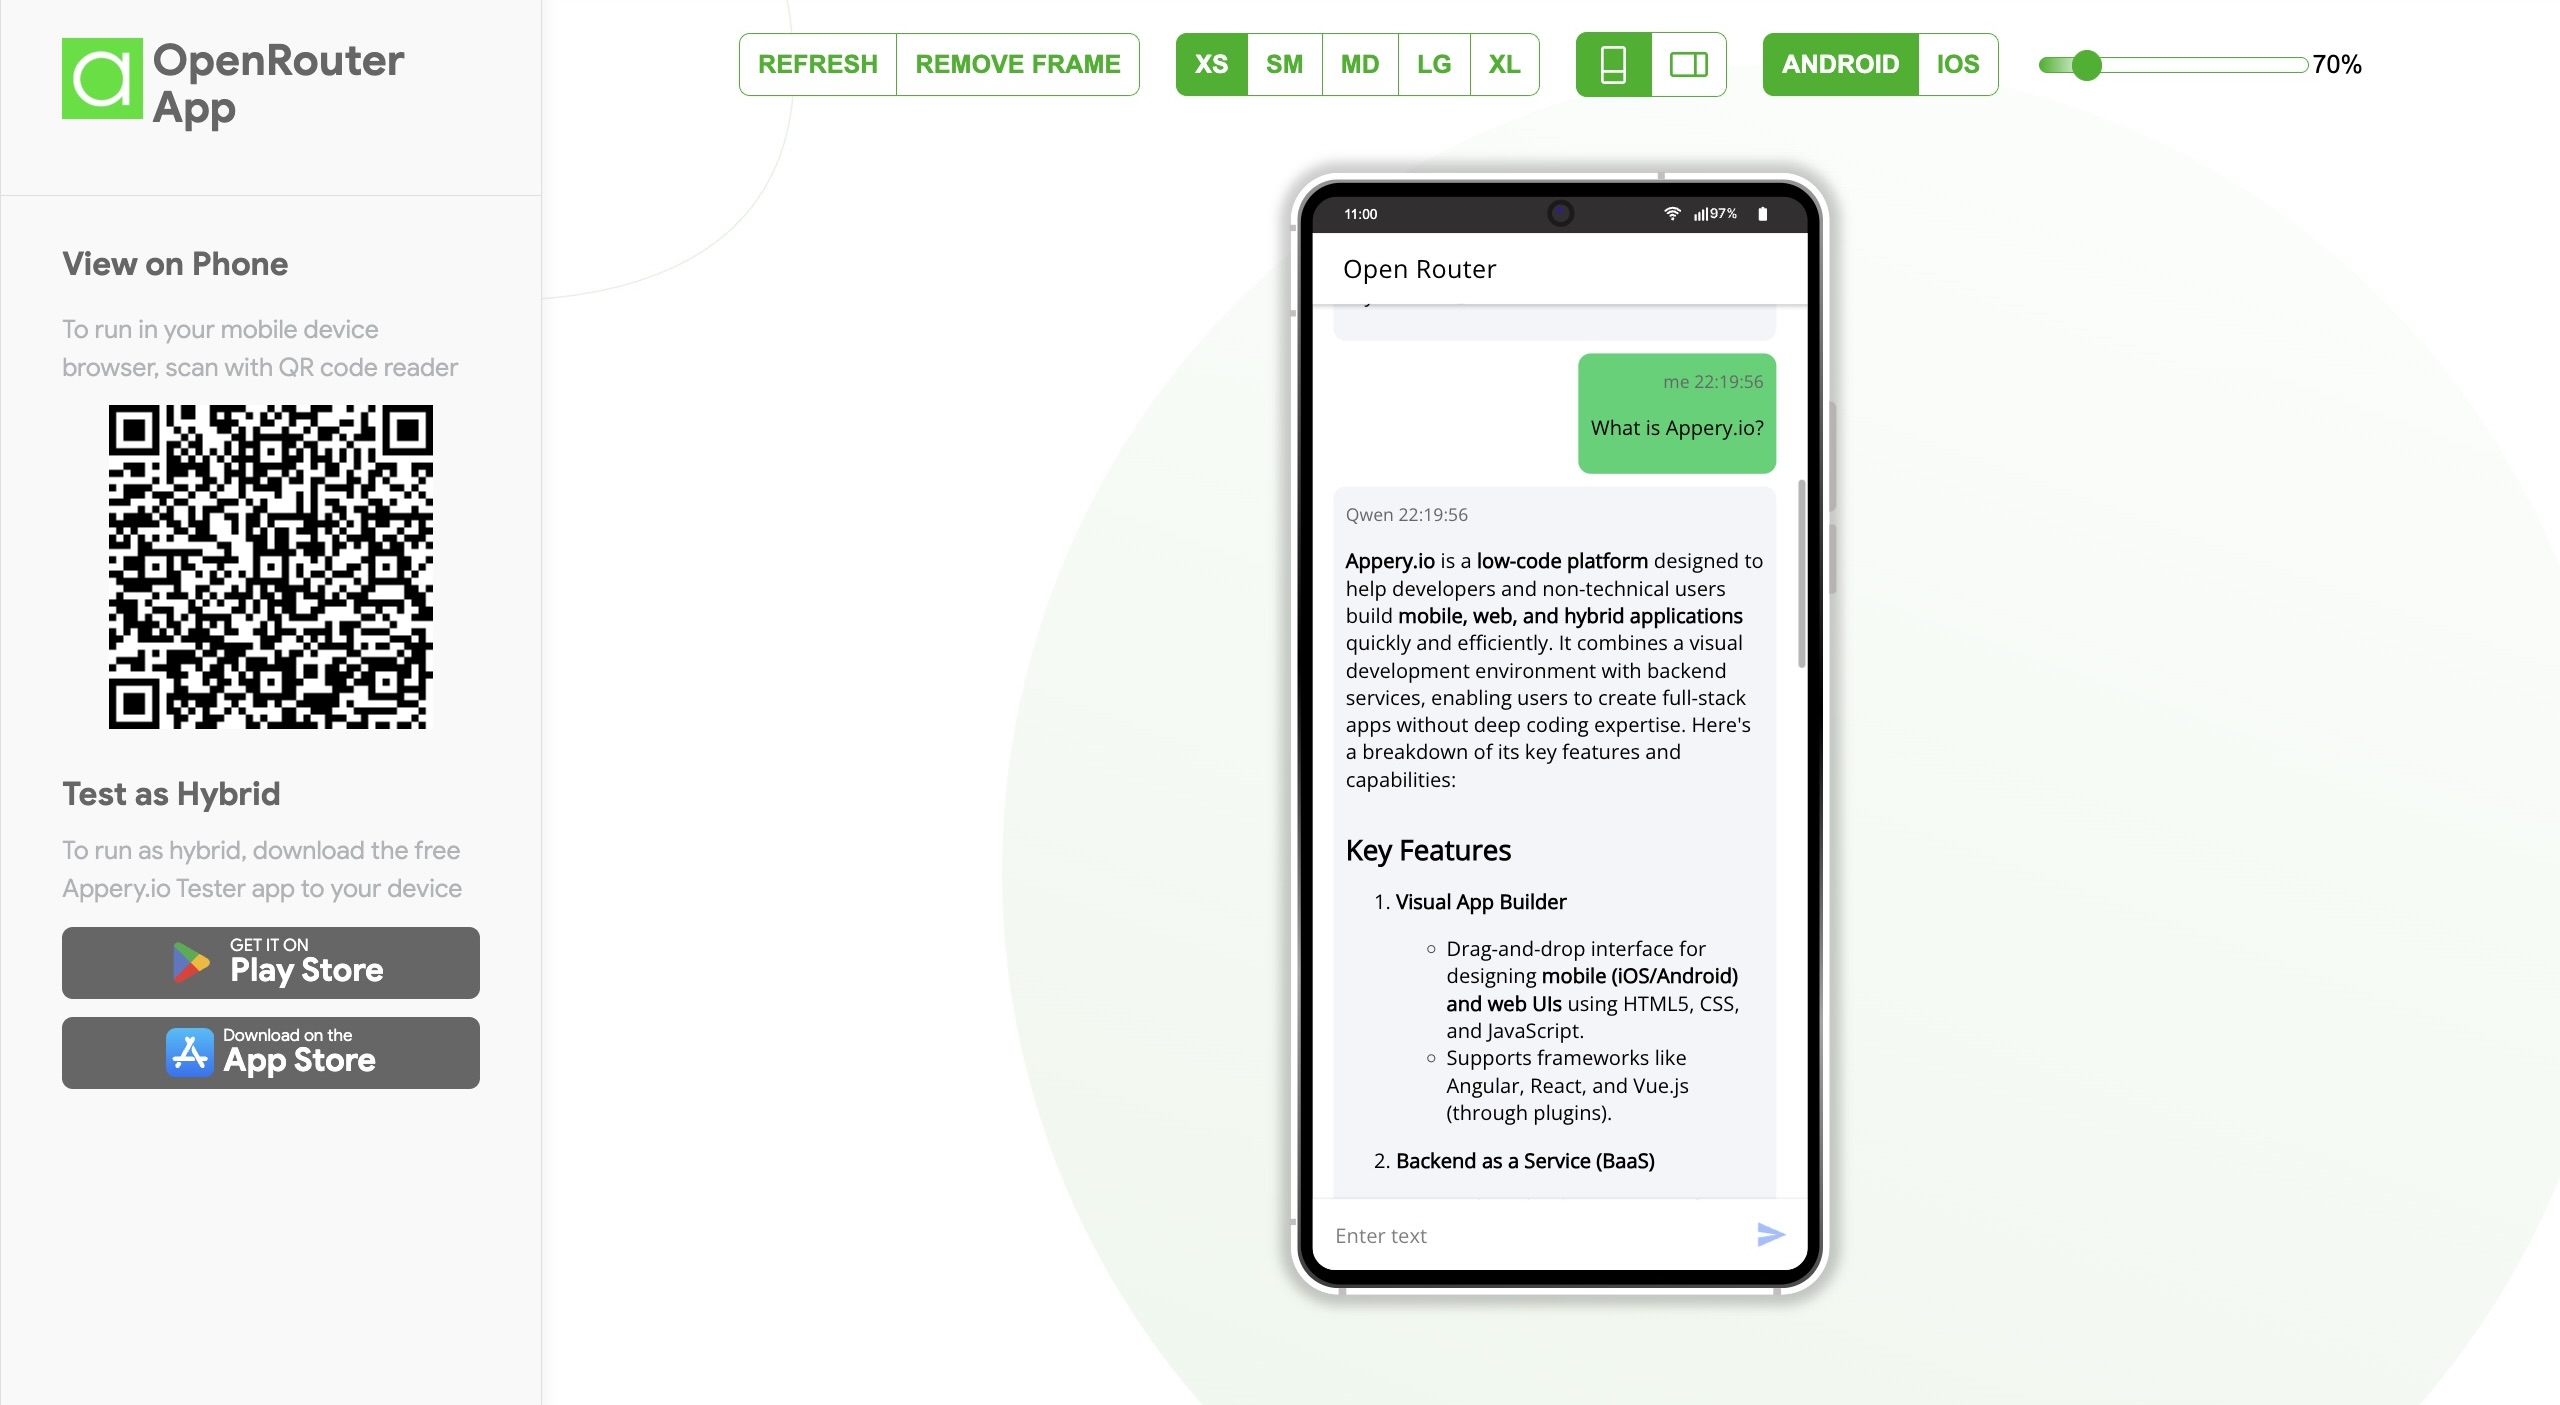
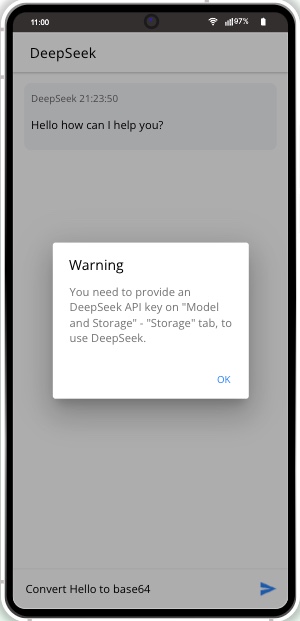
Step 2: Testing DeepSeek with Base64 Conversion

Once your application is set up, click on the Test button to try it out. For example, ask DeepSeek AI to convert the word “hello” into Base64 format. You will likely receive a message asking you to enter an API key. This key is needed for the DeepSeek AI to work properly.


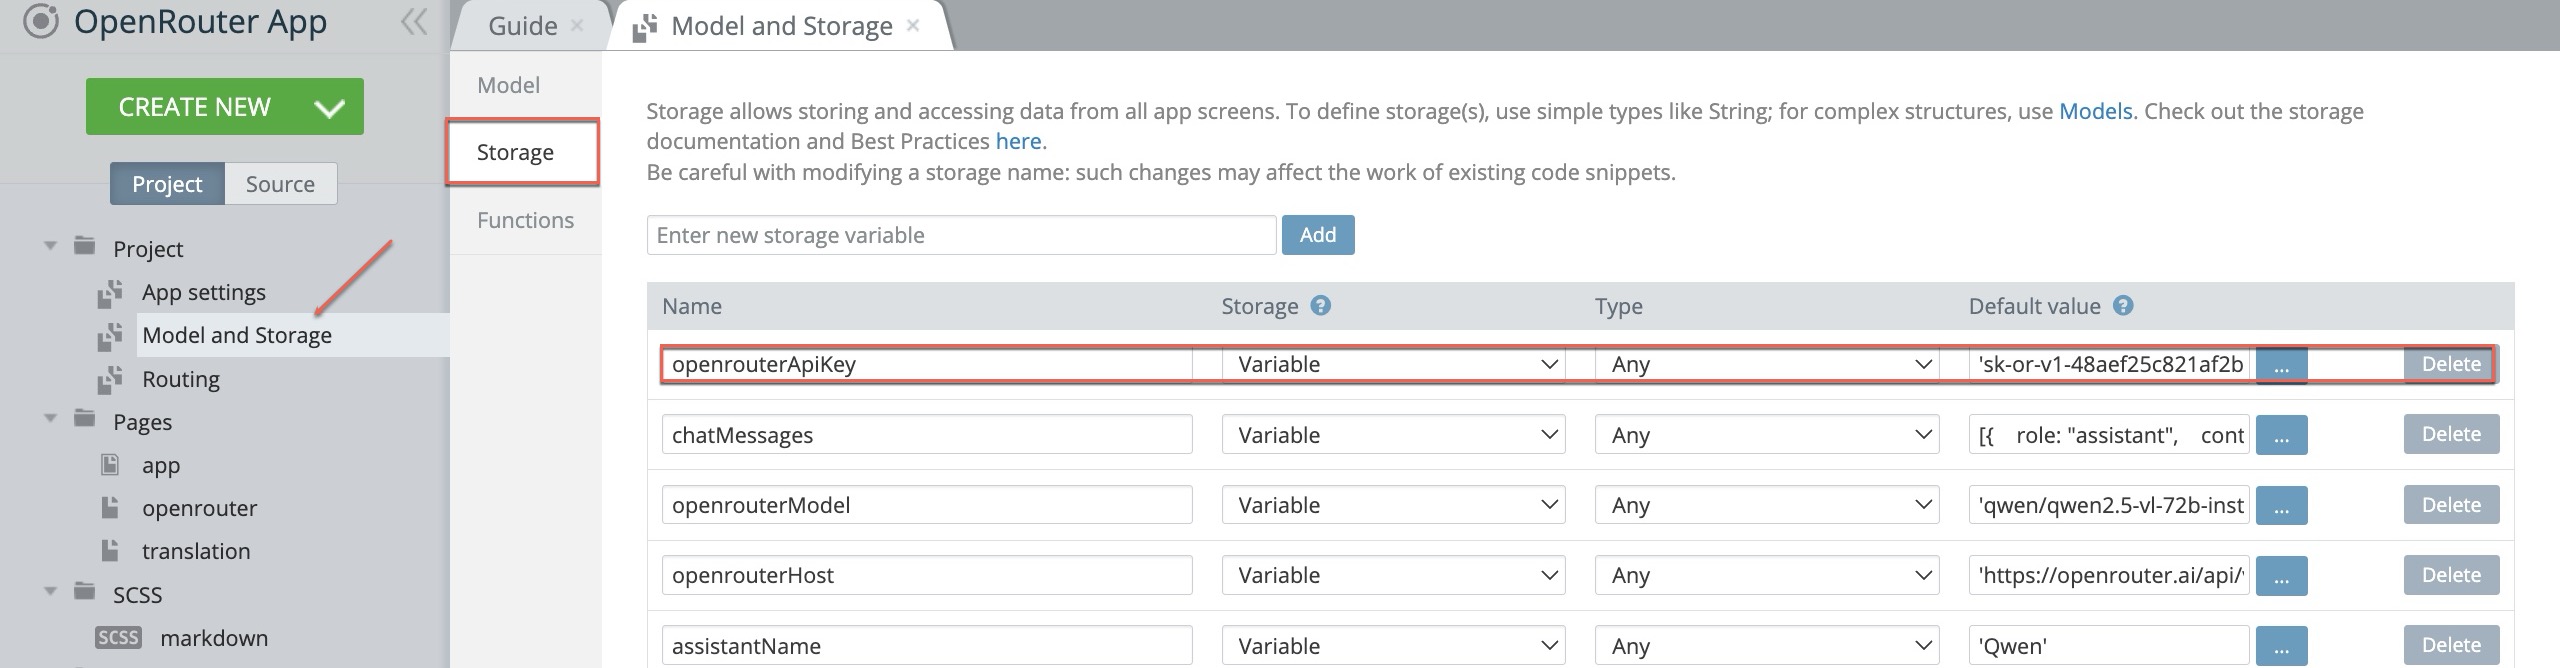
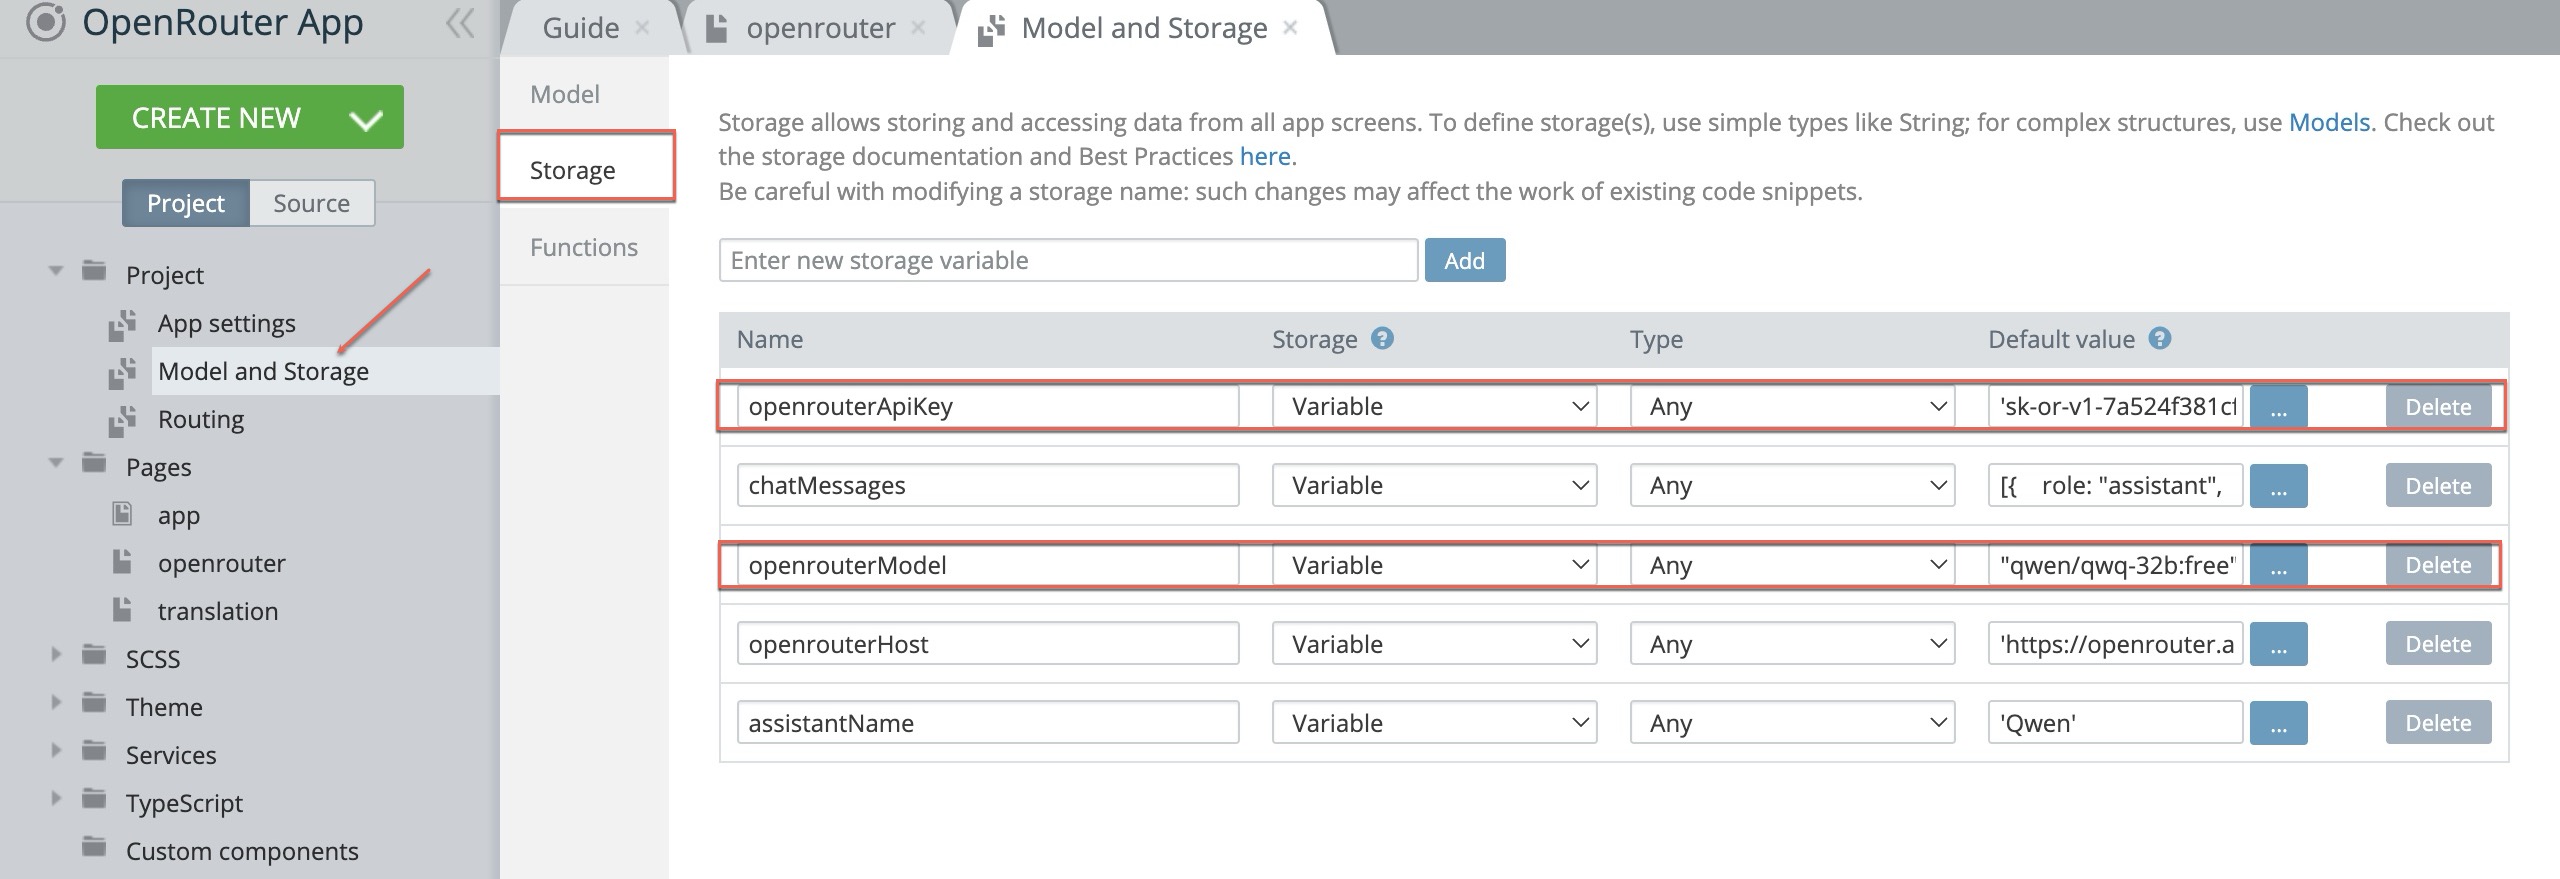
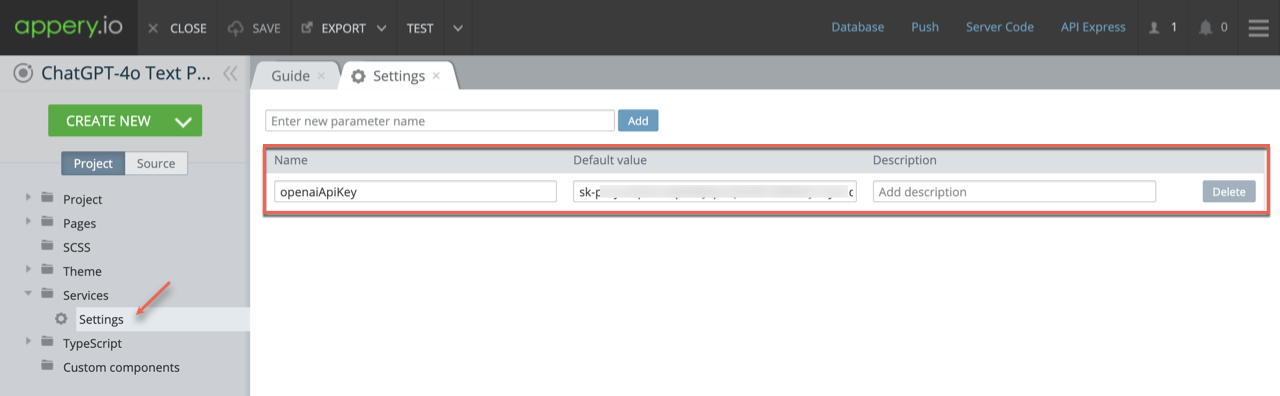
Step 3: Get Your API Key

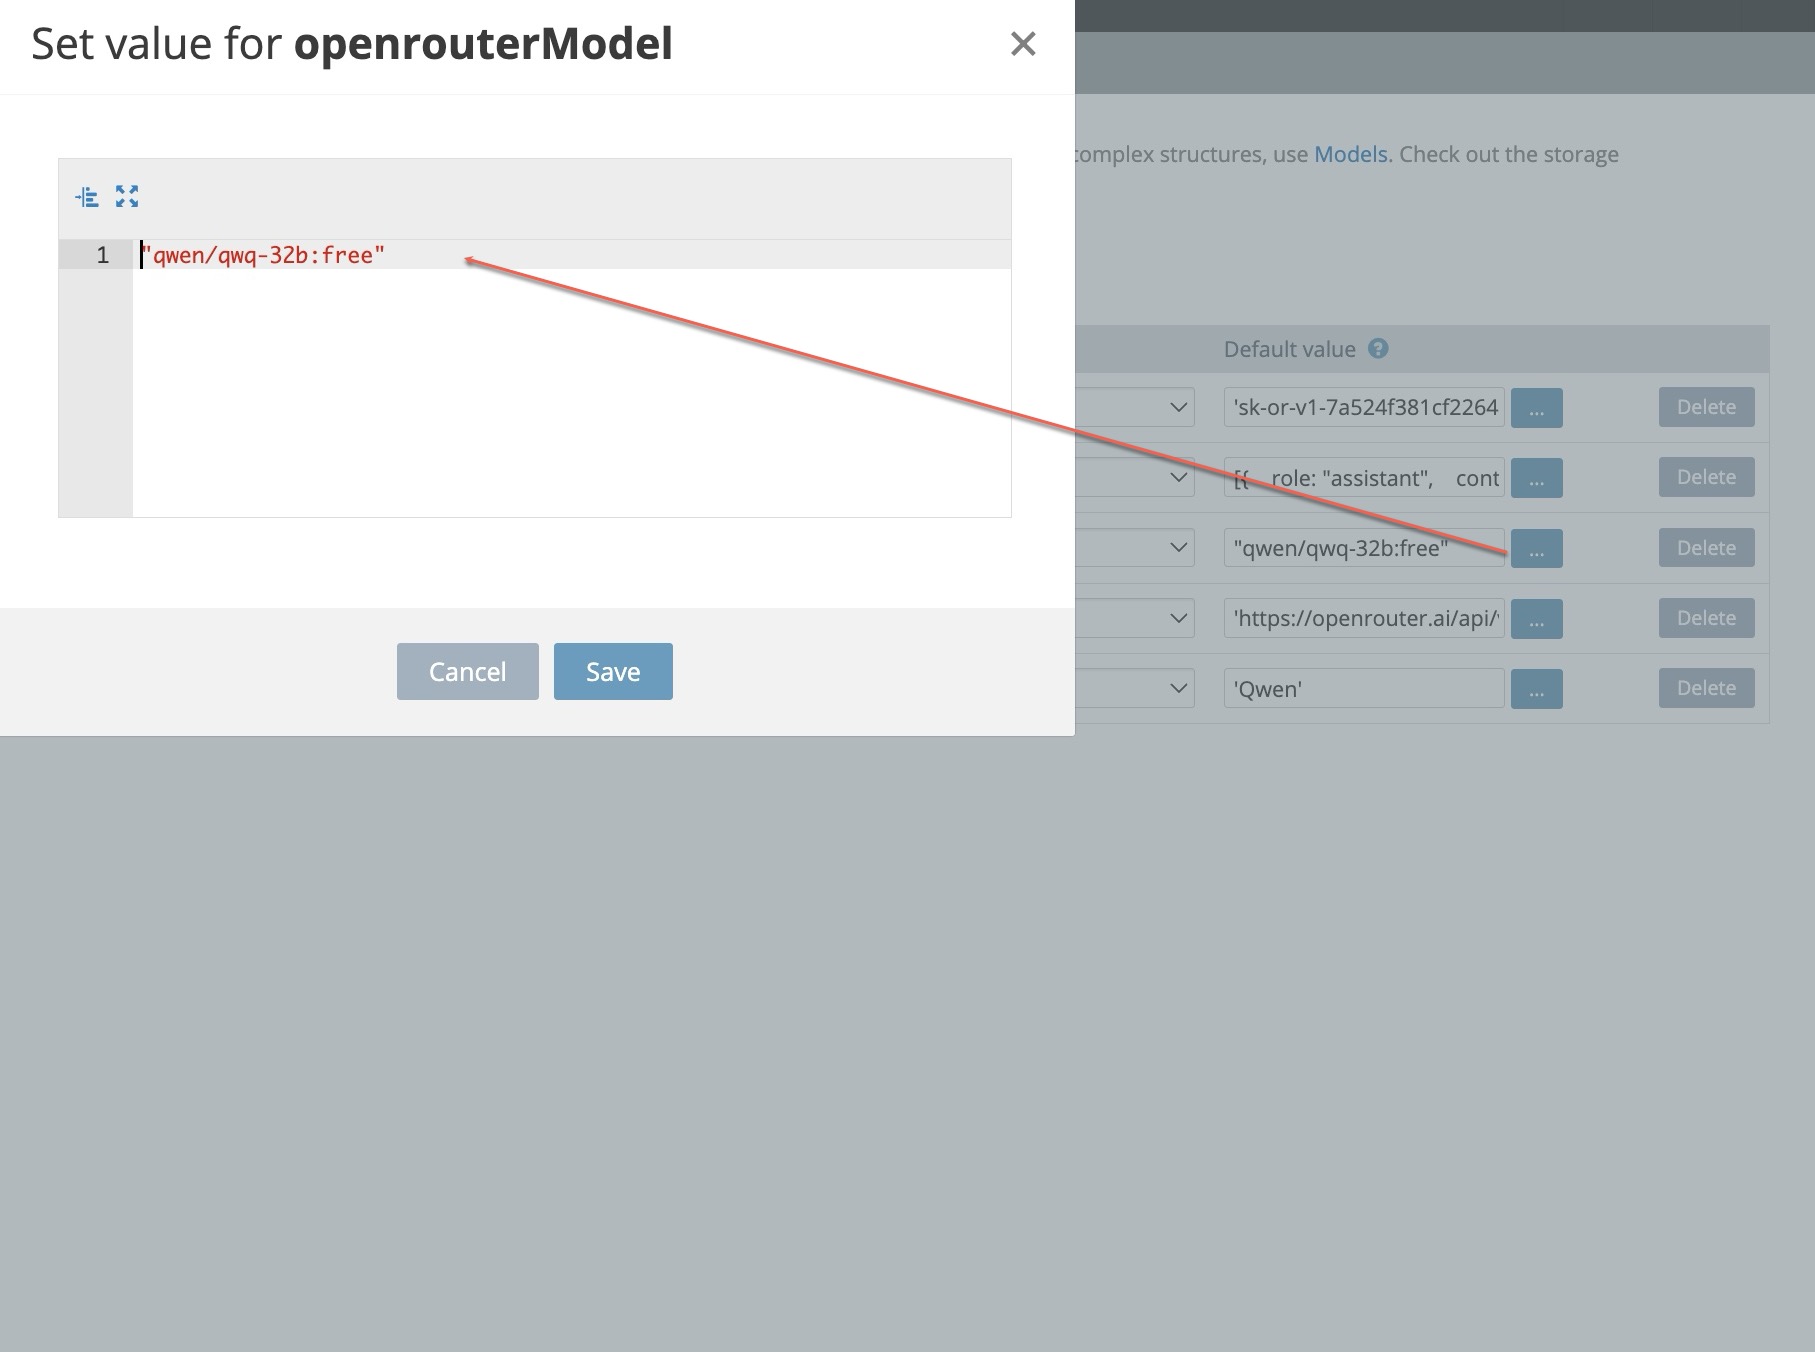
Head to the DeepSeek platform, create your API key, and copy it. Return to Appery.io and paste the key into the Model and Storage section of your application. Save the changes.

Once done, repeat the test. This time, DeepSeek AI will respond with the great result!


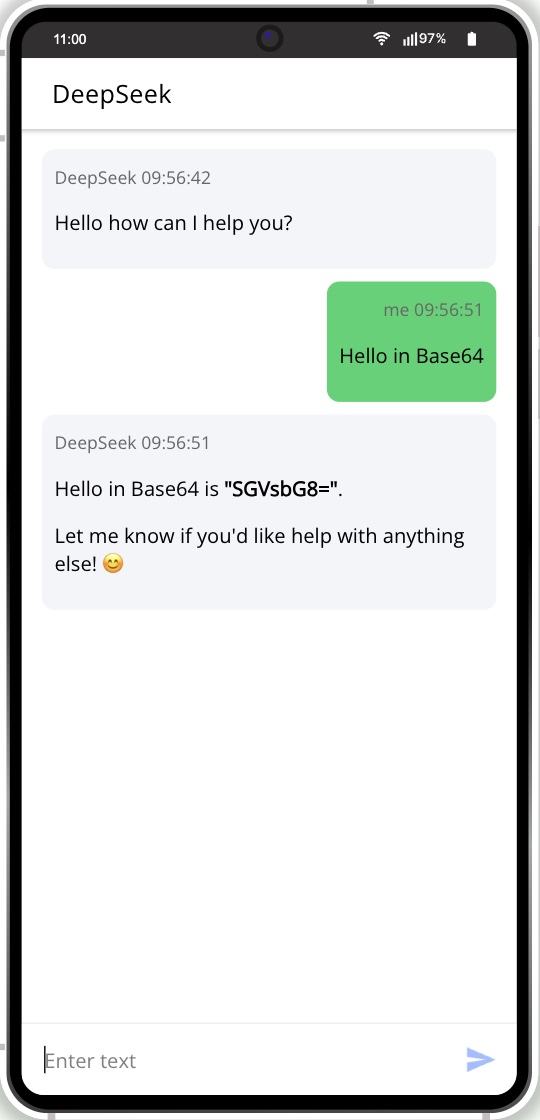
Step 4: Exploring How It Works

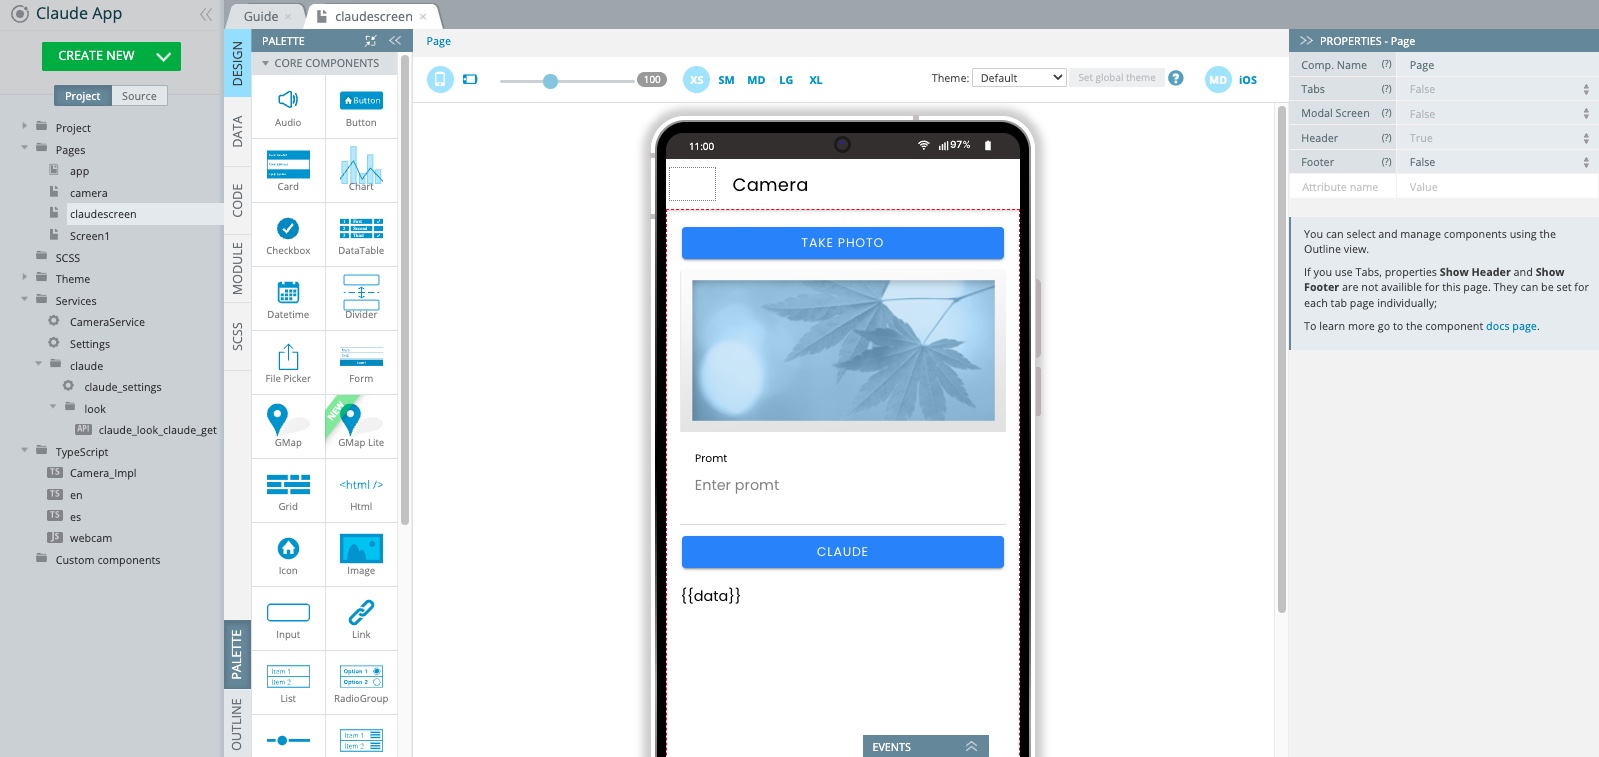
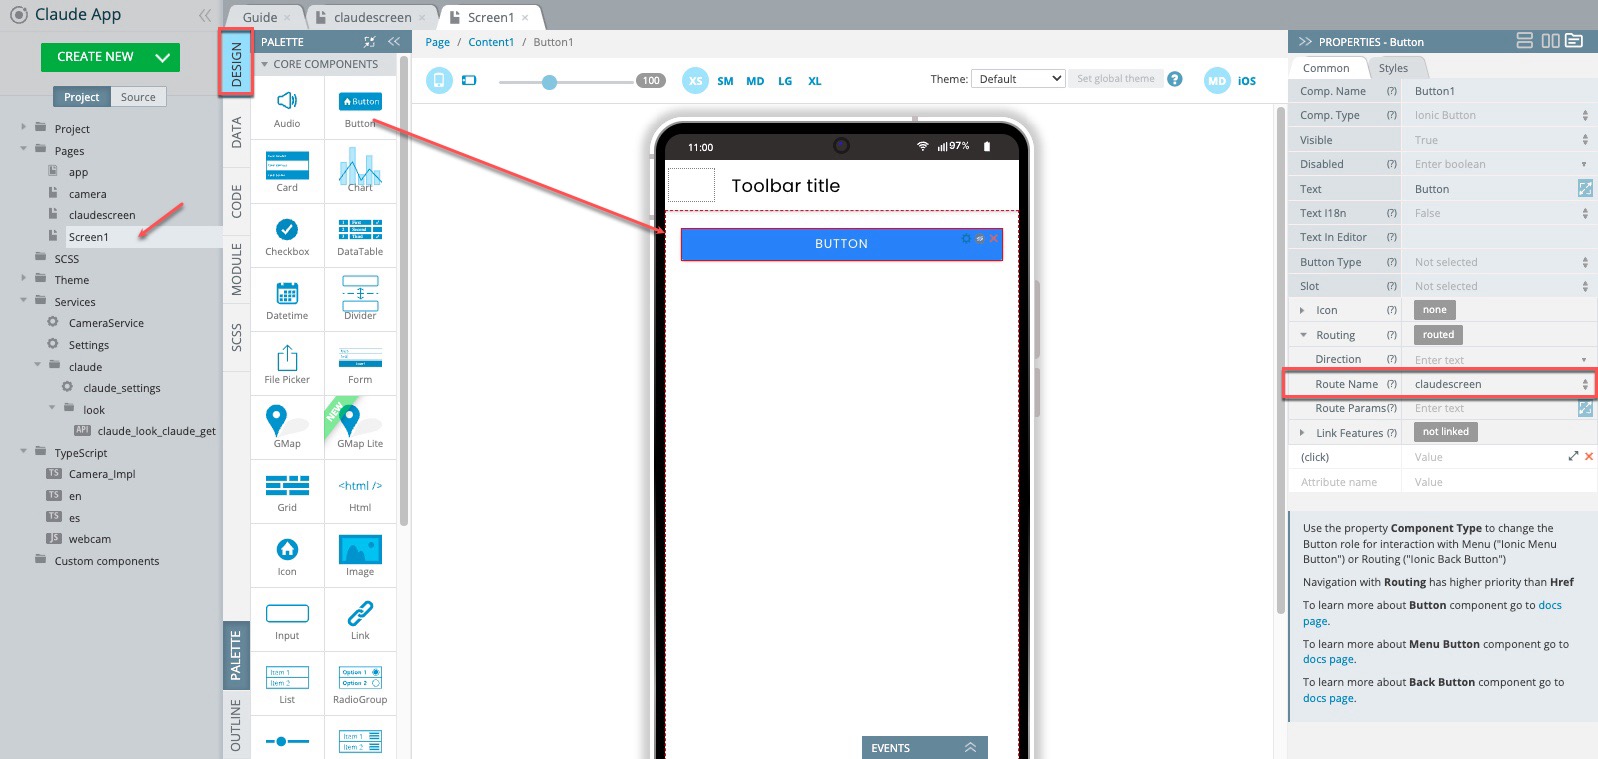
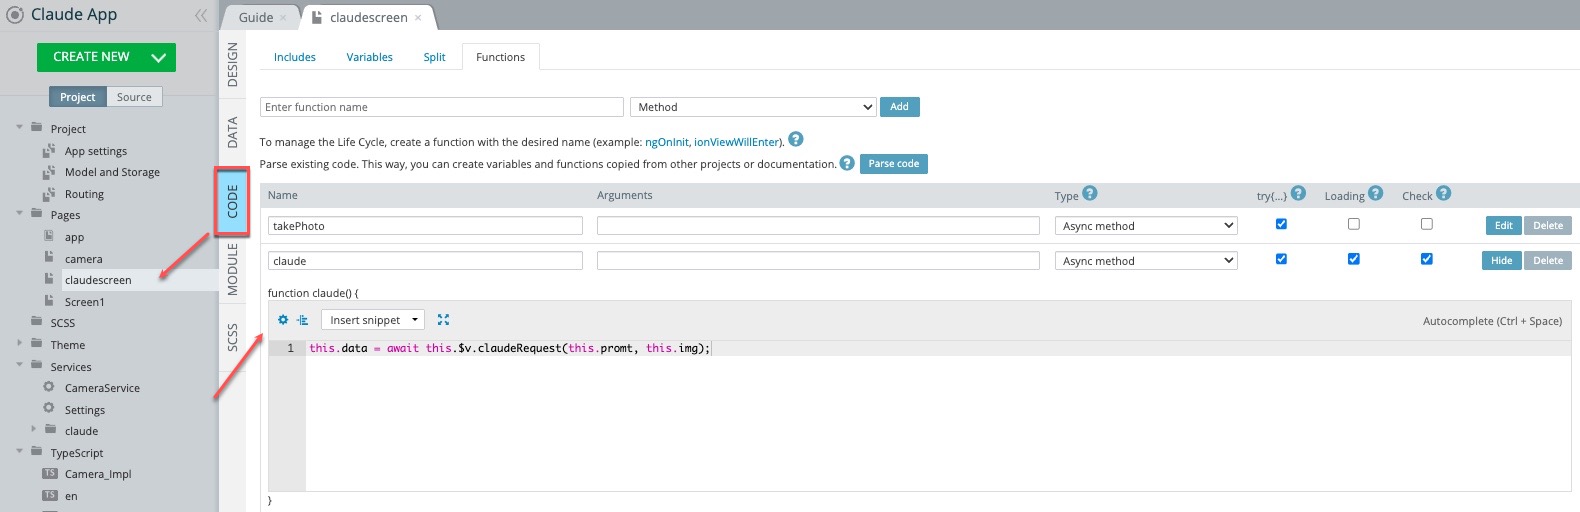
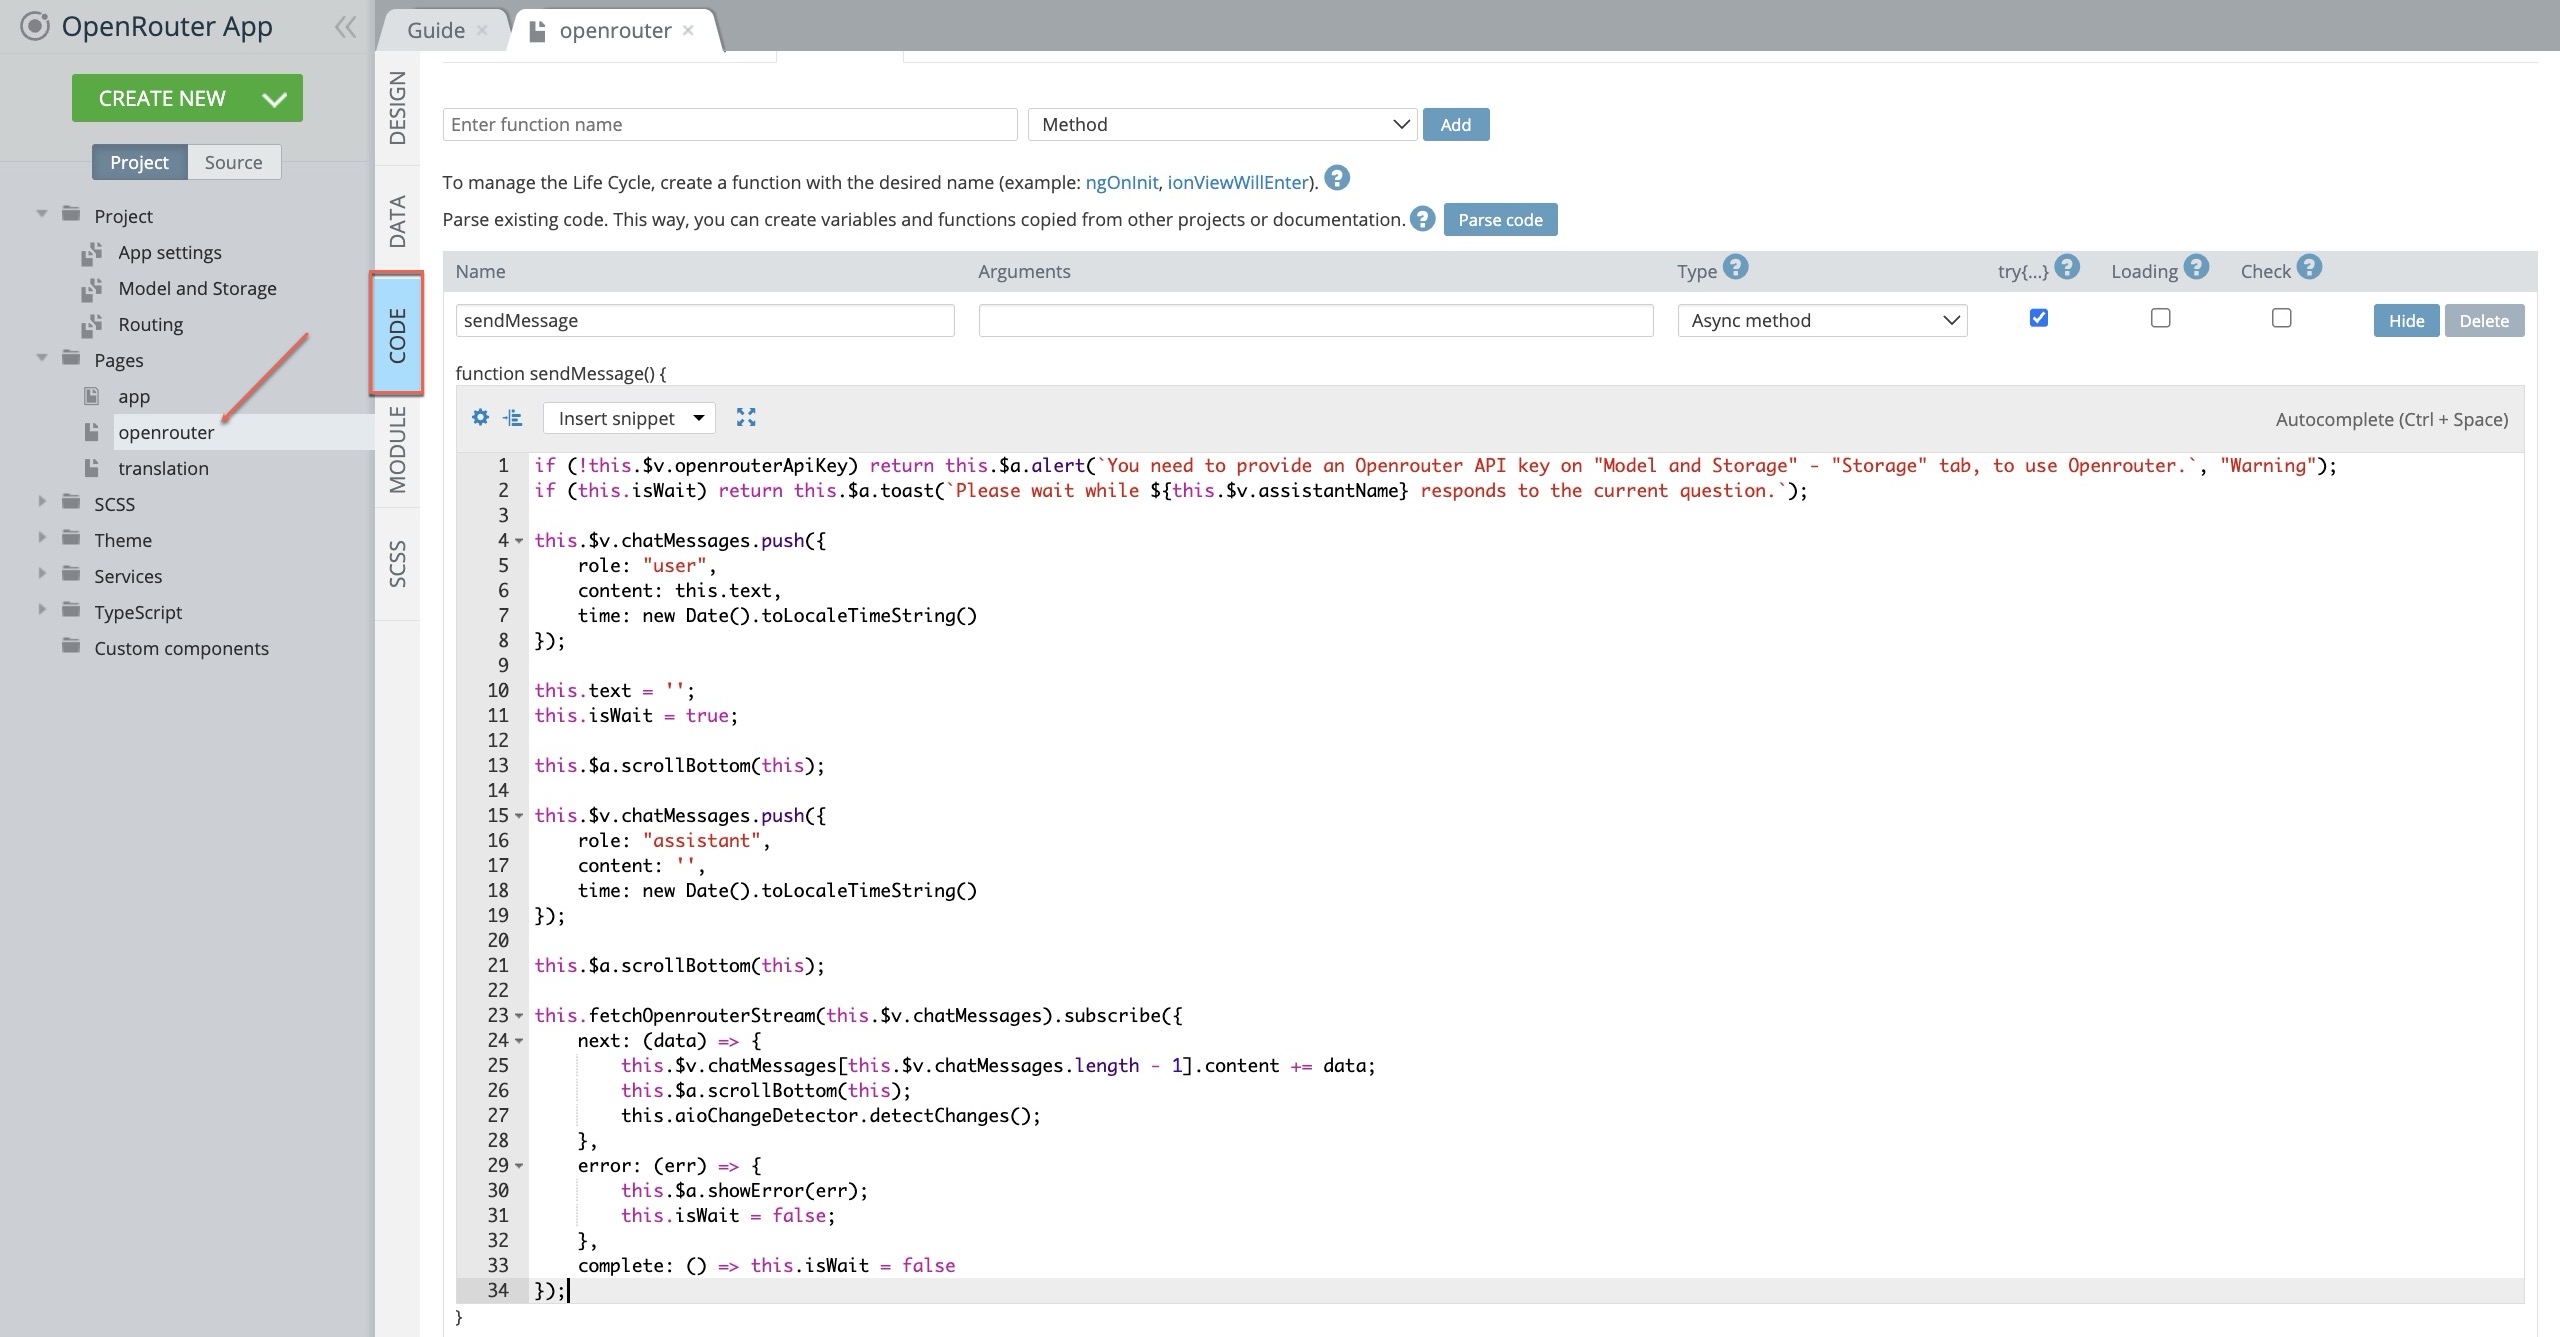
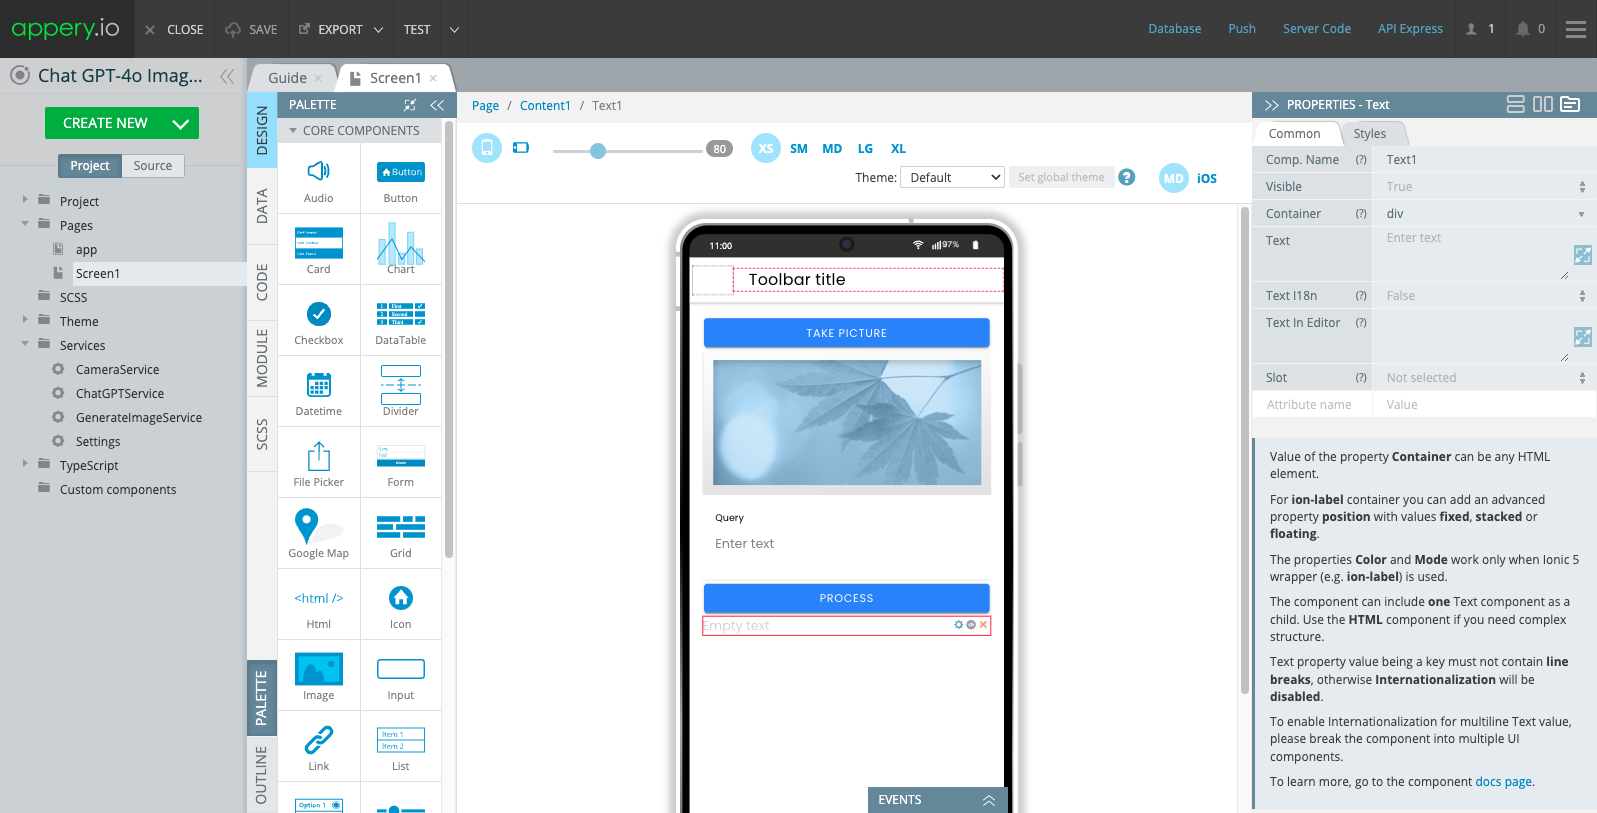
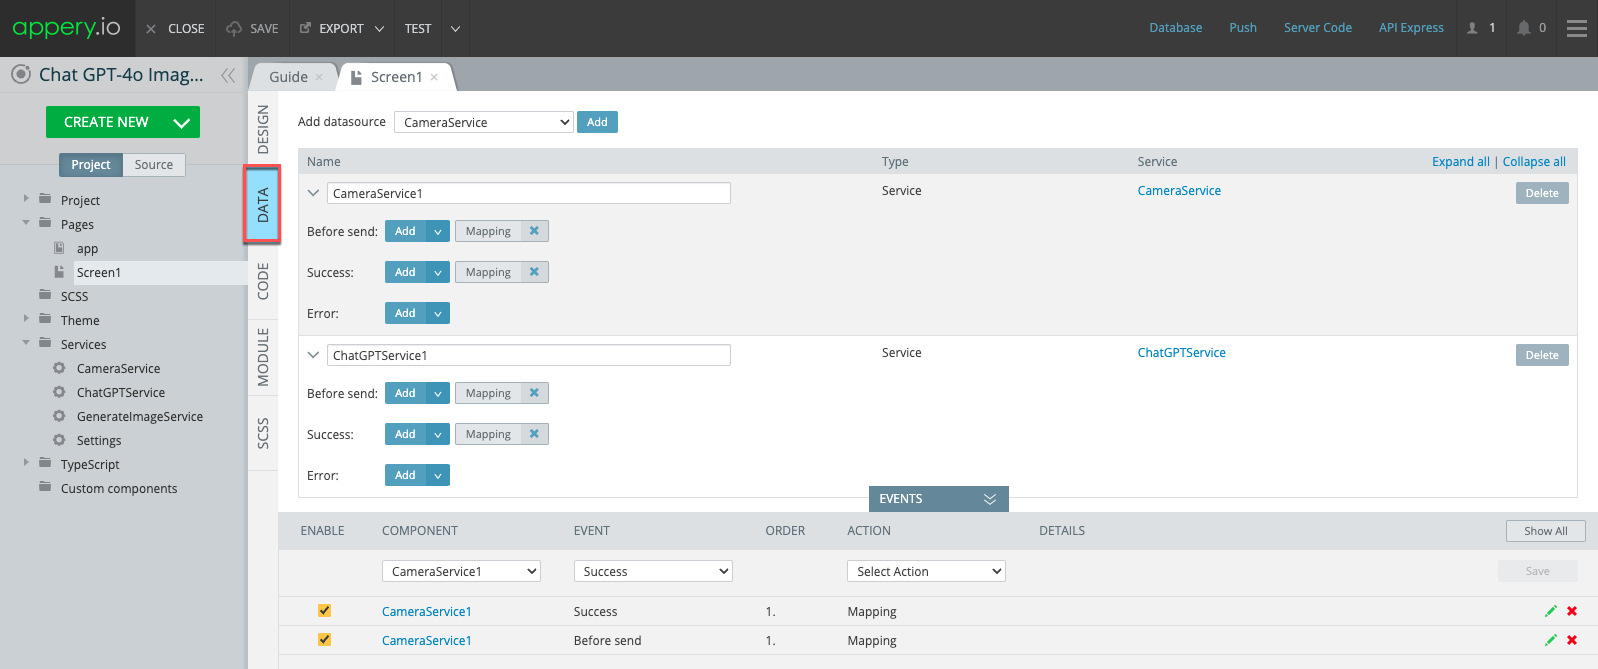
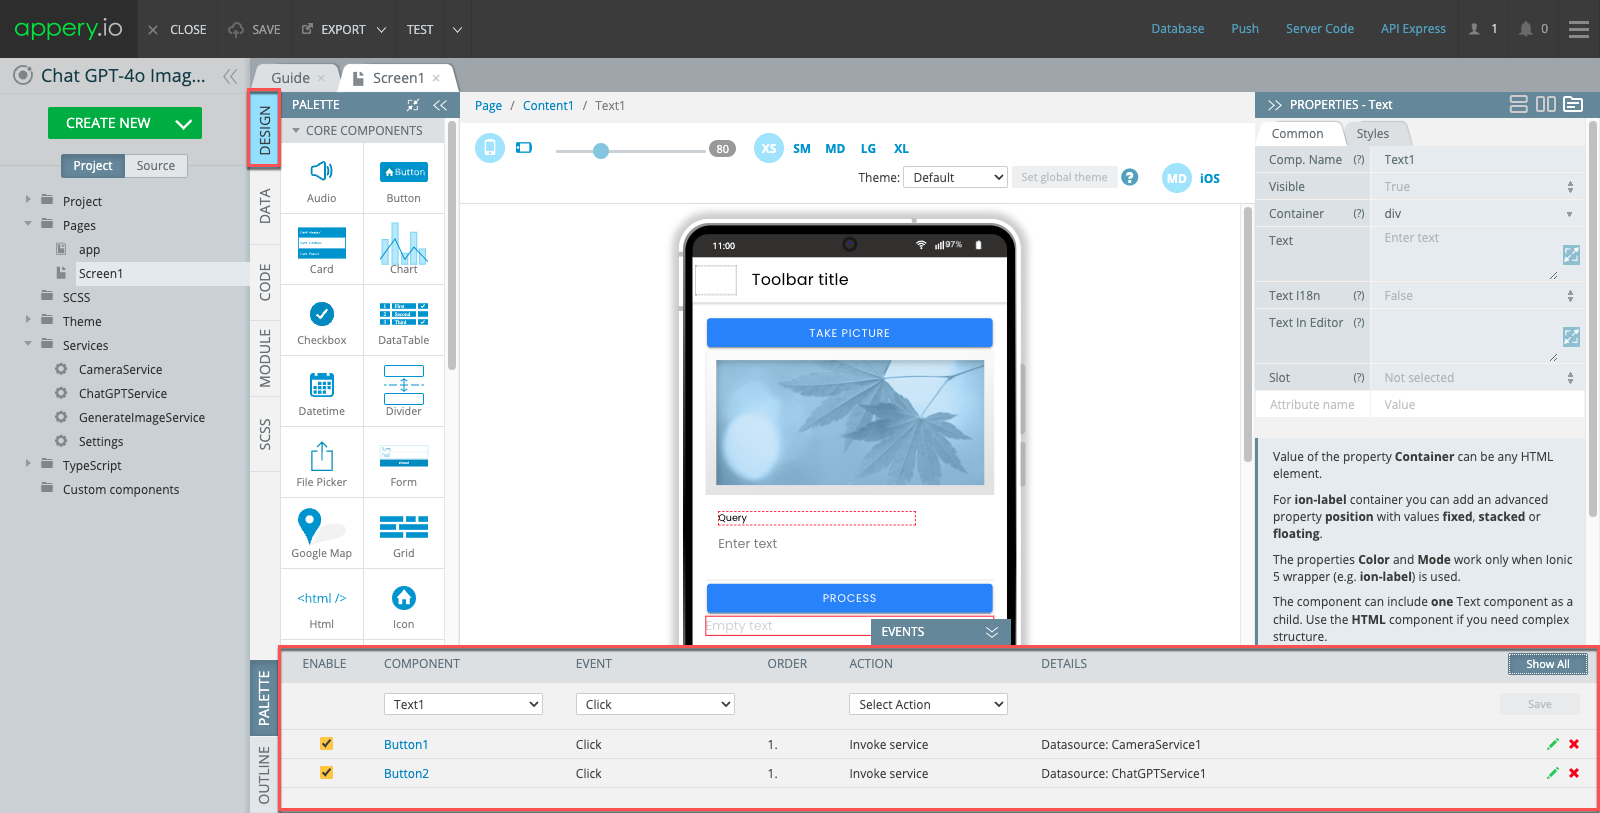
Now that you’ve seen it work, let’s dive into how the app is built. In the Pages section, open the page named DeepSeek. Here, when you click the Send button, it calls the Send Message method. To understand the app’s behavior, open the CODE tab and look at the Functions section.

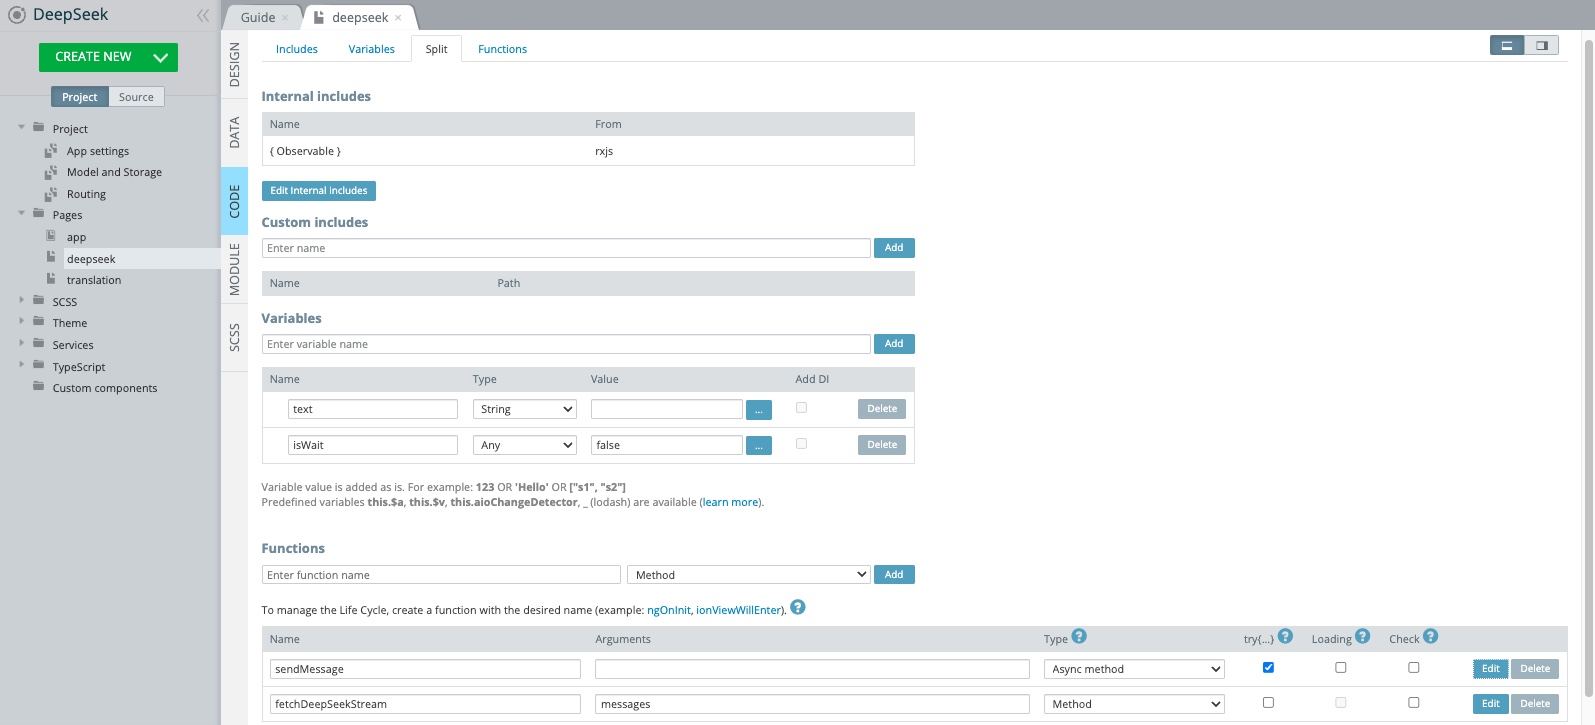
You’ll find that there’s a global variable, chatMessages, which stores all messages. The text entered by the user is saved in the text variable. The app then calls the fetchDeepSeekStream function, which processes the response from DeepSeek AI.


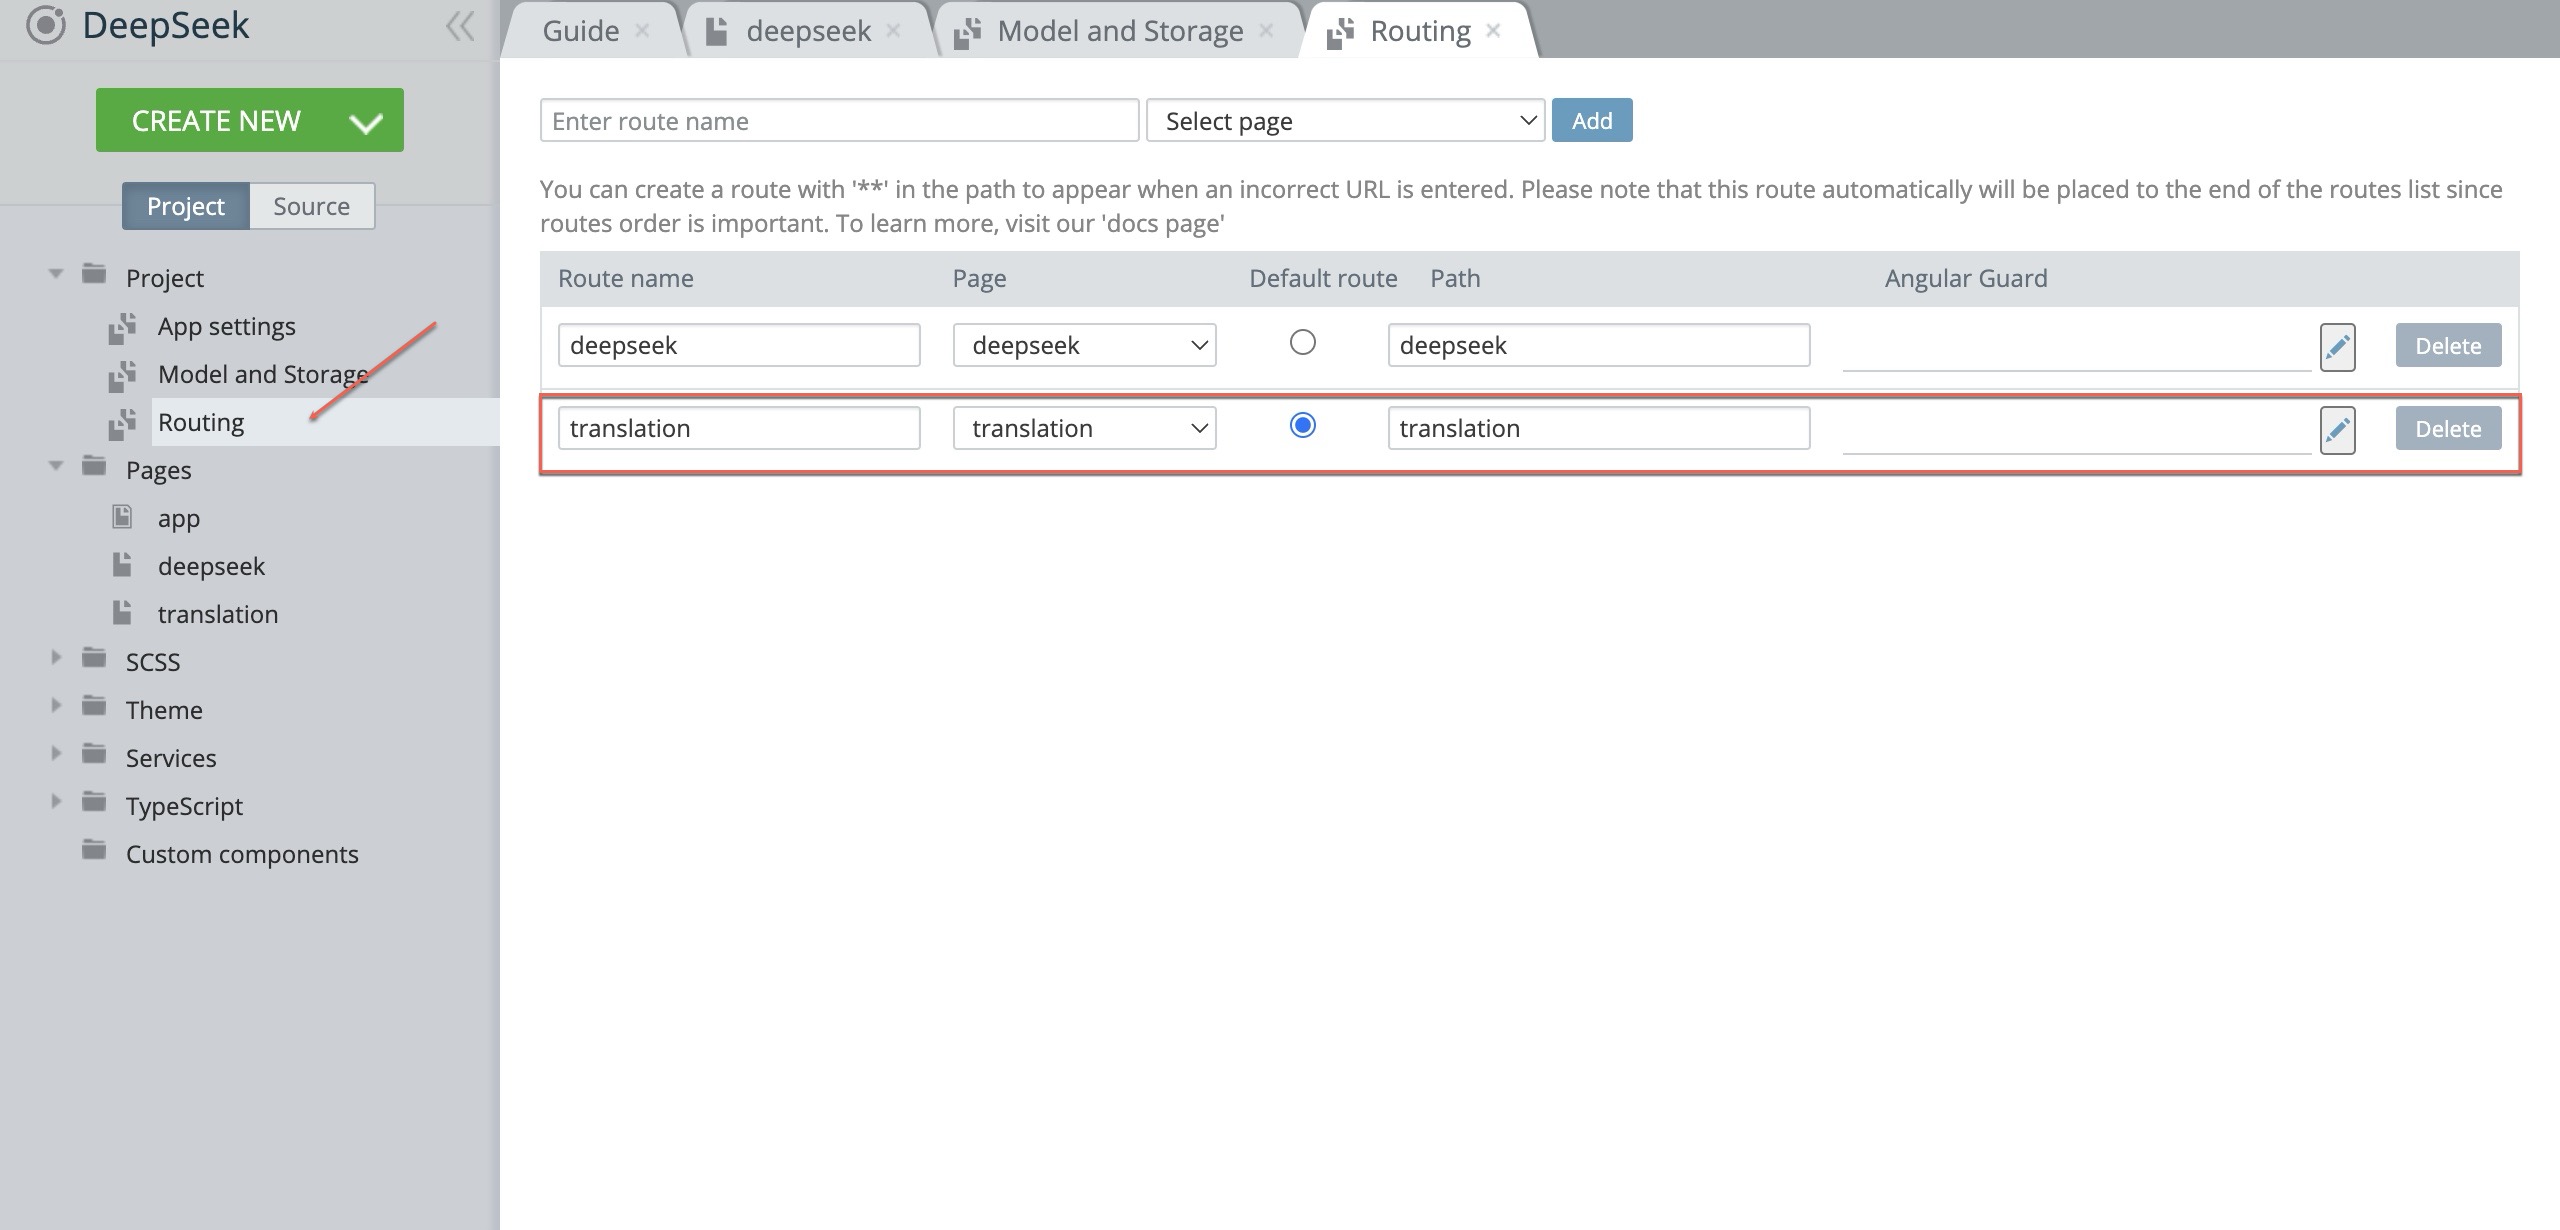
Step 5: Using DeepSeek for Text Translation

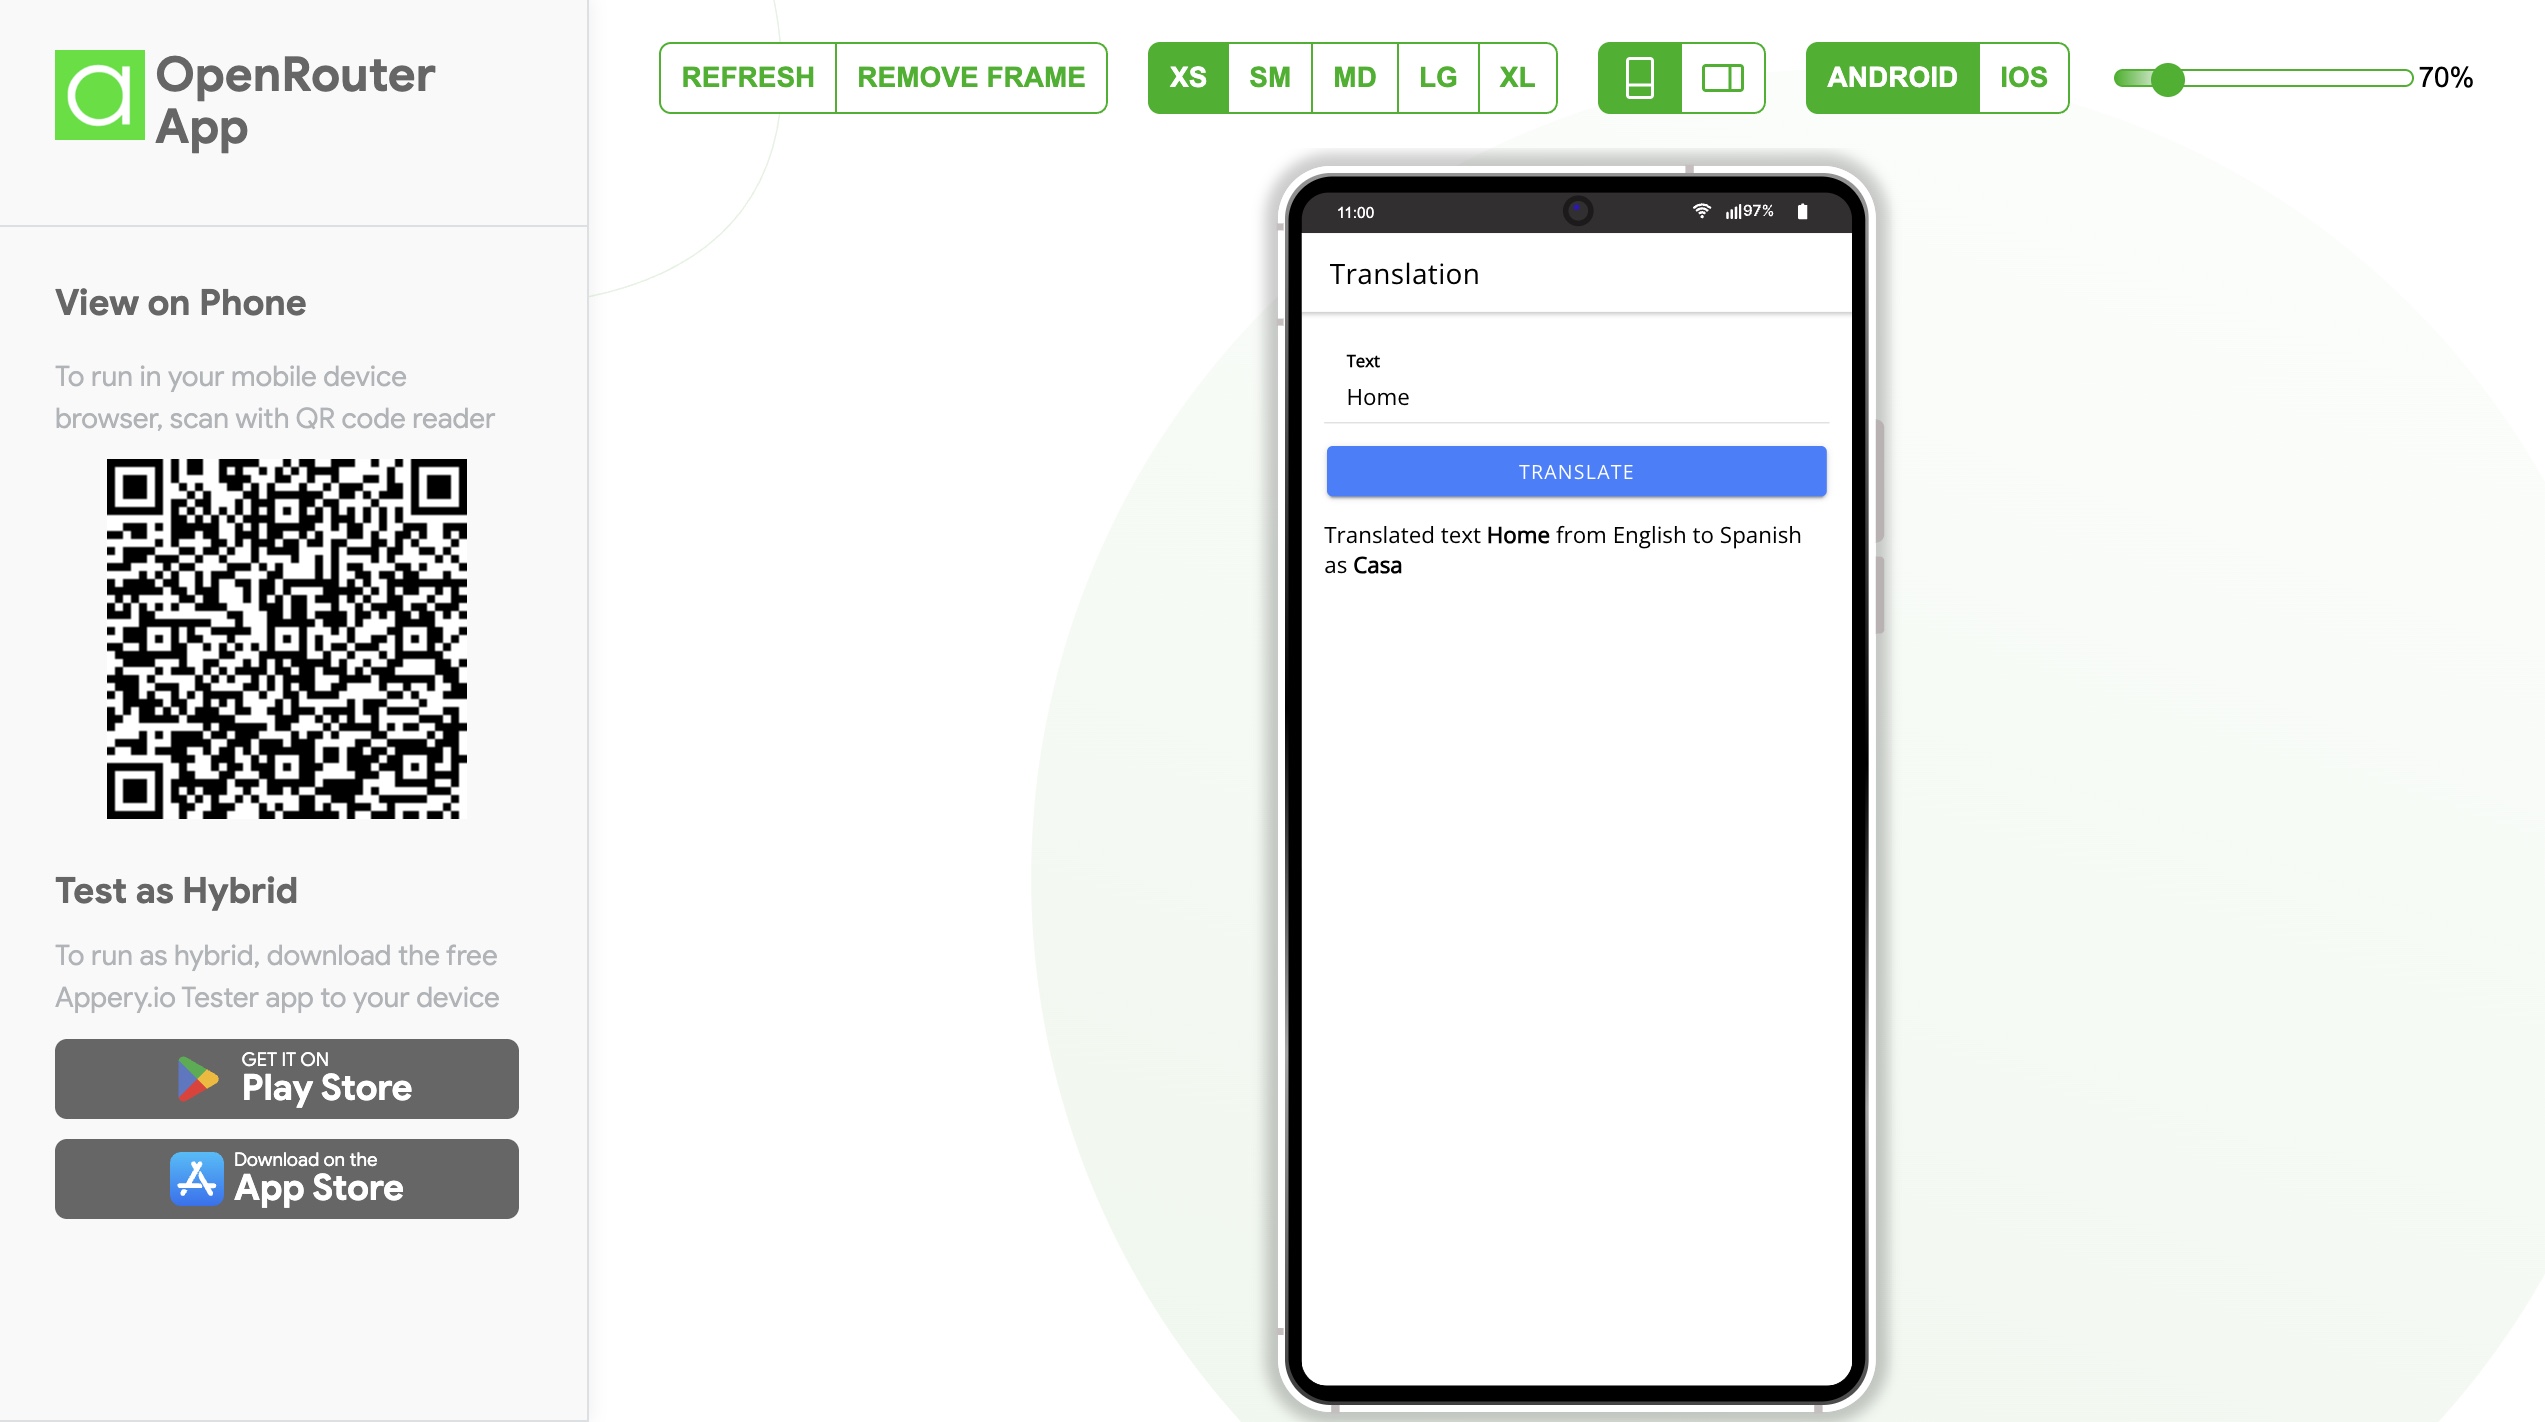
Next, let’s explore another use of DeepSeek AI—translating text. We’ve updated the app’s routing and set the initial page to Translation.

Now, try testing it:

  • Type the word “home.”
  • Click Translate.
  • Watch the app translate “home” into Spanish!

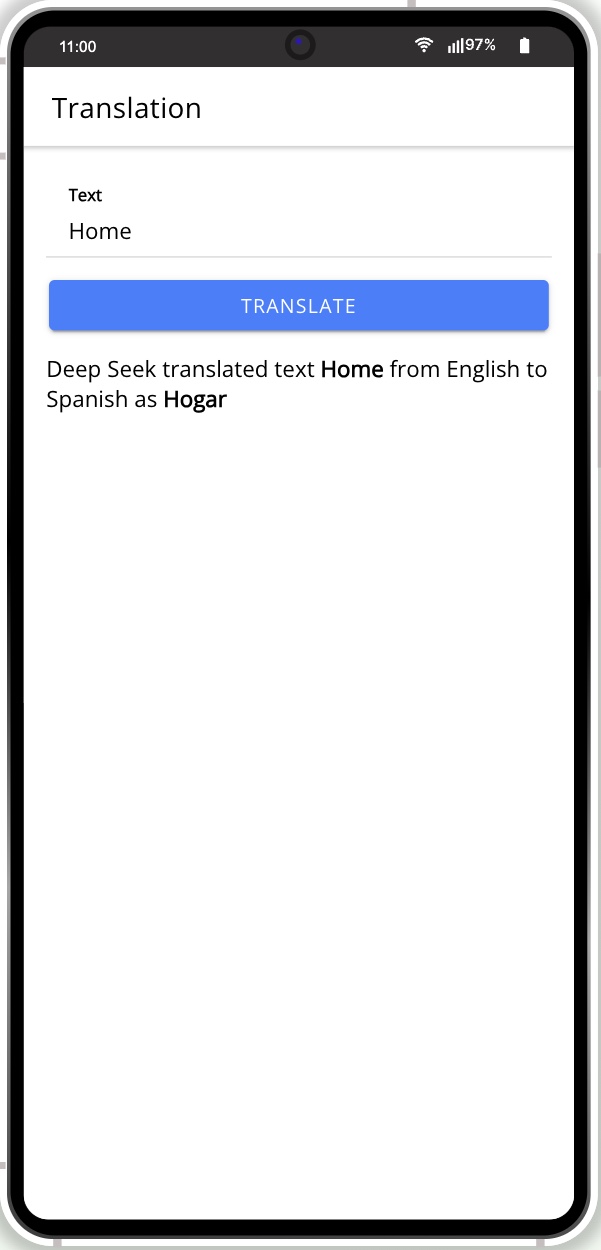
This is how simple it is to use DeepSeek AI to handle text processing tasks like translation.


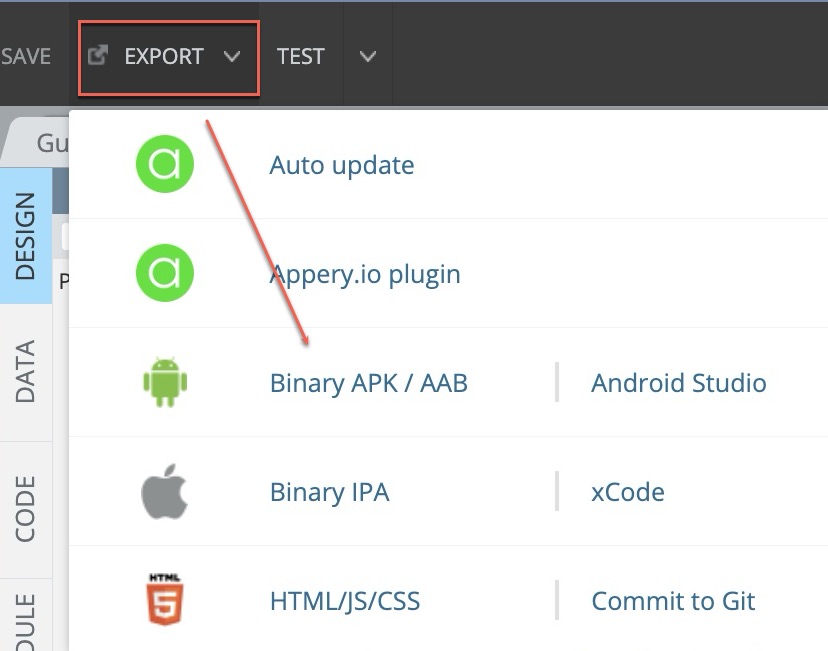
Step 6: Exporting Your App

Once your app works, it’s time to build it. In Appery.io, select EXPORT, then choose Binary APK. After a few minutes, your app will be ready.

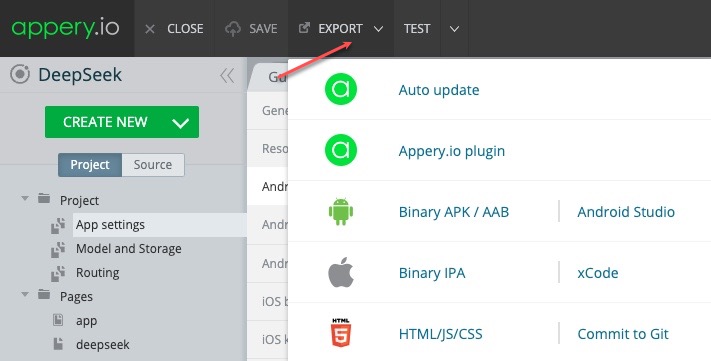
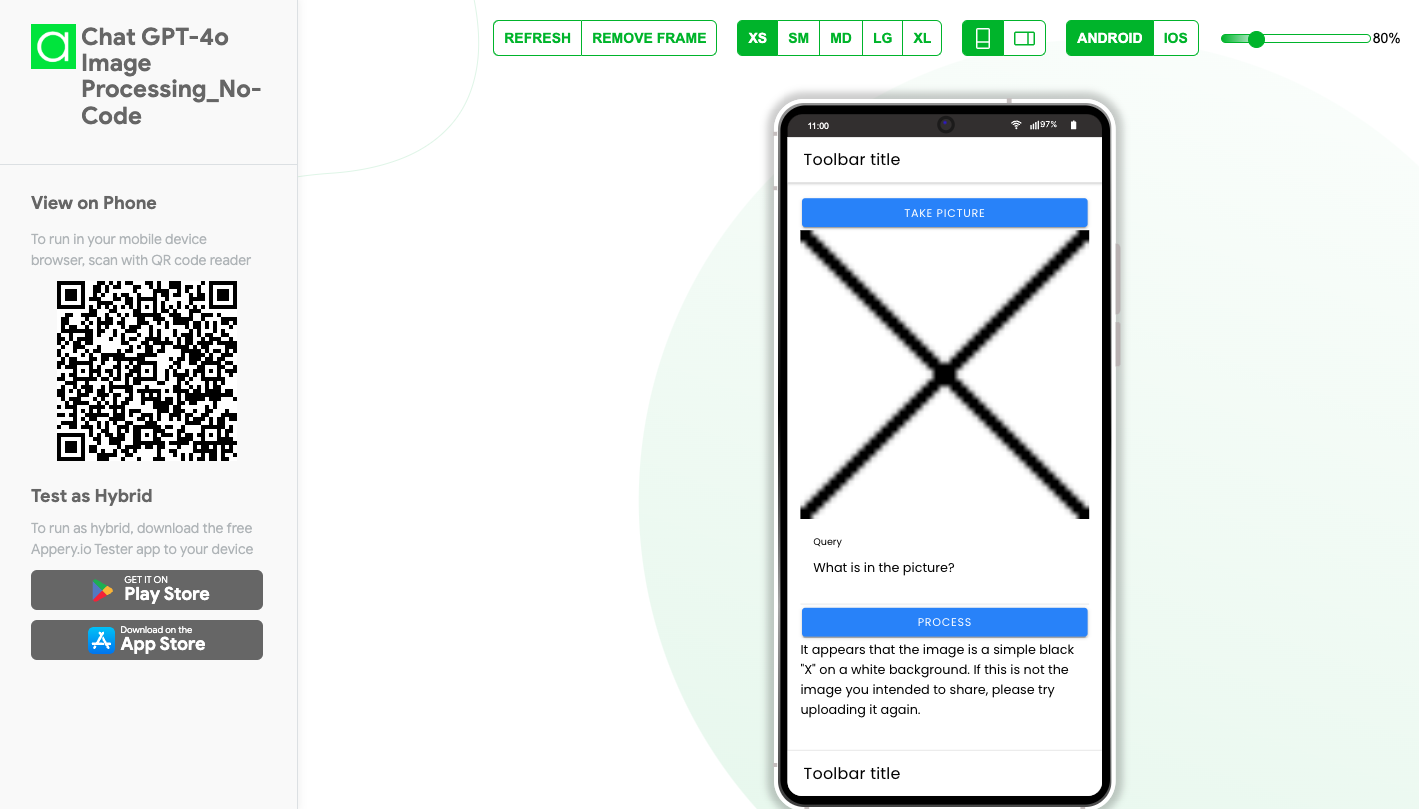
You can then scan the QR code, download the app file, and install it on your phone to see it in action.


Conclusion:

In just a few simple steps, you’ve built an AI-powered mobile app using Appery.io and DeepSeek AI. The process is fast, easy, and requires no coding experience. Whether you’re a beginner or an experienced developer, Appery.io offers a powerful solution for building AI-integrated apps in minutes.

For clear instructions, follow our full video tutorial to guide you through the process! Watch it now and start building your app today.

If you found this guide helpful, don’t forget to like, share, and subscribe for more tutorials!

Boost Your App with ChatGPT-4 Plugin and Appery.io’s No-Code Power

With the advent of Appery.io—a powerful no-code app-building platform—coupled with the cutting-edge ChatGPT-4 plugin, creating advanced, feature-rich applications has never been simpler.

Discover how to harness the full potential of these tools in our latest YouTube tutorial.

Why Choose the Appery ChatGPT-4 Plugin?

The Appery ChatGPT plugin is a revolutionary tool that enables your app to process file uploads and deliver human-like responses. This plugin integrates seamlessly with Appery.io, leveraging OpenAI’s robust capabilities to bring unprecedented interactivity and intelligence to your mobile applications.

Simplified Integration with Appery.io

One of the standout features of Appery.io is its ability to simplify complex tasks. No need to struggle with extensive coding; instead, you can easily add the ChatGPT plugin, set up your app, and start processing images in no time.

The entire process is user-friendly, ensuring that even those unfamiliar with technical jargon can follow along effortlessly.

ChatGPT-4 Plugin Integration

Create Engaging User Interfaces

Using Appery.io, developers can create intuitive and engaging user interfaces. With drag-and-drop functionality, you can quickly design a UI where users can upload images, enter queries, and receive intelligent responses from ChatGPT-4o.

Enhance User Experience

Adding components like file pickers and text input areas enhances the user experience. These features allow users to select and upload photos directly within the app, making the interaction smooth and enjoyable. The ChatGPT plugin then processes these images, delivering impressive, human-like responses.

Seamless and Efficient Testing

Before launching, testing your app is crucial to ensure a flawless user experience. With Appery.io, you can easily test the image upload, query submission, and ChatGPT-4o response features, fine-tuning your app for optimal performance.

Thorough testing guarantees a seamless user experience

Watch Our YouTube Tutorial

Curious about the detailed steps? Our YouTube tutorial covers everything you need to know about integrating the ChatGPT plugin with Appery.io. From setting up your app to designing the user interface and testing functionalities, we guide you through each stage.

For a comprehensive guide, make sure to watch the full video.

Discover the Power of Appery.io

Appery.io empowers you to create powerful, intelligent apps effortlessly. Its no-code platform, combined with the ChatGPT plugin, opens up a world of possibilities.

Don’t miss out—head over to our channel, watch the video, and see how you can transform your mobile app development process today!


Maximize your app’s potential with the ChatGPT-4o plugin and Appery.io. Watch our YouTube tutorial now for a step-by-step guide to creating intelligent, interactive mobile apps with ease. Whether you’re a seasoned developer or just starting out, Appery.io has the tools to help you succeed. Subscribe to our channel for more exciting tutorials and updates.

Harness ChatGPT-4o with Appery.io: Easy Low-Code Guide

Mobile app development is continually evolving, and one of the most exciting advancements is ChatGPT integration. By leveraging ChatGPT with a low-code platform like Appery.io, you can make app development easier and more effective. This combination offers both seasoned developers and beginners an accessible way to integrate advanced features into their apps. Let’s dive into how ChatGPT integration with Appery.io can boost your app development process.

What is ChatGPT?

ChatGPT is an advanced language model created by OpenAI. It can understand and generate human-like text based on the input it receives. This makes it perfect for creating chatbots, automating content, and enhancing user interactions in mobile apps.

Why Use Appery.io?

Appery.io is a low-code platform designed to simplify app development. It allows you to build advanced mobile apps without needing extensive coding knowledge. The platform offers a user-friendly interface and drag-and-drop features, making it easy to use for everyone.

Integrating ChatGPT with Appery.io

Combining ChatGPT with Appery.io brings together the power of advanced language processing and user-friendly app development.

By following the steps from our latest video, you’ll get a sophisticated image generating app using Appery.io as a low-code platform. This method is perfect for developers who want flexibility without the headache of heavy coding.

Ready for the full walkthrough? Watch our complete video tutorial now! Don’t forget to hit the like button, drop a comment, and subscribe for more amazing content.

Deploying Your App

Once satisfied with the app’s functionality, you can deploy it. Appery.io offers various deployment options, including exporting the app as an APK for Android devices or uploading it to the App Store for iOS.

Conclusion

Combining ChatGPT with Appery.io opens up a world of possibilities in mobile app development. By integrating advanced language understanding with a flexible and easy-to-use platform, developers can create innovative apps that stand out. Whether you are a seasoned developer or just starting, this powerful duo makes app creation more accessible and exciting than ever before.

If you’re interested in exploring this further, why not give it a try? Create your account on Appery.io, get your OpenAI API key, and start building your next breakthrough app today!

Unlock Smarter Apps with ChatGPT and Appery.io’s Low-Code Magic

Hey there!

It’s the Appery.io team back with another exciting tutorial. 🔥

In our last video, we showed you how to integrate ChatGPT-4o with your app using our no-code platform. This cool feature lets your app efficiently process uploaded images and respond just like a human would.

If you missed that video, don’t worry.

You can watch it now by clicking this link.

This time, we’re diving into the low-code environment. We’ll use the Appery.io App Building platform again, but as a low-code editor.

Our new how-to video covers:

✅ Getting Started with Appery.io

✅ Setting Up the User Interface

✅ Adding Variables and Plugins

✅ Creating the `takePhoto()` and `process()` Functions

✅ Adding OpenAI API Key 

✅ Testing Both on Preview and on a Real Device

Ready to start? Let’s jump in!

Follow this step-by-step video guide and by the end, you’ll have a fully functional app, all with minimum coding and with maximum AI power!

Why Choose Appery.io for ChatGPT Integration?

Appery.io is a revolutionary low-code development platform designed to make app building accessible to everyone. Whether you’re a seasoned developer or a beginner, Appery.io simplifies the process of creating functional apps. With its intuitive interface and robust features, it’s never been easier to incorporate advanced functionalities, such as ChatGPT integration, into your mobile applications.


Visit the Appery.io website to download a free trial version and explore the magic of ChatGPT within your own app-building environment.

Happy developing!

Power Up Your App: Effortlessly Fuse ChatGPT Plugin with Appery.io for Next-Level Image Processing Magic

In today’s tech-driven world, mobile app development has evolved to be more accessible and efficient than ever before. With the emergence of innovative tools like the ChatGPT plugin and platforms like Appery.io , building powerful apps has become a breeze, even for those with no coding experience.

At the forefront of this technological advancement is the integration of the ChatGPT-4o functionality into mobile apps using Appery.io . This dynamic duo enables developers to process uploaded images and receive human-like responses seamlessly.

To kickstart this process, the Appery.io team showcases how to leverage the Appery.io platform as a no-code editor, alongside the new Appery ChatGPT plugin. With predefined services at your fingertips, the integration of OpenAI’s power into your app becomes a seamless experience – no coding required!

Key takeaways from the integration process:

1. Create a new blank Ionic app on Appery.io, naming it “ChatGPT-4o Image Processing_No-Code” for easy identification.

2. Click CREATE NEW > From Plugin and add the Appery Chat GPT plugin by selecting it from the Appery.io plugins catalog.

3. Also, add the Camera service for uploading images effortlessly.

4. Integrate the OpenAI key from the OpenAI portal into the Settings service of your app.

5. Once the building blocks are in place, it’s time to craft the app’s user interface. With components like buttons for capturing images, uploading functions, and querying ChatGPT for responses, the app promises a user-friendly experience.

6. The integration doesn’t stop at the UI design – defining services such as input and output mappings ensure that the app functions smoothly. With the Camera service mapping images to display on the screen and ChatGPT service processing queries, the app’s core functionalities come to life effortlessly.

7. Appery.io’s platform streamlines the process further by enabling direct triggering of services with a simple button click.

8. Testing the app’s functionality, whether on a mockup image or a real device using the Appery Tester tool, showcases the app’s capabilities in real-time.

In conclusion, the seamless integration of ChatGPT plugin on Appery.io signifies a paradigm shift in mobile app development, proving that complex application logic can be achieved without writing a single line of code.

Stay tuned for more insights on leveraging Appery as a low-code editor in our upcoming video!

Unlock the Magic of ChatGPT-4o: Effortless Low-Code Transformation for Your Text App!

We have an exciting news for you today! In our last video (you can find more details in this post), we showed you how to integrate an app with ChatGPT-4o using our platform as a no-code editor. Now, we’ll take it a step further. In out new video tutorial, we are demonstrating a similar integration, but this time using a low-code approach.

This means that only a minimum amount of code will be needed to implement the ChatGPT functionality for more complex integrations. Intrigued? Let’s dive in!

For your convenience, we are also providing the step-by-step instructions below.

Getting Started: Create a New App

First, let’s go to the Appery.io platform and traditionally create a new app.

You’ll need to add the necessary OpenAI Key that you can get from the OpenAI portal. Navigate to the Settings service and enter this key.

Just like before, any application will automatically get access to the OpenAI object once the OpenAI API key is specified. You can find more details in our documentation if you need further guidance.

Setting Up the User Interface

Before we start creating our UI, we need to decide how the code will access the input and display the output. We can use either local or global variables. For this demo, let’s use global variables.

So, open Screen1 in your new app, drag the following UI components onto the page and define them as follows:

Textarea (this is where you’ll enter questions):

  • Label = Question
  • [(ngModel)] = $v.question (Global variables are accessed with the $v variable) 

Button: (this will trigger the function named process() to handle the questions):

  • Text = Process
  • (click) = process()

Text: (this will display the responses from ChatGPT):

  • Text = {{obj}}
  •  Text in Editor = Food1 (to make page appear appealing in the editor without breaking the app’s UI)
  • *ngFor = let obj of $v.arr

We configured our no-code app to receive output as an array, not a string. For this low-code app, we’ll do the same. Let’s assume that ChatGPT will return an array of entities which we will iterate over and display.

Setting Up the Process Function

It’s time to configure the process function:

1. Open CODE > Functions, enter process for the function name and make sure it’s set as an async method.

2. Define the process method with the following code:

this.$v.arr = await this.$a.openai.aioRequest(this.$v.question, {format: ["food1", "food2", "..."]})

In this code, we’ll use the OpenAI object to send requests and receive an array of strings as responses. The first parameter is our question, represented by $v.question.

We also need the response to be an array of strings, so we’ll define the format for the second parameter in our code.

To enhance user experience, add a loading indicator before sending the request and remove it once the response is received.

await this.$a.showLoading()

await this.$a.dismissLoading()

All Set! Testing the App

Your app is ready for testing! Enter a query, press the button, and see the output from ChatGPT-4o:

Thank you for keeping up with us! We hope you found this video helpful.

Don’t forget to subscribe to our channel for more insightful content. Stay tuned and happy coding!

Push Notifications with Appery.io Server Code: Watch Our New Tutorial

Hey everyone! The Appery.io team is excited to announce our latest video tutorial on integrating push notifications into your mobile app by using Server Code. 🎉

Push notifications are a powerful tool for engaging app users. With Appery.io, integrating these notifications is simple, even if you’re not tech-savvy. In this video, we are showing you how to add push notifications to your mobile app using Appery.io , a low-code platform that makes app development accessible for everyone.

Our new how-to video covers:

Setting Up Push Notifications: Learn how to configure notifications before sending.

Triggering Custom Actions: See how to trigger popups or other actions when a notification is delivered.

Sending Technical Data: Discover how to pass custom data, like navigation instructions, via push notifications.

Automating Notifications with Server Code: Understand how to send notifications programmatically for real-world use cases.

Targeting Specific Devices and Users: Master the art of sending notifications to individual devices and users.

Highlights from the Video

1. Real-Time Updates: With Live debug, any changes you make in Appery.io are instantly reflected on your mobile device.

2. Custom Alerts: Trigger TypeScript code when a notification is delivered, showing custom alerts or actions.

3. Server Code Integration: Learn to automate push notifications using server-side code.

4. User Targeting: Send notifications to specific users across all their devices by linking user IDs.

Watch Now

Don’t miss out! Watch the full video tutorial and elevate your app’s user engagement effortlessly. Click below to watch the video.


Want more insights? Check out our YouTube channel for more videos and tutorials.

Don’t forget to like and subscribe. Your support keeps us going!