Creating and using custom components in Appery.io

This tutorial will show you how to build and use a custom component. Custom components (or composite components) are very useful because you can combine any components together, create a custom component, and reuse it through out the application. Using custom components will save a lot of time.

To start, let’s build a small prototype which we will then save a custom component.

  1. Drag and drop a Panel container, change header label to Deliver options
  2. Then, drag and drop 4 radio buttons and set their labels as shown:
  3. One last thing we want to do is a button. Drag and drop a Button component and change its label to look like this:
  4. Let’s test what we have created so far. Click Web Preview button on the top menu to open a browser window. Looks nice? Let’s now make this a custom component.
  5. To create a custom component, select both the panel and button on the page. You can do it with the mouse (“stretch rectangle”), by selecting the container and button as shown here:
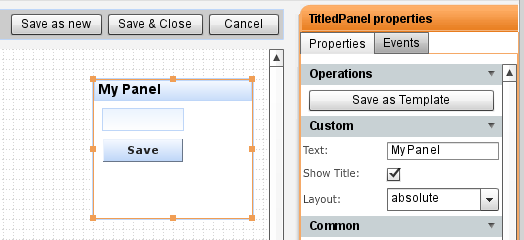
  6. Now, go to Properties windows on the right-hand side and click Save As Custom Component button.
  7. For Template Name enter: DeliveryComponent
  8. For Palette Name select: My components
  9. Click Create.
  10. Go to Components tab on the left-hand side and open My components palette (you might have to close other palettes). There you will see (see screen shot) the custom component we just created: DeliveryComponent.
  11. Open any screen and drag and drop this component into the page as any other component. That’s it. You now have a custom component which can be reused anywhere.

Editing a custom component

  1. To edit a custom component, select the component, then click Edit Source in Properties panel.
  2. If you need to separate individual components inside a custom component, select the custom component, then click Break Apart Template. This will break or unlink the components inside and let you use them as any other components individually. Note: this will not affect the custom component. It will still be listed under My components palette
  3. To delete a custom component, select Project/Assets, then select Custom Components tab. Select the custom component. From there you can edit, rename or delete the custom component.

Getting started with Appery.io – building and sharing interactive HTML prototypes

If you are not familiar with Appery.io, this is the place to start. We will create a two page prototype and add navigation between pages. Let’s start, all it takes is 5 minutes to build it!

If you are new to Appery.io, create a new Appery.io account and build your first prototype.

  1. In Projects page, create a new Appery.io project, let’s call it: MyCoolPrototype
  2. Once the project has been created, click the project name to open Appery.io editor.
  3. Select Components tab on the left, and then open Container palette
  4. Select the Panel container and drag and drop it into the editor
  5. Double click on Panel title and change it to Login. Your screen should look like this:
  6. Let’s now change the layout inside this panel. Go to Properties, Custom section and then Layout property, change the layout to Absolute
  7. From Components palette on the left-hand side, drag and drop Text component into the Login panel. Set label name to Email. Adjust component name if needed.
  8. From Components palette, insert Text input component, to the right of Email label. Your screen should look like this:
  9. Now, let’s repeat the same steps and add Password label and input field. Your screen should look like this:
  10. One of the cool things in Appery.io is that you can quickly view the prototype in a browser. Let’s do that. Click the big Web Preview button on the top menu. A browser window will open with the prototype we have created so far. Note: make sure you allow pop-ups for *.appery.io
  11. Now let’s add a button.  From Components palette, insert a Button component under the password input field. Change button label to Sign In, to look like this:
  12. Let’s now create a second screen (page).
  13. Switch to Explorer tab on the left
  14. Click on Add Screen button. A dialog will appear asking you to select a template. Web Screen should already be selected as default value and that’s what we want. Click OK. You should now see screen1 and screen2 under Screens.
  15. Let’s rename to screens as we will use them later. Select screen1 and go to Properties, Common section and then Name property. Change the name to Login. Repeat the same for screen2, set its name to Welcome.
  16. You should have Welcome screen open. Switch to Components tab and open Containers palette.
  17. Insert  Drag and drop a Panel container and change its label to Welcome
  18. Insert a Text component inside the panel and change the text to: You are now logged in!
  19. Insert a Link component, right under the text and change its label to Sign Out. The result should look like this:
  20. Let’s view the second page of our prototype in a web browser. Click Web Preview button. A new window will open with the prototype.
  21. You will also see an orange arrow at the top of the page. Click on the arrow, a menu will appear where you can select a different page to view from the prototype. It looks like this:
  22. Let’s make the prototype interactive by adding navigation. Switch to Explorer tab on the left and select Login page and then select Sign In button.
  23. Switch to Events tab in the right panel.
  24. Click Add Event and select click. A Click event will appear. It looks like this:
  25. To add an action to this event, click + icon on Click event and select Navigate to Page action.
  26. From the menu shown, select Welcome.  It should look like this:
  27. Click OK. When Sign In button is clicked, we are going to navigate to Login page.
  28. Let’s test how this works. Click Web Preview and click the Sign In button. Pretty cool, right?
  29. Let’s now add navigation to Sign Out link on Welcome page.
  30. Select Welcome page
  31. Select Sign Out link and switch to Events tab in the right panel
  32. Click Add Event, add Click event
  33. Add an action to this event by clicking + icon and select Navigate to Page action
  34. From the menu shown, select Login as we are navigating back to Login page (when we Sign Out)
  35. We are done. Now, select Login page and click Web Preview. Try your first interactive prototype!
  36. To close this project, from the menu bar select File/Save and Close.

Appery.io: A Tool for Building Interactive Html Prototypes (UXMovement)

Try this very interactive HTML prototype created in Appery.io

Check out this interactive prototype. It was complety created in Appery.io using the new events/actions feature.

Every time a new wonder is selected, a different image is shown. On click event, the image src attribute is updated with a new image. When you click Find Out where?, a pop-up opens showing the location of the wonder. Every time a new wonder is selected, a custom location JavaScript variable is set. Inside the pop-up, component which display the location is bound to this variable. Pretty cool, huh?

Create your first interactive prototype in Appery.io.

Appery.io: Web and Mobile Prototypes Tool on jaxenter.com

Appery.io article on jaxenter.com.

Appery.io 2.0 packs powerful new features: expanded events/actions, page templates, custom components and annotations.

Appery.io 2.0 packs powerful new features: expanded events/actions, templates, custom components and annotations. Try the new Appery.io today

Events and actions

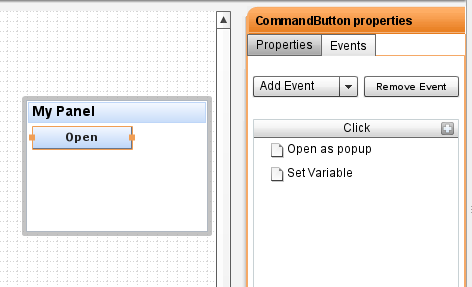
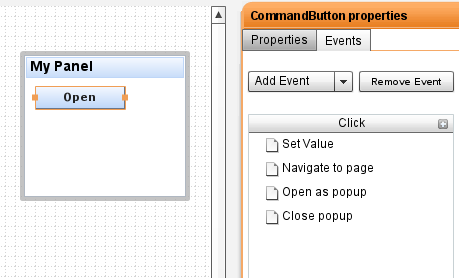
We have greatly expanded actions and events feature and now in addition to navigating between pages, you can set events such as click, value change and associate actions with those events such as setting a value, opening a pop-up window and much more. We are taking HTML prototypes to, well, real HTML prototypes. The following actions are supported (and more are coming soon):

  • Set HTML attribute
  • Set Property
  • Navigate to Page
  • Navigate to Link
  • Open as Popup
  • Close Popup

To start using the expanded events/actions features, just switch to the new Events tab.

Page templates

Who doesn’t need or like templates? As the prototype becomes bigger, making changes that repeat on every page becomes more difficult and time consuming. That’s why we just introduced templates – frequently requested feature!. You will be able to save any screen as a template and then use the template to create new pages based on it. How do you like this time-saving feature!

Custom components

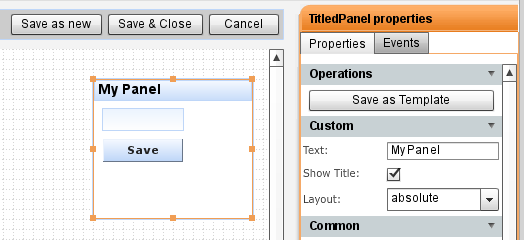
Need to reuse two or more components multiple times? Now you can create a composite custom component to use anywhere in your project. The composite component will appear in Custom Components palette. To create such component, just select two or more components and click Create Template button.

Annotations

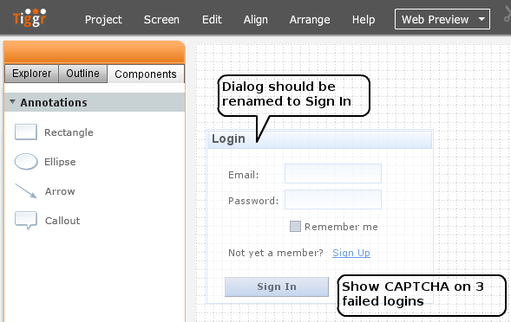
Collaborating and sharing the prototype was possible since the beginning. However, it can be very useful to be able to leave notes or comments inside the prototype for users to view later such as “Change button label to “Save”. Now it’s possible with the Annotations features. Another cool and useful feature! To activate annotations, click Show Annotations at the bottom of the application.

New View with three tabs – Explorer, Outline and Components

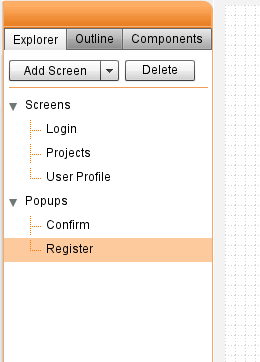
To make it easier to work with projects that have large number of pages, we have created a new view which combines Explorer, Outline and Components tabs. Explorer tab is for pages, Outline tab is for quick navigation, and Components tabs has all the controls you can use to create prototypes, it will also list your custom components.

Feedback from the community

We also fixed or added the following issues reported by users:

You can always tell us what you think by visiting http://getsatisfaction.com/apperyio or on Twitter: @apperyio.

Happy Interactive Prototyping!

New Appery.io features coming up: action/events, templates, and annotations

We are working hard on getting the next major release of Appery.io out and have planned a number of major and user requested features: actions and events, templates and annotations (notes). Here is a quick preview of what’s coming up!

Expanded actions and events

Today you can navigate between pages but wouldn’t it be cool if it was possible to define other actions and events. Well, that’s coming up. We are expending actions and events feature and soon you will be able to set events such as onclick, onchange and others and associate actions with those events such as setting a value, opening a pop-up window and much more. We are taking HTML prototypes to, well, real HTML prototypes.

Screen templates

Who doesn’t need or like templates? As the prototype becomes bigger, making changes that repeat on every page becomes more difficult and time consuming. That’s why we are introducing templates. You will be able to save any screen as a template and then use the template to create new pages based on it. How do you like this time-saving feature!

Annotations (notes)

Need to comment on particular component or design? Need to leave a note for other users with whom you shared the prototype? You will be able to do it very soon. We are adding annotations feature where you can add notes to the prototype (these notes will not be visible in Web Preview of course).


But, don’t wait, try Appery.io today!

Appery.io release 1.2.6.3 – user survey, a few minor features, and bug fixes

Today Appery.io team released a minor update, release 1.2.6.3. In addition to some behind the scene improvements, we added a user survey (shown only once) and a number of small improvements.

When you login to Appery.io, you might be presented with a survey. It should take you under a minute to complete the survey. Please tell us how you use Appery.io and what features you would like to see.

Web Preview is now a 1-click action. Just click Web Preview button to see how your prototype looks in Web browser. If you need to configure preview, click the down arrow and select Configure.

We have made it even simpler to share your prototype. We have added popular share icons to Web Preview version. In case you don’t want the icons in your Web Preview version, select Web Preview/Configure and uncheck Display share buttons in Preview.

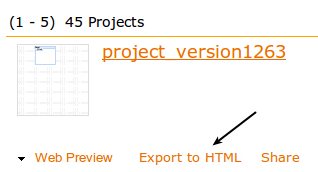
Export to HTML link is now visible right under the project name. It was previously an action in Options menu and many people didn’t know it was there.

We also updated our home page with 3 simple steps you need to take to start creating, sharing and previewing interactive HTML prototypes. Check it out and let us know what you think!

Lastly, we fixed two issues reported by users.

Wireframing Tool Review: Appery.io

Not just pictures, real HTML components with properties

What makes Appery.io different from other tools that just let you export a picture is that you can create real and interactive HTML. Every component in Appery.io (and we are going to add more) comes with properties to configure the component. Of course when you preview the prototype in web browser, whatever properties you set will be generated in HTML. You go from a prototype to an HTML prototype – which is really very close the actual application UI.

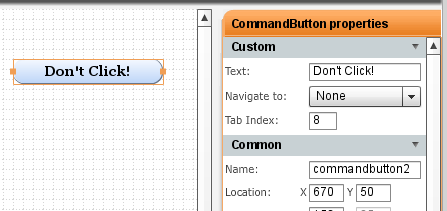
Let’s take one of the most popular components in Appery.io, the button, and see what properties you can work with.

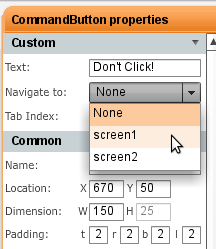
You can set the button label (that’s kind of obvious). Appery.io prototypes are interactive and let you define navigation between pages. When running in web browser, you will navigate between pages. If you have multiple screens, you can set navigation like this:

Tab Index allows you to set the tab index order when you preview the prototype in the browser and use the Tab key to navigate the input components.

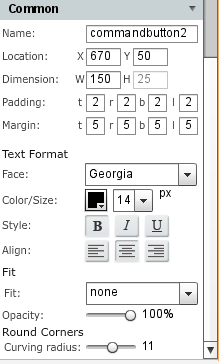
Scrolling farther in properties, you will see other properties you can set shown below. As you can see, you can set everything from padding, margins to standard formatting such as font face, color, size and style. The very last property allows you to set round corners.

Having all the properties is very powerful as you can create real interactive HTML prototypes with actions and events and not just static images. We soon we are going to expand action and events. You will be able to build even more interactive prototypes.