How to Add reCAPTCHA to an Ionic App

reCAPTCHA is a nice service that usually added to a registration form and helps prevent bots from registering automatically. The service usually displays a small and easy challenge to a human but which would be difficult for a bot to answer. In this blog post we are going to show you how to add reCAPTCHA to an Ionic app.

Let’s start.

  1. Create a new Ionic app based on Ionic Blank template.
  2. Go to https://github.com/vividcortex/angular-recaptcha, download vcRecaptcha.js, and unzip the file.
  3. Inside the App  Builder, go Create New > JavaScript, name it vcRecaptcha, check Upload from file and select the angular-recaptcha.js file from your drive. For type, select Angular module and click Create JavaScript.
  4. Now, open Screen1 and add an HTML component to the page.
  5. Under the Properties panel, click Edit and add the following code:
    <div vc-recaptcha key="'XXXXXXXX'" on-success="onSuccess()"></div>
    

    where 'XXXXXXXXX' is the key generated on https://www.google.com/recaptcha/admin (your key must be inside the double quotes).

  6. Switch to Scope view and add a new function, name it onSuccess, and add the following code to the editor:
    Apperyio.navigateTo("Success");

    onSuccess() is the scope function that executes when the correct Captcha is entered (here, another page will open).

  7. To demonstrate this, create a new page and name it Success. Add a Text component to the page and paste Welcome! for its Text property.
  8. Also, if you want to add a solving annotating images to your reCaptcha, go to Project > Routing, click Manage dependencies for Screen1, and check reCaptcha.

That’s it. You are ready to test your app with the reCAPTCHA.

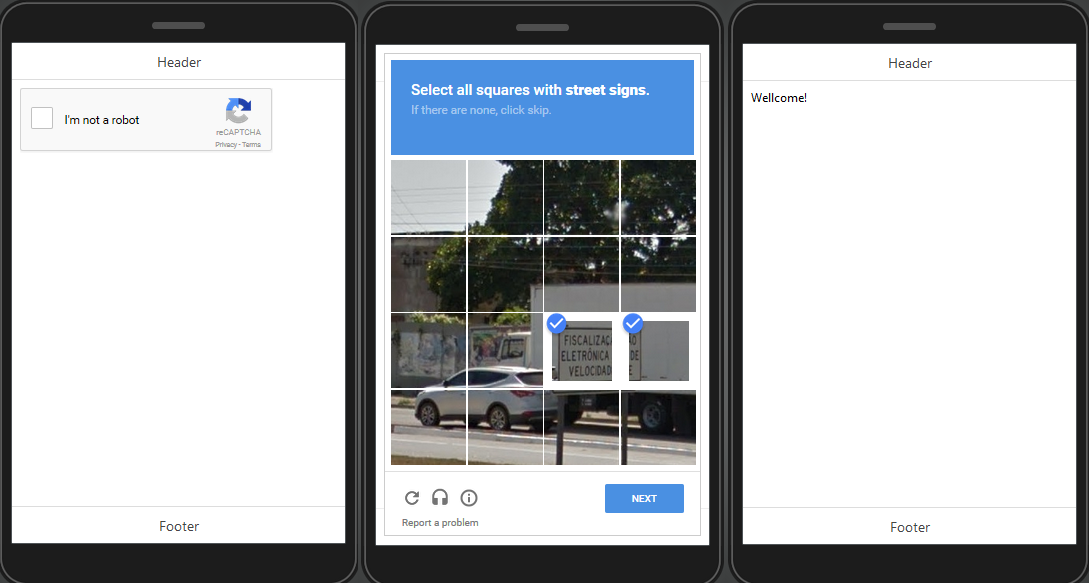
reCaptcha

reCaptcha example.

Looking for more examples? Check out our sample apps list. Every app has preconfigured app UI and app backend for you to try.

Update on Upcoming New Pricing

Hi there – this is John, Appery.io CEO.

There has been a fair amount of discussion on the recent change in pricing for the Appery.io platform. I do want to assure you all that we are reading, listening, and we do understand the concern. We are grandfathering existing customers to their plans, but even without that, the change would actually affect a very small number of our customers as our platform is very efficient in the use of API calls, etc..

These changes should only impact a few of our customers that have the higher levels of consumption and need high levels of support and SLAs. For those customers you can contact us and we can work with you on an appropriate business model.

For the vast majority of customers, the only effect is that you will end each month having consumed 50% or 75% of the allowance versus an extremely small percentage.

By doing this, we are moving our high consumption customers to appropriate plans so that performance and quality of service is maintained for all. Please post any comments or questions and I will be happy to answer them.


How to Use the HTML Video Tag to Play Videos in an Ionic/AngularJS App

When building an Ionic/AngularJS app with the Appery.io App Builder you can add an HTML component to play back video files.

In this tutorial, you will learn how to do this.

To start, you need to create a new Ionic app.

  1. Drag an HTML component to the page and click Edit to modify the code.
  2. Add the following to the tag editor:
    <video controls="controls" width="640" height="340" name="Video Name" ></video>

    EditHTML

    Edited HTML tag

  3. Save it and switch to the SCOPE tab.
  4. For the init() function, pass the following:
    $scope.makeAction();
  5. Now, create a new function and name it makeAction and add the next code, replacing urlToVideo with the URL of the video you need to play:
    var vidURL = "urlToVideo";
    var myVideo = document.getElementsByTagName('video')[0];
    myVideo.src = vidURL;
    myVideo.load();
    myVideo.play();

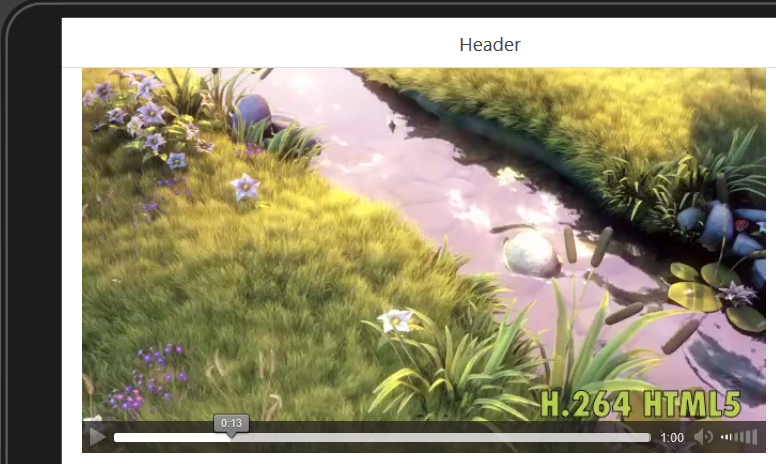
Below is the example of playing back the video with URL = http://clips.vorwaerts-gmbh.de/VfE_html5.mp4:

Sample video playback with embedded player

Note that some HTML video may be unavailable for playback.

How to Add JavaScript Form Validation to a Mobile App

Validating user input is one of the most important requirements in a mobile app. The most common approach of form validation requires that you check the form fields before the form is submitted; this is to make sure that the required information is supplied. Today we will show you how you can validate the input fields in your app before submitting the information to the Appery.io Database.

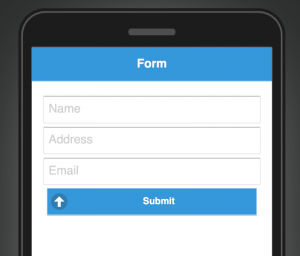
In this example the app will have following simple design:

Form App design

Form app design

Read the rest of this entry »

Development Tip: New ClientSDK Methods For Better Offline Apps

appery

One of the new key features of API Express is that you can build apps offline with the synchronisation functionality so when you go online all off your changes have been synchronised. The ClientSDK library has a set of methods, which when you execute can you build more powerful apps offline. The last Appery update bought us the ClientSDK library of API Express’ new methods to work with action histories made offline:

  • revertLocalChanges – reverts all local changes made in offline mode without clearing the cached data.
  • getDeferredActions – returns the iterator, which you can use further to iterate through the history array items.
  • saveDeferredActions – saves changes to a history, if there was any changes.

ClientSDK will automatically detect the network state and when a device is connected to the internet the ClientSDK synchronises with the server, and sends all offline changes (actions history) made by the user. You can find more information here.

Make sure you check out all of our mobile development tips.

Do you want to build apps fast? Start developing with our trial plan!

Development Tip: Internationalisation In AngularJS Apps With Angular Translate

angular-translate

Internationalisation is one of the must have feature when building global reach mobile apps. An Angular Translate module can be really helpful in translating your app UI. It can be included into an Appery.io app in a few quick steps:

  • Go to the Angular Translate page and download the latest release bundle. Inside this bundle you’ll find angular-translate.min.js file – the one that you need to upload.
  • Open your AngularJS Appery.io app, click CREATE NEW > JavaScript. Type angular-translate.min for the name and select Upload from file, and browse for this file on your PC. Also, change its Type to Angular module, check the Use shim check box and finally, type pascalprecht.translate for Shim exports: input. Click Create JavaScript once the file will be uploaded.
  • Now, another module should be created. It will be responsible for the Angular Translate configuration. Perform CREATE NEW > JavaScript, type AngularTranslate for the name, and choose Angular module for Type. Click Create JavaScript.
  • You’ll see an Angular module template and a lot of commented configuring options. First, this module requires pascalprecht.translate as dependency, so add it  to square brackets. Here is how it should look:
    var module = angular.module('AngularTranslate', ['pascalprecht.translate']);
  • Configuration logic should be added to the module.config function. Here is how your whole module should look when the configuration logic has been added:
    define(['require', 'angular'], function(require, angular) {
        
        var module = angular.module('AngularTranslate', ['pascalprecht.translate']);
        
        module.config(
            
            ["$translateProvider", function($translateProvider) {
                $translateProvider.translations('en', {
                    TITLE: 'Hello',
                    FOO: 'This is a paragraph.',
                    BUTTON_LANG_EN: 'english',
                    BUTTON_LANG_DE: 'german'
                });
                $translateProvider.translations('de', {
                    TITLE: 'Hallo',
                    FOO: 'Dies ist ein Paragraph.',
                    BUTTON_LANG_EN: 'englisch',
                    BUTTON_LANG_DE: 'deutsch'
                });
                $translateProvider.preferredLanguage('en');
            });
        
    }]);
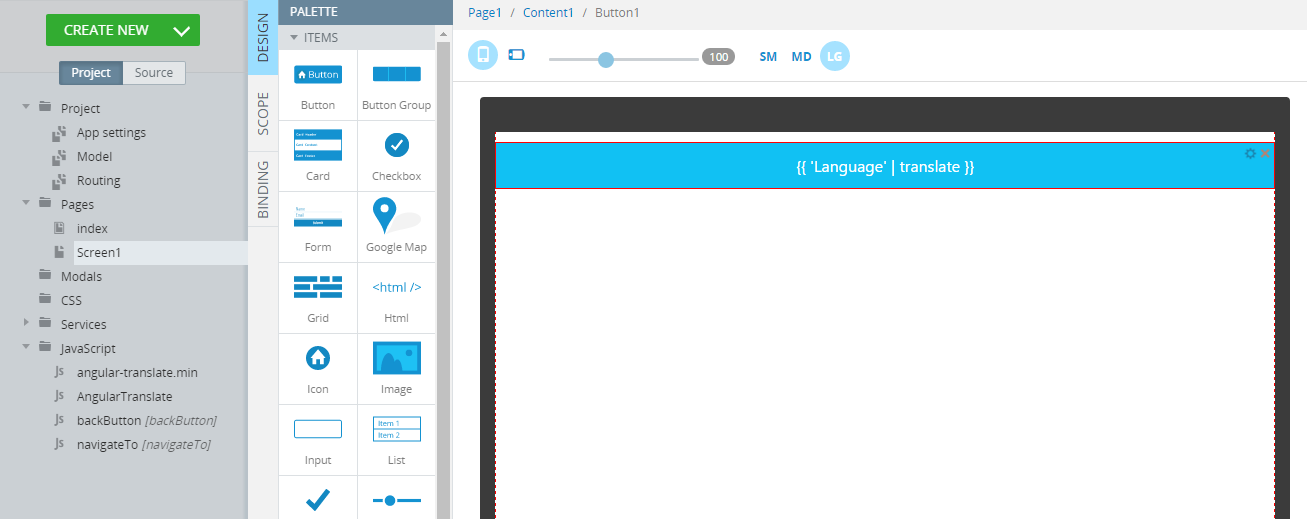
  • The last step is to create a simple UI and check the translation engine. Go to any page in your app, place a Button on the page and provide {{ 'TITLE' | translate }} for its Text property. Launch the app!
  • If you see Hello on the button – you’re done.

One option is to customise the translation mechanism to initiate the language based on the browser or device language. For example, you can get the browser or device language like this:

$translateProvider.determinePreferredLanguage();

Try Ionic app backup with Angular Translate included if you facing some issues.

Read more Angular Translate possibilities in its docs, and make sure you check out all of our mobile development tips.

Do you want to build apps fast? Start developing with our trial plan!

Development Tip: Design Faster with New Copy and Paste Functions Inside the Visual App Builder

apperyio_context_menu

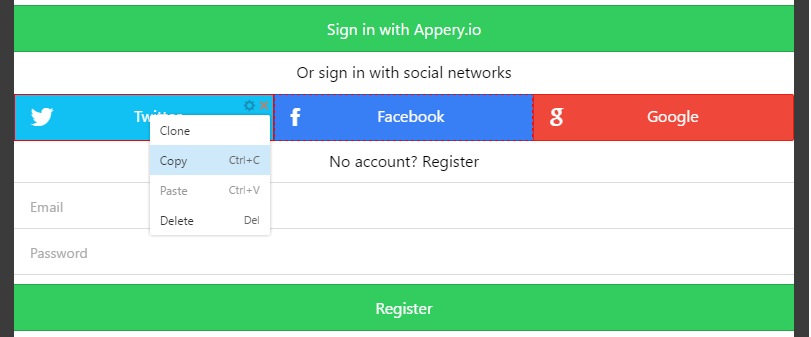
Component context menu

When building a mobile app in the Appery.io visual App Builder it’s very common to place the same component in multiple places. Before, you had to drag each component separately, now there is a simpler and faster to do this with our new copy and paste capabilities.

AngularJS projects in Appery.io use the standard copy and paste functionality that you are familiar with, plus you can clone (duplicate) a component. This means that you can copy your component via a context menu or hotkey (CTRL+C), and paste it even into a different AngularJS project! In order to open the context menu, select any component and click the cog icon.

You can find more information about UI components in Appery.io in our documentation, and make sure you check out all of our mobile development tips.

Do you want to build apps fast? Start developing with our trial plan!

Big Update: New Enterprise Components in API Express, Upgraded Push Notifications, New Ionic Version and More

This is our second major platform update in 2016, we are excited to share our new features and benefits to help you build enterprise apps fast.

New enterprise components in API Express

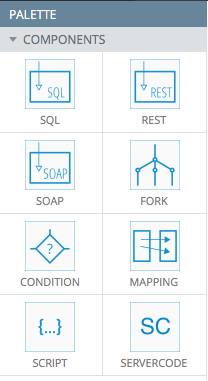
There are two new features of our API Express, these new service components are for creating advanced service logic using the visual builder. Our new features to API express are:  Script and ServerCode. Both components allow you to write custom service logic using JavaScript.

Screen Shot 2016-03-18 at 4.39.34 PM

API Express visual editor enterprise components

  • ServerCode component – allows call Server Code scripts from the API Express. This will be beneficial if your app relies on some server-side logic that is written as a Server Code script. Read more about this component here.
  • Script component – can be used for changing the body structure before passing the data to another component. Find more on Script component in documentation.

Read the rest of this entry »

Learn How to Copy and Reuse Pages Between Apps for Faster Development

Today we will show you how to copy pages into Appery.io projects. This very simple process is described in our documentation, but we are going to show you how to build apps faster by copying and re-using pages. 

First create a new app and add some components to the page which you would like to clone.

1

Page we want to clone

Read the rest of this entry »

Development Tip: Using The Bootstrap Grid In Appery.io

grid

Popular Bootstrap Grid is available in Appery.io’s Bootstrap project as an UI component that can be dragged and dropped to the page. The following steps show how to change grid cell sizes for different screen resolutions:

  1. First open the AngularJS / Bootstrap project and place the Grid component to the page.
  2. Now, if you will look at top right corner of the grid you’ll see a green plus button, this button will add a new row to your grid. If you don’t need to add a new row, but want to add new cells to existing row click on one of the grid cells and then choose GridRow through the breadcrumbs:
    new_cell
  3. A green “+” sign now will add a new cell to an existing row.
  4. You can configure the size for each cell for the four screen sizes. Click on the grid cell and the expand Columns properties in the PROPERTIES to the right of the screen. Type a number from 1 to 12 to define how it will look on the screen:
    cell_sizes

Don’t forget that you can emulate page size directly inside the editor, and when testing the app in browser by clicking XS, SM, MD and LG buttons.

Make sure to check out all of our mobile development tips.

Do you want to build apps fast? Start developing with our trial plan!