Elevate Your Android App with Powerful Push Notifications via Appery.io
Hey there, fellow app developers! Want to keep your users engaged? Push notifications are the perfect way to grab their attention. Today, in our new video tutorial, we’ll guide you through setting up push notifications for Android apps using Appery.io. Let’s dive in!
Here’s a short plan of actions:
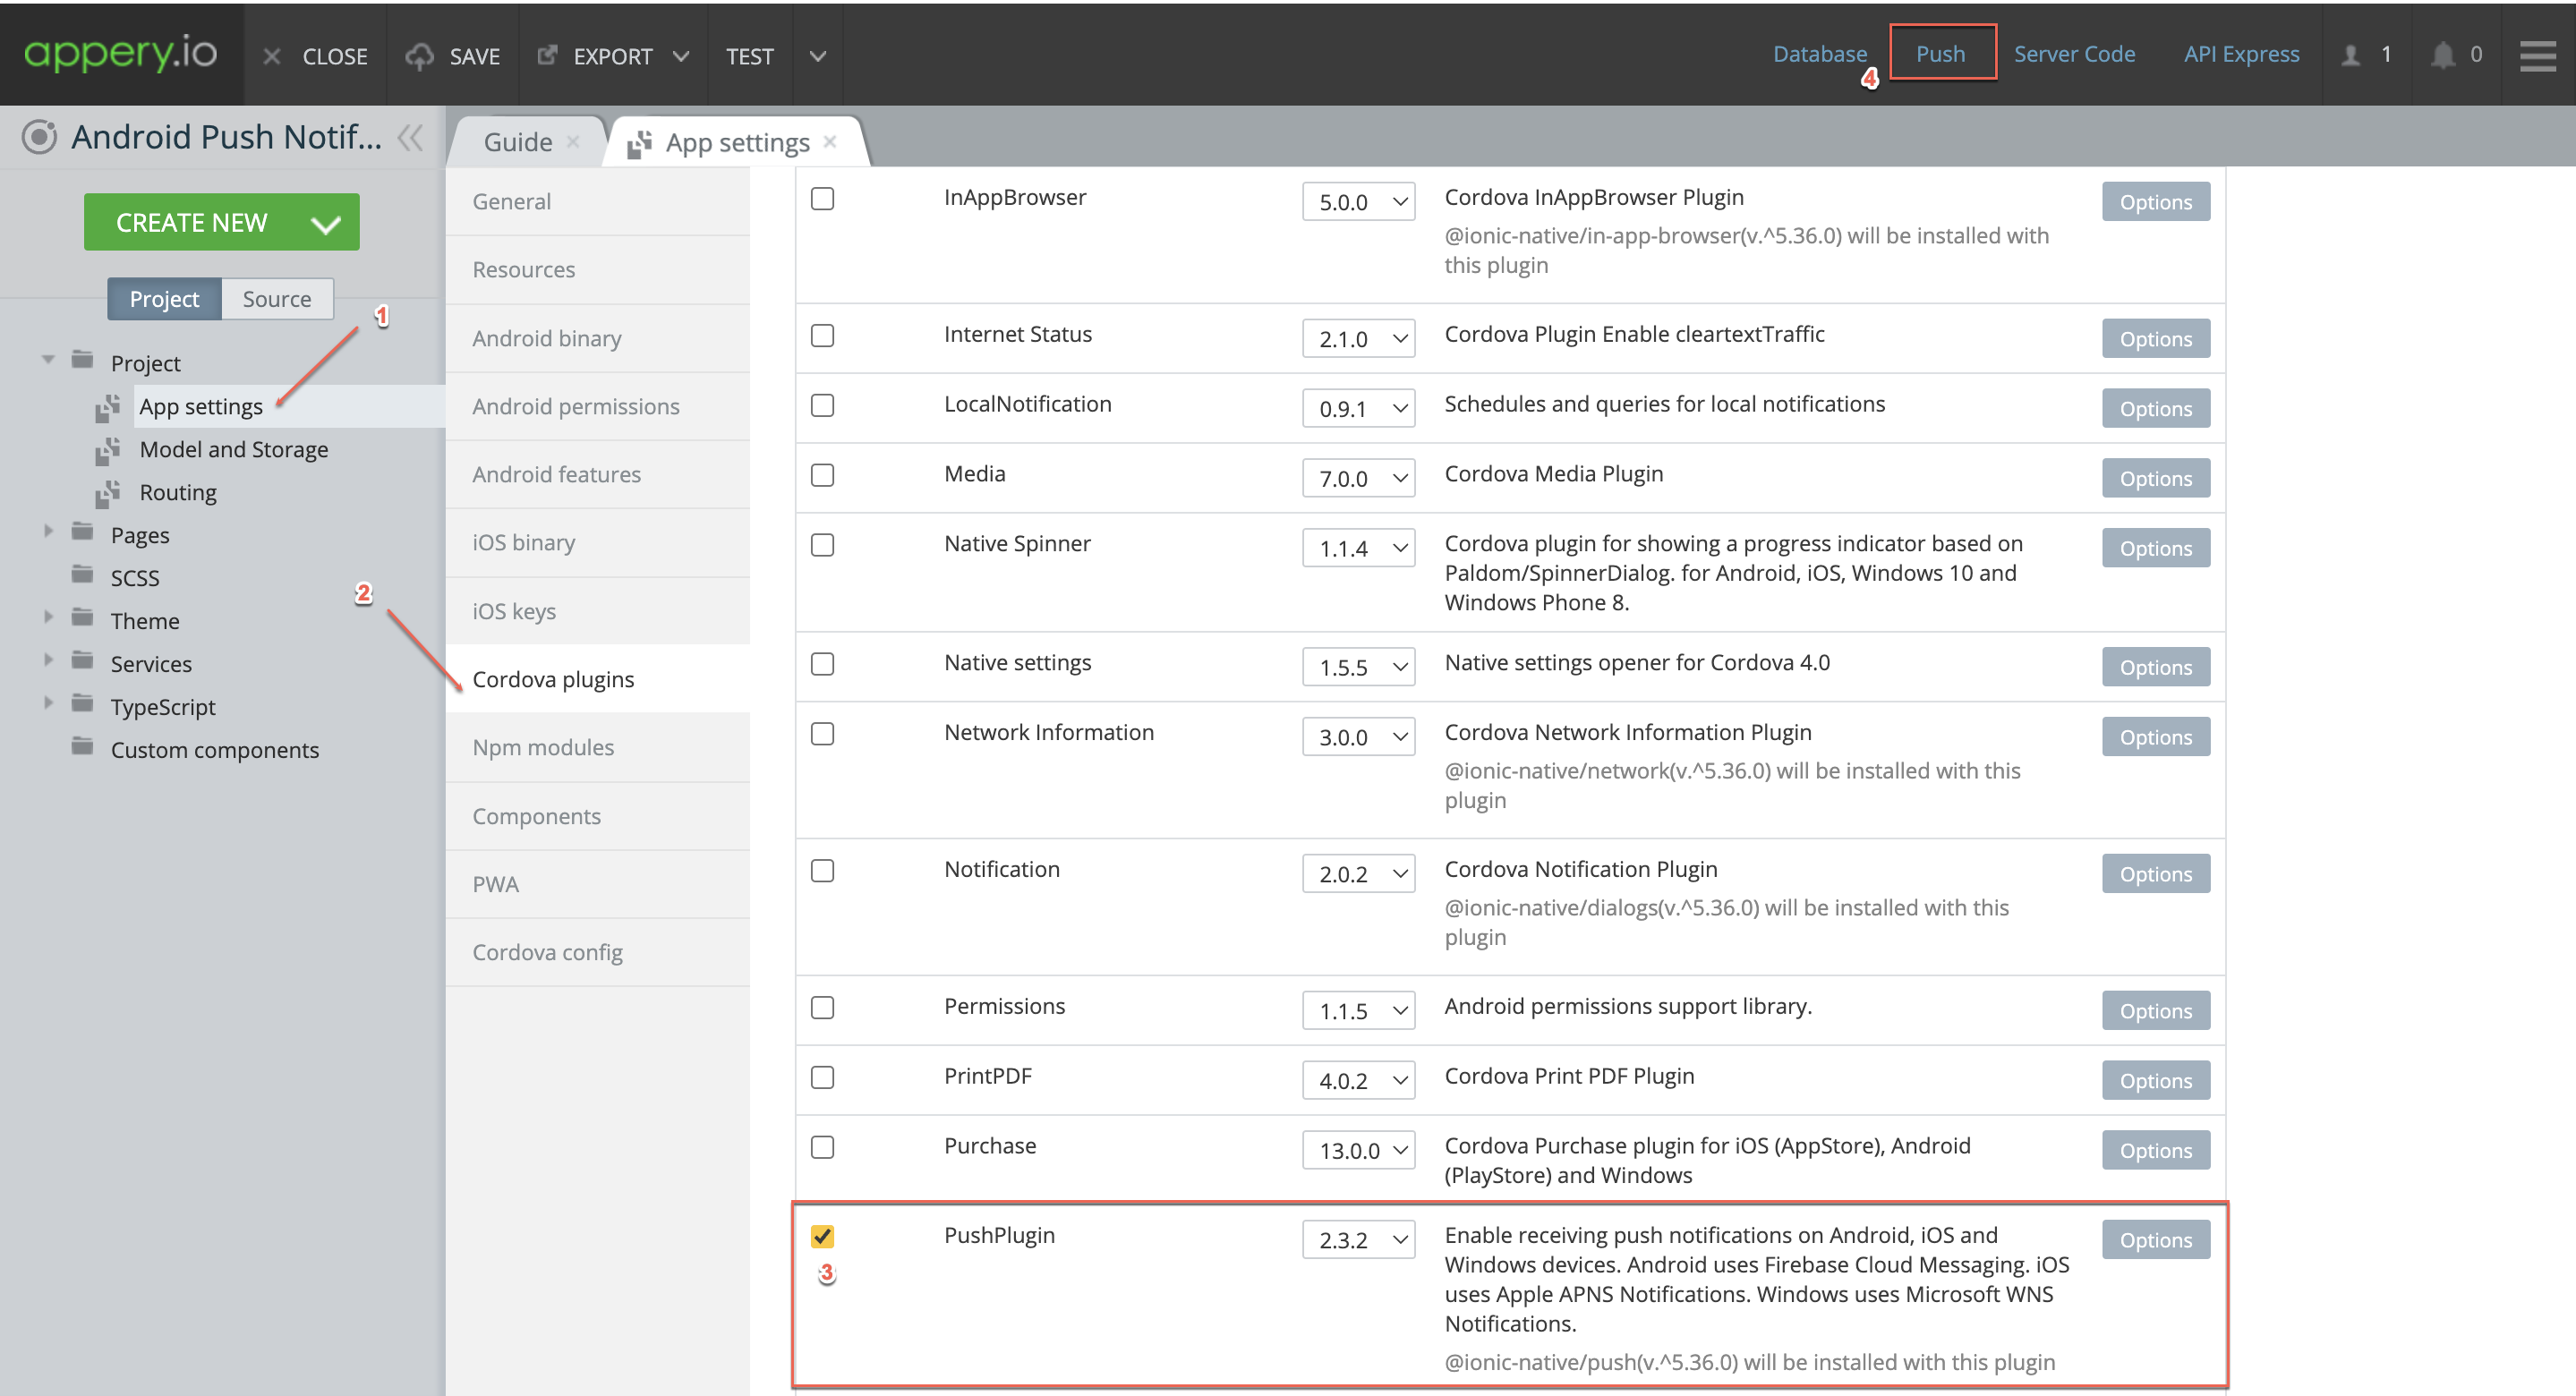
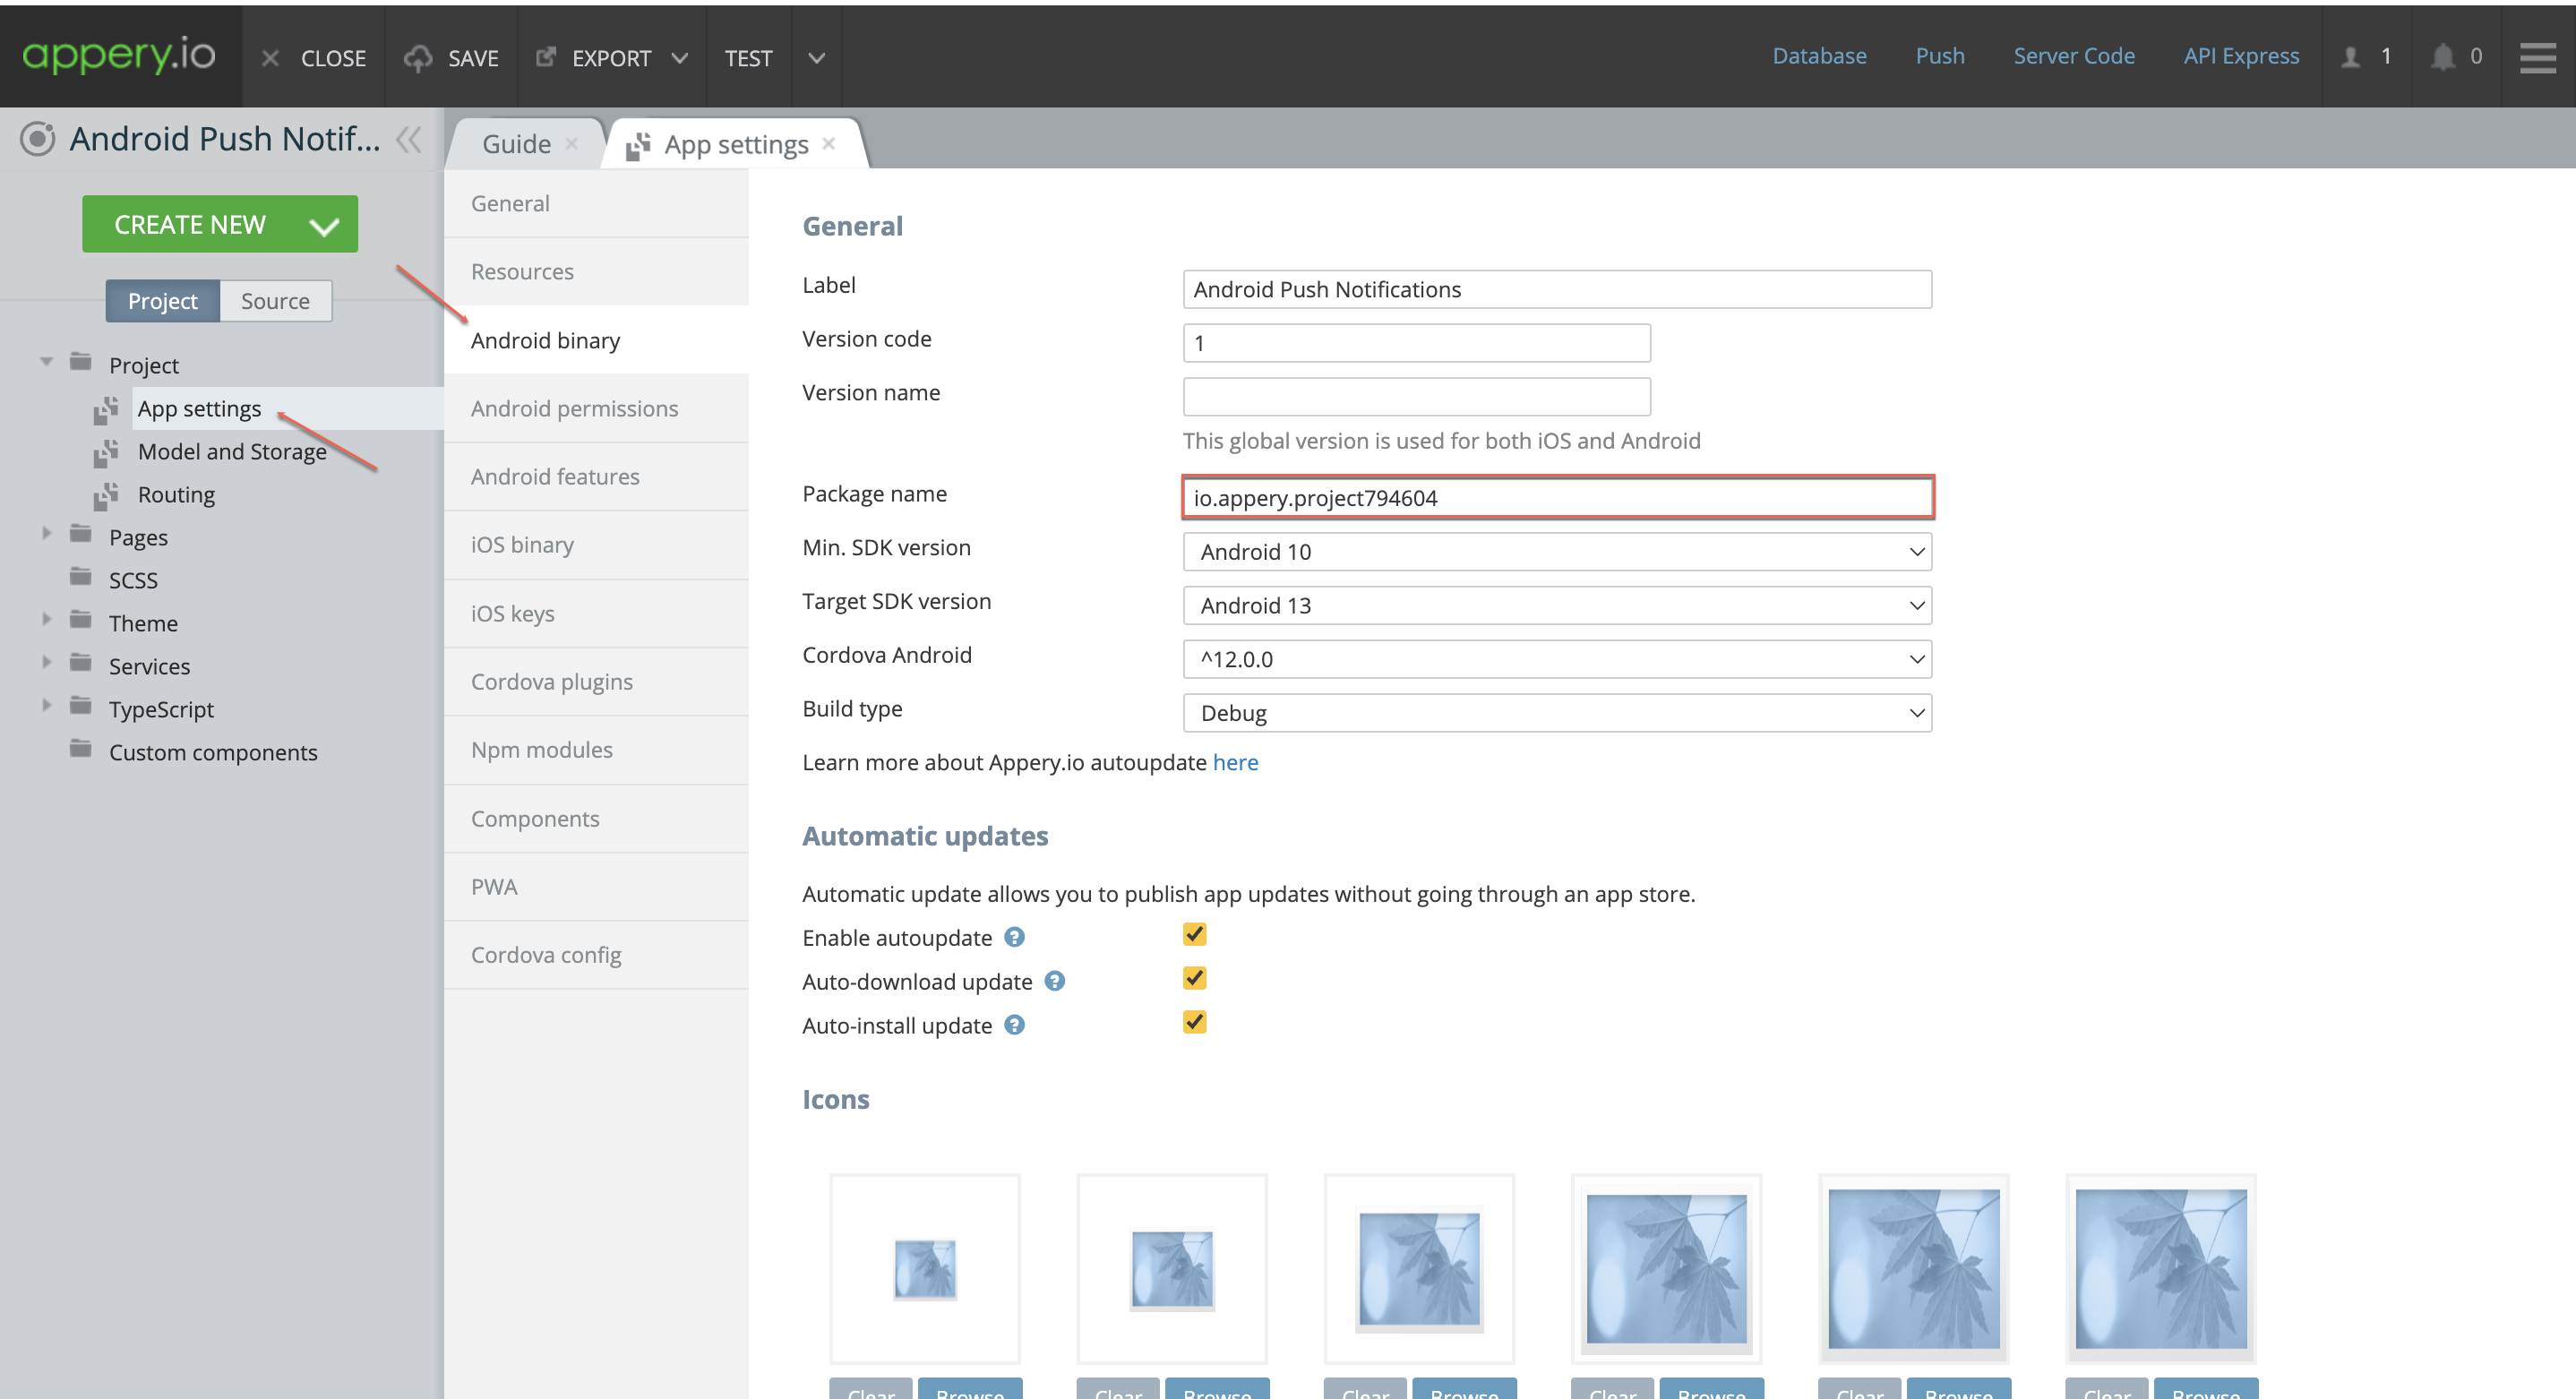
Step 1: Create a New Application
First, launch Appery.io and create a new application. Go to Project > App settings > Cordova plugins and enable the Push Notification plugin to get started.
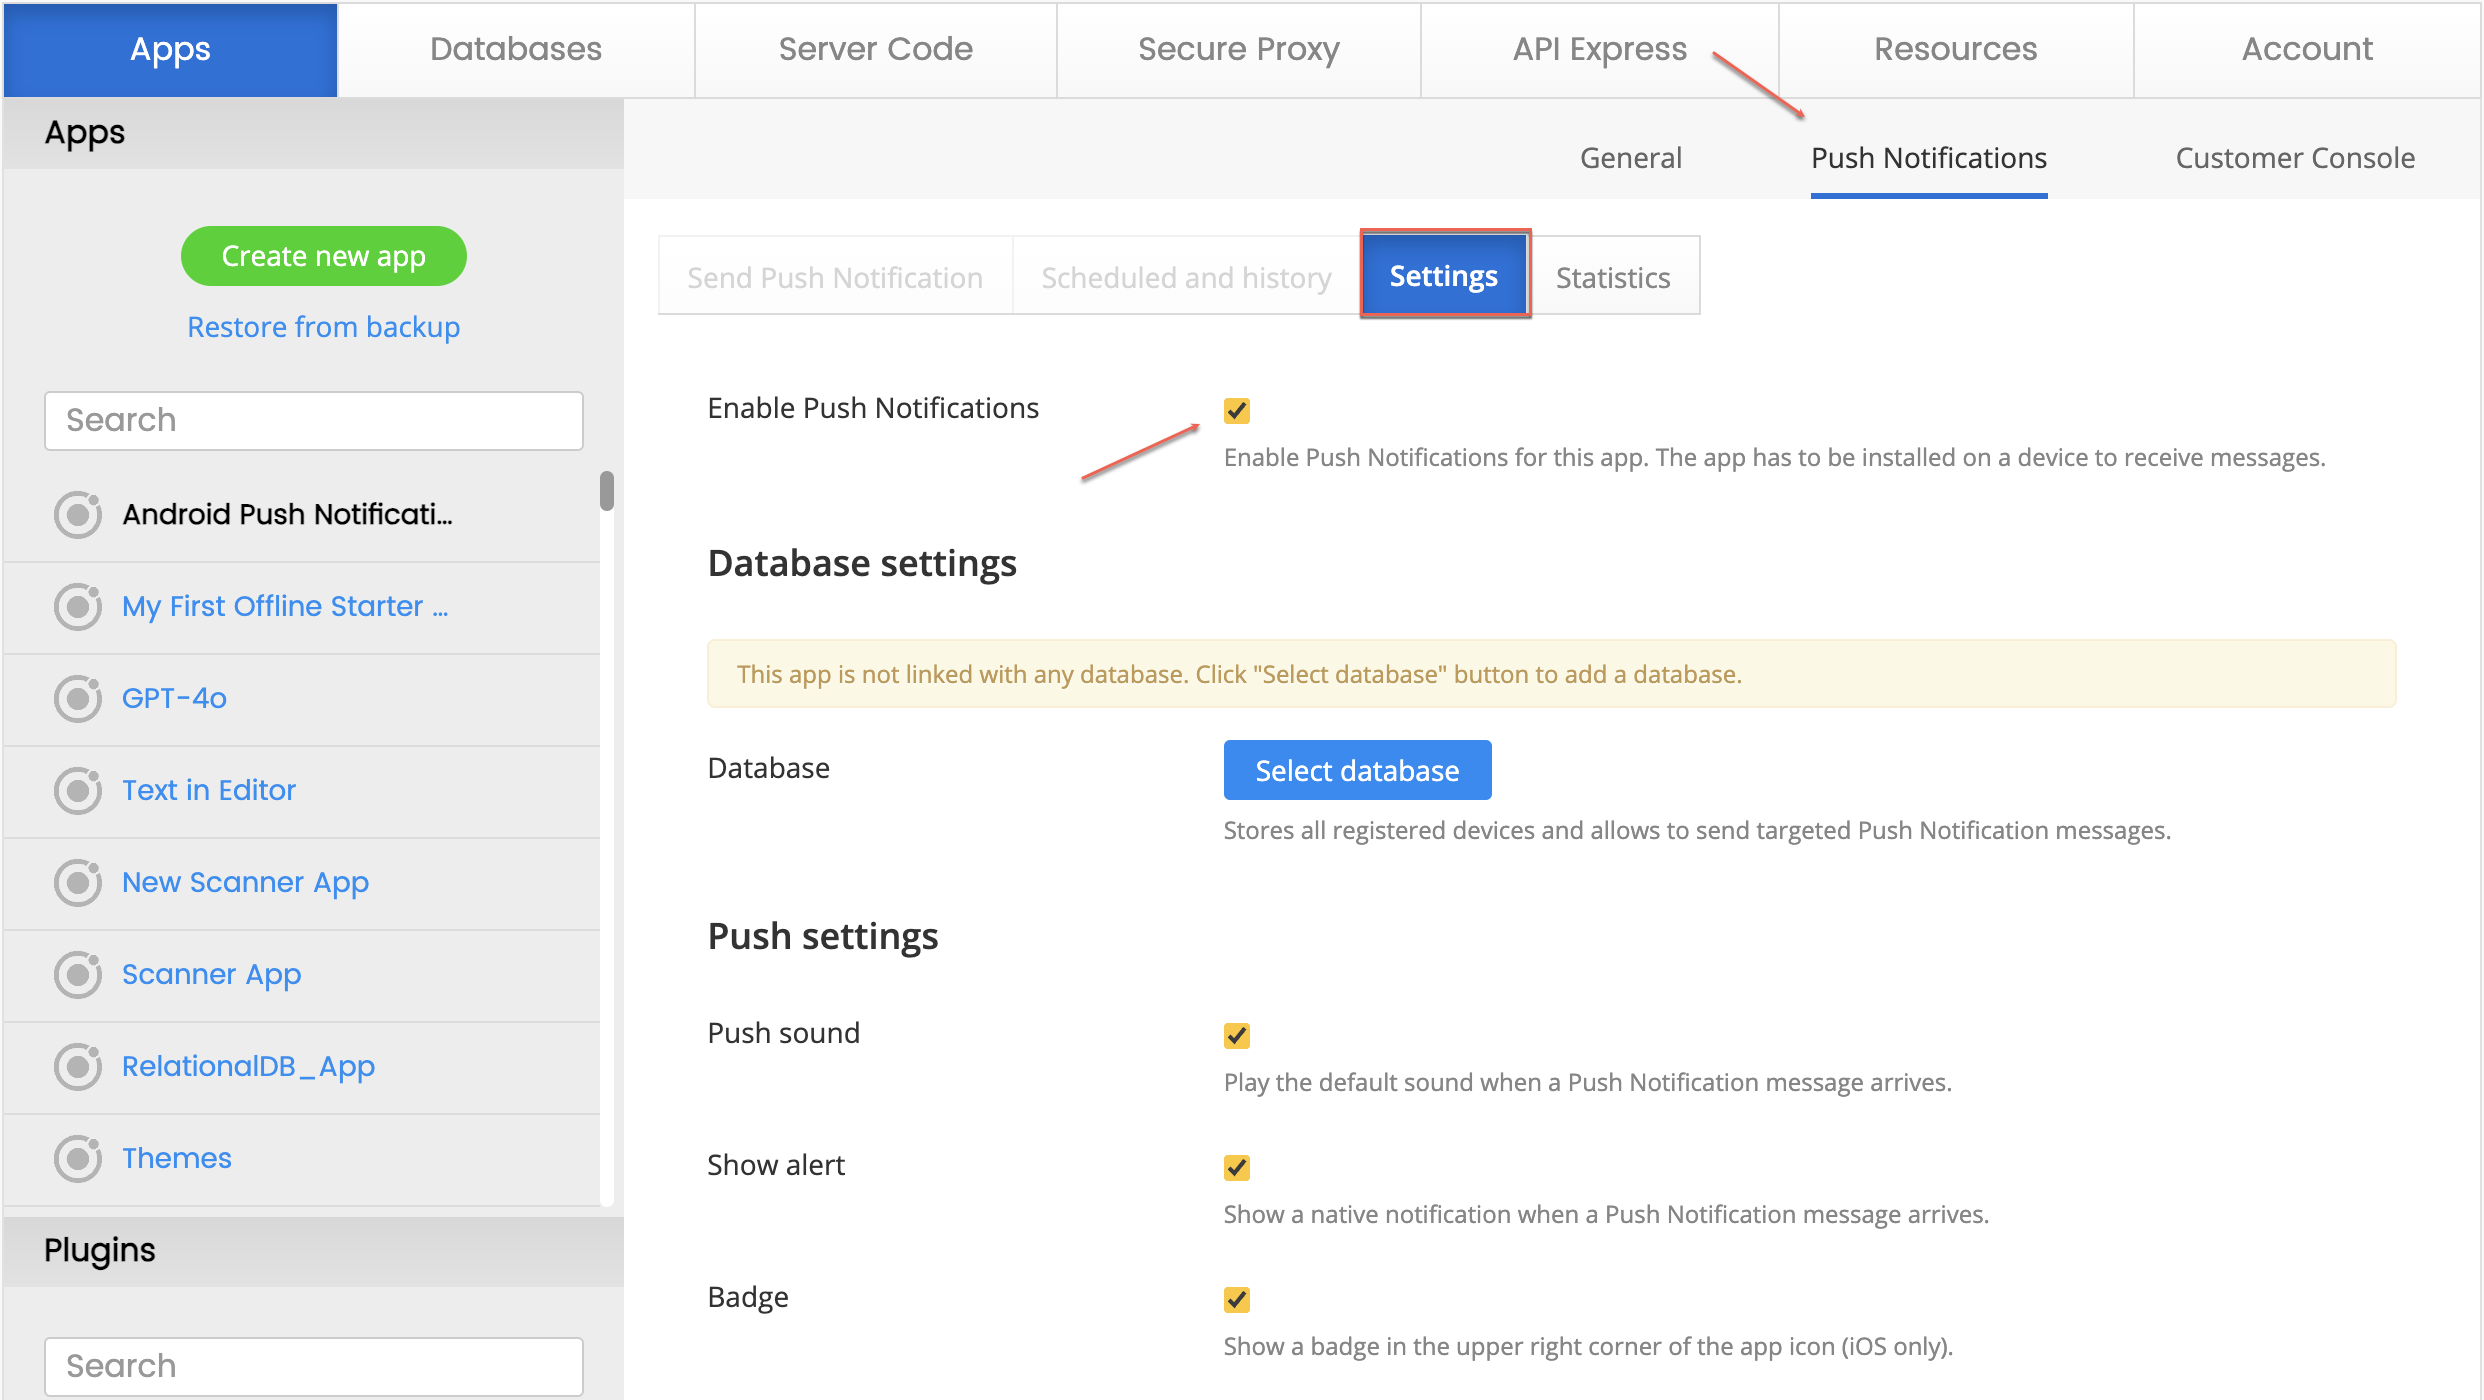
Step 2: Configure Push Settings
Exit the editor and head to the Push Notifications Settings section. Toggle the Enable Push Notification option. Then, we need to specify a database to store device identifiers.
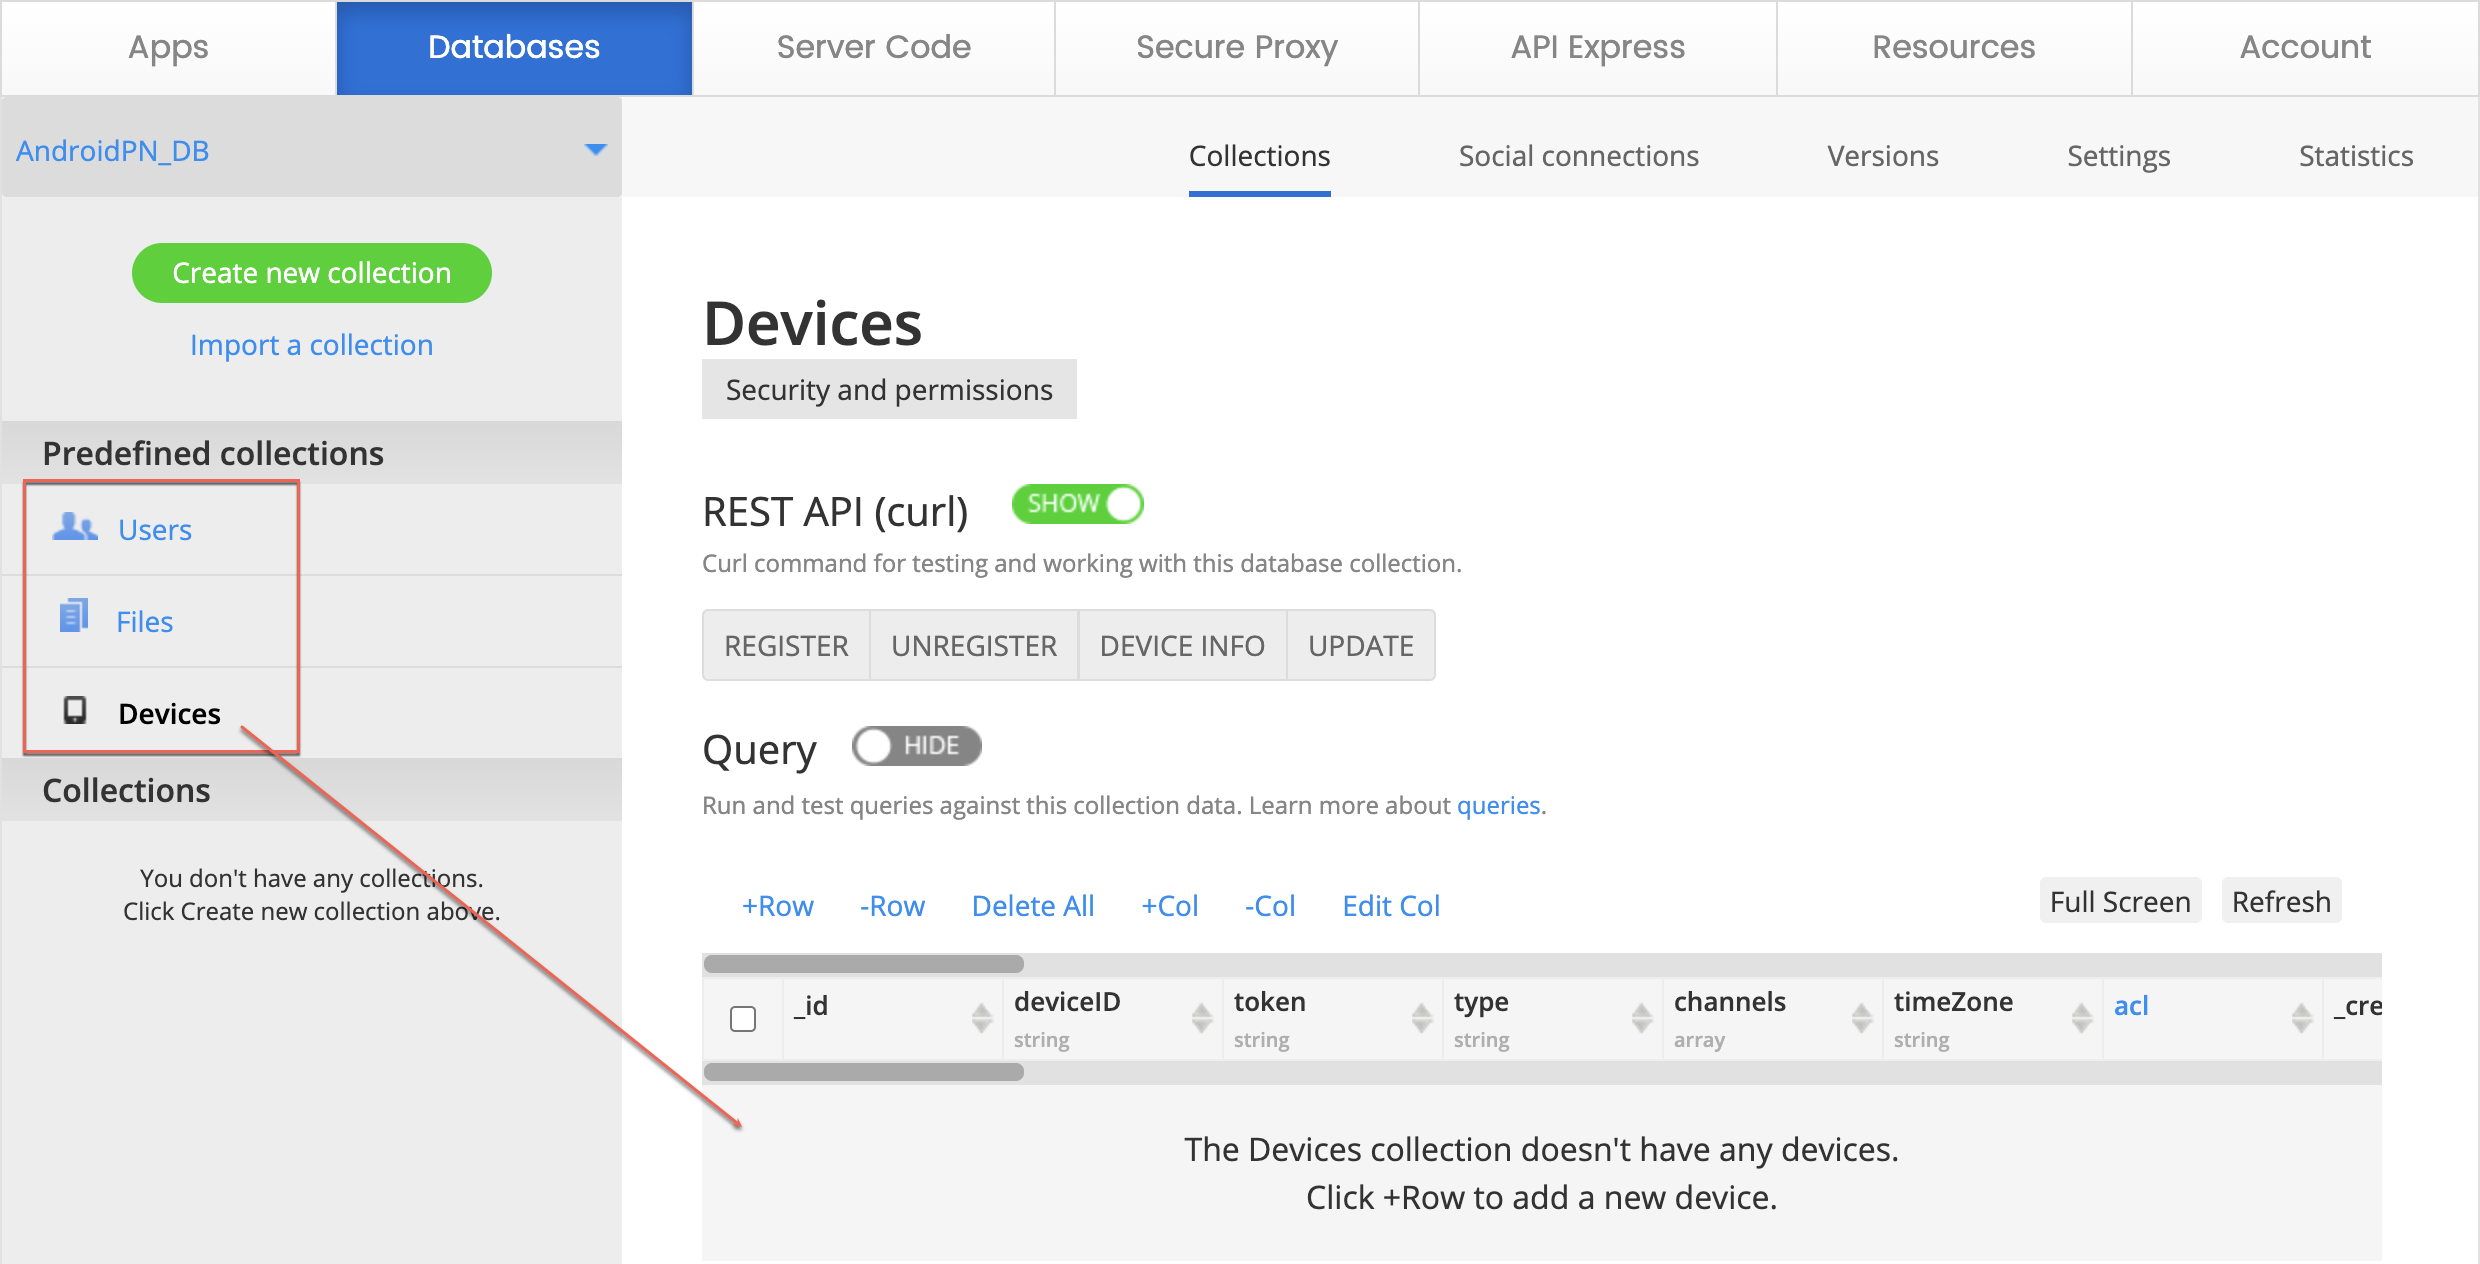
Step 3: Set Up a Database
Navigate to the Databases tab and create a new database. By default, Appery.io provides the predefined Devices collection for storing device IDs and tokens.
Step 4: Link Firebase to Your App
Push notifications on Android require Firebase. You need to get two files:
1. google-services.json
2. Firebase Admin SDK JSON
So, head to the Firebase console to create a Firebase account if you don’t already have one. Set up a new project and register your Android app. Grab the package name from the Android Settings in Appery.io and enter it into Firebase.
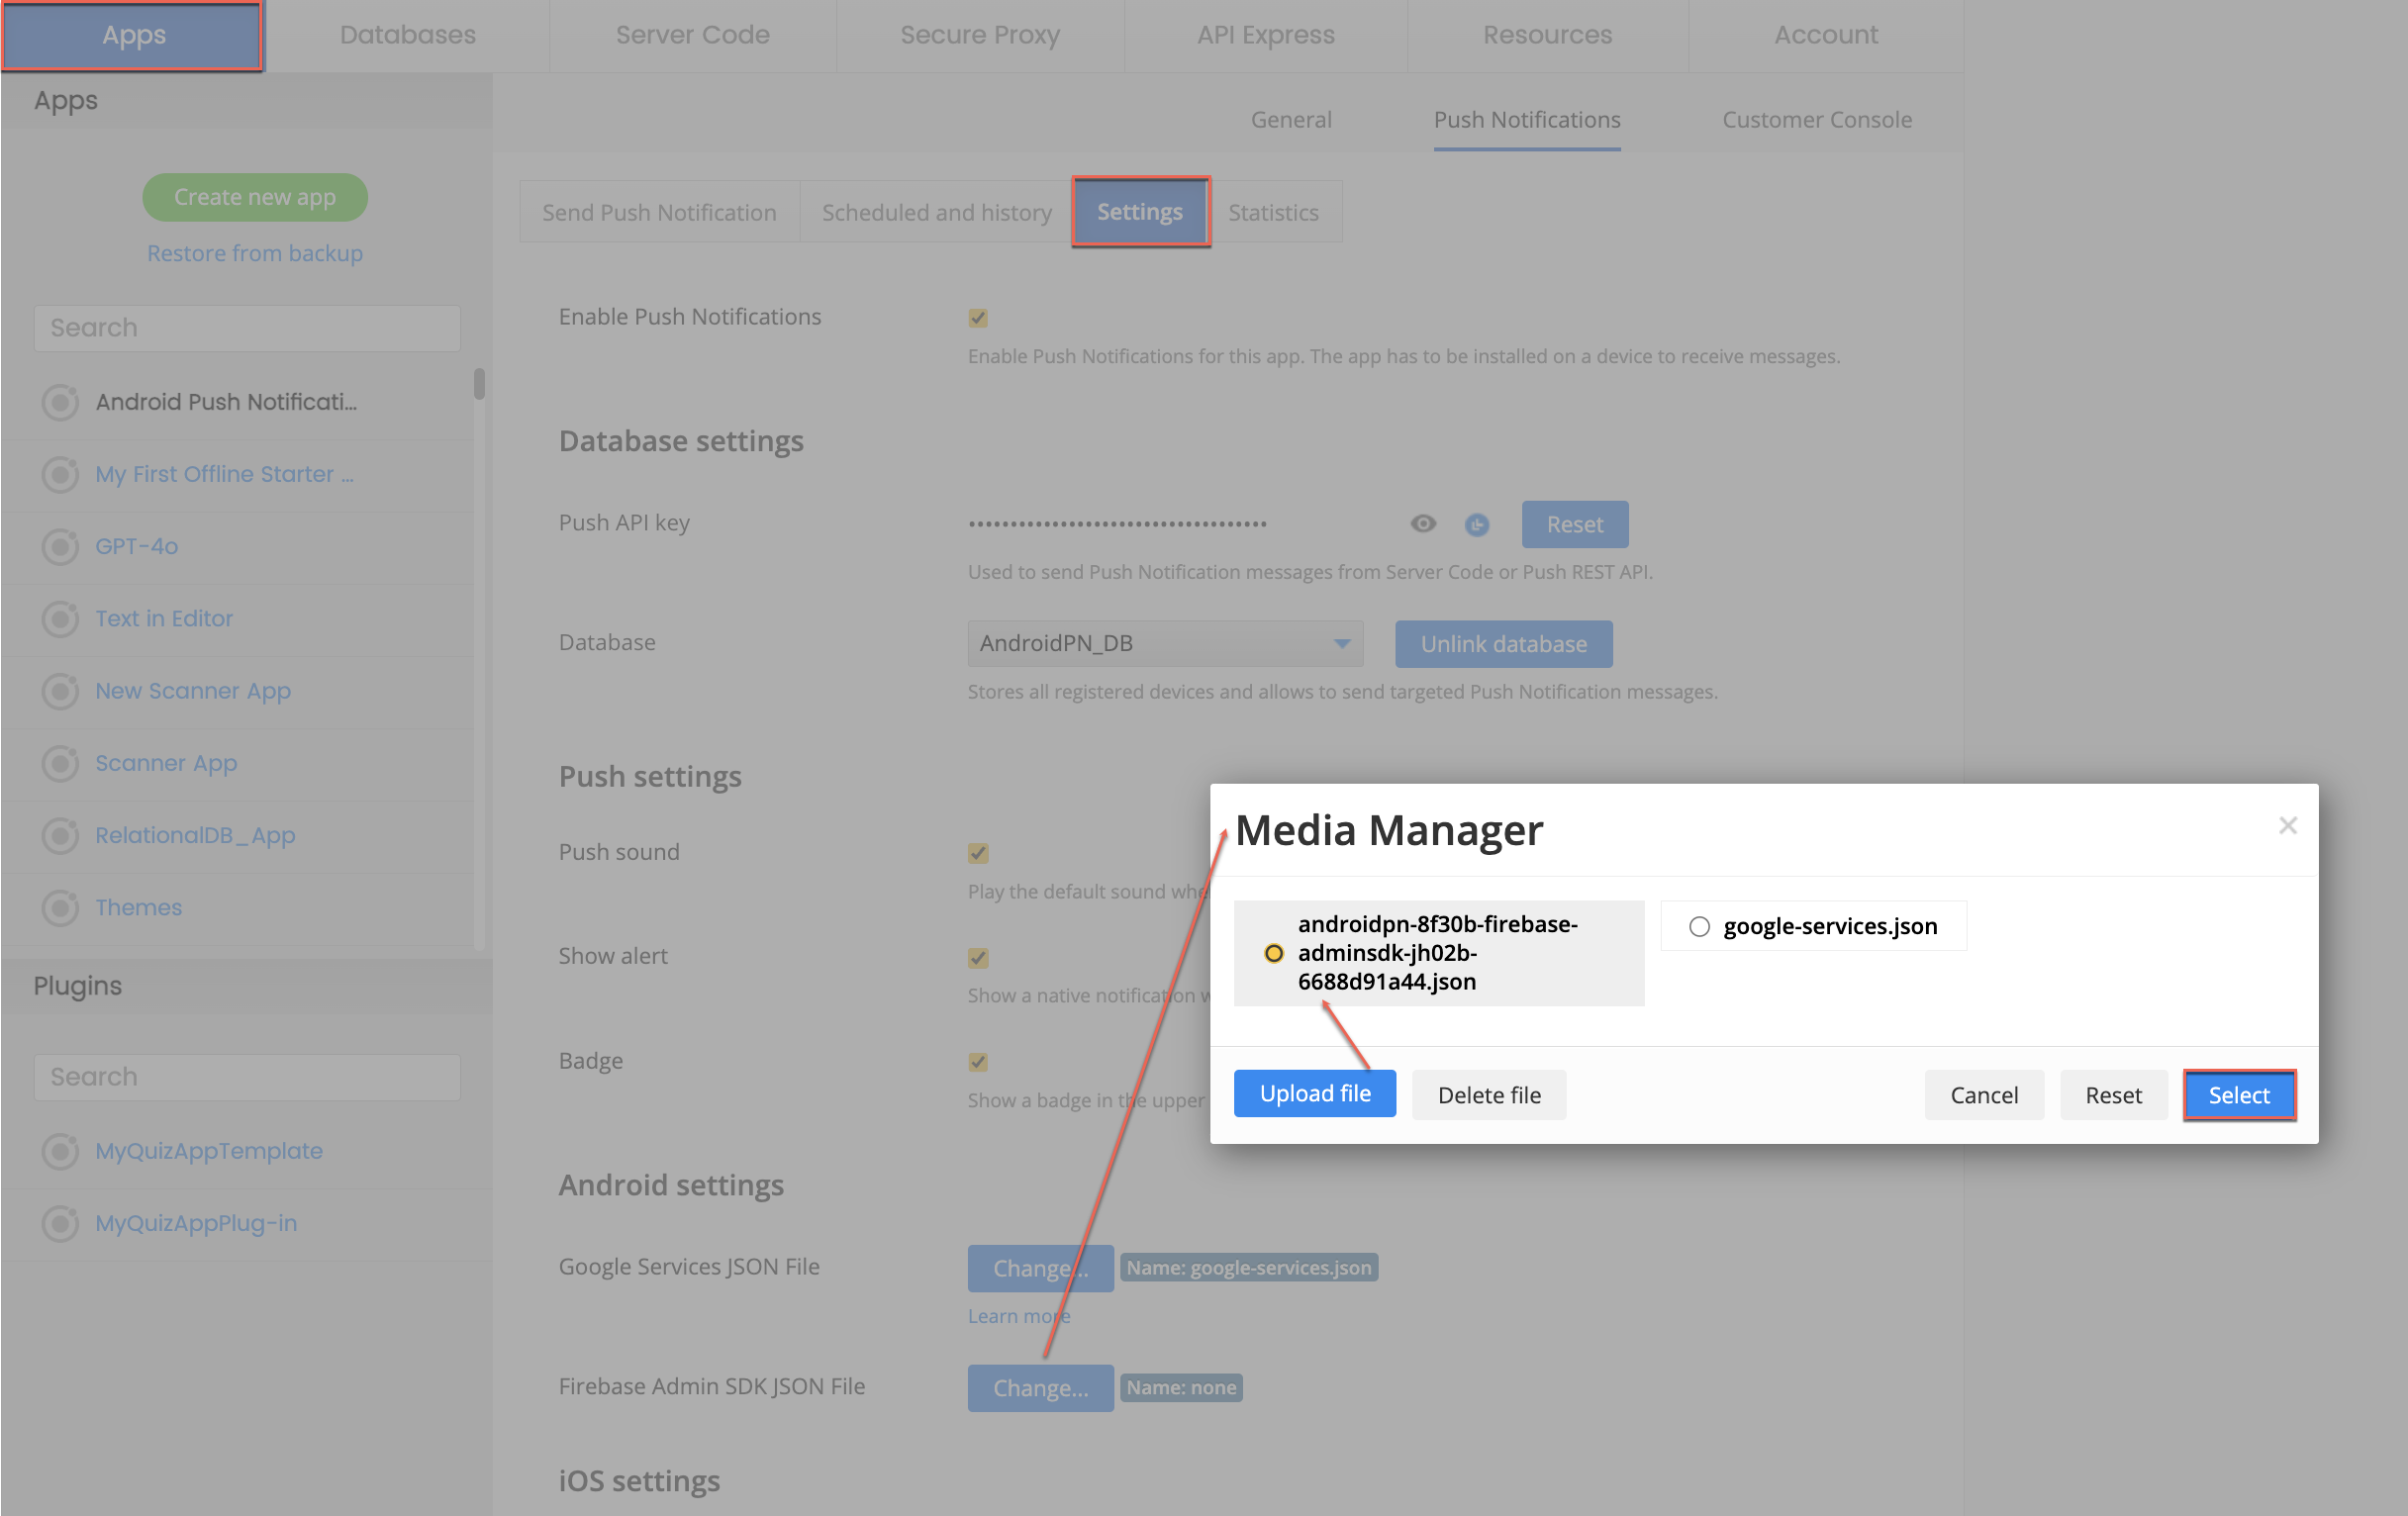
Step 5: Download and Upload Files
Download the `google-services.json` file from Firebase:
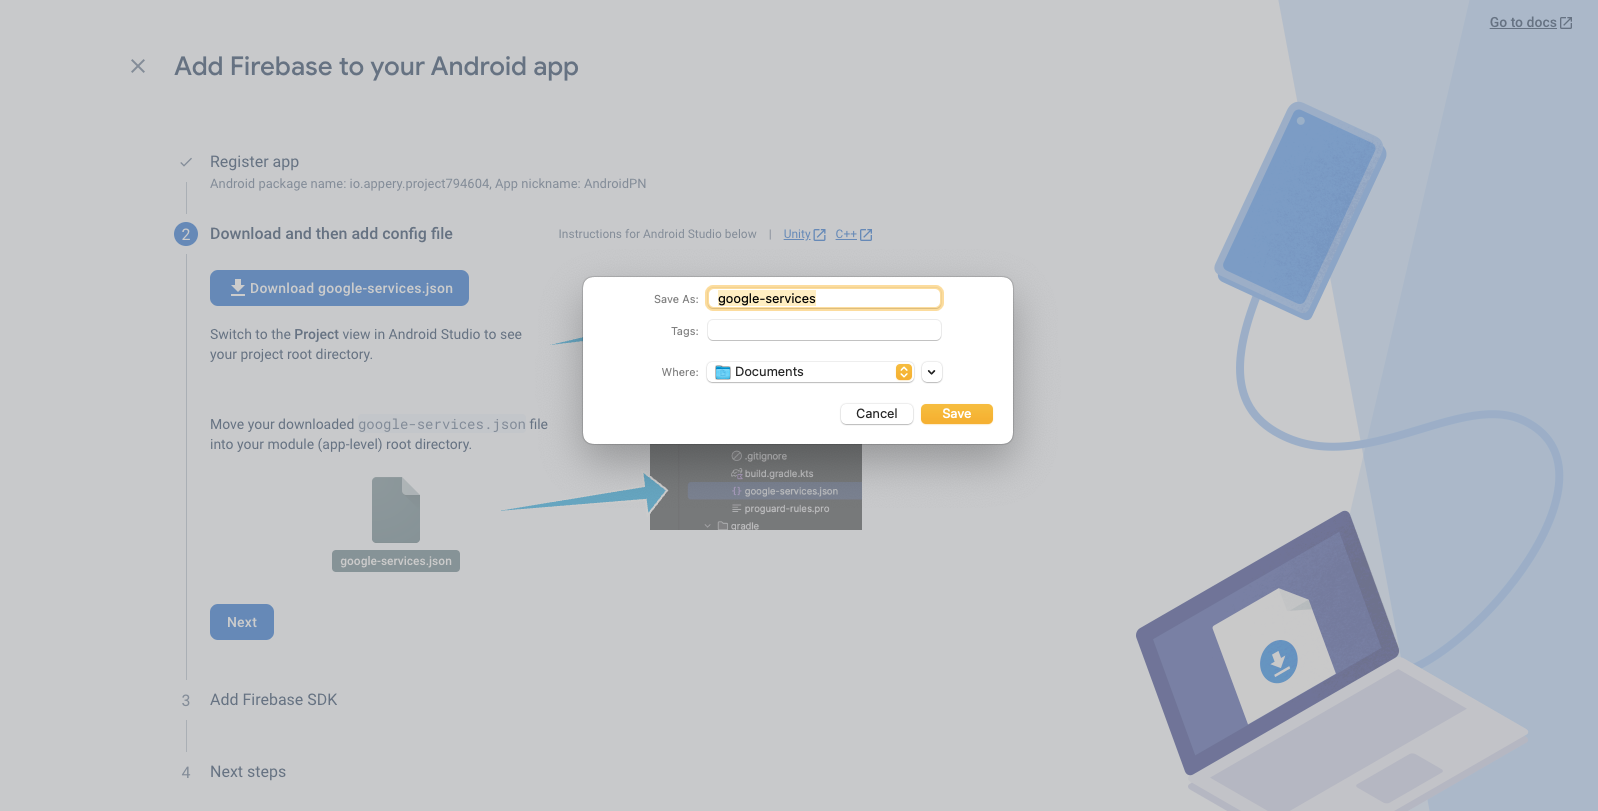
And upload it to your Push Notification Settings in Appery.io:
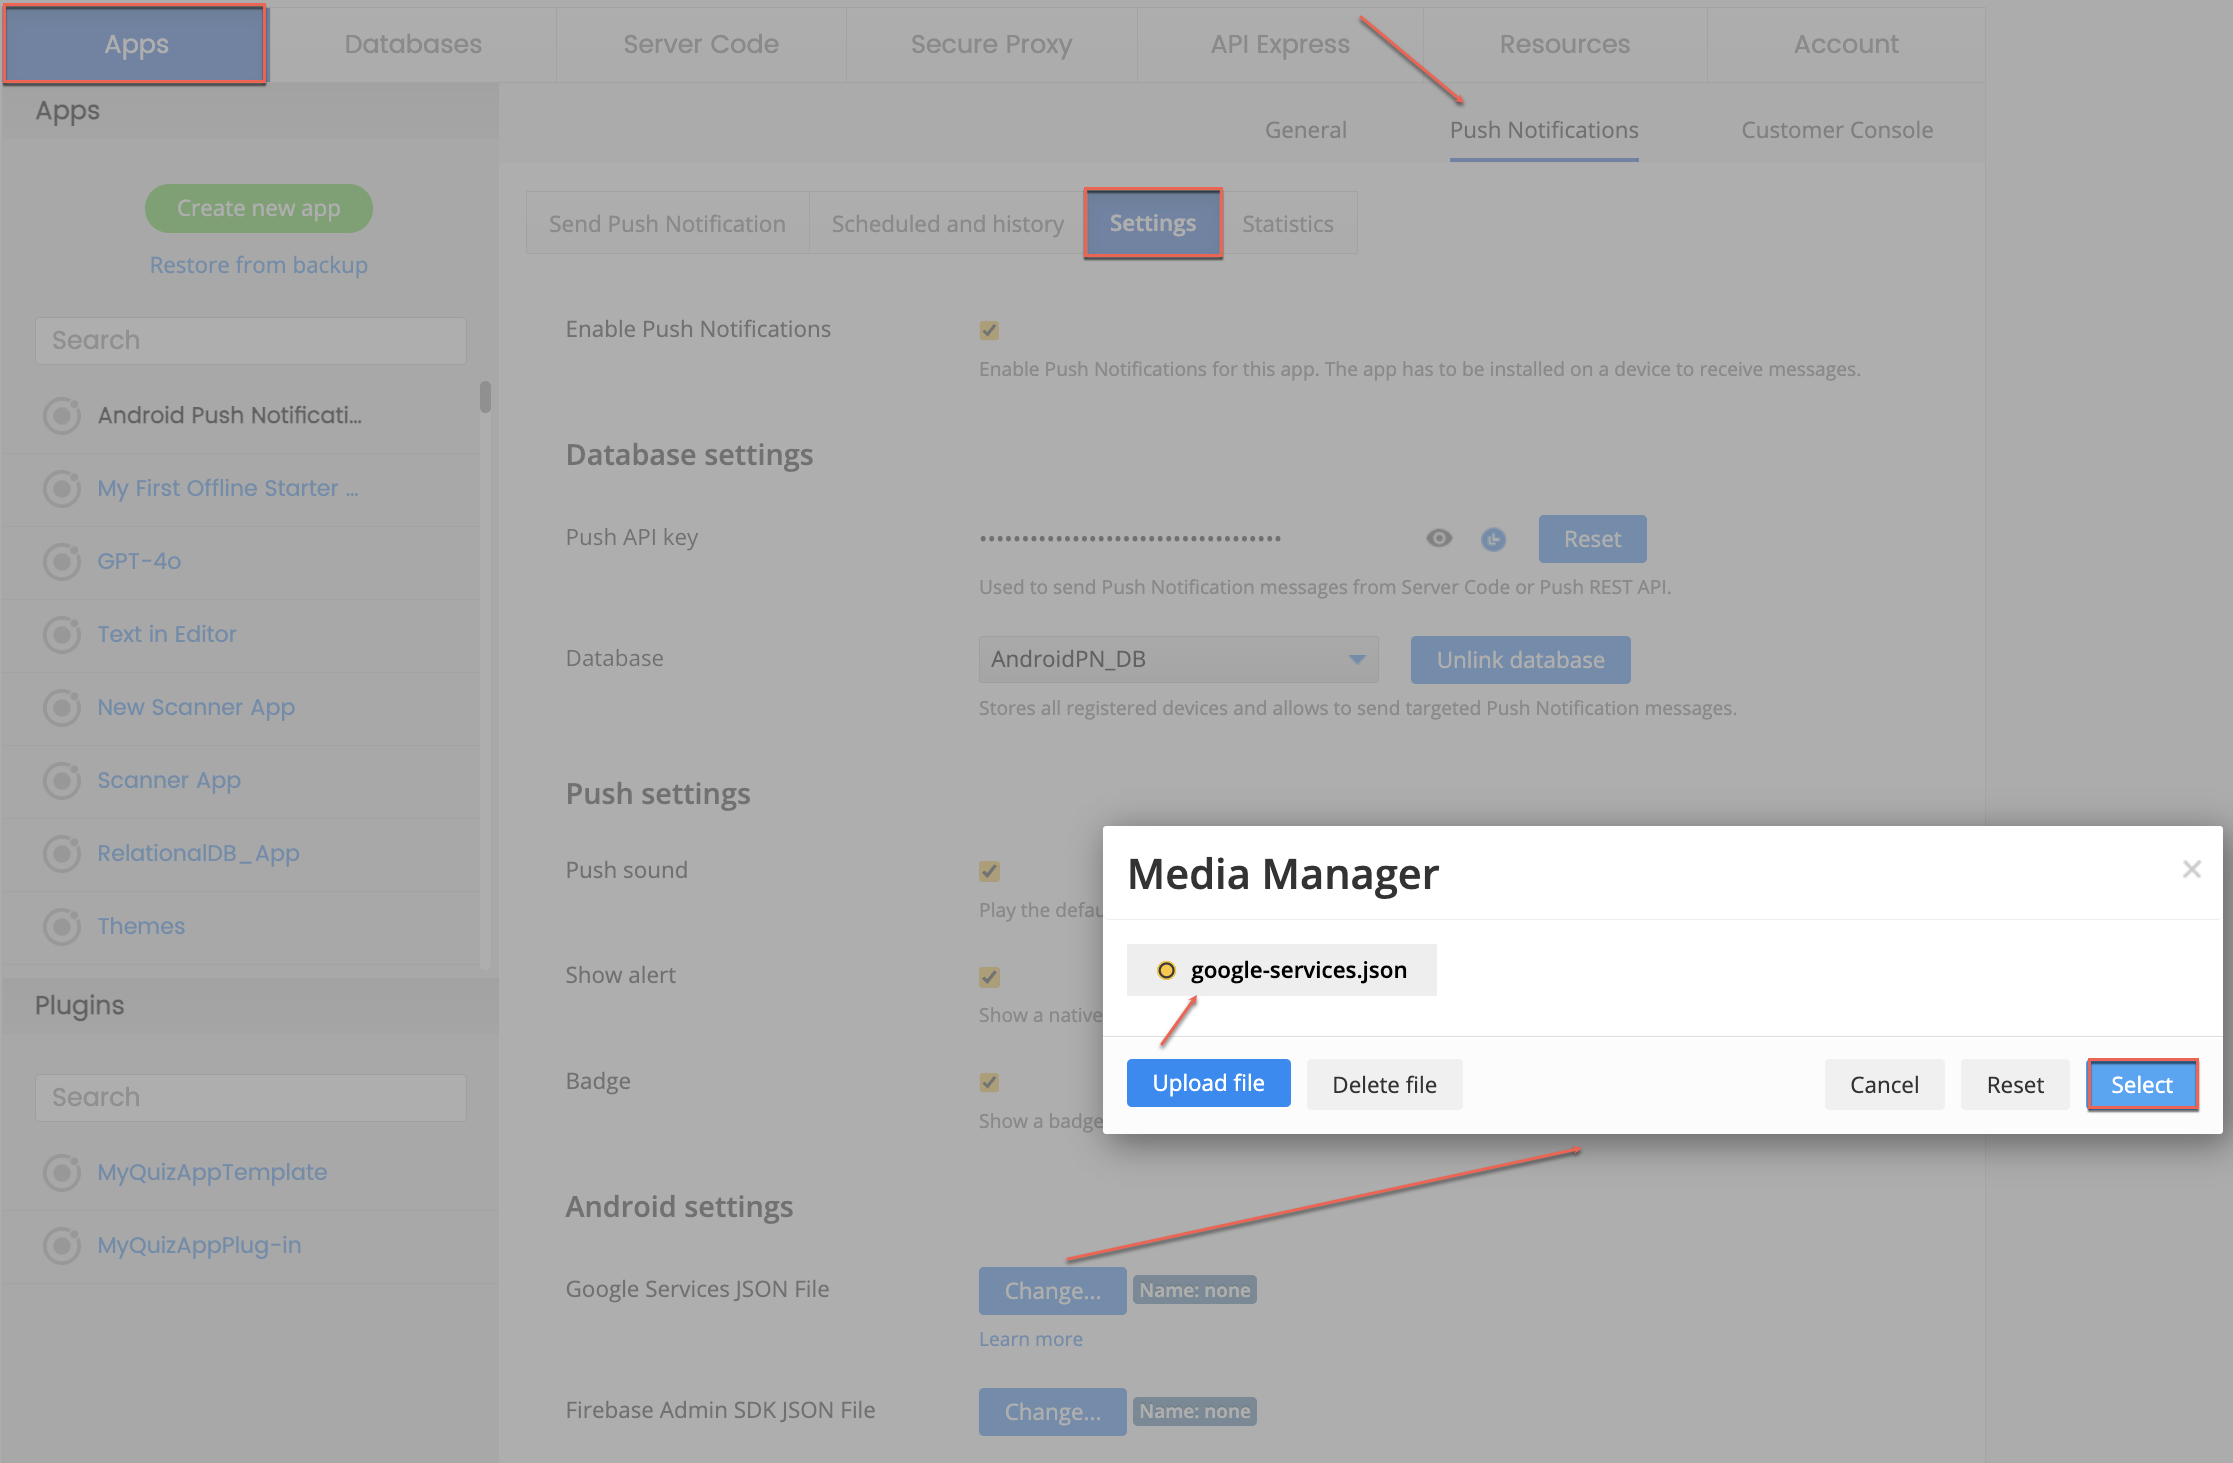
Then, click Next and follow the steps in Firebase to get the Admin SDK file and upload it to Appery.io.
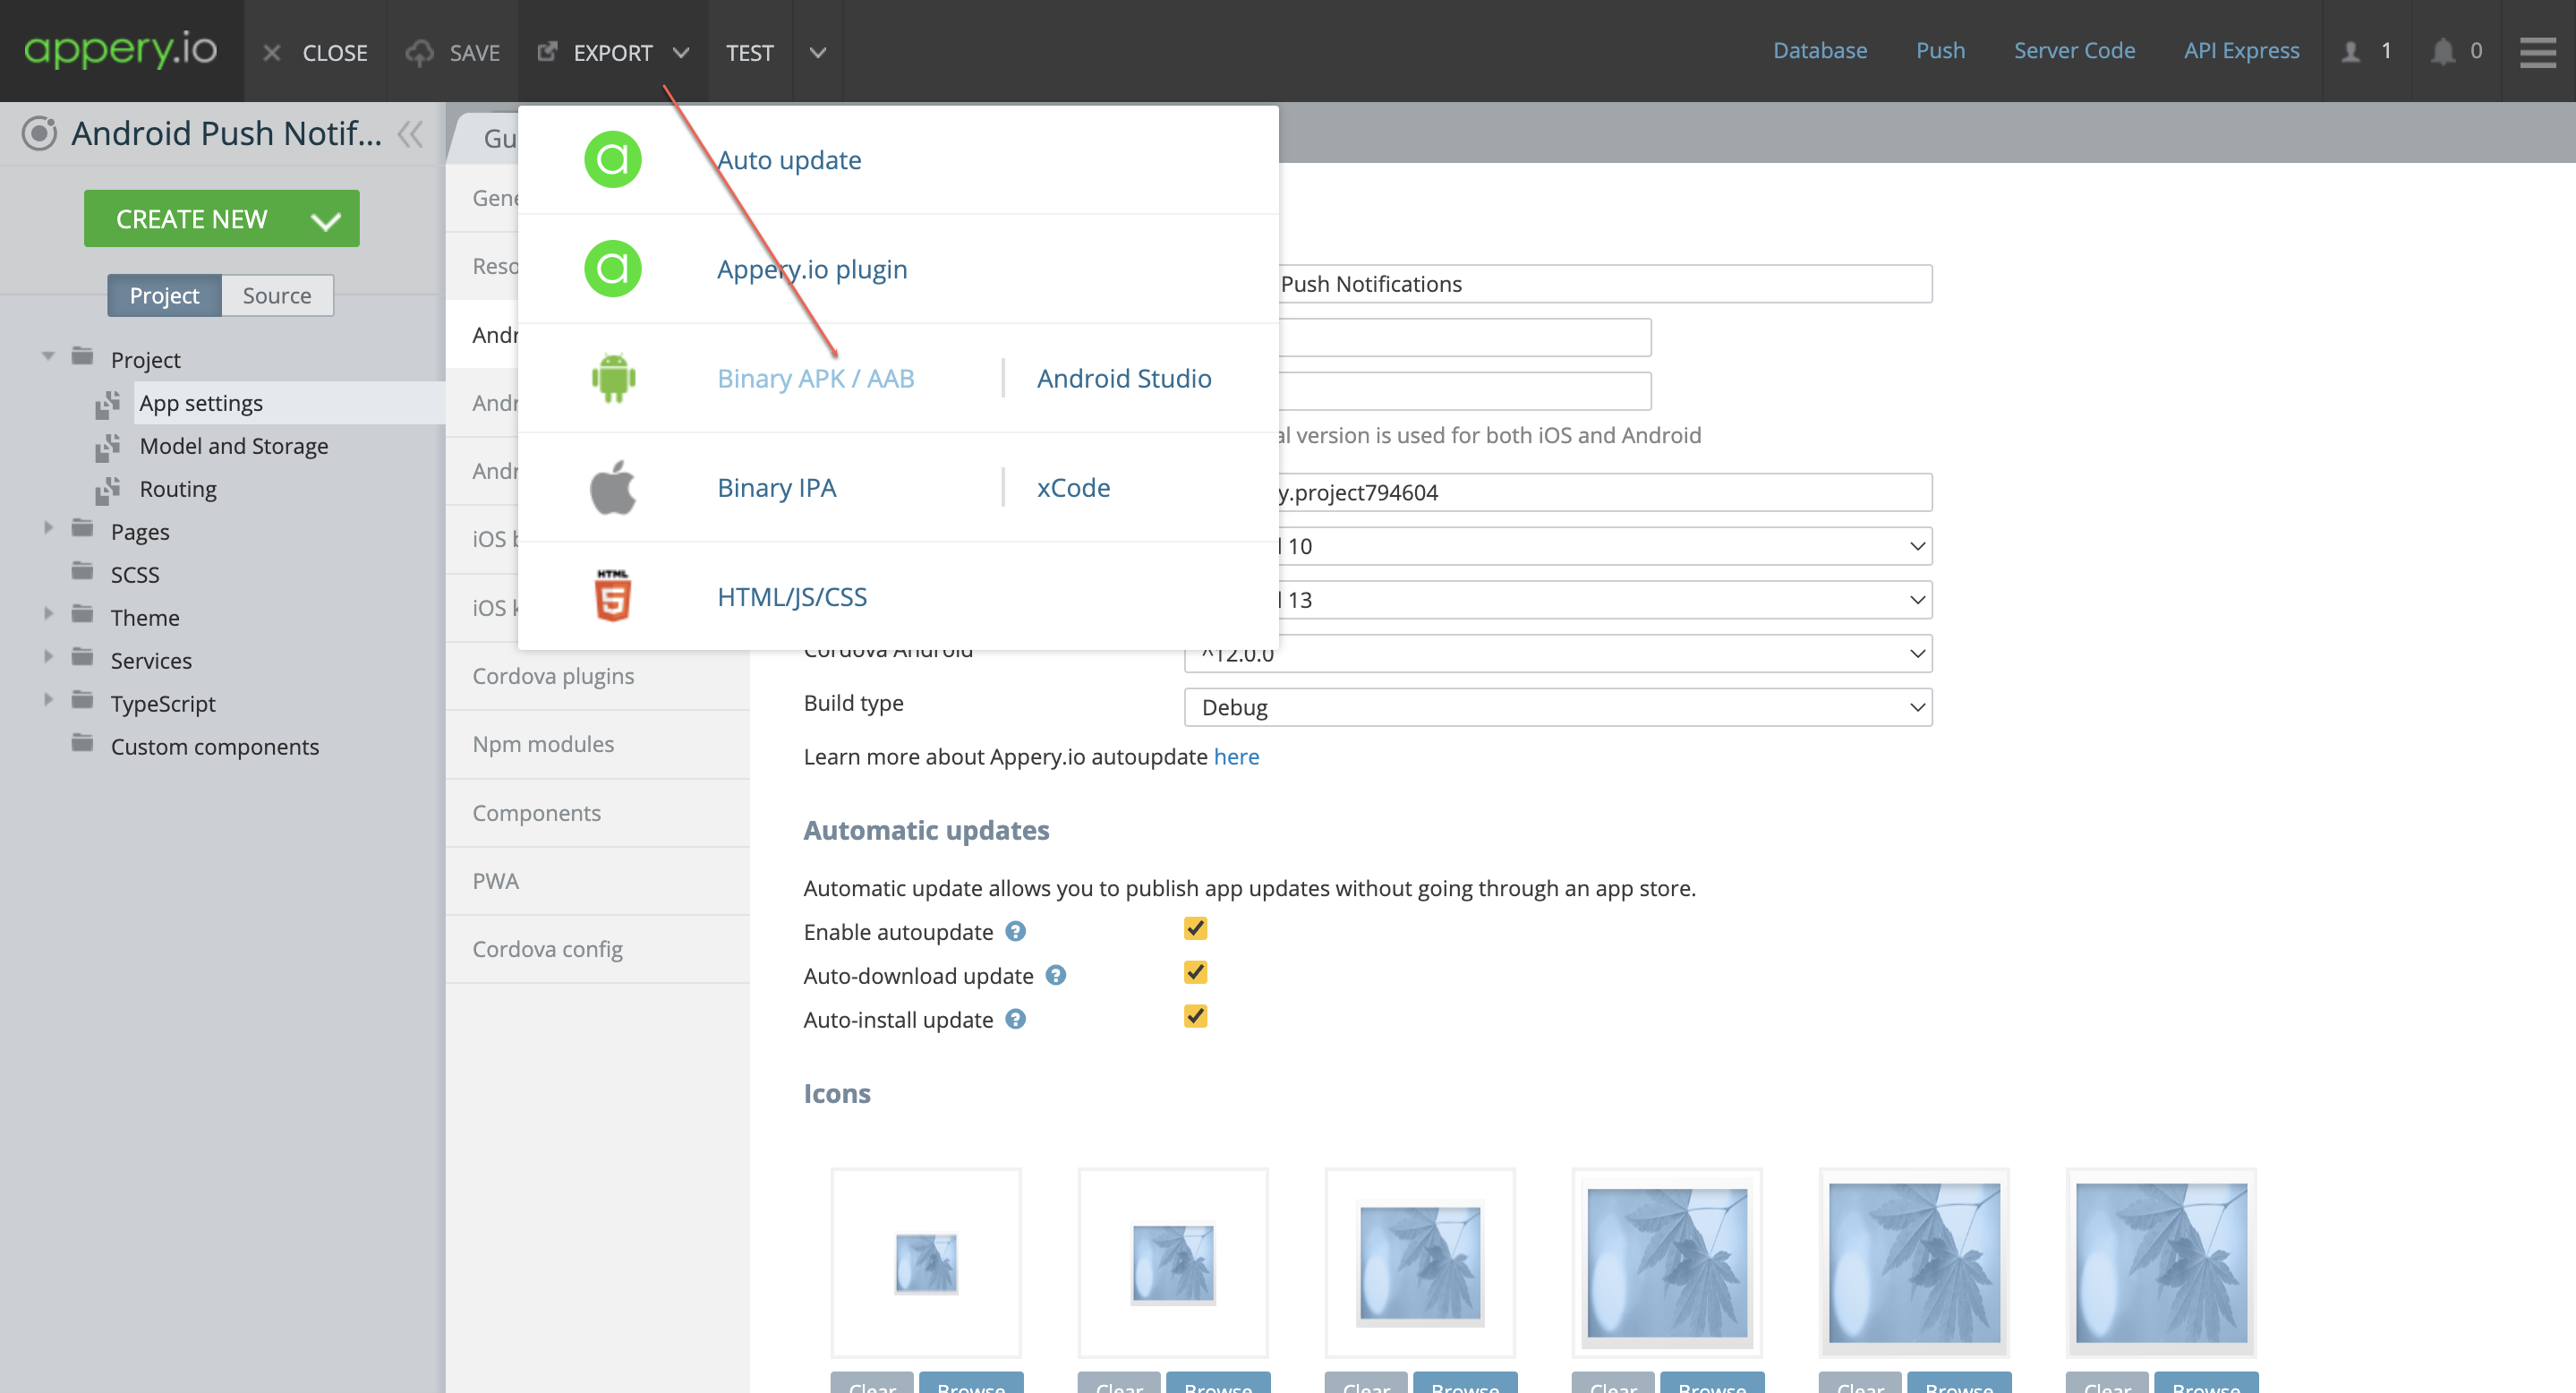
Step 6: Generate Your APK
With everything configured, generate your binary APK file:
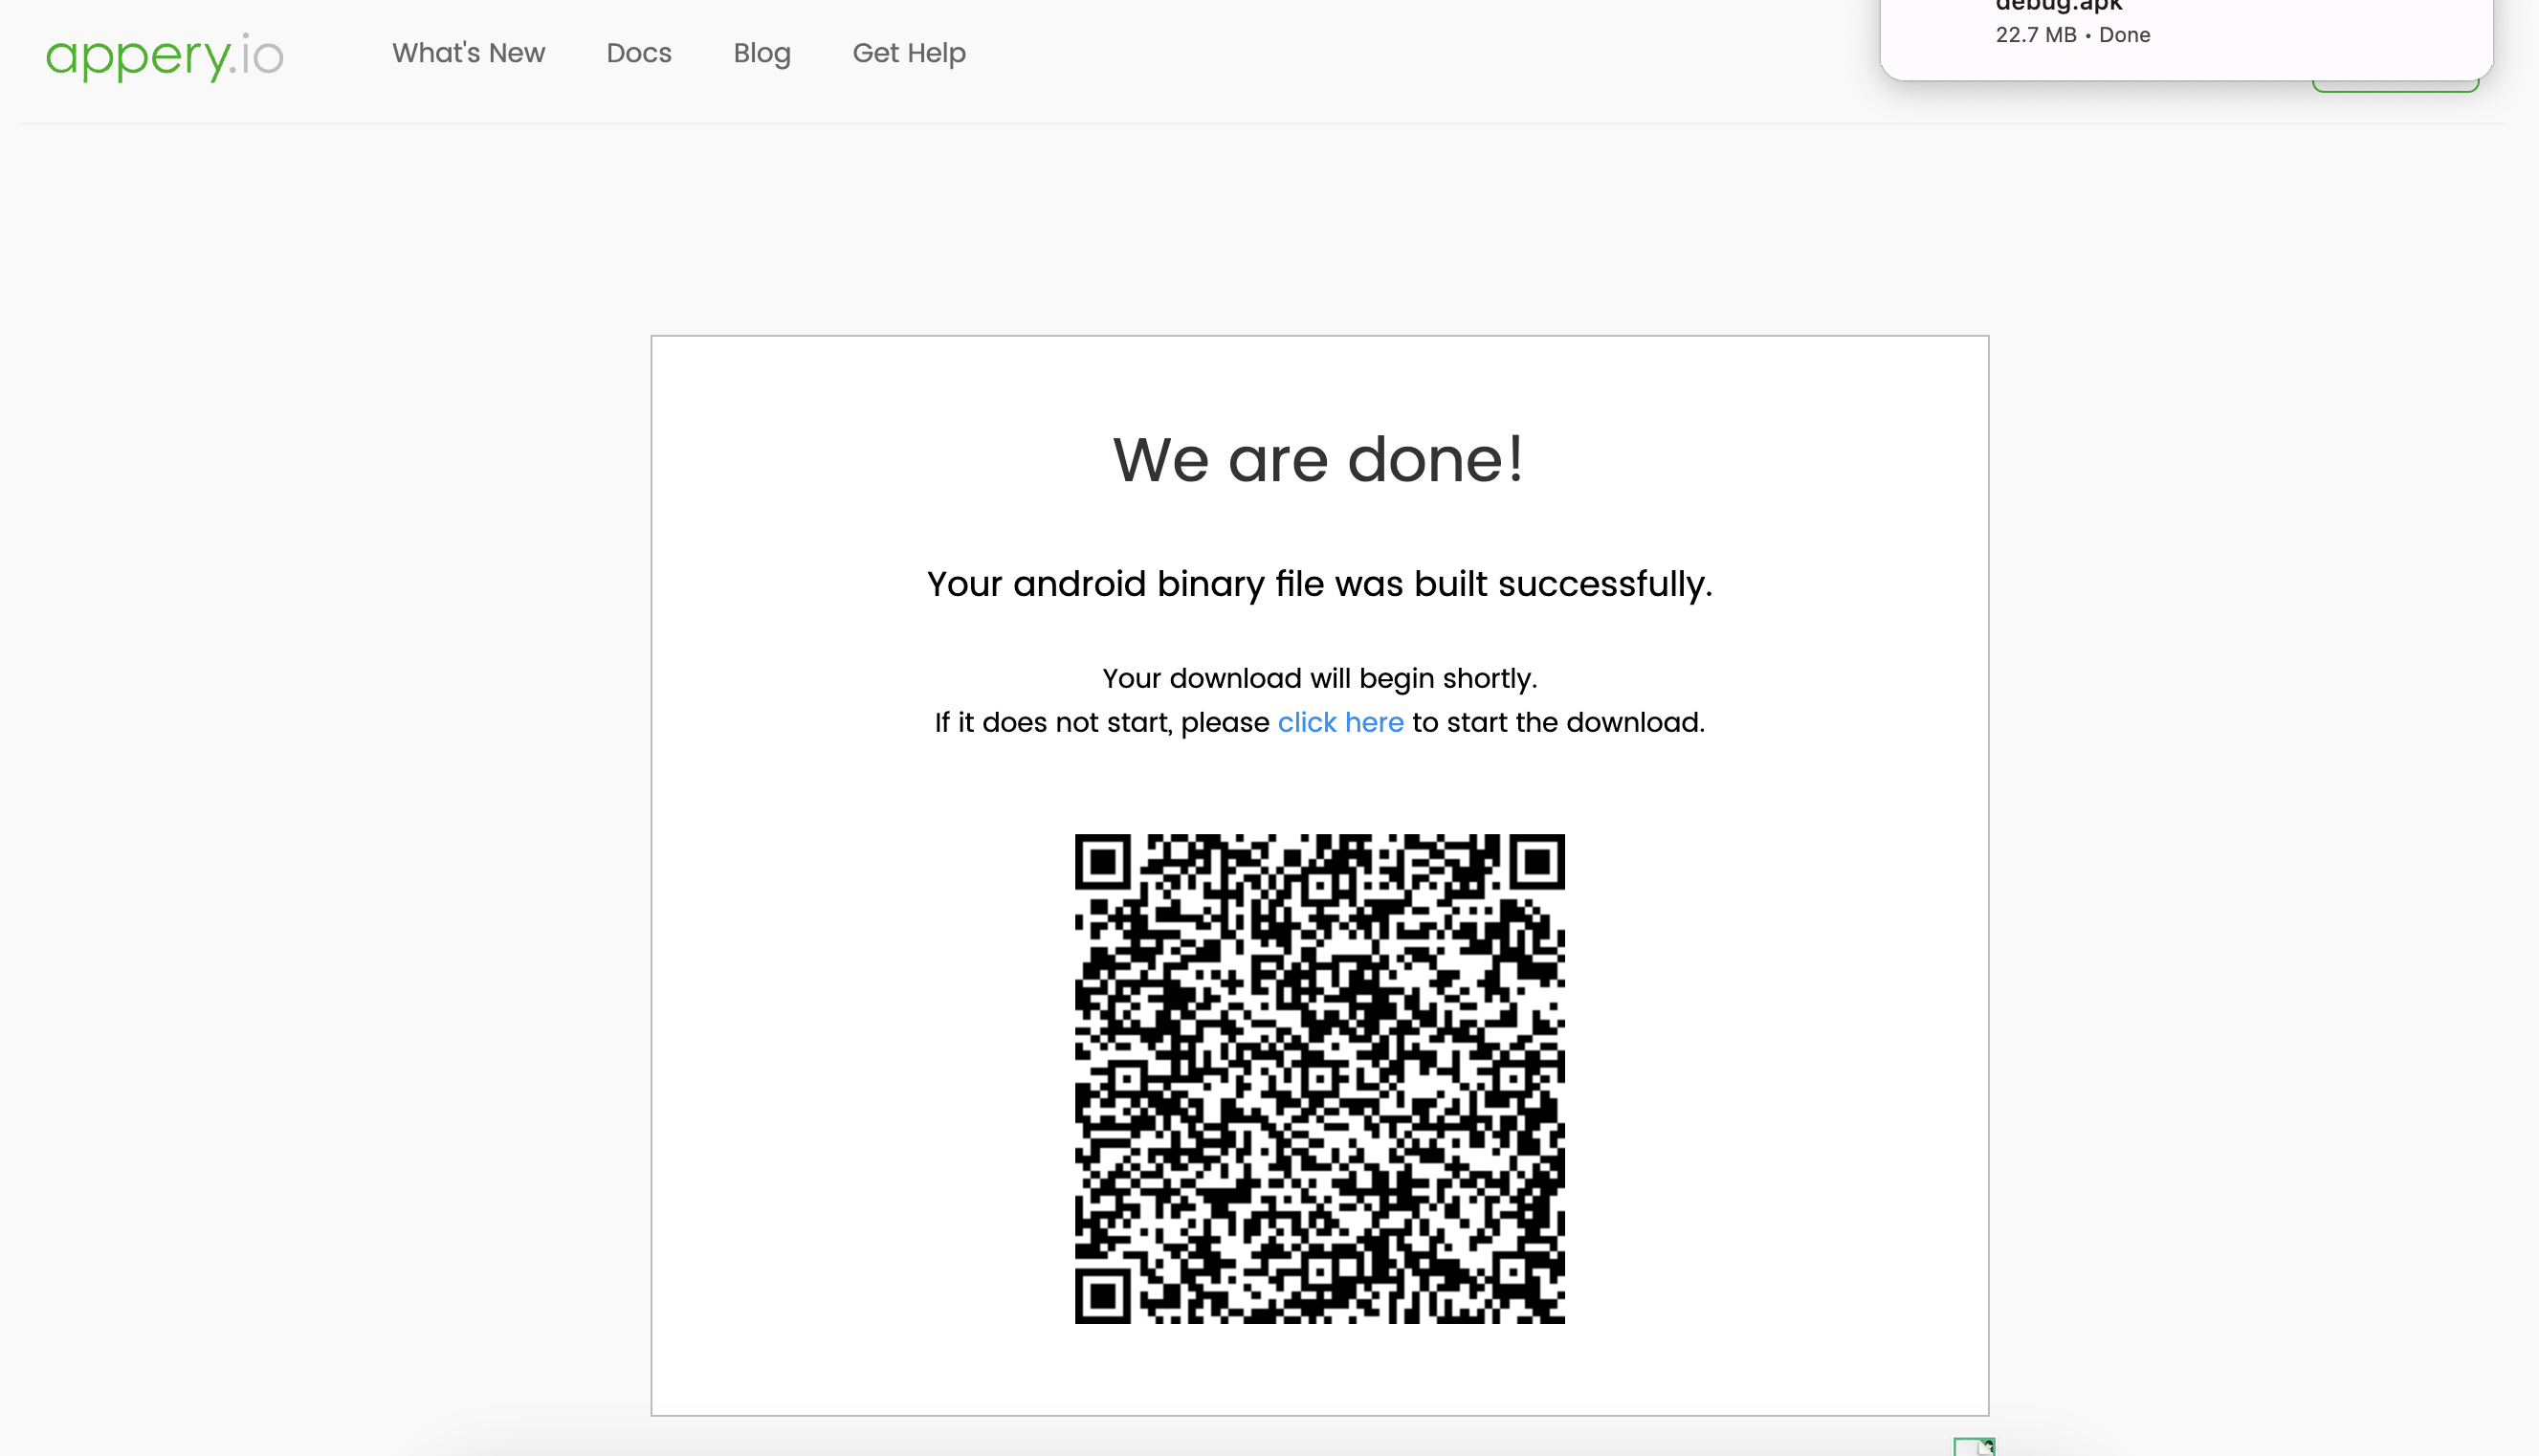
Step 7: Test Your Application
Scan the generated code to install the APK on your device:
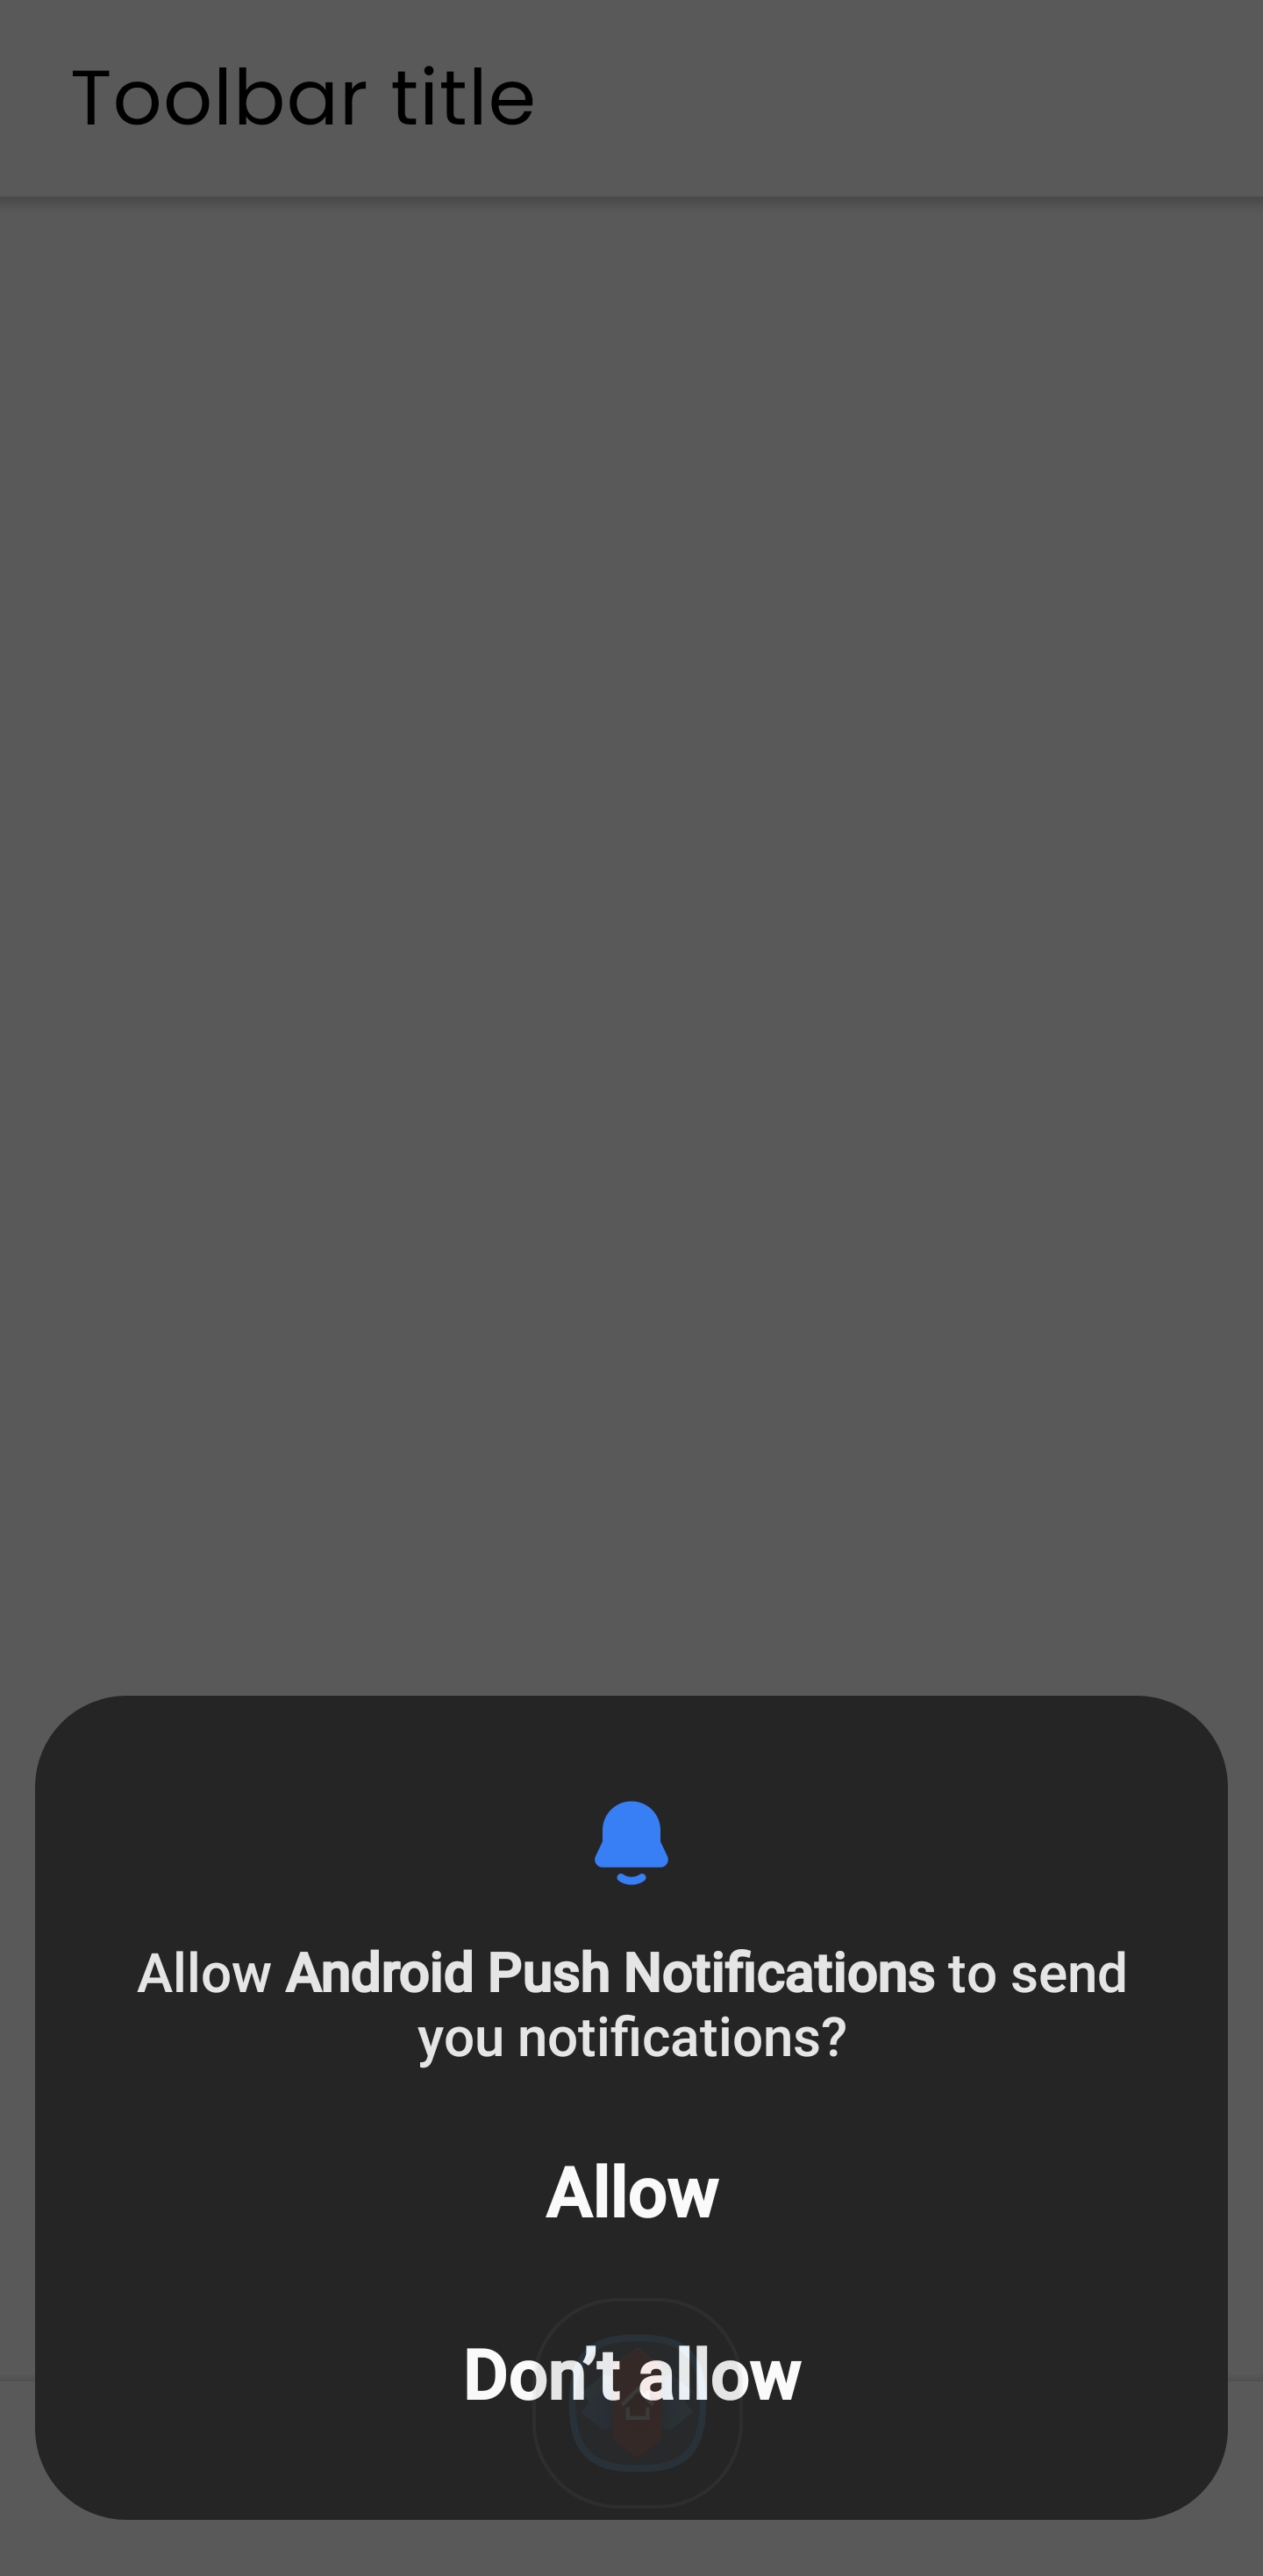
Launch the app and grant permission to receive push notifications:
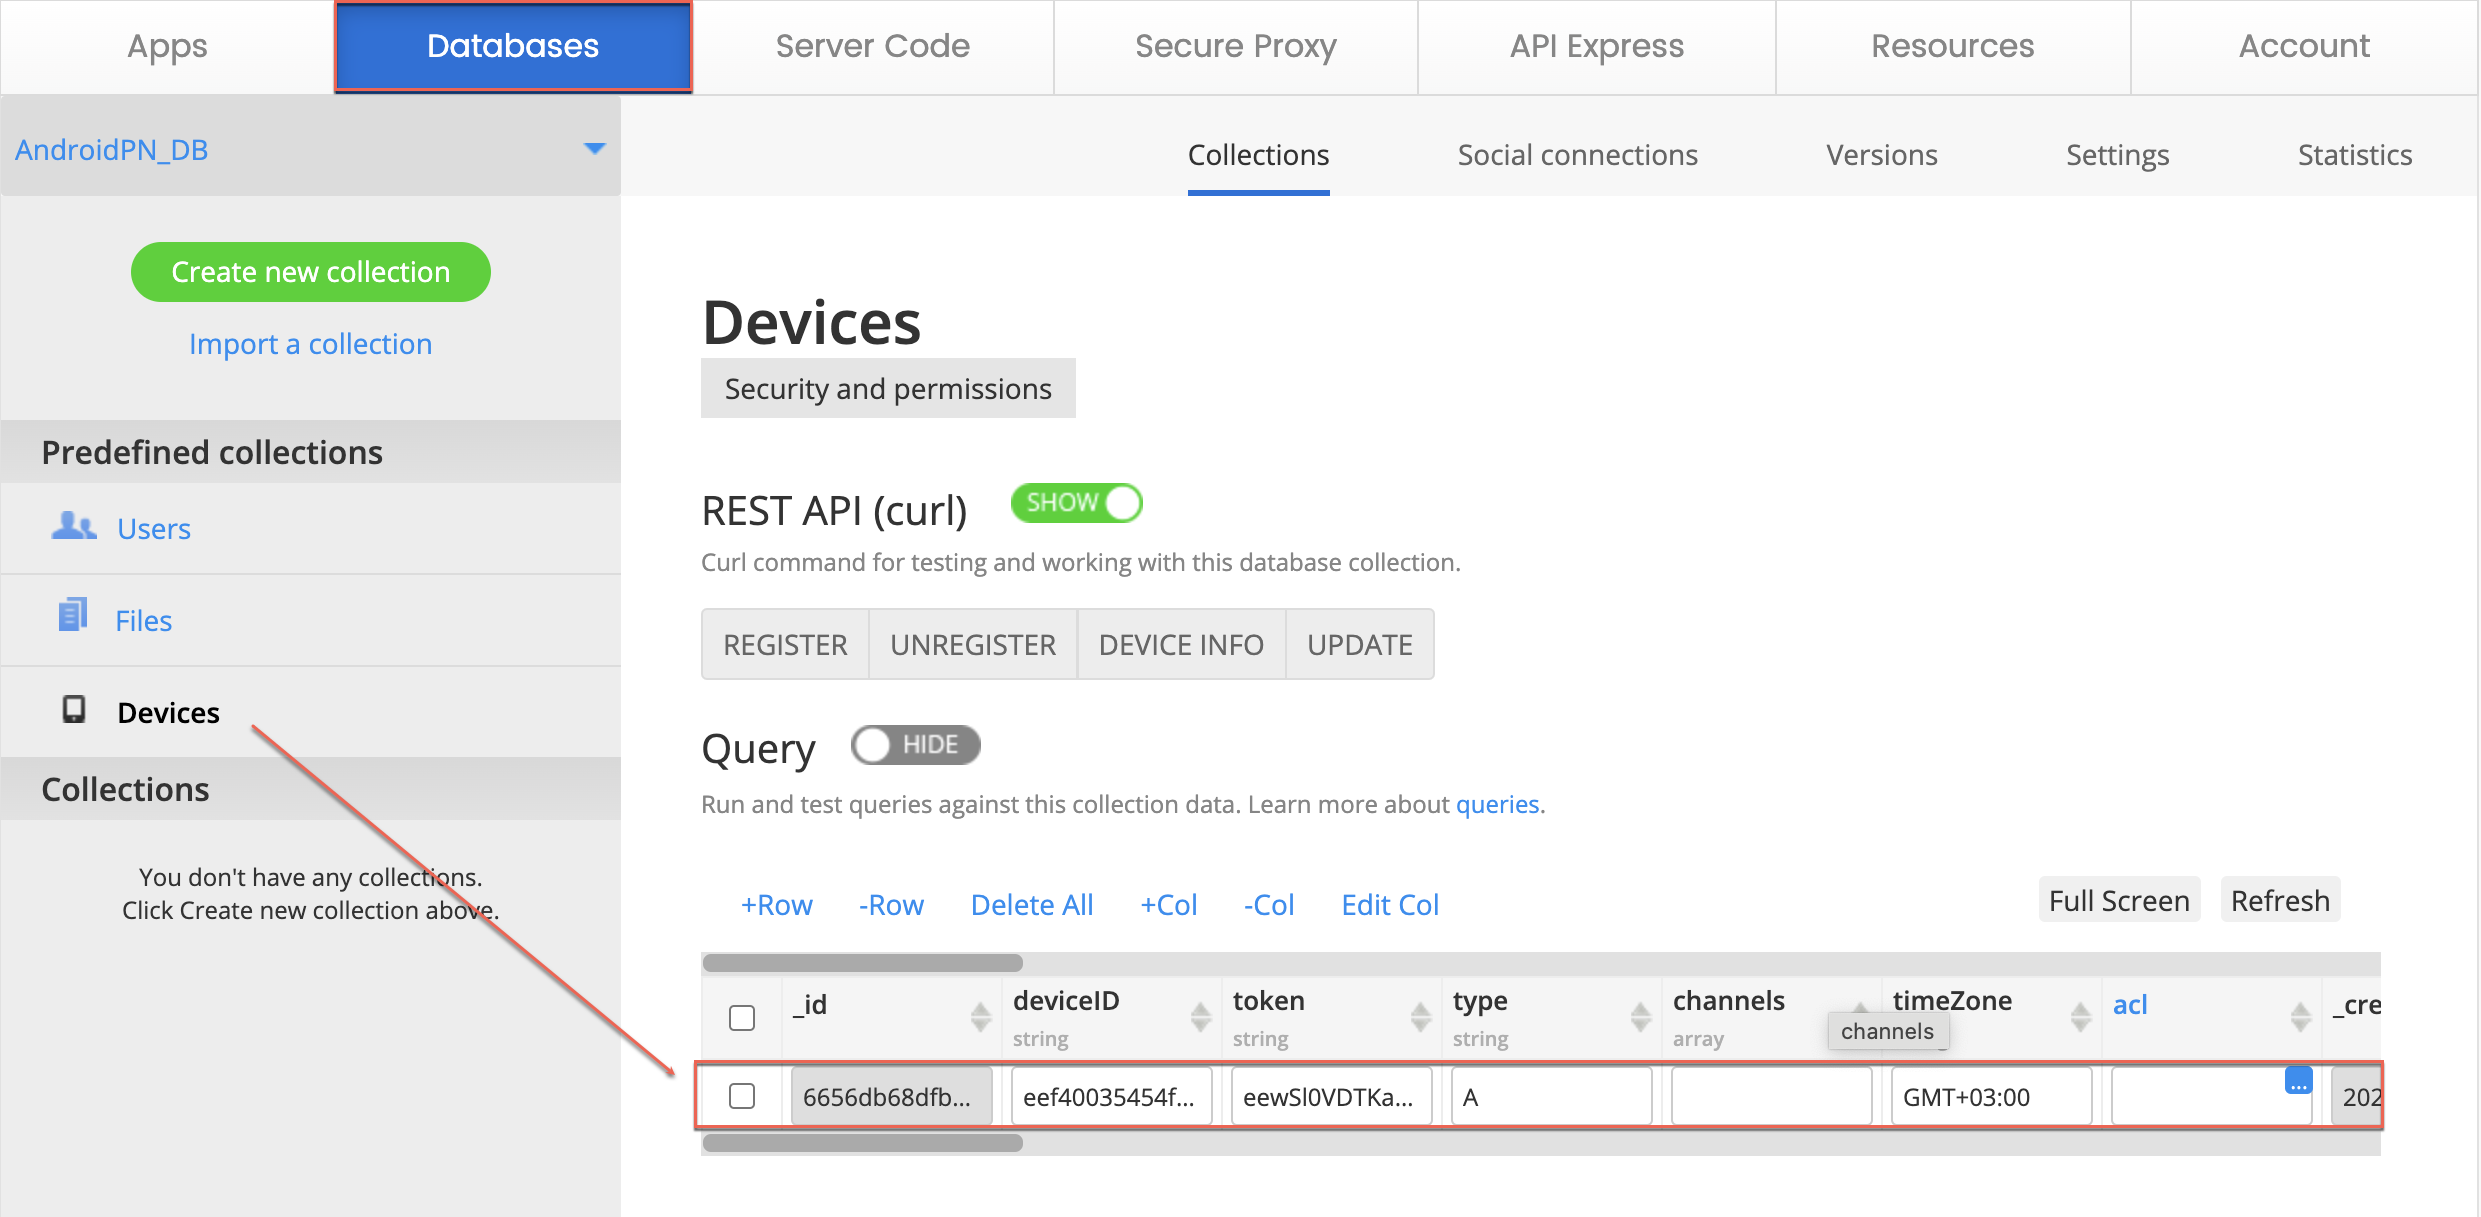
Minimize the app, refresh the Devices collection in your database, and you’ll see a new entry for your device:
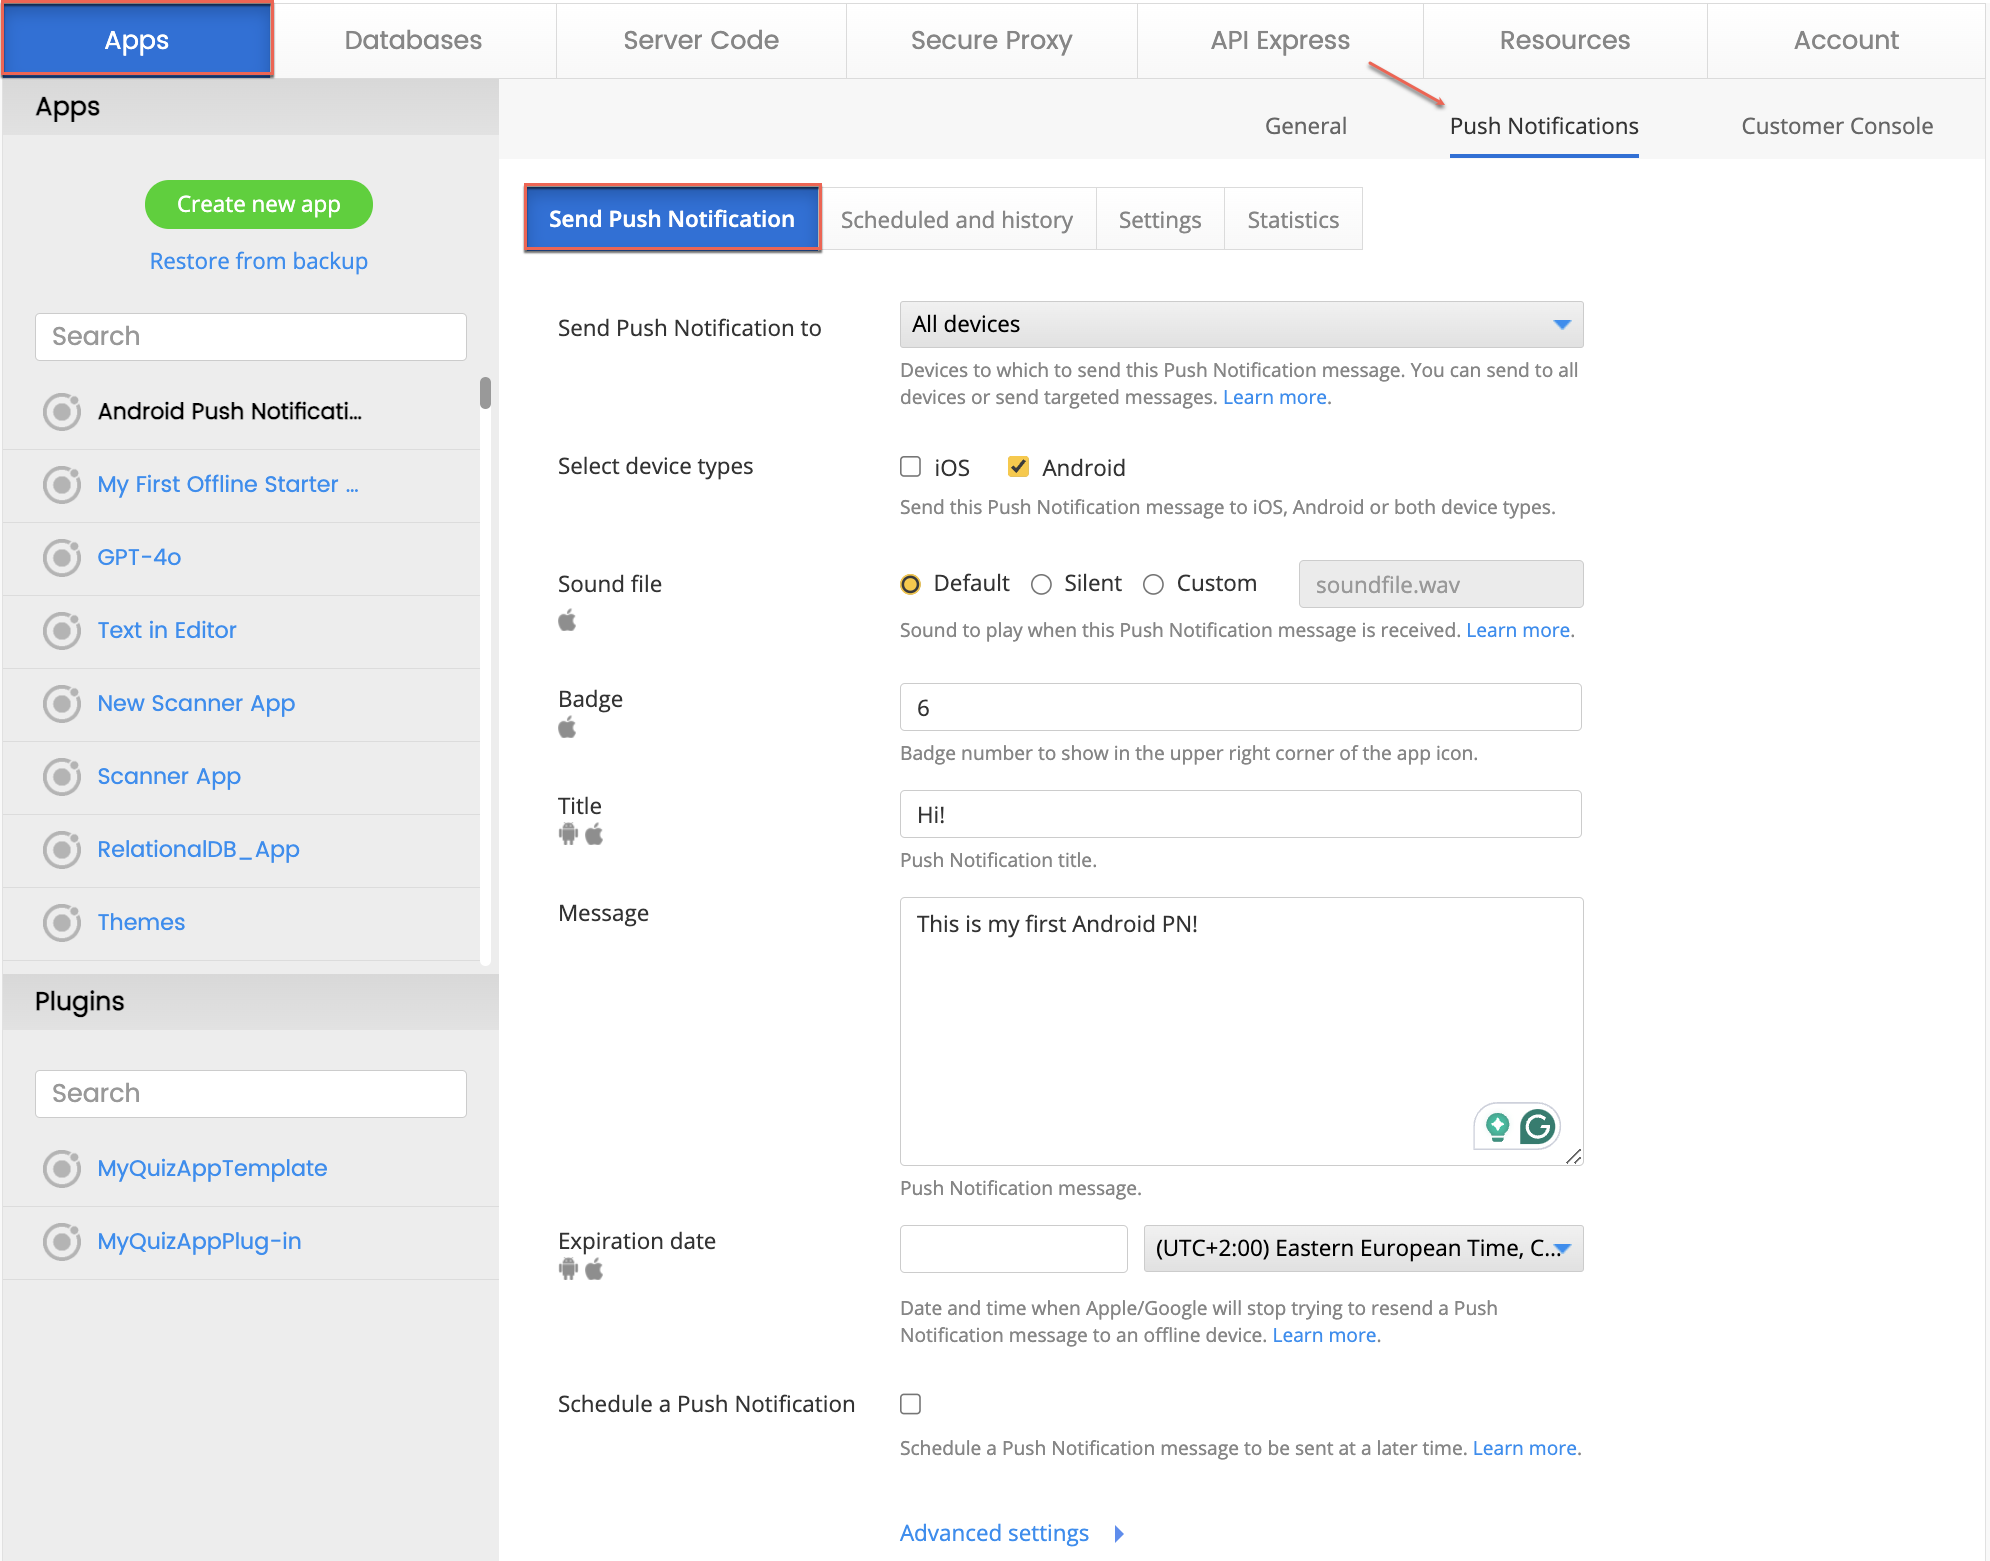
Step 8: Sending Push Notifications
Go to the Push Notification Sending section in Appery.io. Specify the type of device (Android), and customize the notifications sending options of your message:
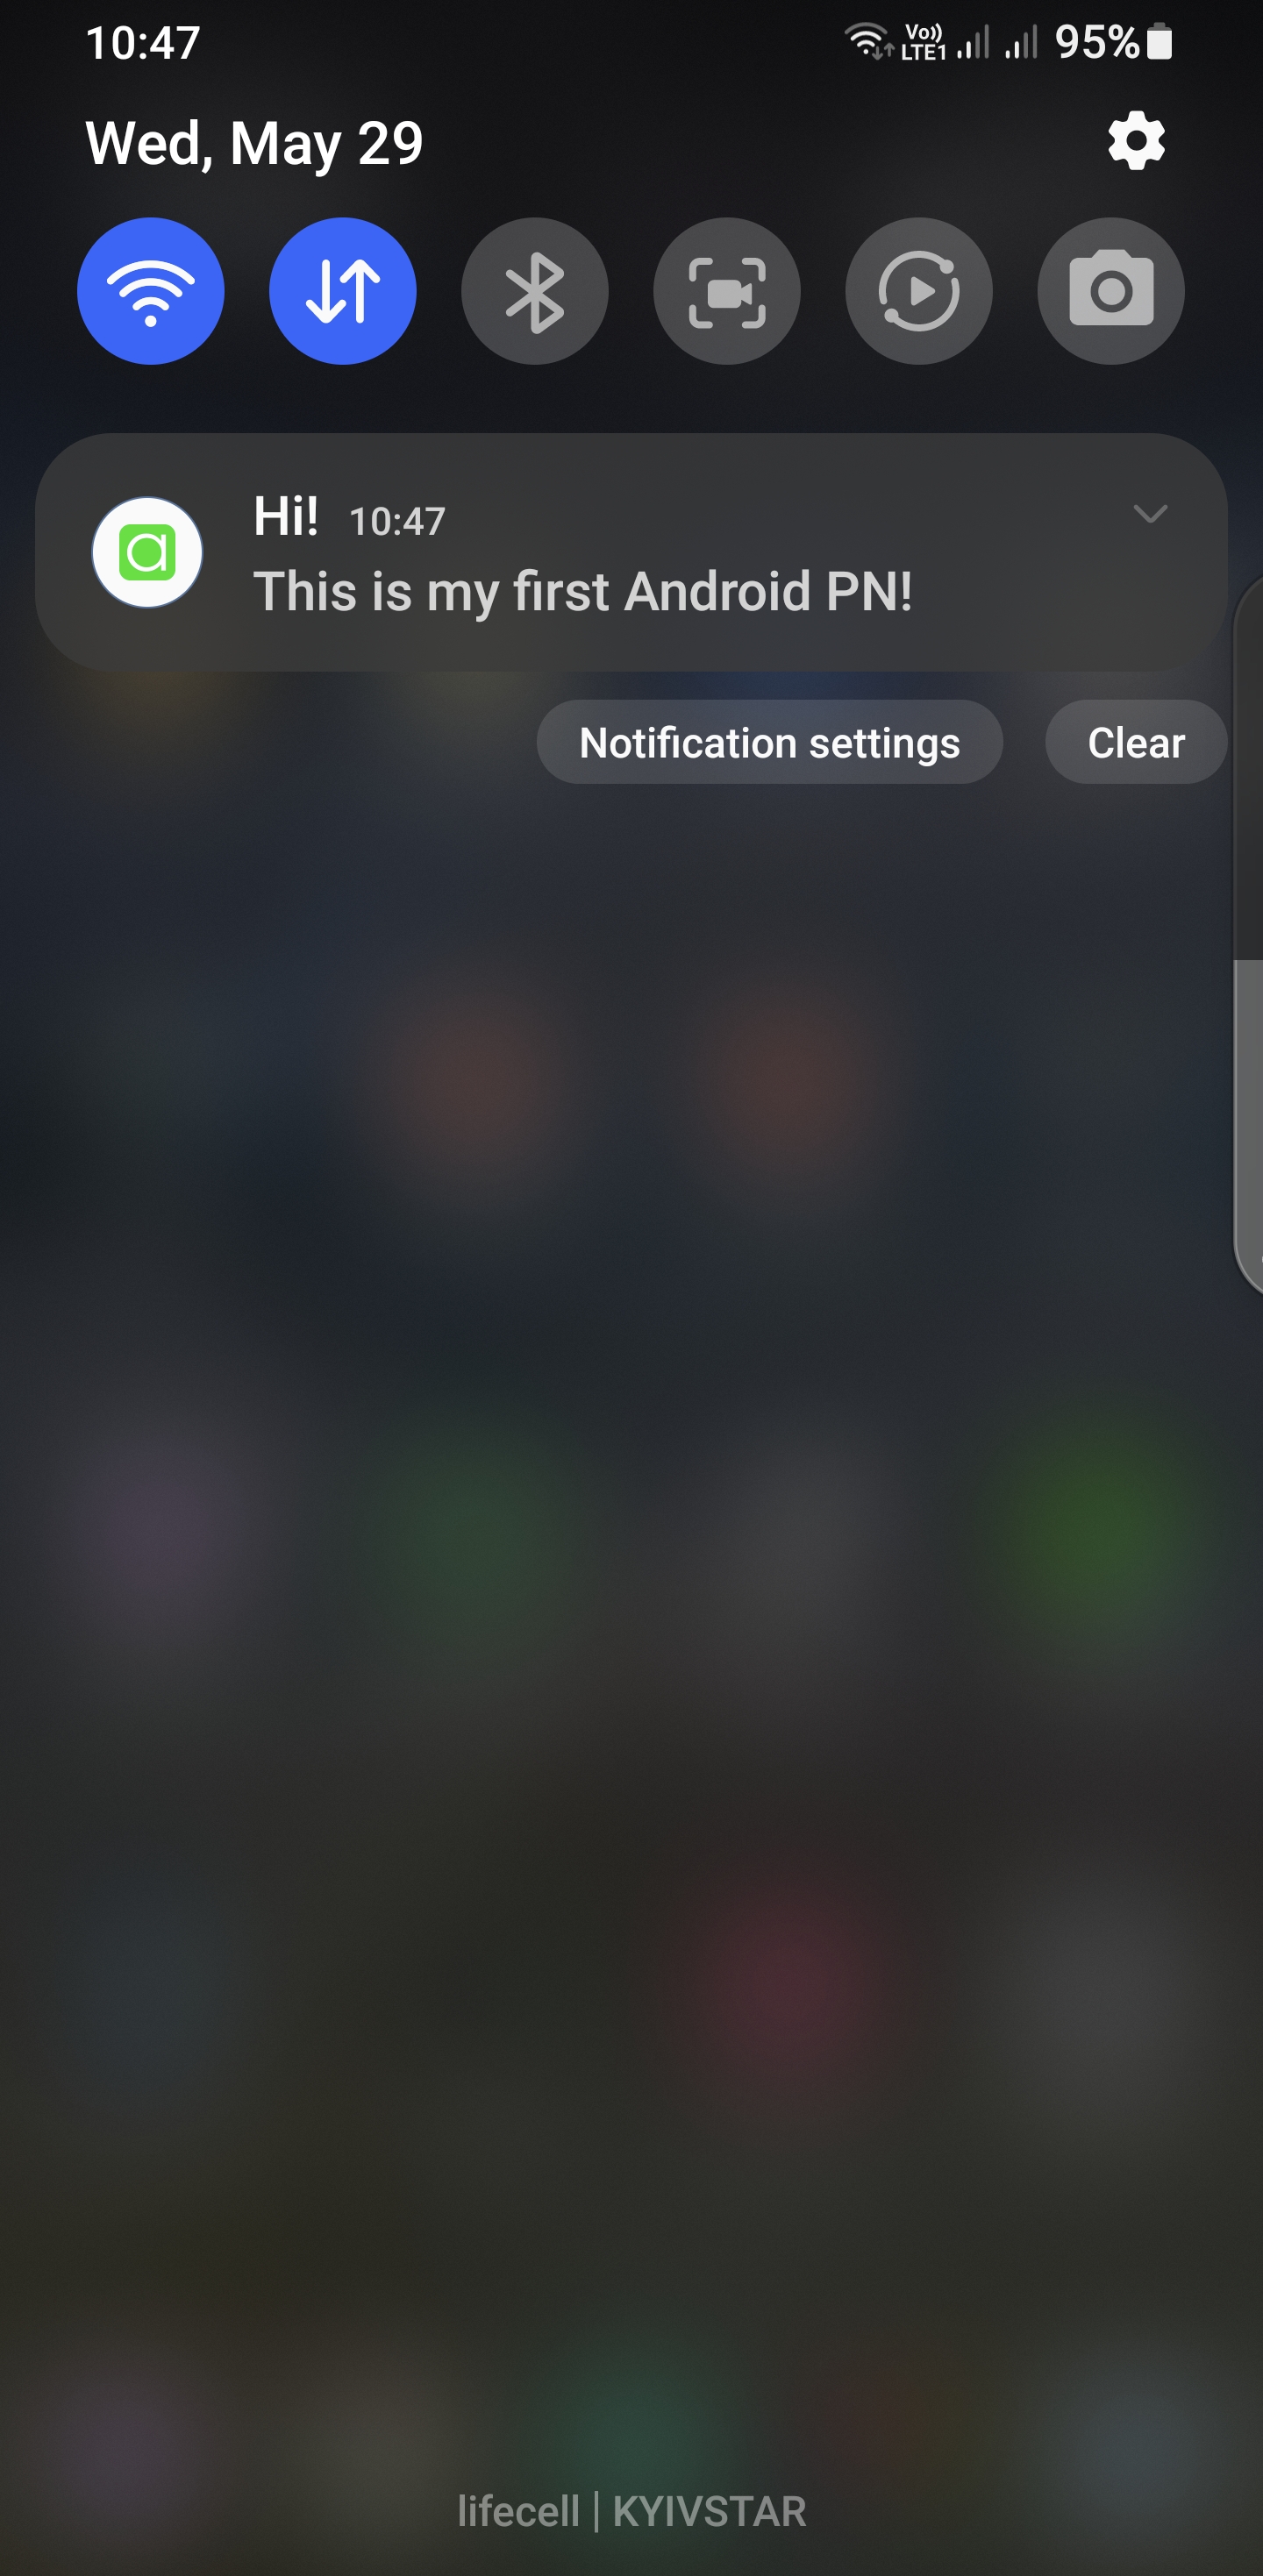
Send the test notification and watch it appear on your app’s icon:
Conclusion
And there you have it! You’ve successfully set up push notifications for your Android app using Appery.io. Stay tuned for more tutorials on setting up notifications for iOS, associating devices with users, and sending notifications from Appery.io Server Code.
Don’t forget to like, subscribe, and share this post if you found it helpful! Happy coding!
Feel free to leave any questions in the comments below. We’re here to help!