4-Ways to Send a Push Notification on Appery.io Platform

Being able to send Push Notifications to users is one of the fundamental capability in an enterprise mobile app. Appery.io platform comes with Push Notifications component out-of-the-box and allows you quickly to send targeted messages to iOS and Android devices. In this blog post we will show the four ways to send a Push Notification message to a user:

  1. Push Notifications Console.
  2. Server Code Push Notifications API (server-side).
  3. Push Notification REST API.
  4. Customer Console.

Push Notifications Console

This first option is probably the simplest way to send a Push Notifications once you have installed an app on a device. Select device types, enter the message and send. The Push Notification message should arrive on the registered device instantly.

PN_console

Sending a Push Notification from the console.

Read the rest of this entry »

Learn How to Build an Ionic App to Save Form Data Into a Database

Saving app data is one of the most basic functionality in any business or enterprise mobile app. A user is presented with a custom form (page). A user enters information and the information is saved into a cloud data storage. We created this video to show you how to do exactly that.

In this video tutorial, you will learn how to build an Ionic app that saves form (page) data into a database. The video tutorial shows:

  1. Creating a database.
  2. Creating server-side logic to save data into the database.
  3. Building an Ionic app. The app uses the server-side script to save data into the database.
  4. Testing the app.

Watch the video now:

Looking for more videos on how to build mobile apps? Check out our YouTube channel.

How to Perform Basic Database Operations: Create, Read, Update and Delete

The Appery.io Backend Services consists of the following components:

  • Database – for storing any app data.
  • Server Code – for writing server-side app logic using JavaScript.
  • API Express – integrating with external systems and APIs.
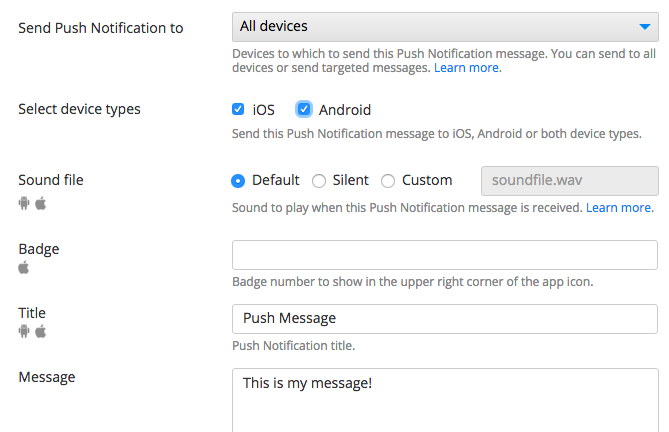
  • Push Notifications – sending push messages to devices.
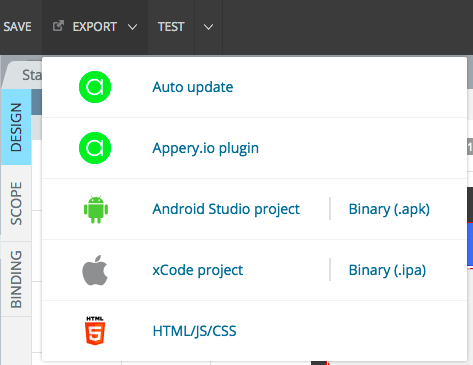
  • Web Hosting – publishing and hosting mobile web apps.

In this post, we will show you how a Server Code script integrates with the Database.

One of the most common questions we get is how to work with the database, how to create, edit and delete data. This makes sense as virtually any mobile app needs to store data in a database and perform these basic operations. To access the database, we are going to use Server Code script. Server Code allows writing app logic using JavaScript which will be executed on the server. For example, a script can access the database, send a Push Notification message, sort data and invoke an external REST API. We will start with the most basic operation: how to read data from the database.

The database collection used in this post looks like this:

Database collection.

Database collection.

This can be data collected from a form inside an app – a form that collects information about the user.

Reading Data

Server Code script has out-of-the-box API to access the database to perform all the basic operations. The following script reads all objects from the above collection.

var dbApiKey = "fe7c124b-f7c5-4764-9274-173b56a97102";
var result = Collection.query(dbApiKey, "Data");
Apperyio.response.success(result, "application/json");

One line 2, the script retrieves all the data.

One line 3, the script response is set. A Server Code script is invoked as a REST API. The code on this line defines the API response.

A script can be quickly tested from the Run tab where you can see the JSON data:
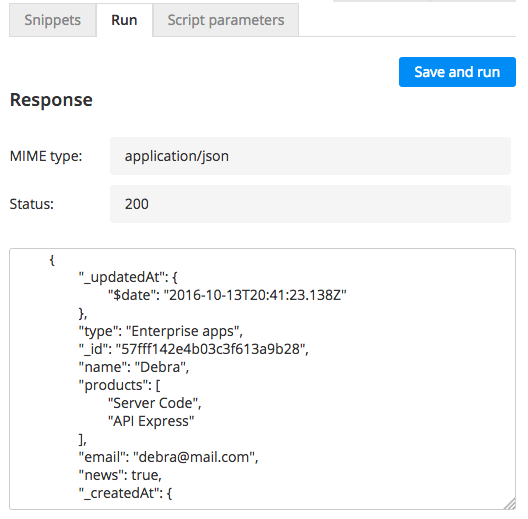
Testing the script.

Testing the script.

Reading data from a database collection is fast and simple. Next, we are going to save data into the database.

Read the rest of this entry »

How to Build and Test an Ionic SMS App with Nexmo API

This video shows how to build and test an Ionic SMS app using Nexmo API. The video tutorial first shows how to create a backend to invoke Nexmo API. Then the Ionic app is created which uses the backend. The app is then tested in the browser and on the device using the Appery.io Tester app. The video also shows how to build a binary file for Android and iOS.

Also, check out how to create an app backend with API Express and Nexmo SMS API.

October Update: More Secure, Better Auto-Update, Binary Support, Google Maps and More

We got some interesting stuff in October platform update, check out what’s new below.

More Secure with HTTPS

We switched to HTTPS to make everything more secure. If you are using any non-HTTPS API services a quick workaround is to invoke the API from the Appery.io Server Code or API Express.

Improved User Experience on Android During Auto-Update

This was a long requested feature from our community. When an Android device was checking and installing auto updates, the screen would simply go black which created a pretty bad user experience. We pushed a minor update which we believe will greatly improve the user experience. If an update is available you will see a short message explaining that the app is checking and installing updates.

Send Binary Data with API Express Service

It’s now fast and simple to work with binary data inside API Express service with the new binary option. For example, you can build an API Express service which uploads binary data to an external REST API service.

apiexpress_binary_request

API Express binary data option.

Read the rest of this entry »

Video Tutorial: How to Expose a Custom SQL Query as a Login REST API Service

This video shows how to use the SQL and Script components to build a Login service. The SQL component runs a custom SQL query to check if a user exists in a database. The Script component adds custom logic to check what the SQL component returned and defines the response (user found or user not found).

Want to learn more how to connect to enterprise data source? Watch our API Express playlist.

Updates to Salesforce Import Service Inside the App Builder

Please read about upcoming changes here. It’s important to understand that invoking Salesforce APIs (or any APIs) is now perfomed using the Server Code or API Express. This update only impacts the App Builder (development time).

How to Validate an Email Field in a jQuery Mobile App Using a Regular Expression

pablo (45)

Validating an email entered on a form is one of the most fundamental requirements in any mobile app. In this blog post, we are going to show you how to validate an email input field using a regular expression. This blog post is a follow-up to How to Add JavaScript Form Validation to a Mobile App post.

Validating an email input field using a regular expression is very simple. Here is the code to perform email validation.

// Read a value from the email input component.
// Apperyio() is a quick wrapper for a jQuery select
// emailInput is the name of the UI component
// It's possible to use jQuery directly as well
var emailInput = Apperyio("emailInput").val();

// Regular expression to validate email input value
var re = /^(([^()[\]\\.,;:\s@\"]+(\.[^()[\]\\.,;:\s@\"]+)*)|(\".+\"))@((\[[0-9]{1,3}\.[0-9]{1,3}\.[0-9]{1,3}\.[0-9]{1,3}\])|(([a-zA-Z\-0-9]+\.)+[a-zA-Z]{2,}))$/;
var test = re.test(emailInput);

// condition check part
if(test) {
    alert ("Everything is good.");
}
else {
    alert("Invalid email entered. Please try again.");
}

You can quickly add this code to any app inside a JavaScript file and reuse. Looking for more examples and how-tos? Check out YouTube channel for large number of short videos.

How to Add reCAPTCHA to an Ionic App

reCAPTCHA is a nice service that usually added to a registration form and helps prevent bots from registering automatically. The service usually displays a small and easy challenge to a human but which would be difficult for a bot to answer. In this blog post we are going to show you how to add reCAPTCHA to an Ionic app.

Let’s start.

  1. Create a new Ionic app based on Ionic Blank template.
  2. Go to https://github.com/vividcortex/angular-recaptcha, download vcRecaptcha.js, and unzip the file.
  3. Inside the App  Builder, go Create New > JavaScript, name it vcRecaptcha, check Upload from file and select the angular-recaptcha.js file from your drive. For type, select Angular module and click Create JavaScript.
  4. Now, open Screen1 and add an HTML component to the page.
  5. Under the Properties panel, click Edit and add the following code:
    <div vc-recaptcha key="'XXXXXXXX'" on-success="onSuccess()"></div>
    

    where 'XXXXXXXXX' is the key generated on https://www.google.com/recaptcha/admin (your key must be inside the double quotes).

  6. Switch to Scope view and add a new function, name it onSuccess, and add the following code to the editor:
    Apperyio.navigateTo("Success");

    onSuccess() is the scope function that executes when the correct Captcha is entered (here, another page will open).

  7. To demonstrate this, create a new page and name it Success. Add a Text component to the page and paste Welcome! for its Text property.
  8. Also, if you want to add a solving annotating images to your reCaptcha, go to Project > Routing, click Manage dependencies for Screen1, and check reCaptcha.

That’s it. You are ready to test your app with the reCAPTCHA.

reCaptcha

reCaptcha example.

Looking for more examples? Check out our sample apps list. Every app has preconfigured app UI and app backend for you to try.

Learn How to Build an Ionic App with an RSS Feed [Video]

Looking to add an RSS feed into your Ionic app? This video shows you to display an RSS feed inside an Ionic app.

Learn from other short YouTube videos on the Appery.io channel.