In this post, we cover some features for app management in Appery.io. Many new Appery.io customers will find the answers to frequently asked questions like:
Can I make sure that my application and data are saved securely?
Is it possible to keep my project/database/server code, etc. for future use?
How can I manage my apps/databases/Server Code/API Express data efficiently?
And who knows—this post might also be helpful for some users that have been with Appery.io for some time already. 🙂
Making Project Backups
So, good news. All of your Appery.io projects can be easily saved. You can create a backup of any existing app and restore it later or even transfer it to another account if necessary.
By making a backup of an app you can save all the created pages with their UI and services, enabled plugins, libraries versions, keys and binaries, themes, JavaScript, CSS, etc. The structure of the application also remains unchanged. Sounds great, doesn’t it?
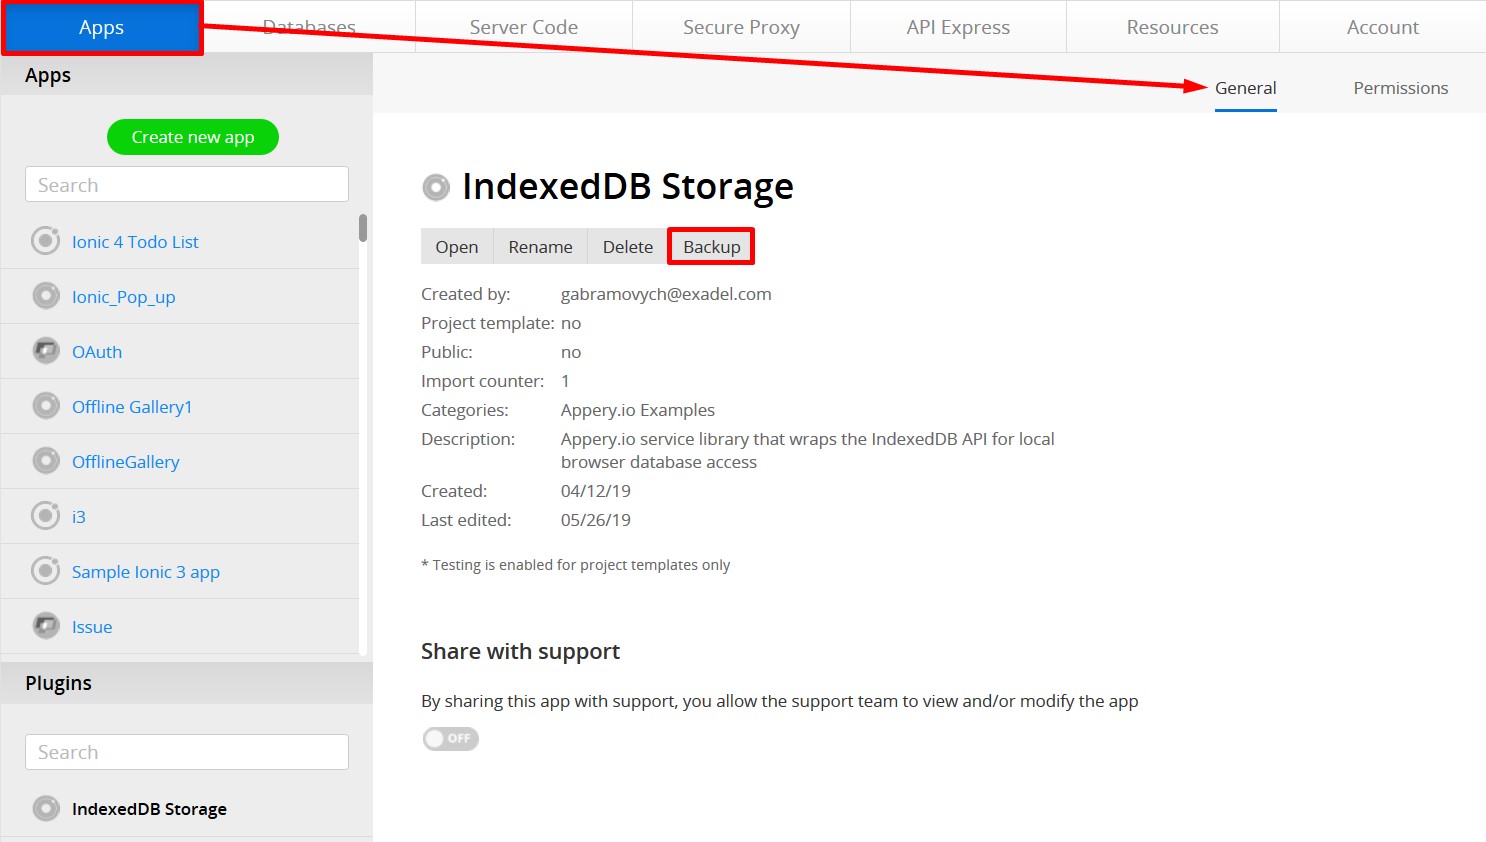
And all you need to do is to select an app under the Apps tab, go to the General tab and click Backup:
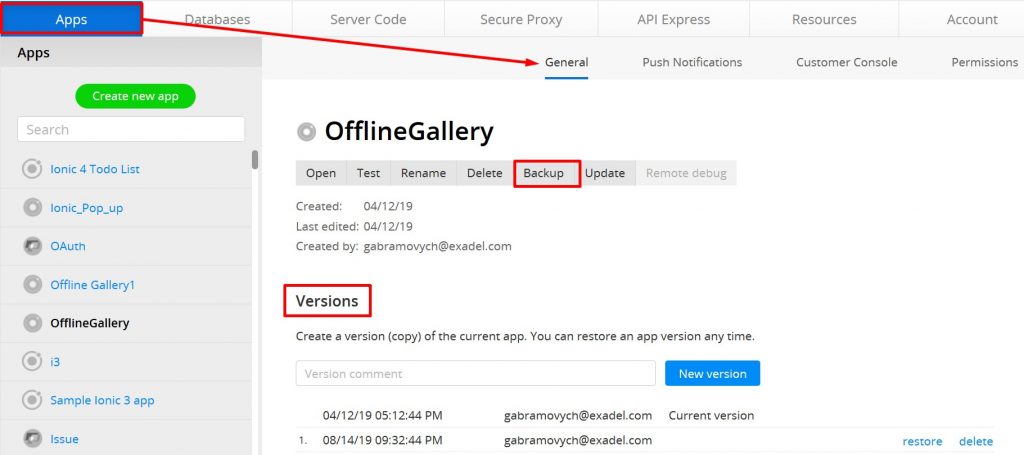
A new window opens allowing you to select where you would like to save your backup.
IMPORTANT: If you need to create a backup of the database for further use together with your app, you will have to save it separately by exporting its data to JSON or CSV (check below for how to do it) and all of the databases connections will need to be recreated. The same applies to API Express projects and Server Code.
We also recommend saving all custom generated data like Apple provisioning profiles or those involving 3rd party Push notification providers like Firebase Cloud Messaging(FCM) and legacy Google Cloud Messaging (GCM) since it cannot be saved in backups either.
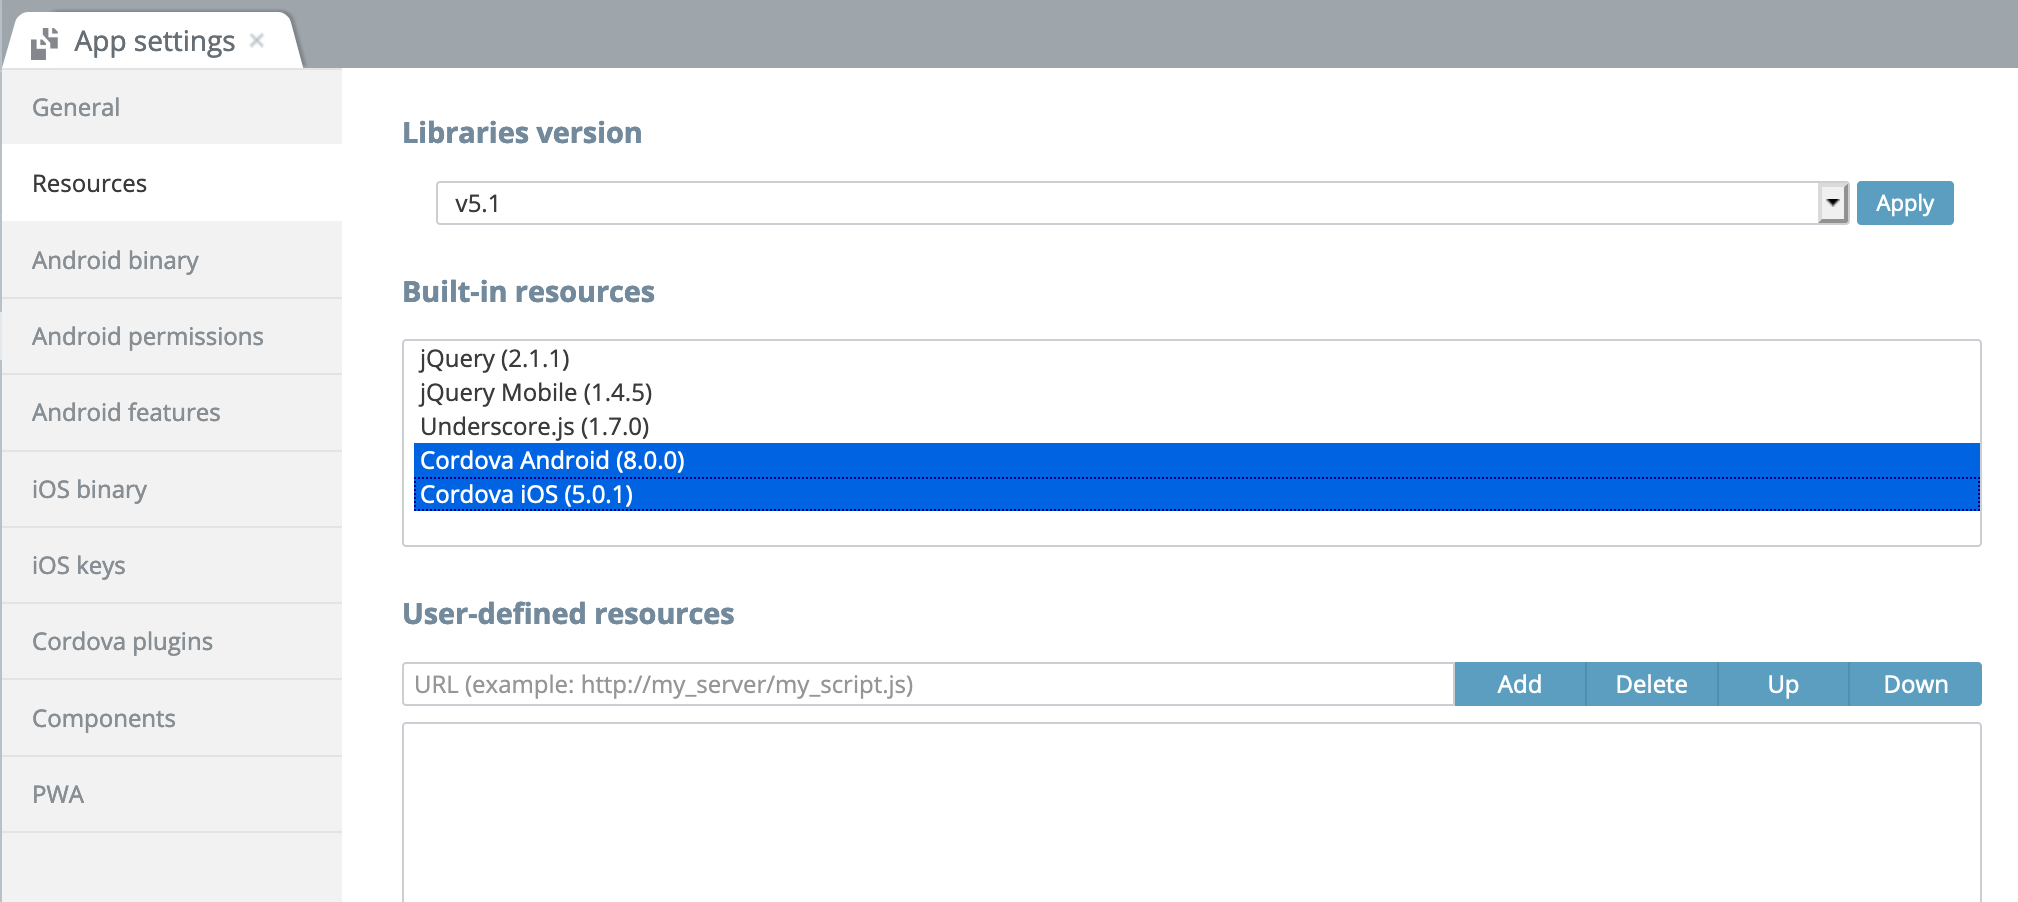
Under the Apps tab, you can also create backups of the plug-ins you have:
Creating App Versions
It’s a good idea as well to make app versions as you go along during your development so that you can more easily experimenting with your project.
Later, you will be able to go the General tab, scroll down to the Versions section, restore the necessary app version and create another backup if needed.
Working with Databases
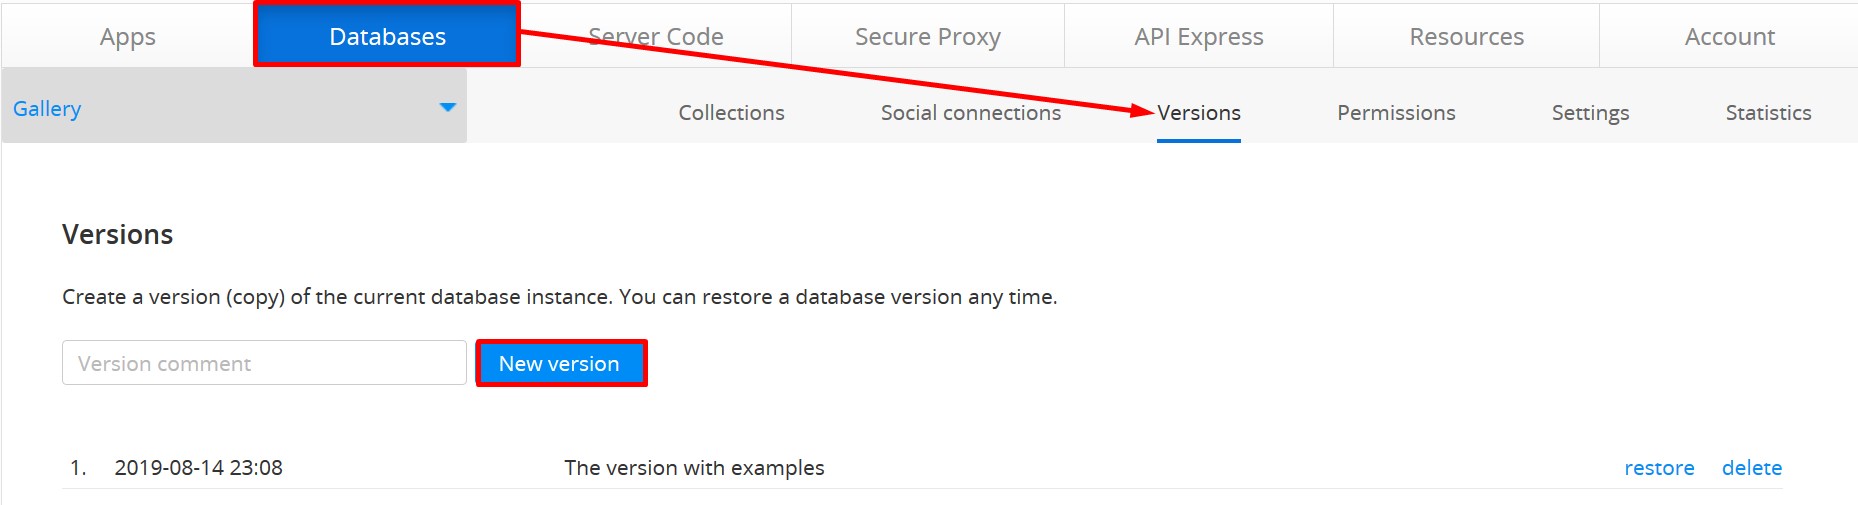
Another piece of good news is that you are also free to copy the current database instance as saved version. To create a new database version, under the Databases tab, open the Versions tab and click New Version. The process will be initiated and when the version copy is ready, you will be notified with am “Appery DB operation completed” email signifying that your database version has been successfully created and can be accessed from the Databases list under your Appery.io account:

Moreover, when you switch to the Settings tab, you will be able to:
- Rename the database
- Delete the database
- Clone the database
- Export all database data to JSON or CSV.
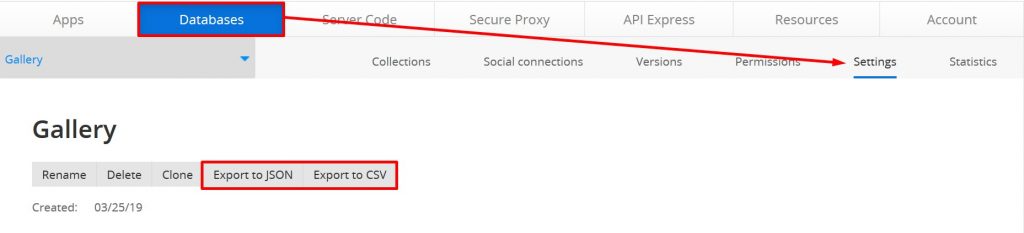
The last two options can also be used to keep your database safe for future use which is a great option to take into consideration:
Managing Server Code Scripts
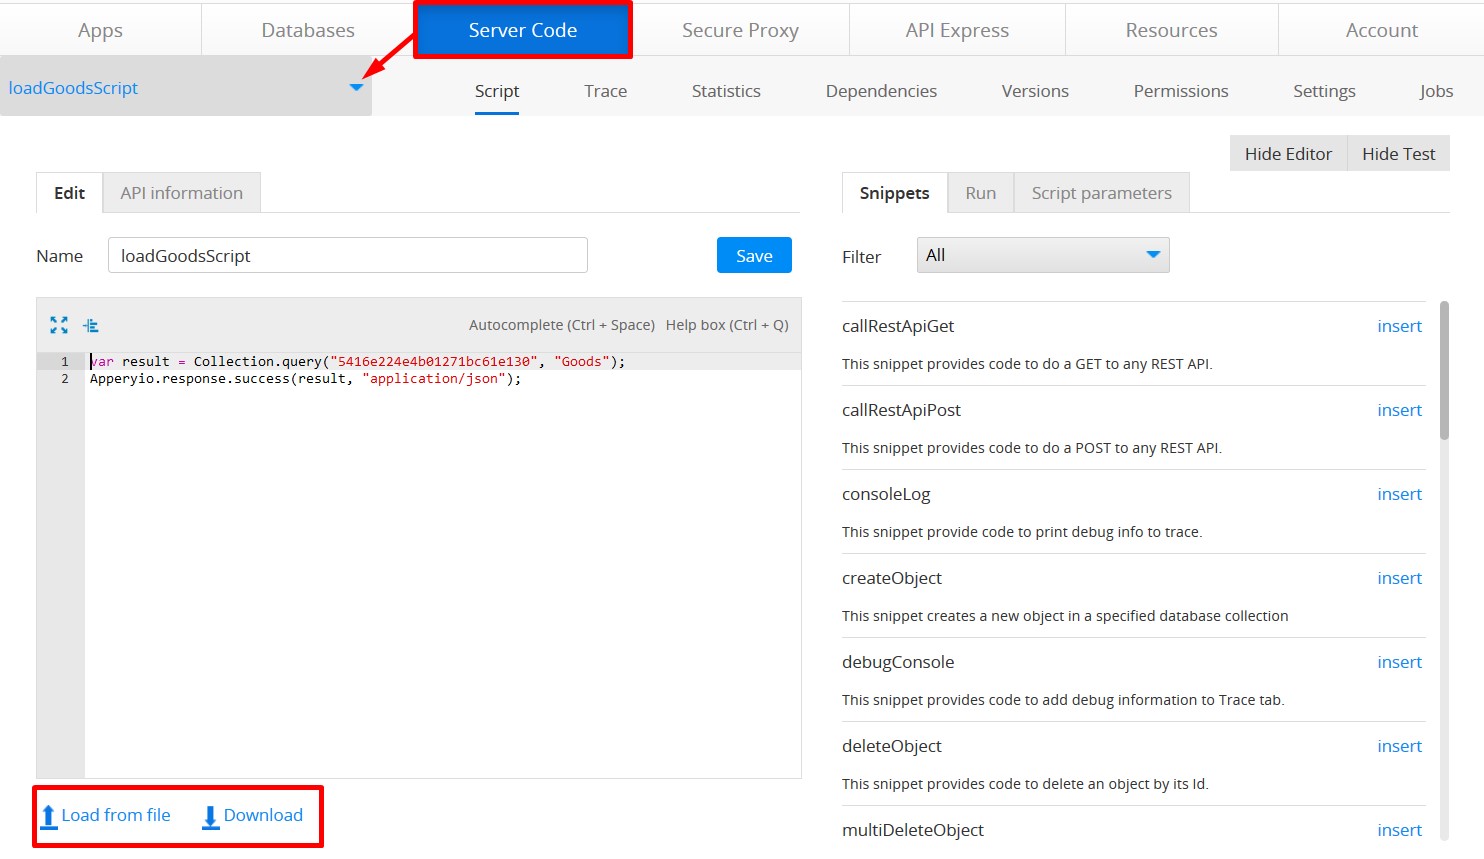
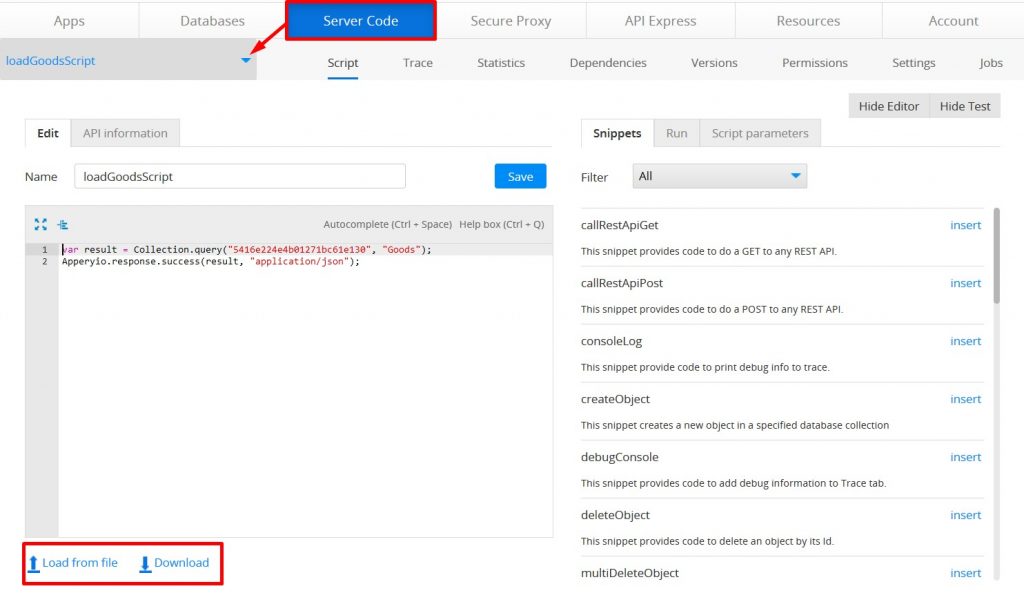
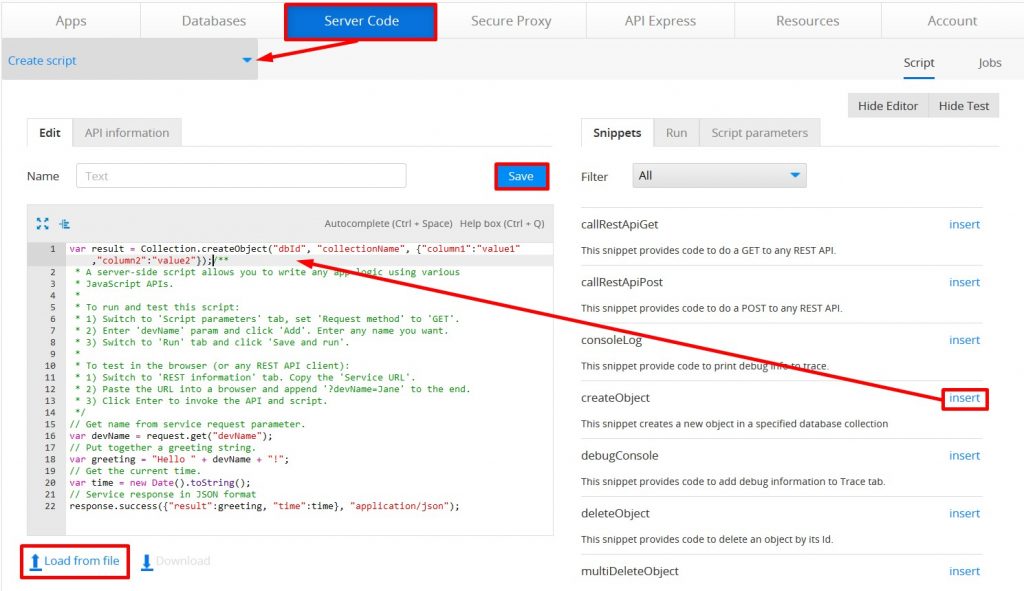
Working with server codes is organized under the corresponding Server Code tab. Select the code you would like to manage from the Scripts list in your App Builder and select the needed option. This would be Load from file to upload the previously saved or prepared script or Download to save the script for future use:
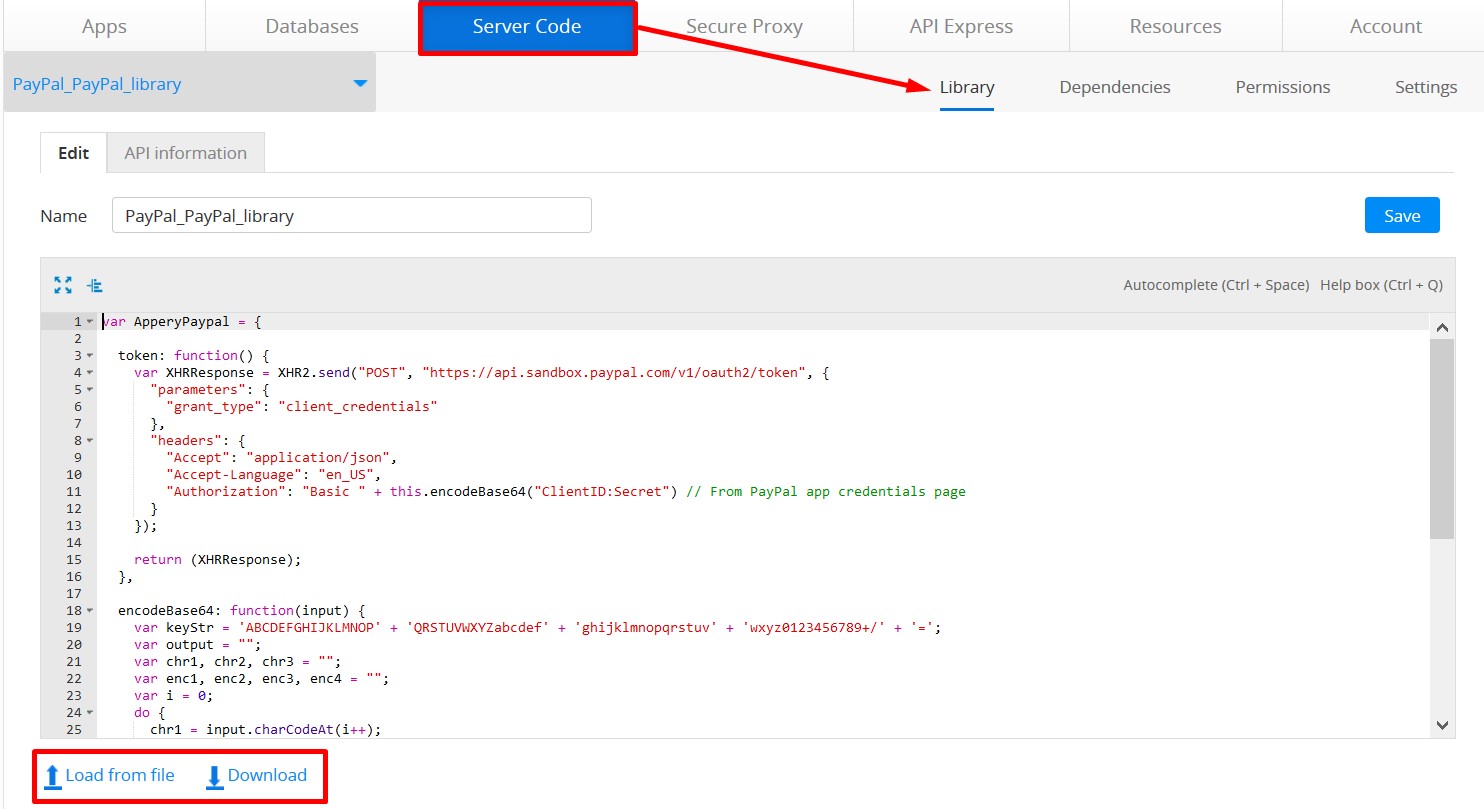
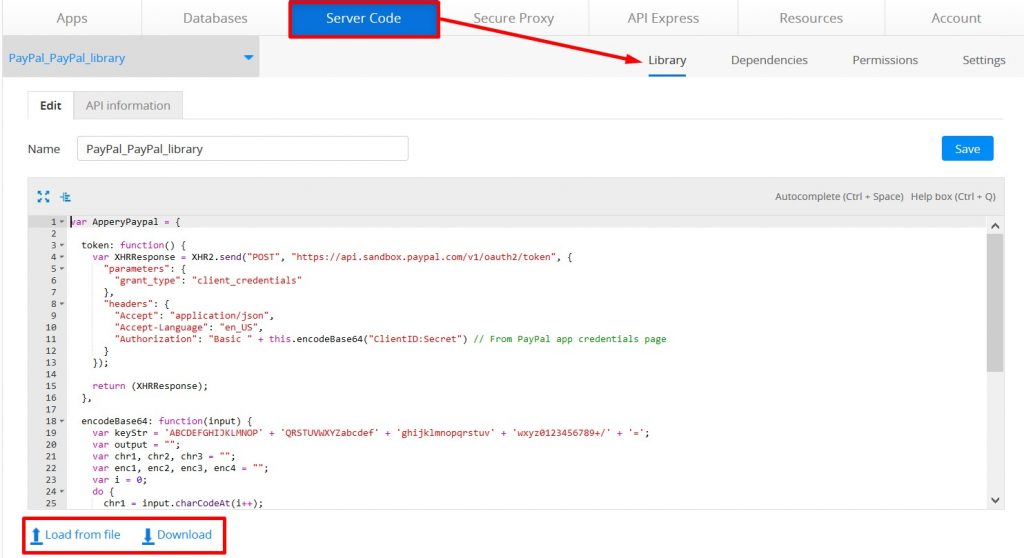
Similarly, you can organize your libraries: under the Server Code tab, scroll down to the Libraries section, select the library, and click Load from file (to upload the previously saved or prepared library) or Download (to save the library for future use):
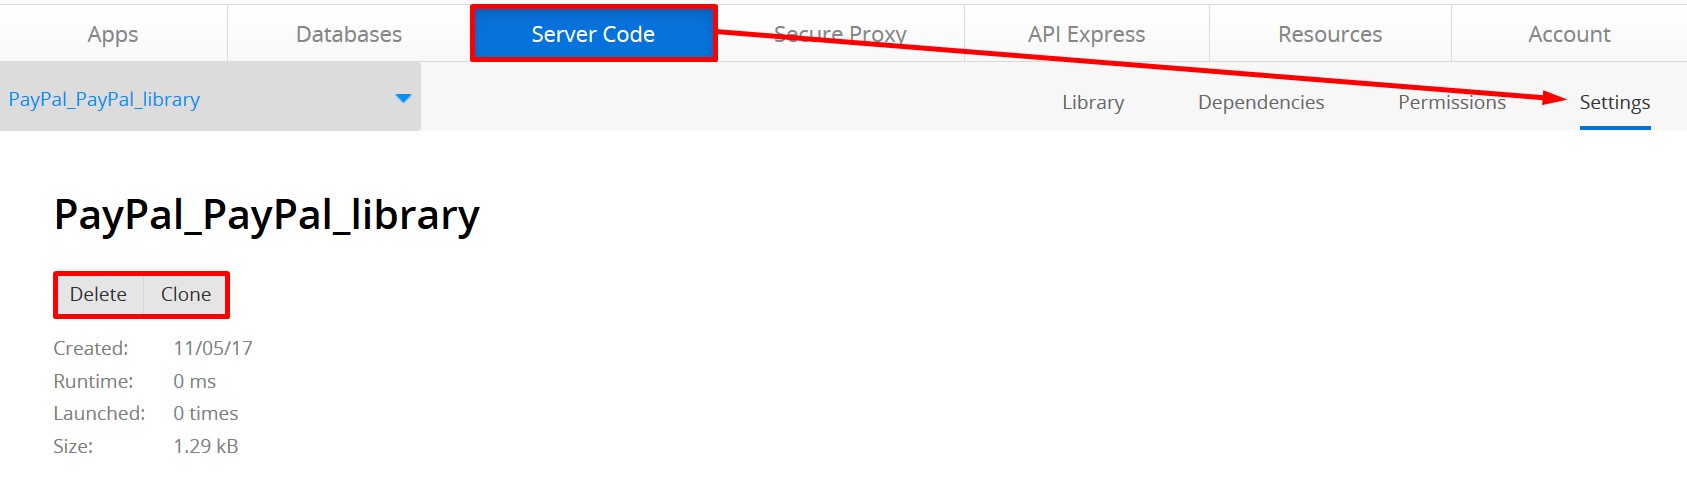
You can also delete or clone Server Code scripts or libraries of your choice. To do this, go to the Server Code tab, open the Settings tab of the needed resource, and select the necessary option:

Exporting API Express backups
Similarly, the Settings tab under the API Express tab provides the option of exporting backups of your selected API Express projects along with the basic options of editing and deleting them:

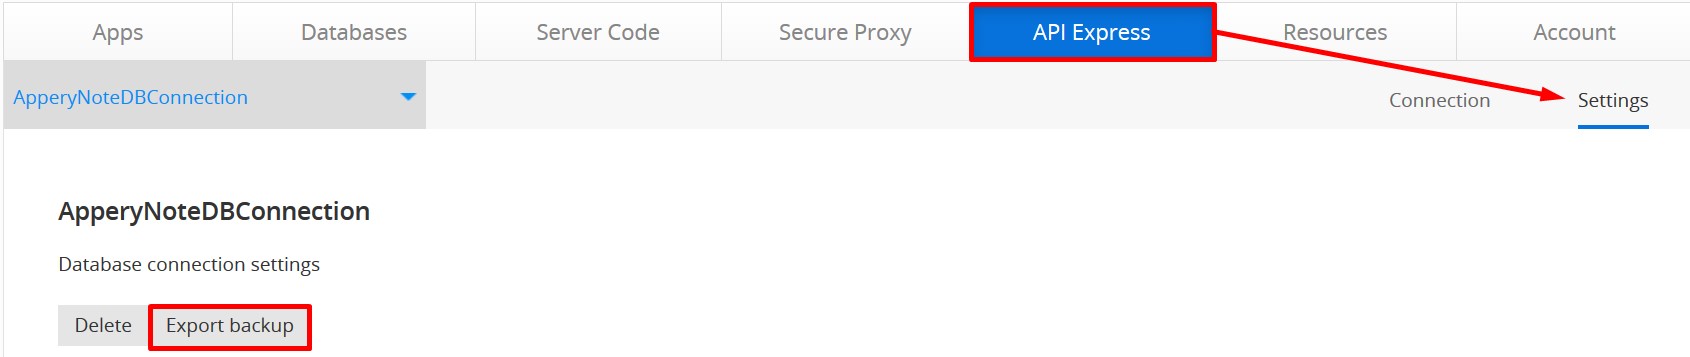
Now, meet the last but not the least great backup feature: with Appery.io, not only creating API Express projects backups is possible: you can easily create a backup of any database connection you might need.
To make use of this feature, scroll down to the Database connections section under the API Express tab, select the connection to be exported, switch to the Settings tab, and click Export backup:
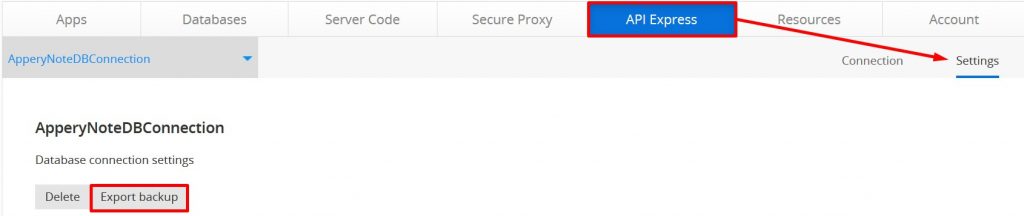
IMPORTANT: Please be aware that this option allows the creation of database connection backups independently, so, to run correctly, they will have to be recreated and linked to your new project from scratch!
Importing Backups or Saved Data Back
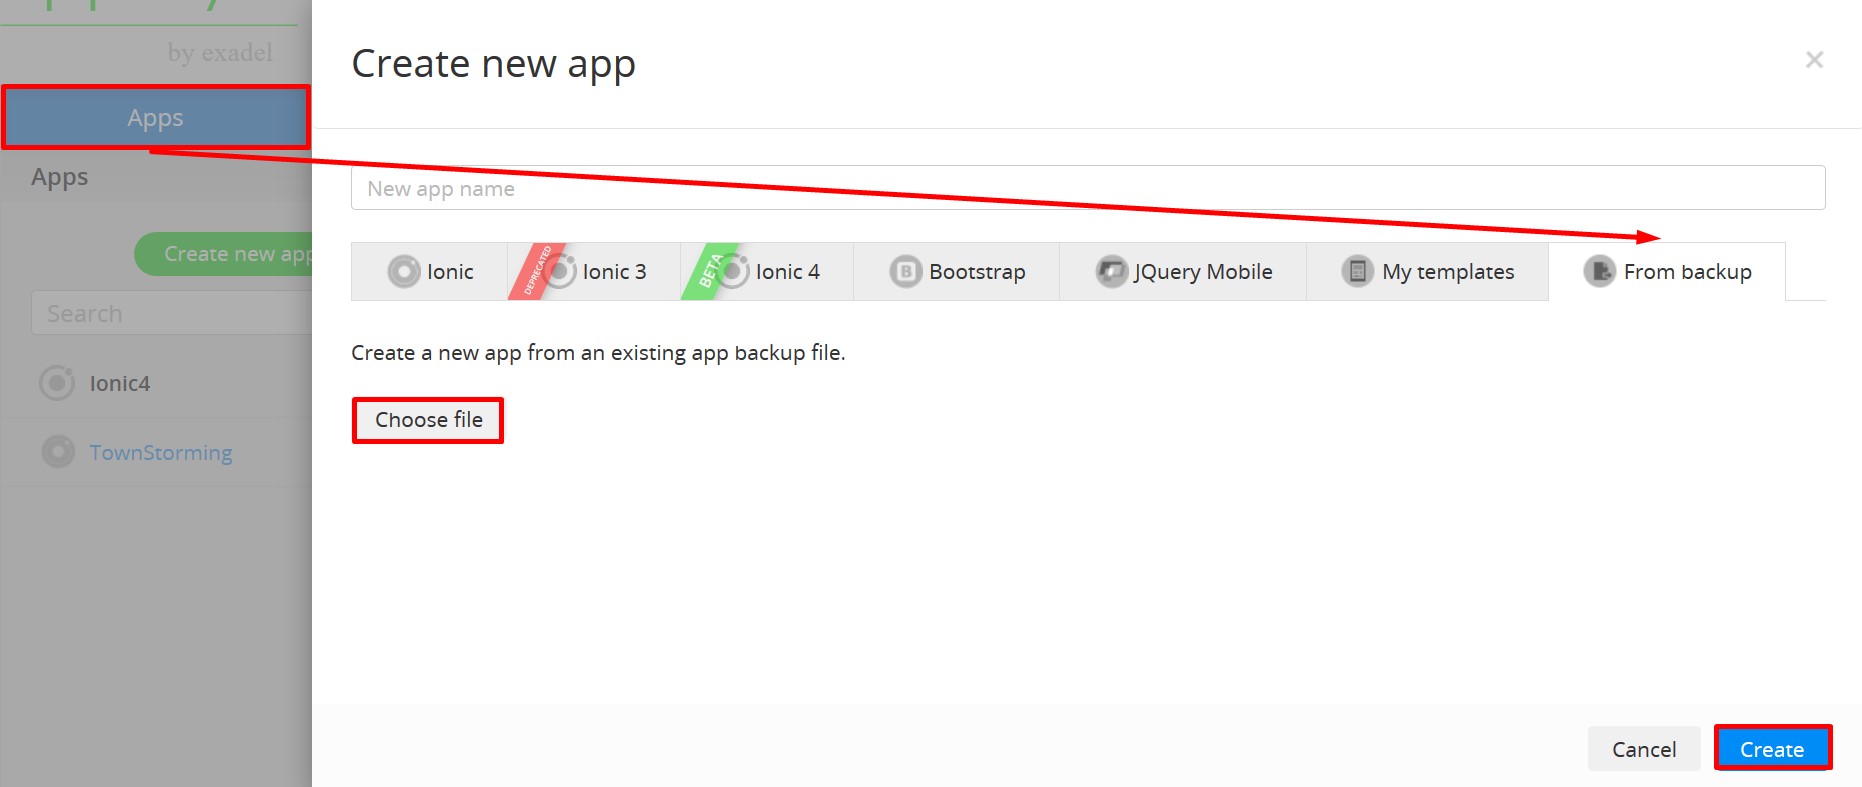
Importing backups and other saved data is even easier. Just select the appropriate tab (Apps, Databases, Server Code, or API Express) and click the green button Create new … In the new window, choose the previously saved backup file to be imported, name it, and hit Create. You will need to wait a bit and then… Congratulations! You’re done!
IMPORTANT: Please be aware that you will need to make backups under the corresponding tabs and import them back under the same tabs.
Check below how to create a new app from backup:

When creating a script you can select whether you would like to upload a previously saved file (click Load from file) or use one of the ready-to-go snippets created to simplify the development process (select the snippet you need and click insert to add it to the code). Then, save:
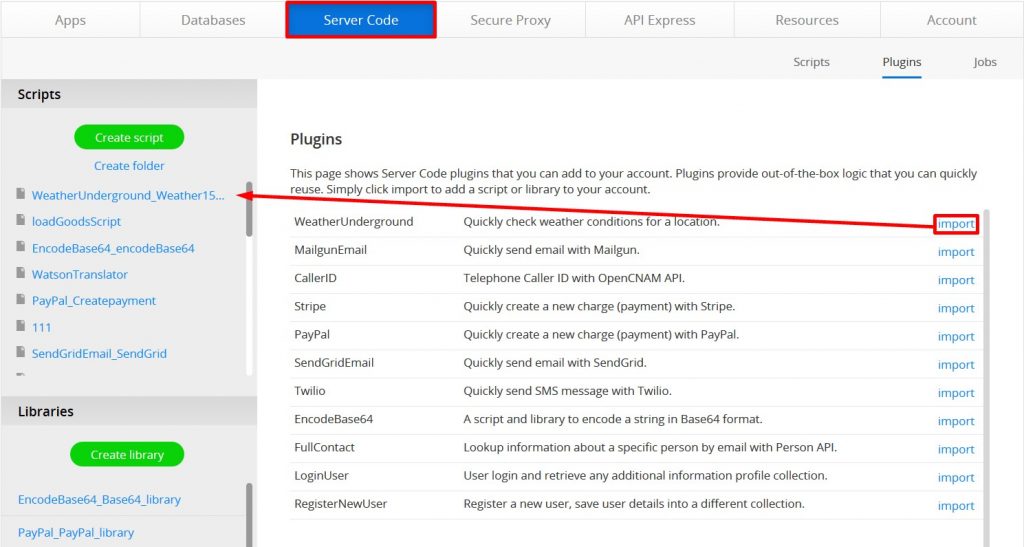
Now, if you switch to the Plugins tab, you will be able to create scripts from the out-of-the-box plug-ins list. All you need to do is to click import and check the plug-in added to the Scripts list:
That wasn’t hard, was it? But if it was …
We Are Here to Help
Please remember, if you experience problems with creating backups or saving your data or any other issues with your first (or second or third, etc.) app, you are always welcome to ask for help. Our friendly Appery.io email support (submit your ticket from inside the App Builder by clicking the Get Help button in the upper right corner) and Appery.io forum community are here to assist you. Find more information about how you can get help and advice about other great Appery.io services here.
 And, as a bonus, please check our new instructional video that shows how to use a Google Maps component in Ionic 4 apps