How to Save Camera Images in an Ionic App
This short tutorial will show you how to save images from your device camera into Appery.io database.
- Create a new Ionic project and database.
- Add the Camera Service plug-in and File Upload App plug-in into the project by going to Project > CREATE NEW > From Plug-in, in the Builder.
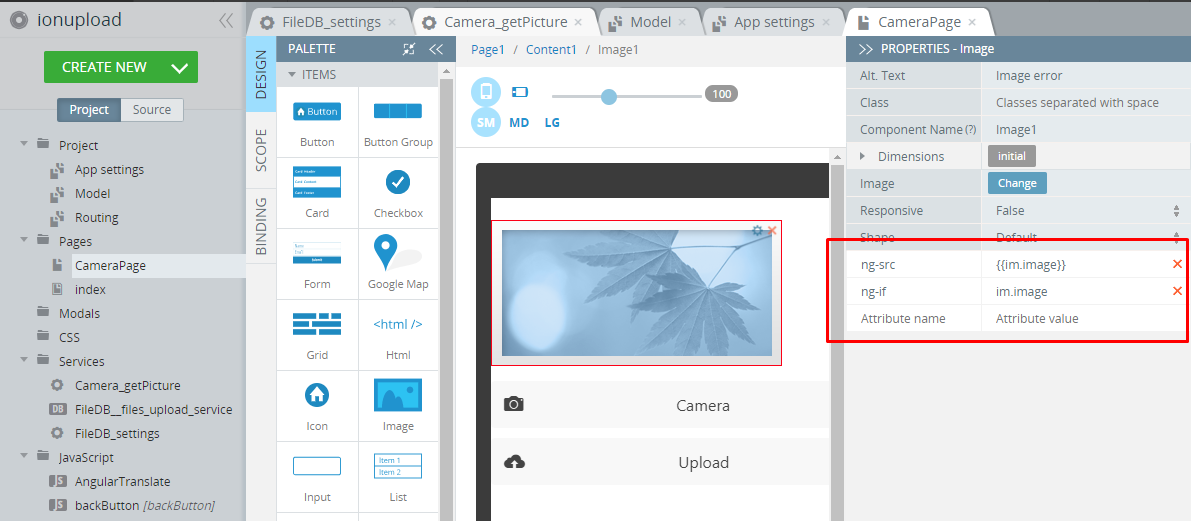
- Create a page CameraPage with 2 buttons Camera and Upload with corresponding attributes and the component Image to display the result:
- On the Scope tab add this code for the Camera button:
var requestData = {};
Apperyio.get("Camera_getPicture")(requestData).then(
function(success){
    $scope.im.image = success.image;
    $scope.$apply();
},
function(error){
});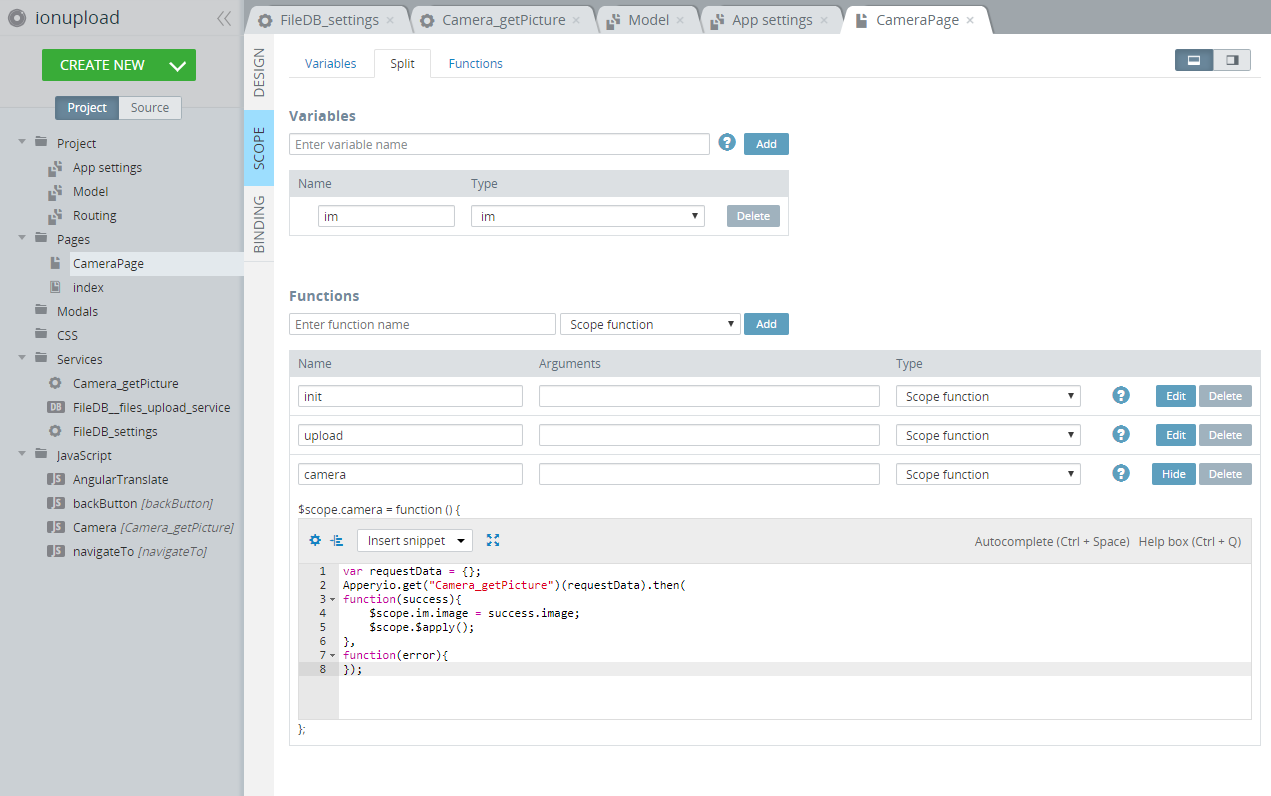
- Then, add this code for the Upload button:
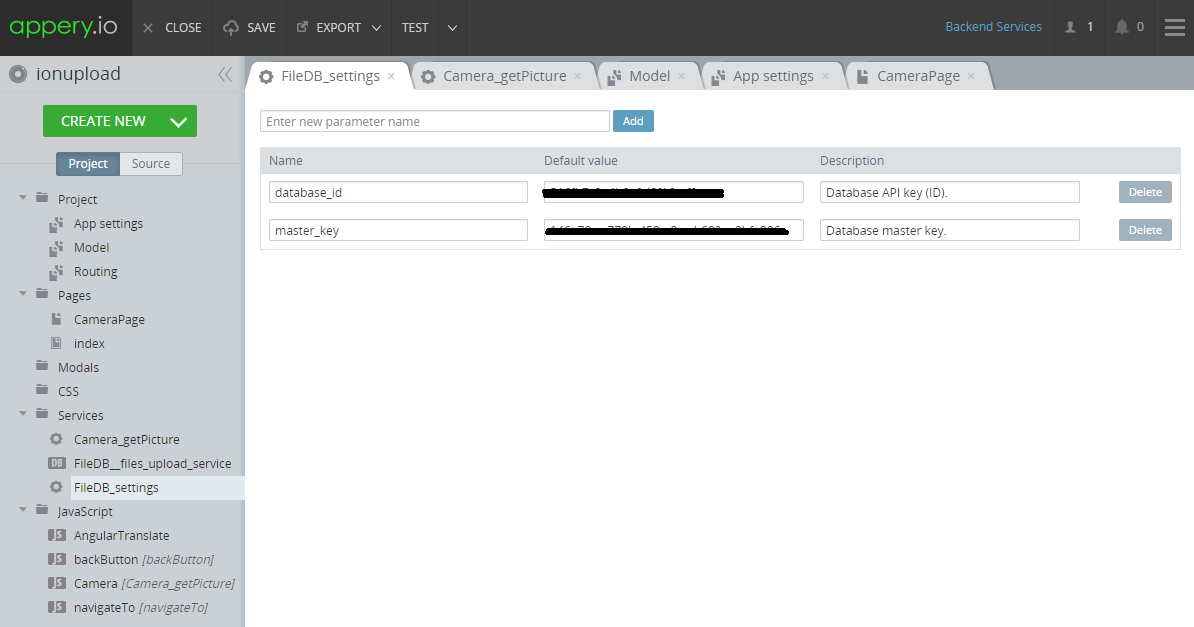
function dataURLtoFile(dataurl, filename) { var arr = dataurl.split(','), mime = arr[0].match(/:(.*?);/)[1], bstr = atob(arr[1]), n = bstr.length, u8arr = new Uint8Array(n); while(n--){ u8arr[n] = bstr.charCodeAt(n); } return new File([u8arr], filename, {type:mime}); } var filepointer = dataURLtoFile($scope.im.image, 'test.png'); $scope.files.push({filename:"test.png", filepointer: filepointer}); if ($scope.files.length === 0) { alert('No file for upload'); return; } var requestData = Apperyio.EntityAPI('FileDB__files_upload_service.request'); var user_scope = $scope.user; var files_scope = $scope.files; var formData = new FormData(); requestData.data = _.pluck($scope.files, 'filepointer'); Apperyio.get("FileDB__files_upload_service")(requestData).then( function(success){ alert('All files has been successfully uploaded.'); }, function(error){ }, function(notify){ }); - Finally, enter tour database_id and master_key in FileDB_settings:
And, that’s it! (Please remember that this app should be tested on a real device.)