Some Useful Tips When Working With PWA
Basic Thesis
PWA works only in SSL secured mode. Therefore you need to use URL to your App only with HTTPS protocol.
All resources in your application should be also set as HTTPS.
In case of using at least one HTTP resource, your app will not be considered as a PWA.
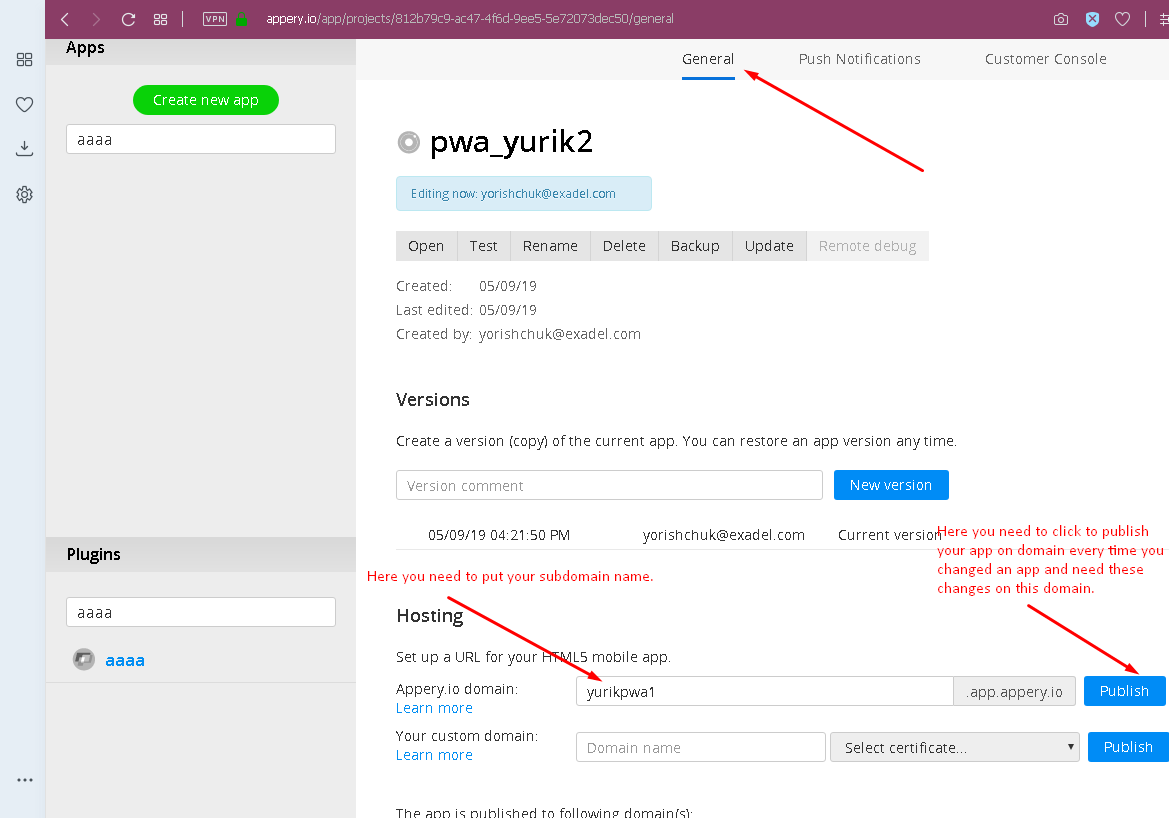
Your app should be published on a custom domain. For this, you need to open your app on the “General” tab and scroll down to “Hosting” options. There you can set your own domain or a subdomain of “.app.appery.io” to host your app.
Note: every time you have made changes in your App you need to click “Publish” button to make it available on the published domain.
PWA Activation
Open Project -> App settings -> PWA.
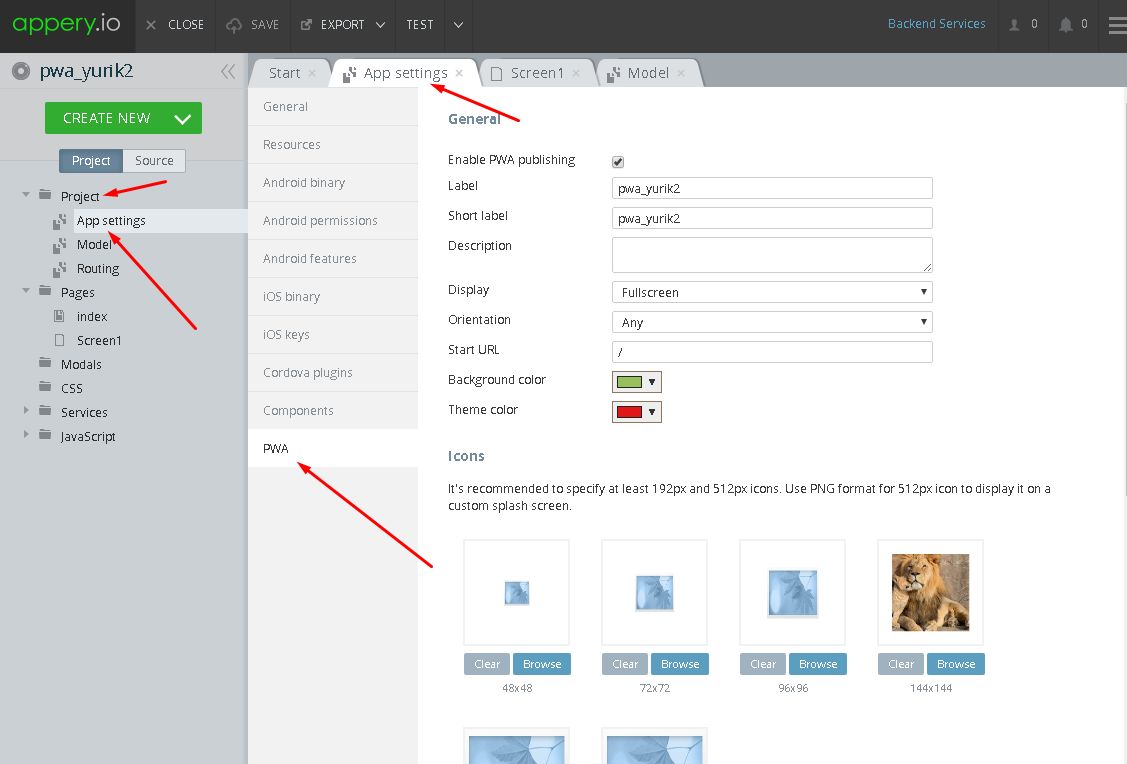
Click on the checkbox “Enable PWA publishing” to enable PWA in your Appery.io app.
Set “Label”, “Short label” and “Description” for your PWA application.
Set at least one type of icon for your PWA app. Please note that only appropriate size .png files are accepted as icons in this interface.
Route handlers (rare case)
This part of PWA options is used to control custom resources loading. There are two ways to load resources. By network and by the cache. There is also a combination of these ways.
You can not control Appery.io builtin resources, you can only control custom resources. Let’s try how it works:
- Add an image component to your application.
- Use custom URL (not from media manager) for this image. Note, it should be HTTPS, as well as all other resources in your app.
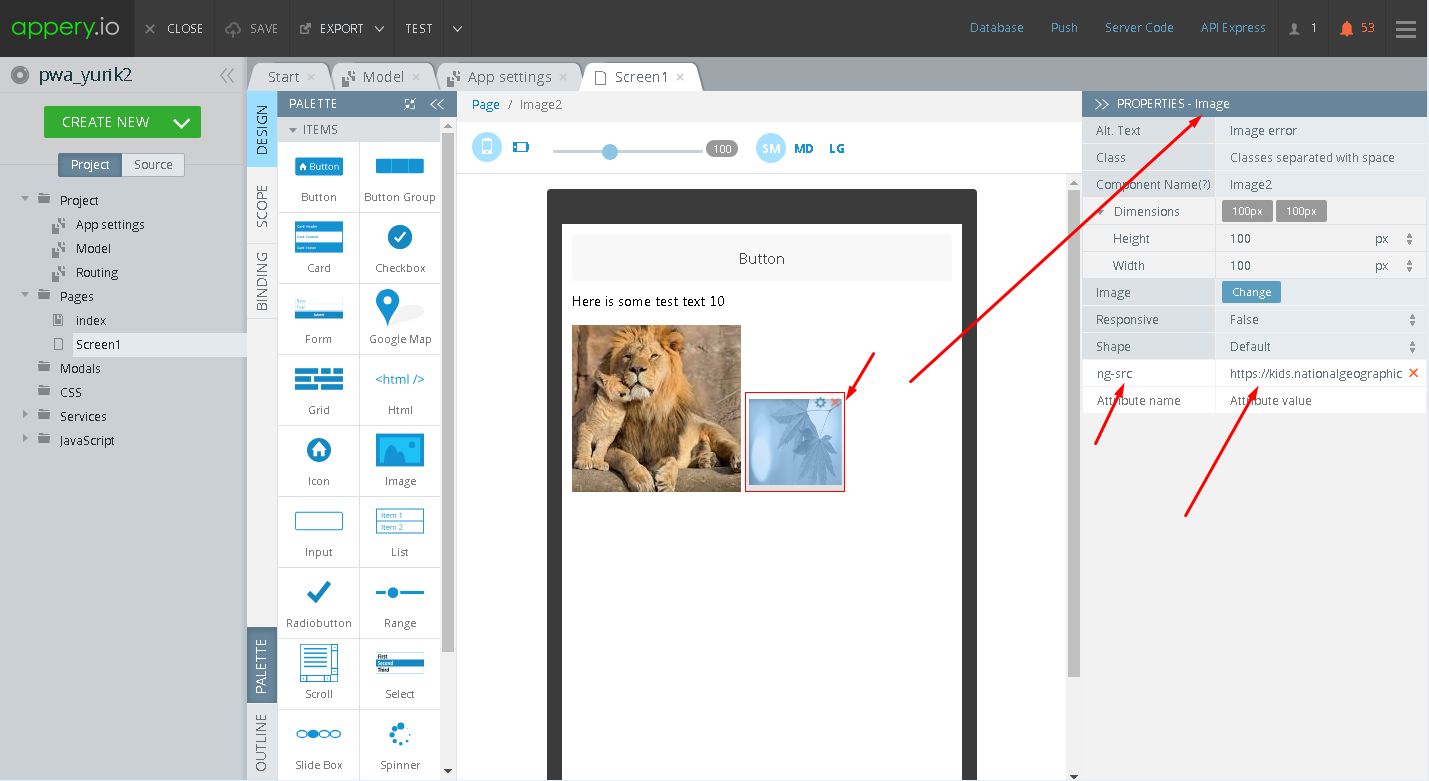
- Open PWA settings and set appropriate resource URL and needed network strategy.

How to test PWA:
First, run your App:
- Open your browser and load your App by using your custom domain URL.
- Open browser debugger (usually, by clicking F12 button).
- Navigate to debugger “Application” tab.
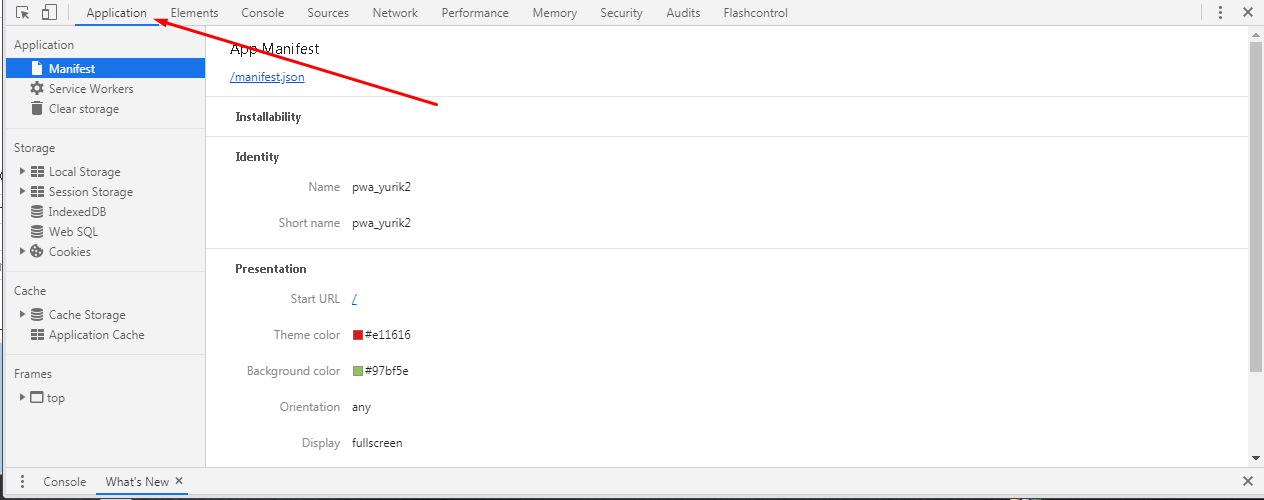
- Click on “/manifest.json” to check your App current manifest JSON file.
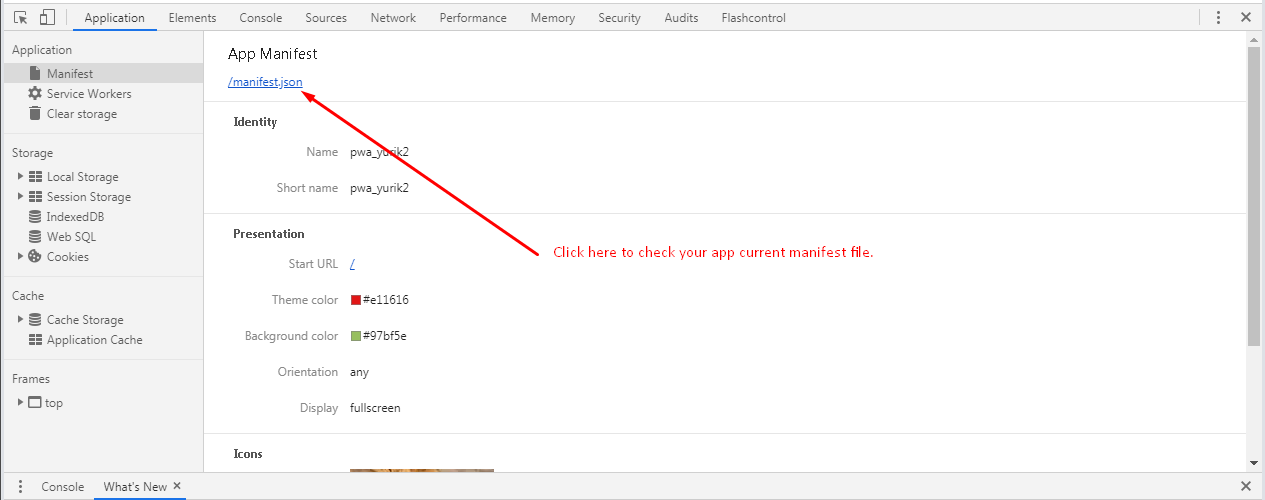
- Set other parameters on “Manifest” tab. There should be no any errors and warning.
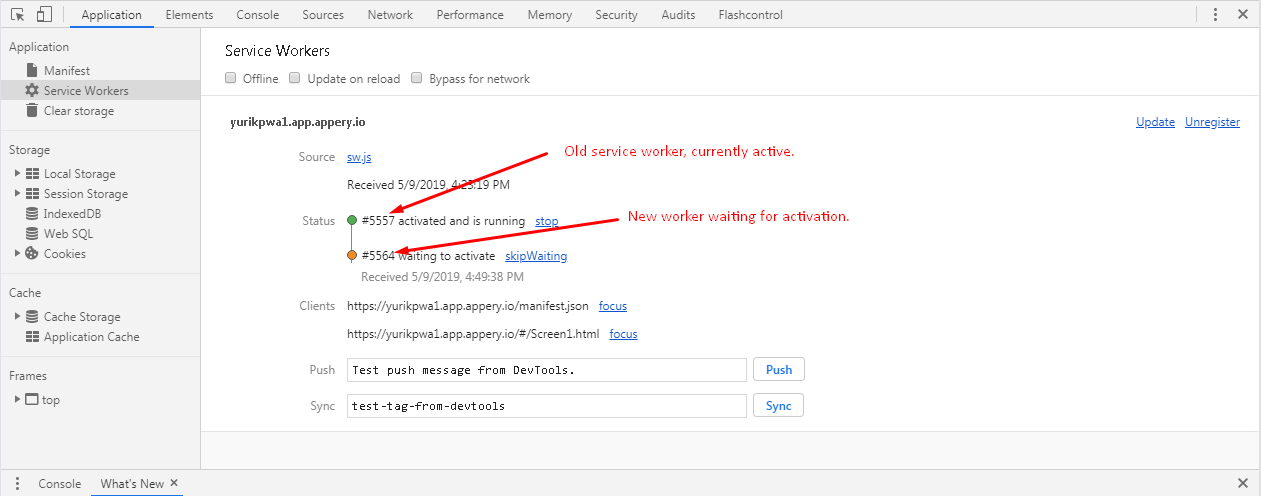
- Navigate to “Service workers” tab.
- There should be information about current service worker and its’ state. Like “#5557 activated and is running”. It does mean “Service worker with identifier 5557 installed and currently activated”.

If you need to make changes in your App (change label, add button etc.) you should save changes first.
Then click “Publish” App to publish a new version on the current custom domain. Wait until publishing process will succeed.
Update your App in a previously opened window.
In “debugger->Application->Service workers” you will see the current worker is set an old one. And the new worker is installed but is waiting for something. You will notice there are no changes on the page you have made previously.
To activate new service worker you need to click on “Skip waiting” in the debugger.
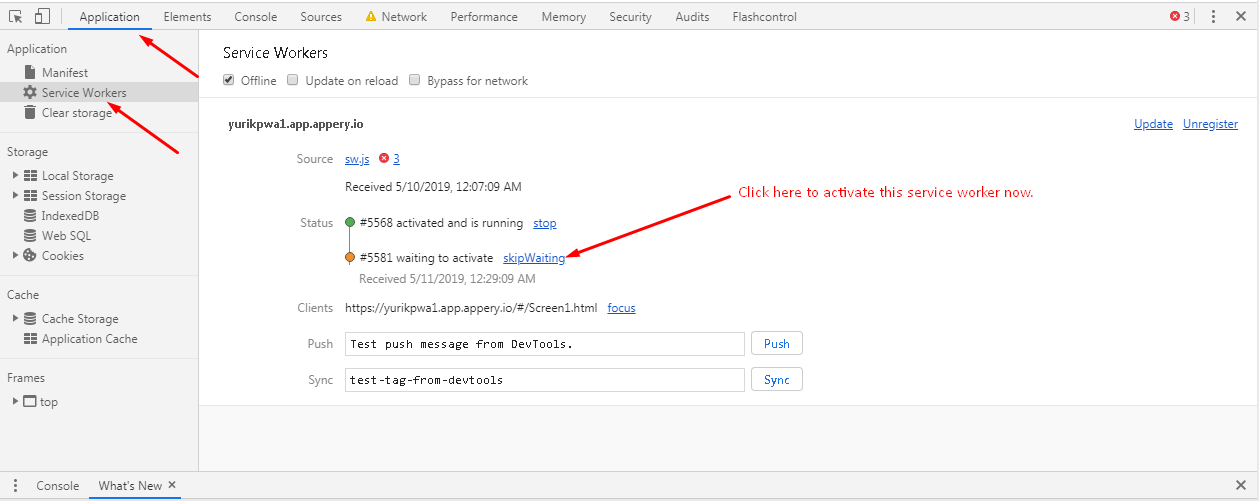
Close all tabs which are using this service worker in the browser (usually, all tabs with this URL should be closed).
After this, you need to open a new tab and load application URL here again. Then open debugger on “Application” tab and you will see the new service worker active.