How to Spice Up Your Appery.io Starter App with a Custom Database Collection – Easy Peasy!

Hey there, friends!

🌟 We are back again with yet another fun and informative dive into the world of Appery.io. If you’ve been hanging out with us for a while, you know we’ve already covered some pretty cool features, like user registration via SMS and beefing up security with two-factor authentication. What’s on the agenda today, you ask? We’re going to get our hands dirty by adding a custom database collection to our Appery.io App Starter project. It’s going to be epic, trust me! So buckle up, and let’s roll.

Kickstarting Your Database Collection

First off, we need a sweet spot to keep all our app data cozy and organized. Here’s the lowdown on setting up your very own database collection:

  • Jump into your Appery.io account and open your project.
  • Click your way to the database tab and say hi to your Starter_DB.
  • Feeling adventurous? Let’s create a new collection by hitting “Create new collection” and teasing it with a catchy name (like “Tasks”).
  • Don’t forget to tick the “Secure collection” box under “Security and Permissions” for that extra layer of protection. Because, of privacy, right?
  • Save those settings, then shake things up a bit by adding some columns: namedatepriority, and userId.

Tweaking the App to Perfection

With our database set up, let’s give our app some flair:

  1. Page Creation Fun – Need more pages? Easy! Duplicate an existing one and dub it “Tasks”. It’s like magic, but you’re the wizard.
  2. Jazzing Up the Tasks Page – Time to get creative. Tweak your page to reflect your shiny new database. Think of it as giving your app a mini-makeover.
  3. Design Time – Head over to the DESIGN tab and let your inner artist loose. Rename stuff, add cool Text components for dates and priorities, and have a blast while you’re at it.

Making Tasks a Breeze

Let’s ensure adding or tweaking tasks is smooth as butter:

  • Clone a page for task management, and simply call it “Task.” Slick, huh?
  • Update labels and fields to make sure they’re talking about the right stuff—dates, priorities, you name it.

The Grand Finale: Testing and Tweaking

All set? Let’s hit that TEST button and take your masterpiece for a spin. Register or log in (if you haven’t already) and try adding some tasks. Edit them, delete them, dance with them – it’s your party!

After your testing fiesta, don’t forget to check your database to see your beautiful tasks resting there. It’s like sending your kids off to college – so proud, yet so emotional.

And That’s a Wrap

Look at you, rocking the Appery.io scene with your custom database collection! Keep playing with it, mix things up, and find what makes your app heart sing.

I hope you had as much fun reading this as I had writing it. If you dig what we’re doing, smash that subscribe button and hang with us for more app-building adventures. Catch you on the flip side, and thanks a gazillion for watching! 🚀✨


How to Create Your Own ChatGPT App from Template

ChatGP technology is on everyone’s lips nowadays and we are happy to let you know that Appery.io is the first no-code mobile app maker platform introducing the ready-to-use and easily customizable template for creating a ChatGPT-based app. Using the template is extremely simple and just in several minutes, you will be able to test your own ChatGPT application without having to write a single line of code. Isn’t that a wonder?

Note, that you can try using the platform for no charge, and if you are new to Appery.io and interested, click here to subscribe for our 2-week Free trial.

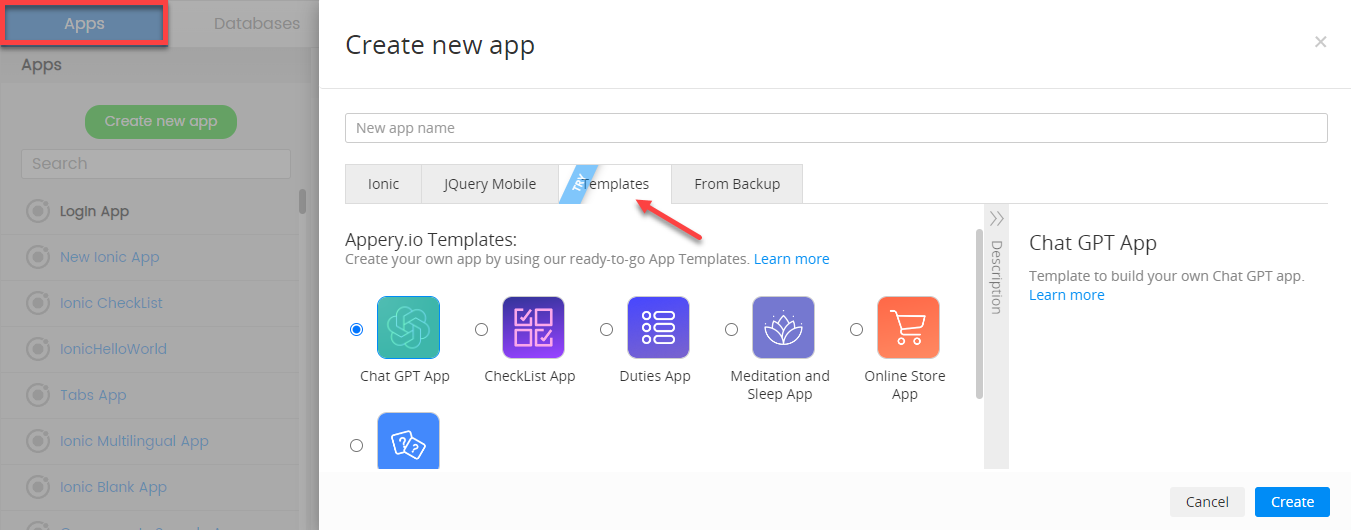
When in the platform, go to the Apps tab, select the predefined ChatGPT App template, and confirm:


In a moment, the app will be created with the autogenerated name. If you like, you can rename your project later under its General tab or do it now.

Well … it’s all set and you can proceed with testing your app.

Testing ChatGPT Template from Appery.io

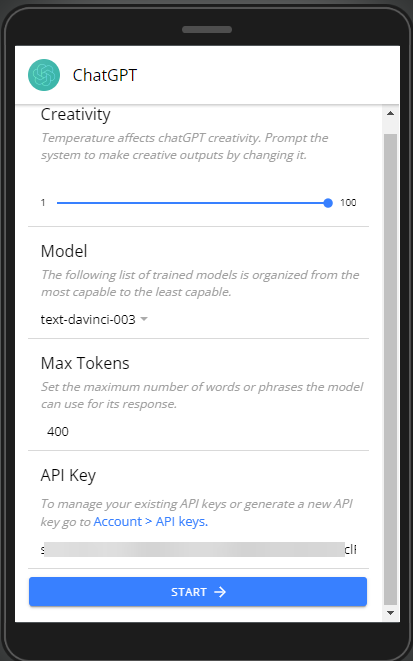
Click the TEST button to open the app preview in the browser and play around with its different options. There are three of them that are available for adjusting: ModelCreativity, and Max Tokens.

In short: the quality of chatbot responses will vary depending on the options settings. But if you need more details, please refer to the OpenAI official documentation site.

Important!

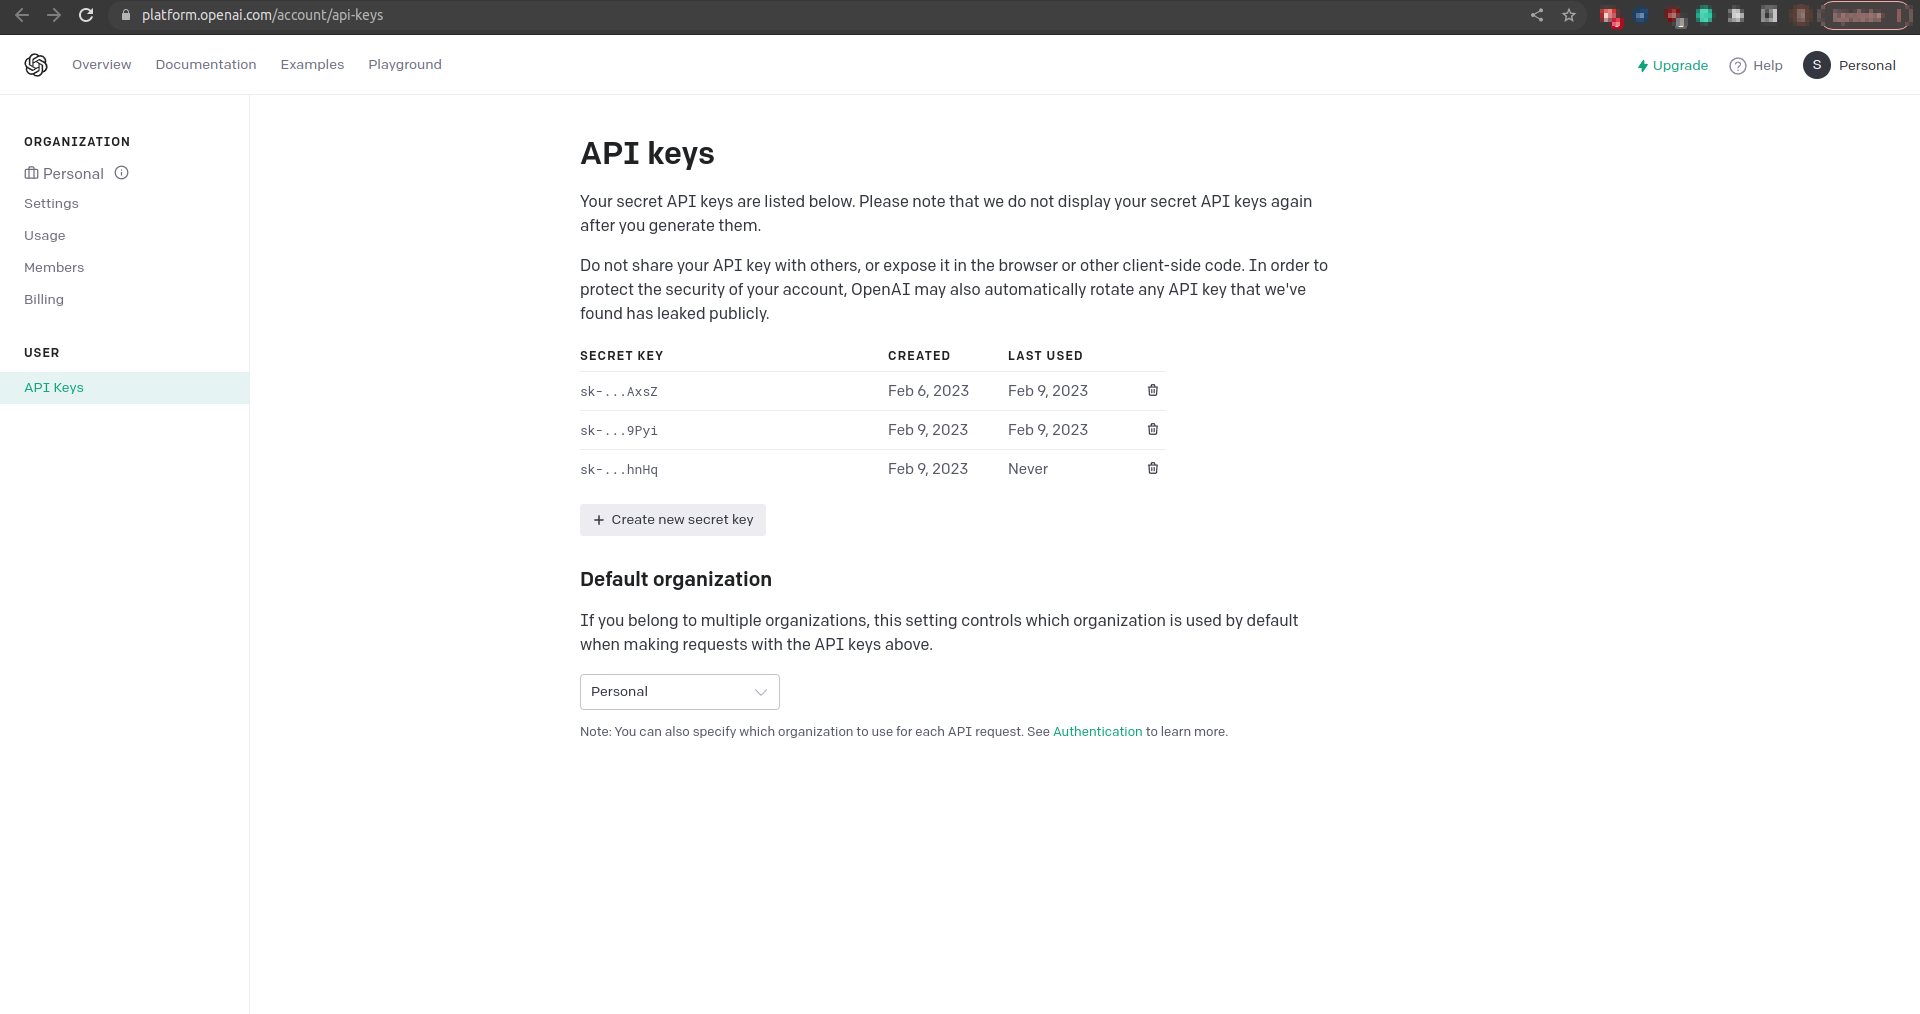
To test this AI technology, obtaining an API key from the OpenAI portal is required. So, open this link (or go to the API Access section of your OpenAI account dashboard) and either generate a new API key or manage your existing API keys.

When done, copy and paste it into the API Key field and you are ready to test the template. Click the START button to begin. Note, that the template also has integrated text-to-speech and speech-to-text capabilities, so you are free to experiment with both entering text and dictating it:

While testing different options, note how the quality of responses is impacted by setting different values for ModelCreativity, and Max Tokens.

Modifying Template

To modify the template to create your own ChatGPT-like app, follow several simple steps below:

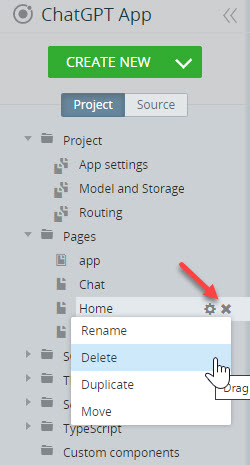
  1. Delete the Home page. After you have defined what values of ModelCreativity and Max Tokens settings work for you best, loading all the parameters’ selections page becomes redundant. So, go to the App Builder Project view on the left, left-click to open the Home page menu, and delete it:

2. Modify the parameters’ default values. Open the Model and Storage > Storage tab and replace the default values with the ones that best work for you.

3. Save the app by clicking the SAVE button in the Toolbar.

Ready! Now, your app has been customized and you can install it on a device.

Installing your own GPT-based App

There are several options you can select from to review your own ChatGPT app on the device and below, you will find the most popular:

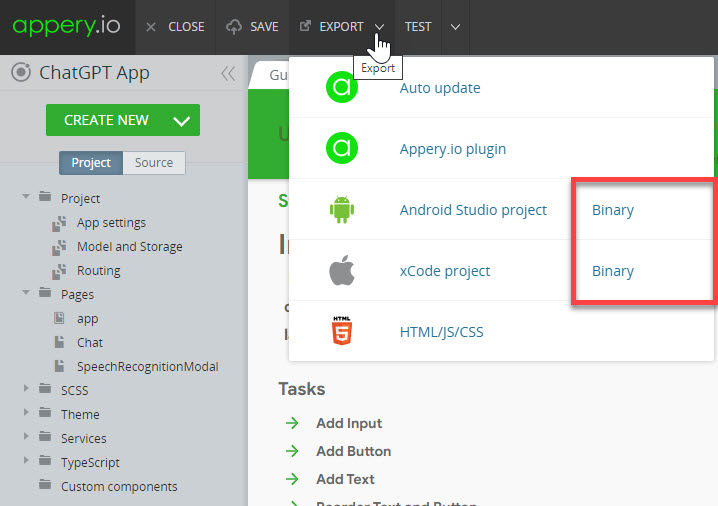
  1. Export the app binary. To do it, click the EXPORT button in the Toolbar and select the type you prefer: Android or iOS:

Note that installing on iOS requires that you have an Apple developer account.

However, if you simply want to test how your app behaves on a device, be it an iPhone or an Android device, use our Appery.io Tester – it’s free and simple.

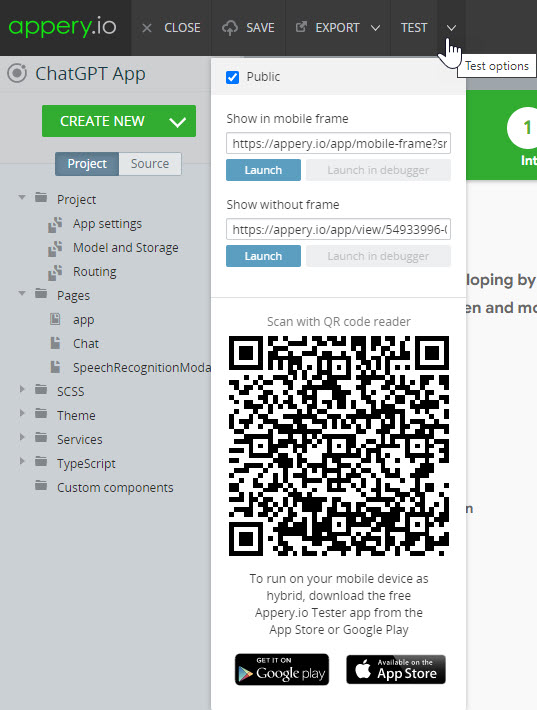
2. Test with the Appery.io Tester – the best option for quick testing your apps without needing to register your Apple or Android developer accounts. The app is free and can be installed on any device in a matter of several clicks. The links and instructions can be found on the preview page, you just have to click TEST again:

Select the needed option in the drop-down to download and install the testing app on your device. This should take less than a minute of your time.

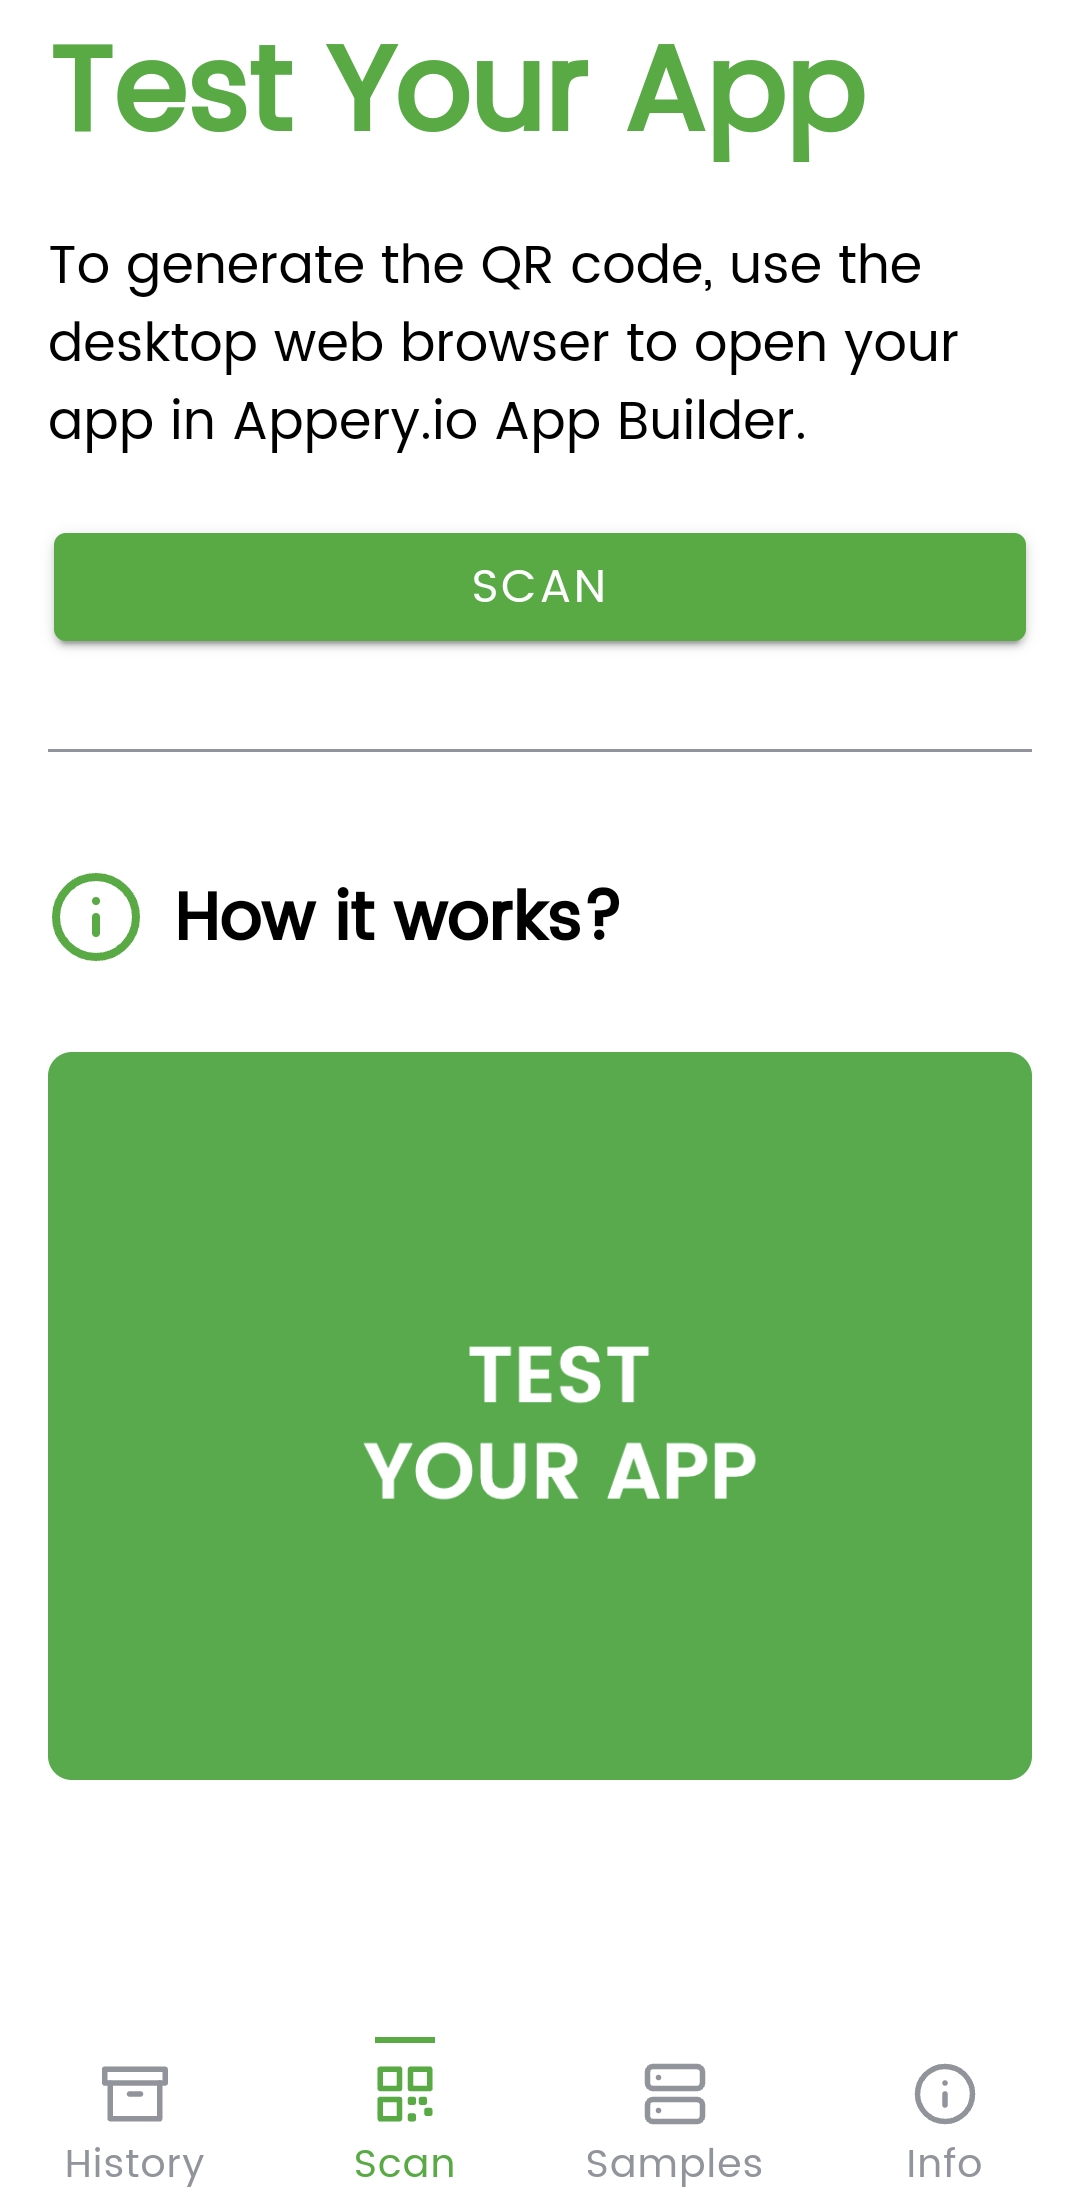
When the app is installed, click the SCAN button and scan the QR code that was automatically generated for your app:

Here is what the app chatting looks like on a device when installed:

 Publishing as a web page widget

You might already know that any app that you build in Appery.io can be published as a mobile web app. This means the app will be hosted on a server and can be accessed from any browser on a mobile device.

But have you already tried adding the published app to any site of your choice as a widget? This is not difficult to do and can be very useful for your personal or business and look perfect. Please check this link to review what it can look like.

Please, visit this page for more details on modifying and customizing your ChatGPT-template.

Conclusion

If you’re looking to create a professionally-looking application that integrates with a 3rd party API, using no-code platforms like Appery.io can be a perfect choice.

With Appery.io, you can simplify the development routine even further by adding ready-to-go templates and predefined plug-ins! And our new-code ChatGPT template is another example of how building apps can be enjoyable and stress-free.