Display Images from a Cloud Database Using Generated REST APIs
 In this post you are going to learn how to access images uploaded to a cloud database via REST APIs and display the images in the app. This is the second post about working with images. You can read the first post here:
Quickly Upload, Display, and Customize Images from the Database with the Built-in Files Collection.
Let’s say you have a list of images, icons, or avatars that you have uploaded to a database. Maybe you are building a contacts app and would like to display employee head shot or just a list of products. Now you would like to display them in your app. In this tutorial we are going to show you how to do that — it’s fast and simple.
Uploading to the Files Collection
To start, upload any images you want to the Appery.io cloud database. You can create a new database or use an existing one. The name of the database we are using in this example is FilesCollection. The images will go into the Files collection. The Files collection is for uploading binary data. The images were uploaded from the console, by clicking the Upload button.
Here is an example of four images uploaded to the database:
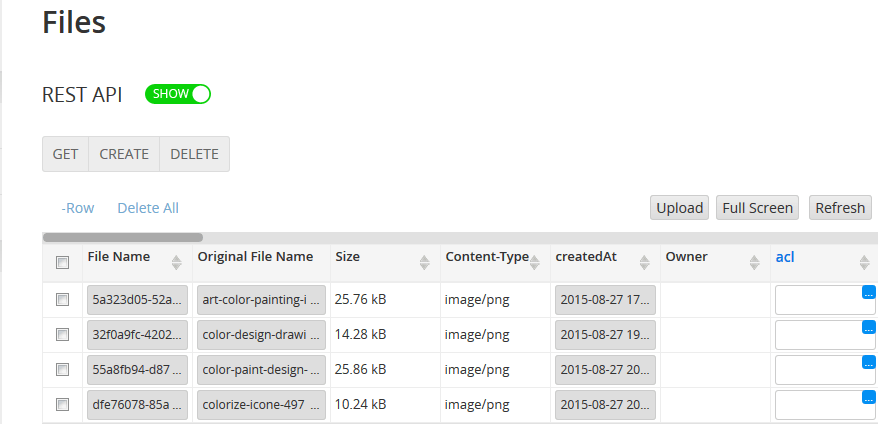
Files Collection
Drop the Image Component in the UI
Next you are going to build a simple app UI to display the images in the app. You are going to use the List component. The UI should have the following layout:
- Add a
Buttoncomponent to the header, setPositiontonotext, and choose the appropriate icon. - Drag and drop the
Listcomponent, changeItemsto1and apply changes. - In the
Listcomponent, insert anImageandLabelcomponent.

Designing App UI
Create a Data Collection
The Files collection holds the binary data, but it doesn’t hold any additional image information that we might need, such as image description or location taken. It’s very simple to add this information by creating a new custom collection to hold any image-related information.
Create a new collection and name it Data with two columns: Description (string type) and Image (file type, we use it to link with our uploaded files). The collection will look like this:

Custom Database Collection to Hold Image Information
Note Image column is of File type. When you click the column to enter information, the system will prompt you to select an image. This is how you will create a reference between this collection and the Files collection.
Generate the List Service
Now that you are done setting up the database, next you are going to generate API services to connect to the database.
Select Create new > Database Services > FilesCollection.
For the Data collection, select to generate the List service.
Once created, add this service to the page: Data tab -> Add datasource-> Select FileCollection_list_service and click Add. Rename it to ListCollectionService. Check the screen shot below, you should have the same configuration:

Adding a REST API to a Page
Add the Mapping
The next step is to add Success mapping (output). Create the following mappings:
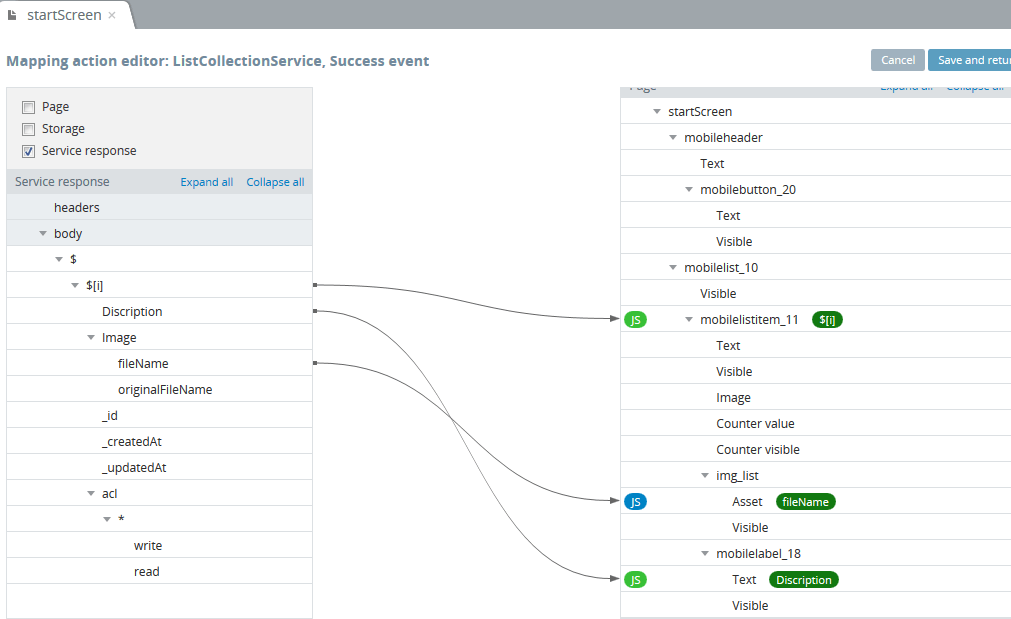
Mapping Service to the Page
Click JS in front of the Asset of Image component and write the following code:
return "https://api.appery.io/rest/1/db/files/xxddxxa0xxb0xx65xx00xxdc/" + value;
The section xxddxxa0xxb0xx65xx00xxdc is the X-Appery-Database-Id. You can find it in Database Settings.
Go back to the Design tab and activate the Button in the header: on the Button click event, add the Invoke Service action:
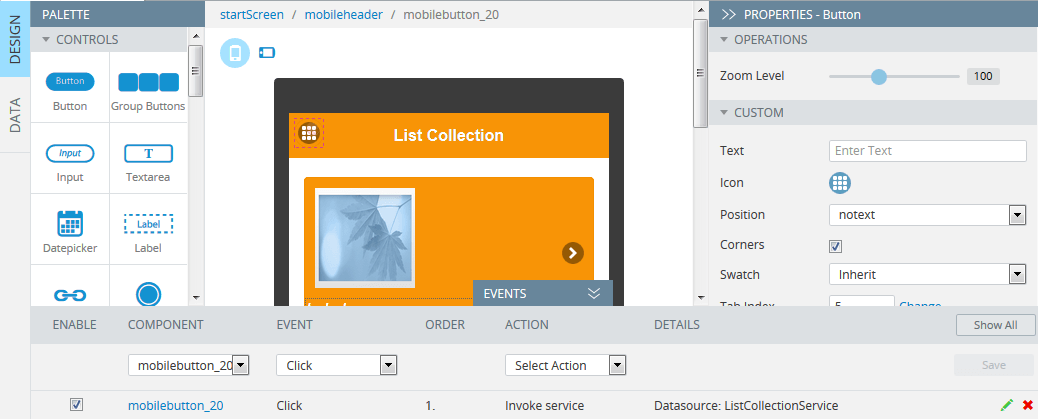
Invoking Service on Button Click
Testing and Result
Now you are ready to test the app. Click the Test button to launch the app in the browser. You should see your images in the list.
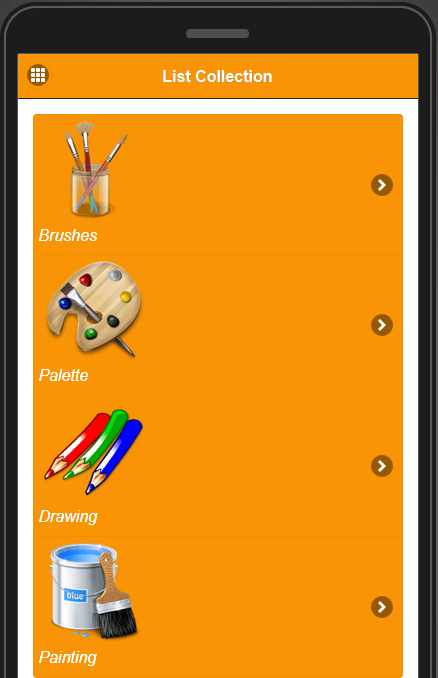
Testing the App in the Browser
As a result, we get a list of images stored in the Files collection accompanied with the description from the other collection.
As you can see, uploading images to a cloud database with additional image information, generating REST APIs and displaying the information in a mobile app is simple and quick with the Appery.io platform.