Extending the Google Map Component with Custom JavaScript
You can extend the functionality of any Appery.io component by adding custom JavaScript. Today, we’ll see how the Google Map component in Appery.io can be used to display driving directions both visually and as text.
With the help of the Google Directions service, we’ll create a mobile page similar to the directions example listed on the examples page for the Google Maps API.
Setting Up the UI
Open a new project in Appery.io. In the visual editor, change the screen size to 960 x 640 and drag a Google Map component from the Mobile palette. Change its name to directionsMap. (You could go with the initially generated name, googlemap1, but a more descriptive name for the component makes it easier to reference later.)
Clear the Address value and set the zoom to 2 to make the map show the entire world. Then, select a marker on the map and deselect Visible attribute. (We don’t need to show it.)
Then add more components: two input components for source and destination and a button component to display directions on being clicked.
Change the names of the inputs to inputSource and inputDestination.
Select the button, go to the Events tab in the right sidebar panel, add a Click event, and then add a Run Custom Javascript action to the event. Click OK in the editing window to leave the coding blank for now. We’ll add it later.
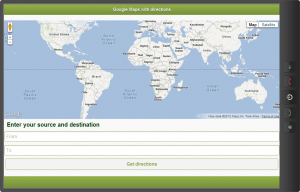
At this point, I recommend testing the app in a browser. Although it doesn’t do anything yet, we want to see how it looks. So, click the big Test button in the upper-right of the Appery.io screen.
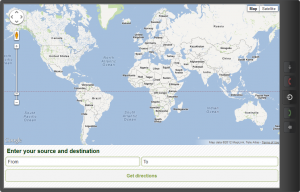
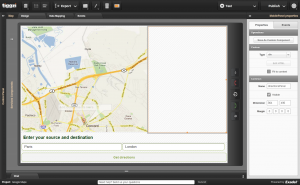
Our main component takes just the half of the screen, so we need to give it more space. I would set the screen’s top and bottom padding and map’s vertical margins to 0, remove the header and footer, and place the inputs and button together into a grid. I would also set the map’s initial Latitude and Longitude to 0 and 20 respectively to make the initial view look better (at least to me).
After testing again, it would look more like this.
Adding the Custom JavaScript
Once we’ve sorted out the view, let’s set up our JavaScript.
Creating the JavaScript Resource
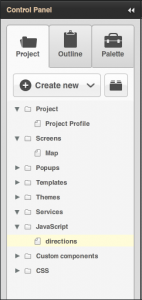
We’ll create a new JavaScript resource for the project by using the Control Panel on the left.
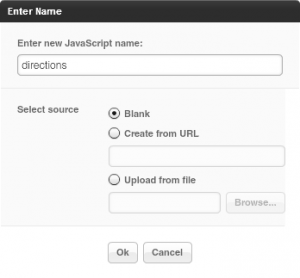
We’ll call it directions.
This will put you in an editor to create a custom JavaScript resource within the project. Paste in these lines:
var directionDisplay;
var directionsService = new google.maps.DirectionsService();

function initialize() {
	directionsDisplay = new google.maps.DirectionsRenderer();
}

function displayDirections(sourceAddress, destinationAddress, map) {
	var request = {
        origin: sourceAddress,
        destination: destinationAddress,
        travelMode: google.maps.DirectionsTravelMode.DRIVING
    };
    directionsService.route(request, function(response, status) {
	directionsDisplay.setMap(map);
      if (status == google.maps.DirectionsStatus.OK) {
        directionsDisplay.setDirections(response);
      } else {
		alert("Directions query unsuccessful. Response status: " + status);
	  }
    });
}
This is slightly modified code from the directions example mentioned above. If you are not familiar with the Google Maps API you might want to check out their JavaScript API documentation to get a better grasp of what’s going on in this code.
We’ll call the initialize method once the page is loaded and the displayDirections method on button click. Let’s add the required events and actions.
Adding a Load Event to the Screen
After closing the JavaScript editor window, select mobilescreen1 under Screens in the Project tab. In the right sidebar panel under the Events tab, add a Load event, and assign a Run Custom Javascript action to the event.
We need to add only one line of code:
initialize();
Defining the JavaScript for the Button
Next, select the button, and double-click on the Run Custom Javascript action under Events. (Remember, we left the coding blank for this when we created it.) Now, it’s time to insert these lines in it:
var sourceAddress = Appery("inputSource").val();
var destinationAddress = Appery("inputDestination").val();
var map = Appery("directionsMap").gmap;
displayDirections(sourceAddress, destinationAddress, map);
In the first two lines, we get the values from the inputs into variables (as explained in more detail in this article). Then, we get the Google map reference by accessing the gmap property of the map component and feed all this to displayDirections method that we’ve defined earlier.
Testing
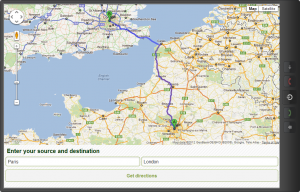
Now we are ready to go. Let’s test the app in browser. We’ll get prepared for the Olympics and see the route to London from…let it be Paris.
It works. The picture looks good, but how much time should I estimate for this journey? And, most of all, I’d like to know how I cross the Channel. I don’t feel like watching the Games if I have to swim to get there.
Adding a Text Directions Panel
Fortunately, the Google Maps API provides the capability to show text information about directions in a separate panel, just like in the Google Maps web interface.
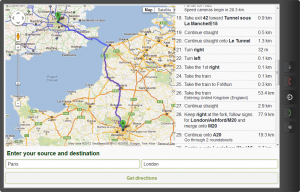
In the screen design, let’s add a panel to display textual directions information. Drag and drop a 2-column grid component onto the screen at the top, drag the map into the left column, resize it, and then drag and drop a panel component into the right column. Set the panel’s name to directionsPanel.
Updating the directions JavaScript Resource
Now we just need to make some changes to the JavaScript. Open the directions script from the Control Panel on the left under Project.
We’ll make two changes. First, we’ll add panel as another parameter for the displayDirections method. Then, we’ll add the following lines:
if (panel != null) {
	directionsDisplay.setPanel(panel);
}
after this existing line:
directionsService.route(request, function(response, status) {
The entire code will be this:
var directionDisplay;
var directionsService = new google.maps.DirectionsService();

function initialize() {
	directionsDisplay = new google.maps.DirectionsRenderer();
}

function displayDirections(sourceAddress, destinationAddress, map, panel) {
	var request = {
        origin: sourceAddress,
        destination: destinationAddress,
        travelMode: google.maps.DirectionsTravelMode.DRIVING
    };
    directionsService.route(request, function(response, status) {
	if (panel != null) {
		directionsDisplay.setPanel(panel);
	}
	directionsDisplay.setMap(map);

      if (status == google.maps.DirectionsStatus.OK) {
	    directionsDisplay.setDirections(response);
      } else {
		alert("Directions query unsuccessful. Response status: " + status);
	  }
    });
}
Updating the Button’s Click Handler
We’ll also need to make two changes to the button’s click handler. First, we’ll need to add this line before the displayDirections method call:
var panel = Appery("directionsPanel")[0];
Then, we’ll need to add panel as a parameter to displayDirections, so that in the end the handler will look like this:
var sourceAddress = Appery("inputSource").val();
var destinationAddress = Appery("inputDestination").val();
var map = Appery("directionsMap").gmap;
var panel = Appery("directionsPanel")[0];

displayDirections(sourceAddress, destinationAddress, map, panel);
Final Result
When I test the app again I can to see the panel with text directions and know that I need to take the train to go through the Channel. That definitely sounds better than swimming!

