How to Never Miss Important Messages in Push Chats
In this post, we will guide you on how to create a Push Notification sounds mobile app where no messages will be missed.
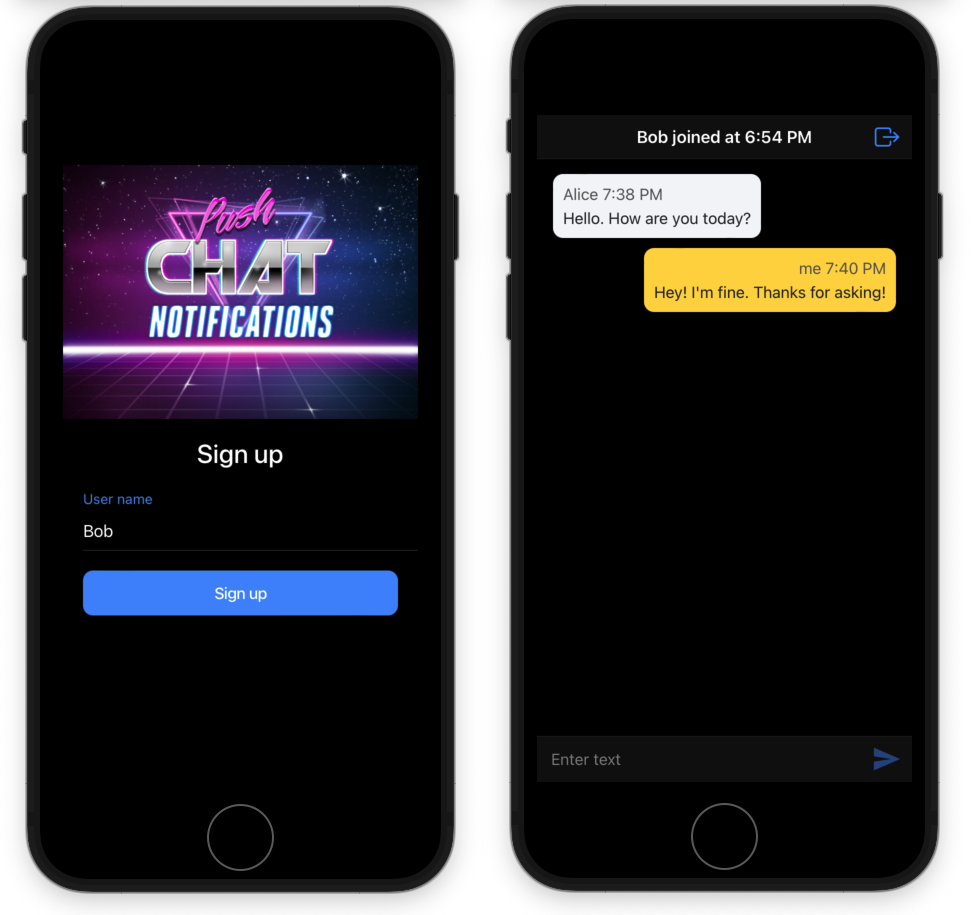
Actually, we will create a chat app that will receive messages from push notifications. No one should miss our messages, so we’ll make them loud enough with special sounds!
Let’s do it using Appery.io so it doesn’t matter if your friend uses iPhone or Android, they can use your app anyway!
Creating push project from backup and customizing it
You know what? We have already prepared this project for you, so you can grab .zip file from here and open it in Appery.io and we will walk through you this project to explain how to customize it and how it works from the inside.
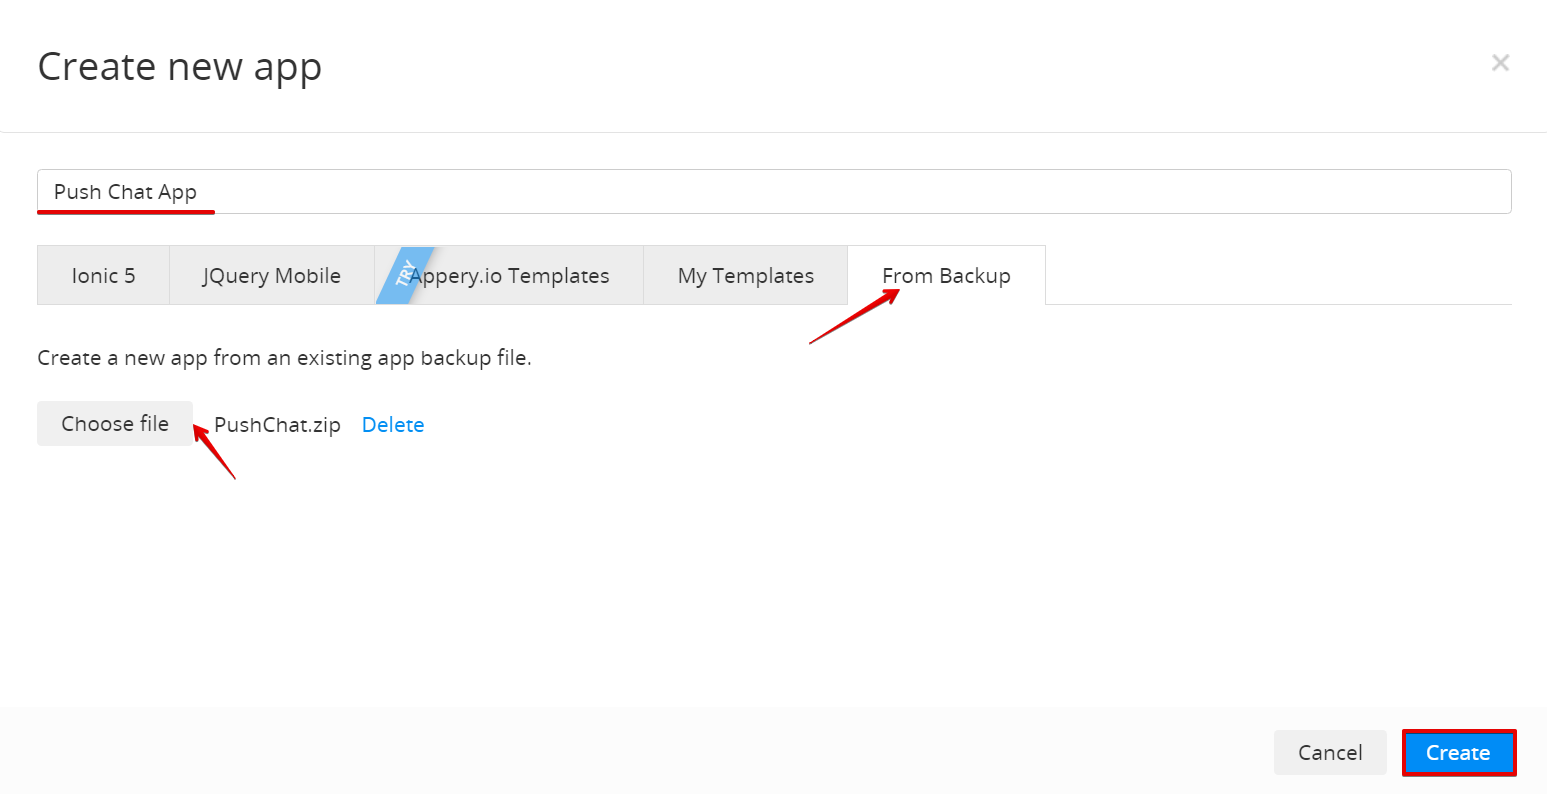
1. To do this, choose Create new app > From Backup, then select the downloaded .zip file, click Create, and wait a bit while Appery.io creates the project for you.
If you have any questions, you can learn everything you need and more about restoring Appery.io projects from the documentation.
OK, great! Now you have a shiny new project in your Appery.io workspace! And it’s time to make it entirely yours.
2. First, click the Push button on the toolbar to be redirected to the Push Notifications > Settings page: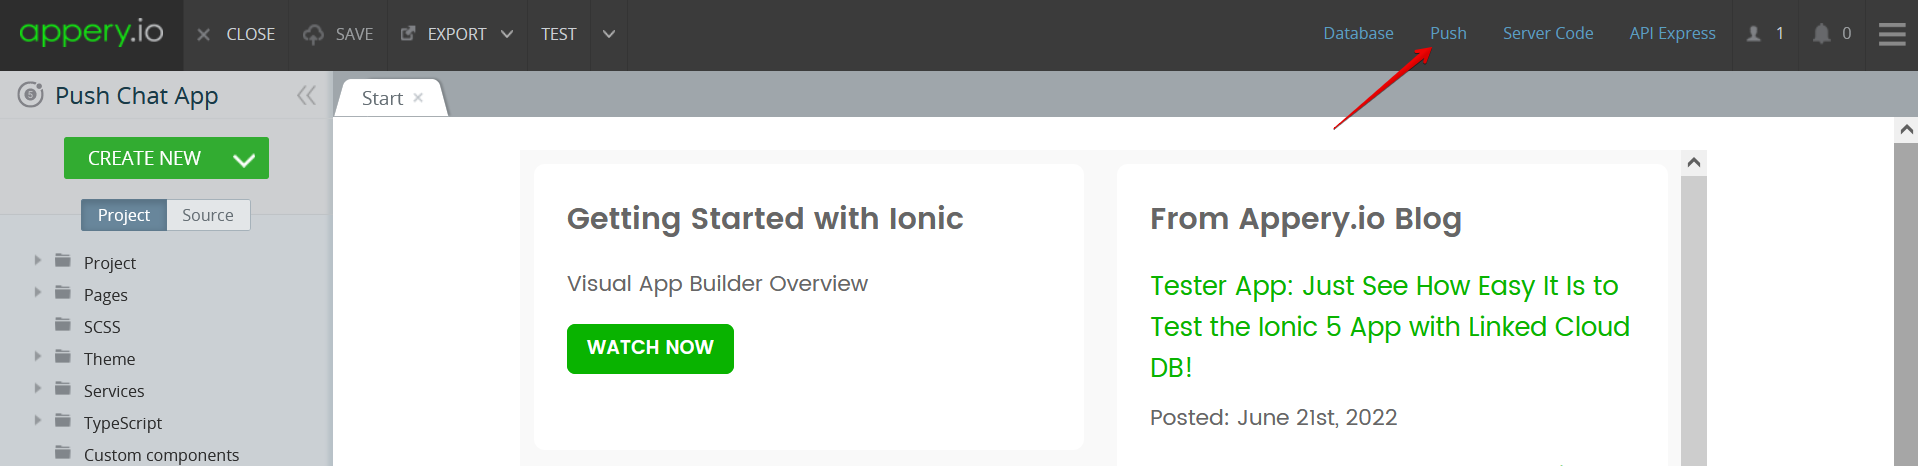
This awesome page already has the Enable Push Notifications checkbox checked, but you also need to select the database where the chatting devices will be registered. 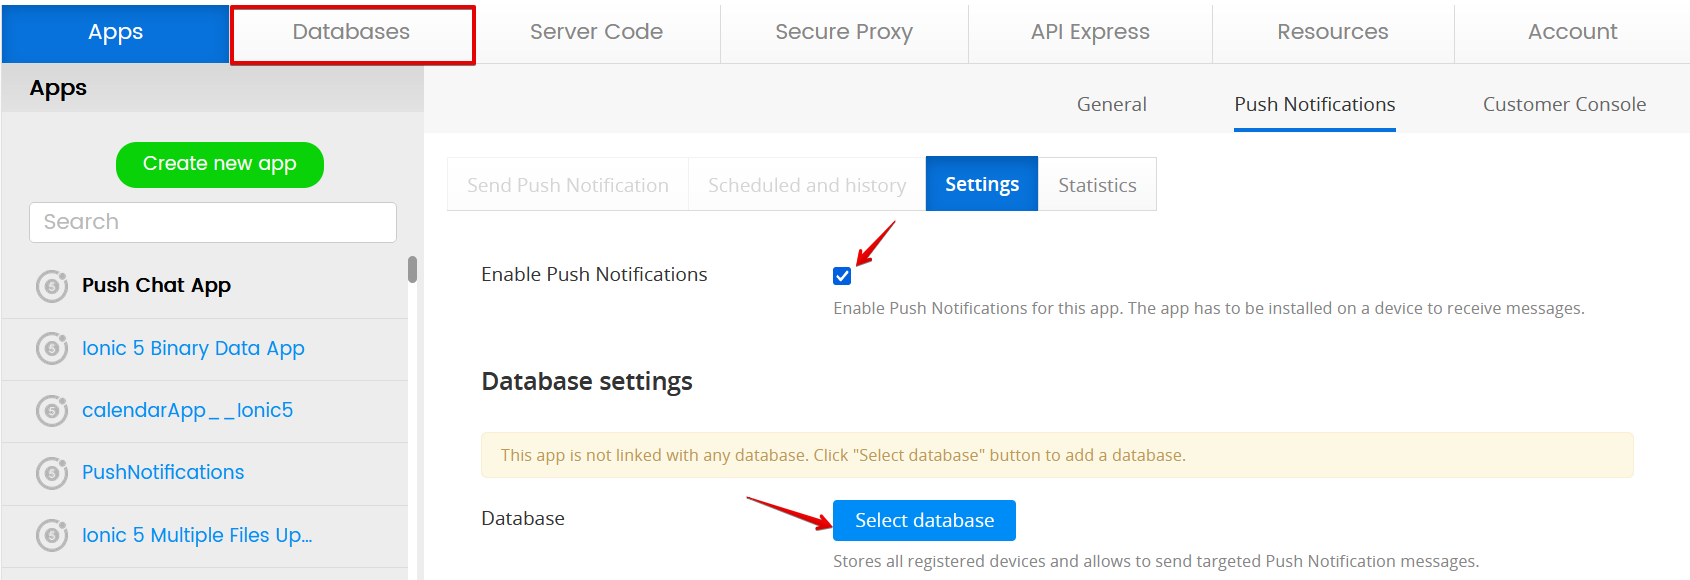
Creating and linking database
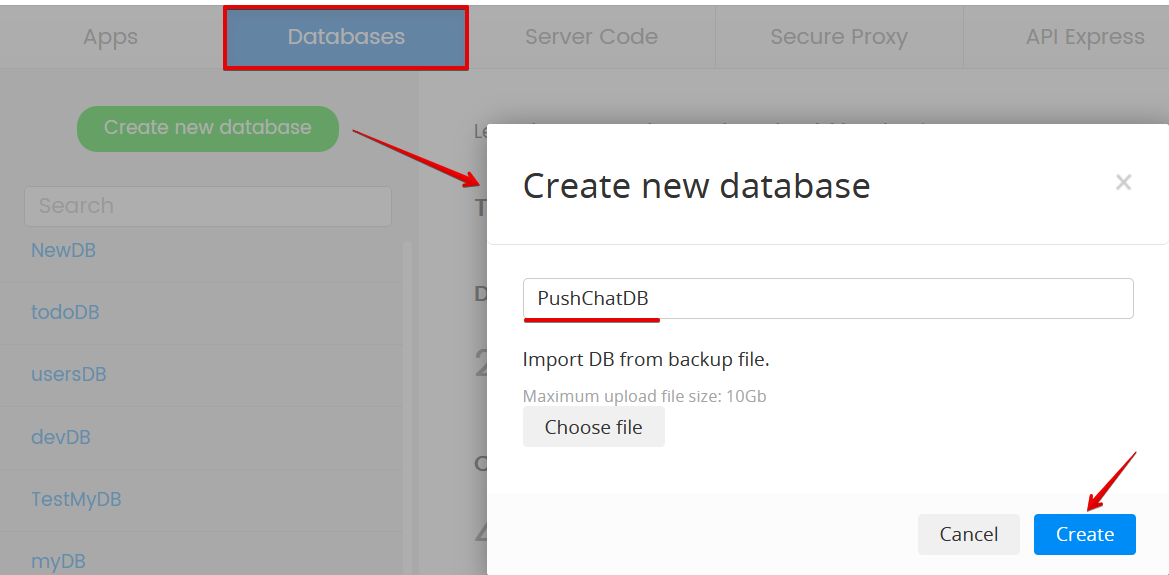
3. If you have no database that will do, you will first need to create one that will be linked to our app: go to the Databases tab in the header and create a new database, for example PushChatDB:
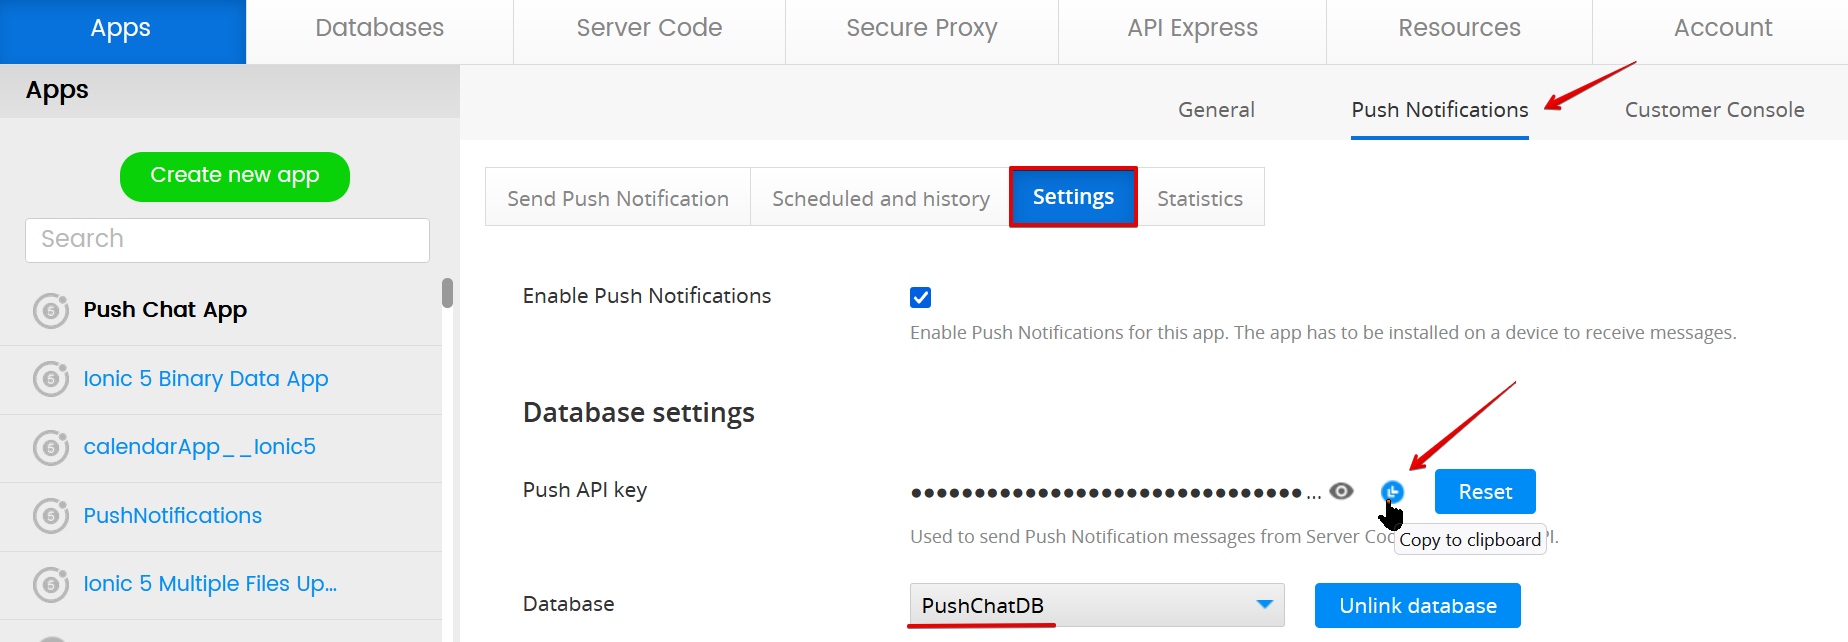
4. Now, you can link it to our app on the Push Notifications > Settings page: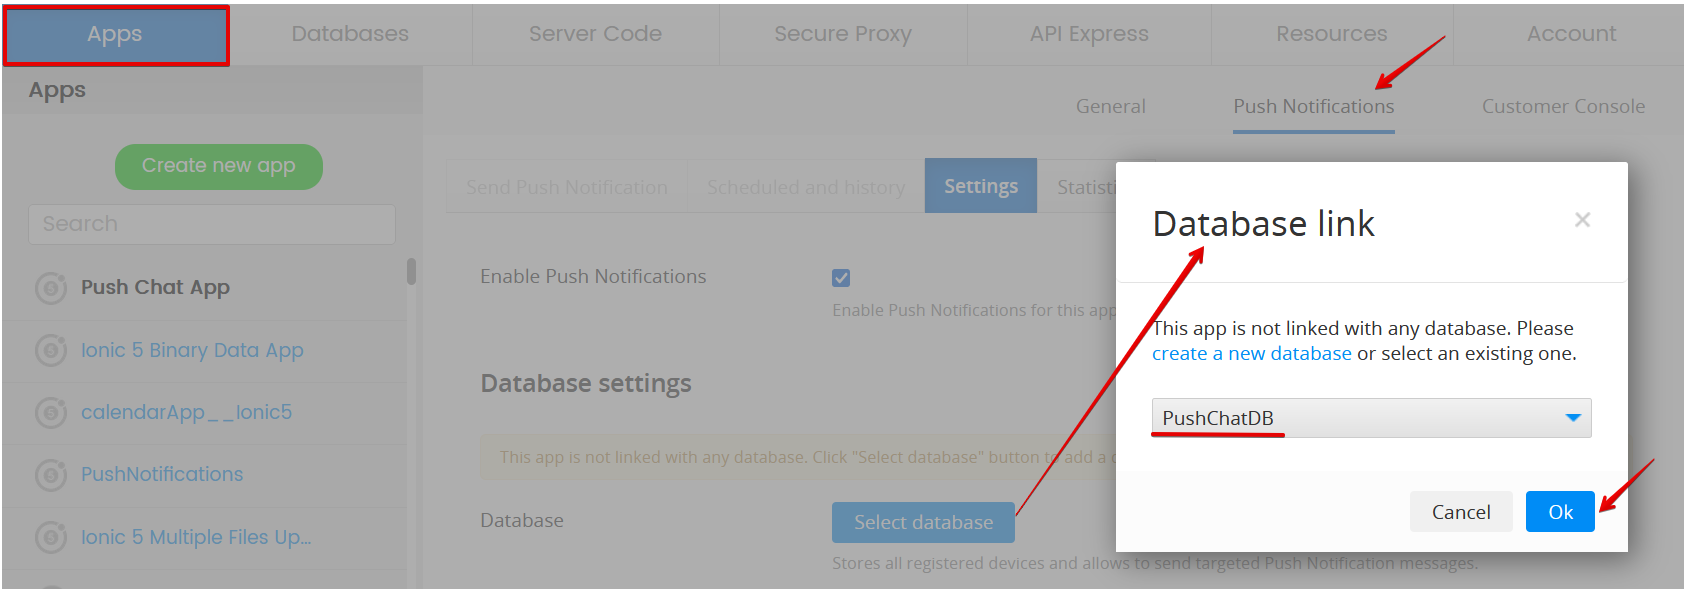 5. After you confirm this operation, the database will be linked and you will be able to copy its Push API key to clipboard:
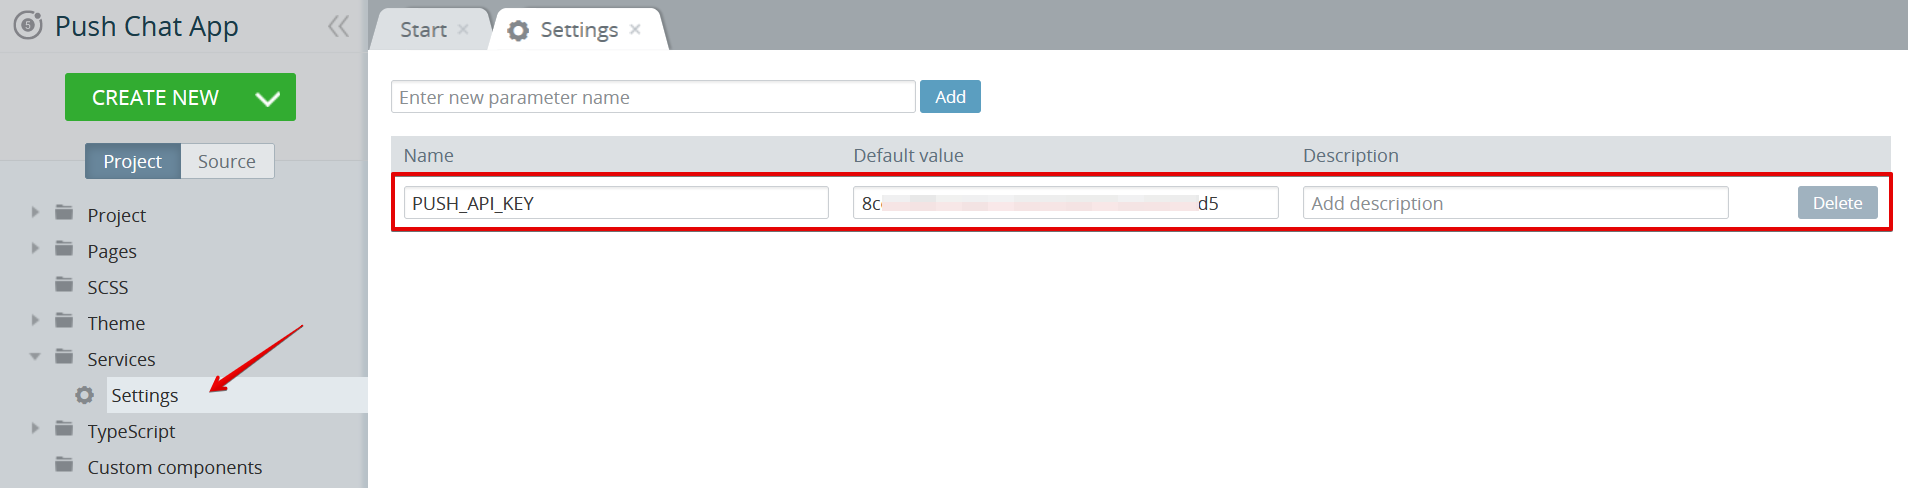
6. In your project, unfold the Services > Settings folder and paste the copied key into the PUSH_API_KEY value field:
Configuring Push settings
To configure other settings on the Push Notifications > Settings page, you need to complete the following configuration steps:
– Choose an ID for your app. If you plan to support iOS, please make sure your app ID matches the ID in your APNS certificate.
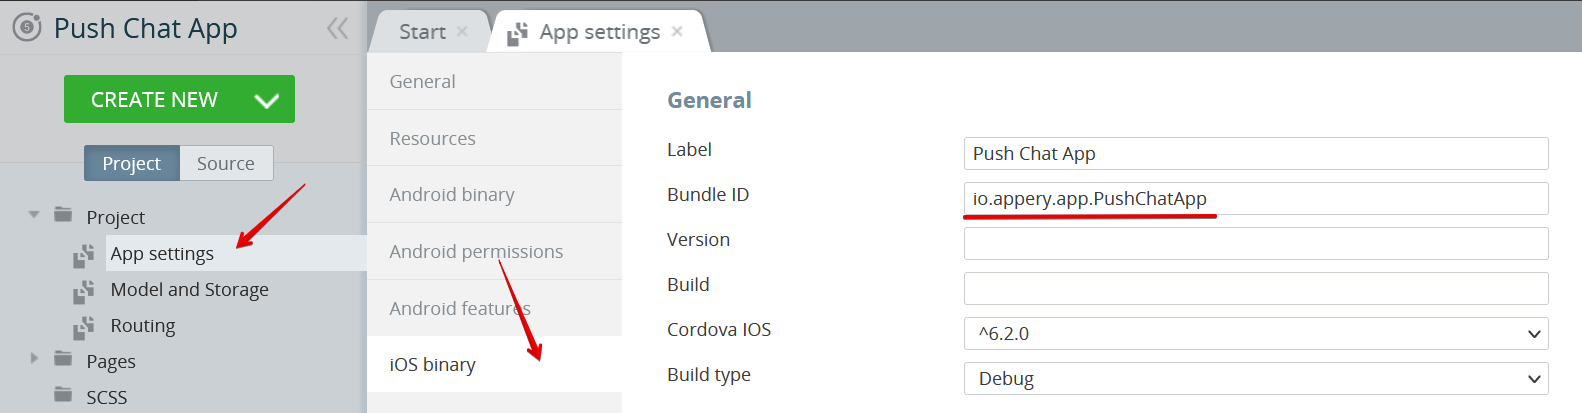
– Set Package name under the Project > App settings >Android binary tab to your app Bundle ID chosen in the previous step.

– Set Bundle ID under the Project > App settings > iOS Binary tab to your app ID as well:
– Set up Firebase Cloud Messaging Provider. Make sure the app package name in Firebase matches your app ID.
– Download Google Services JSON file and Firebase Admin SDK JSON file from Firebase and add them to Push Notifications > Settings page.
– To support push notifications on iOS, add your APNS Push Certificate and Certificate password in iOS settings.
Detailed instructions for above steps can be found on the Push Notifications Configuration page in Appery.io documentation.
App composition
Now, let’s go back to the App Builder and take a look at the app composition.
The app has 2 pages: SignUp and Chat, which are custom versions of the two predefined page templates (SignUp and Chat correspondingly), available via Create New > Page dialog.
SIgnUp page
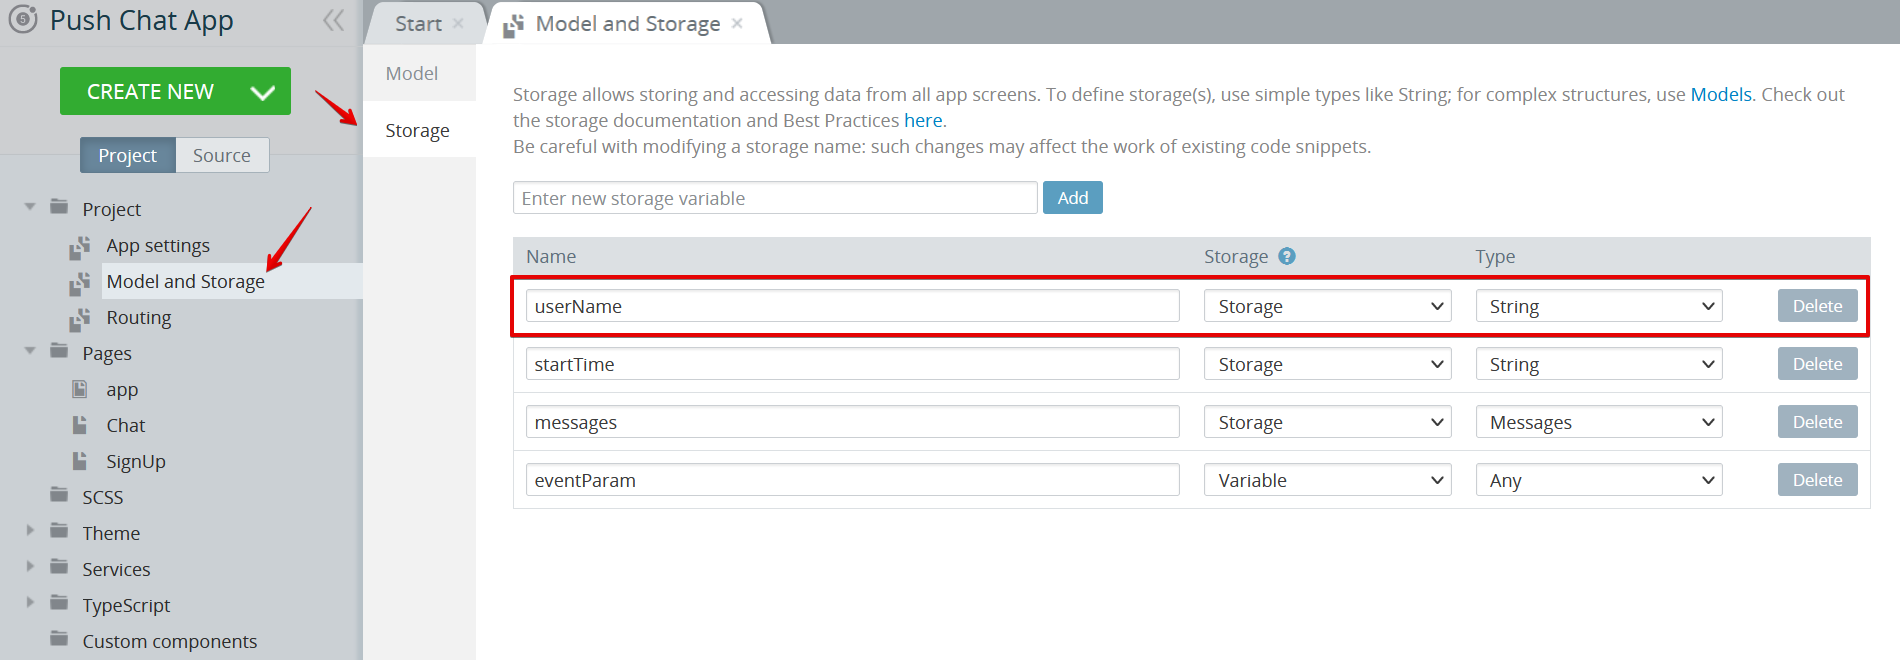
The SignUp page has the userName input field, which is a storage variable defined in Project > Model and Storage > Storage:
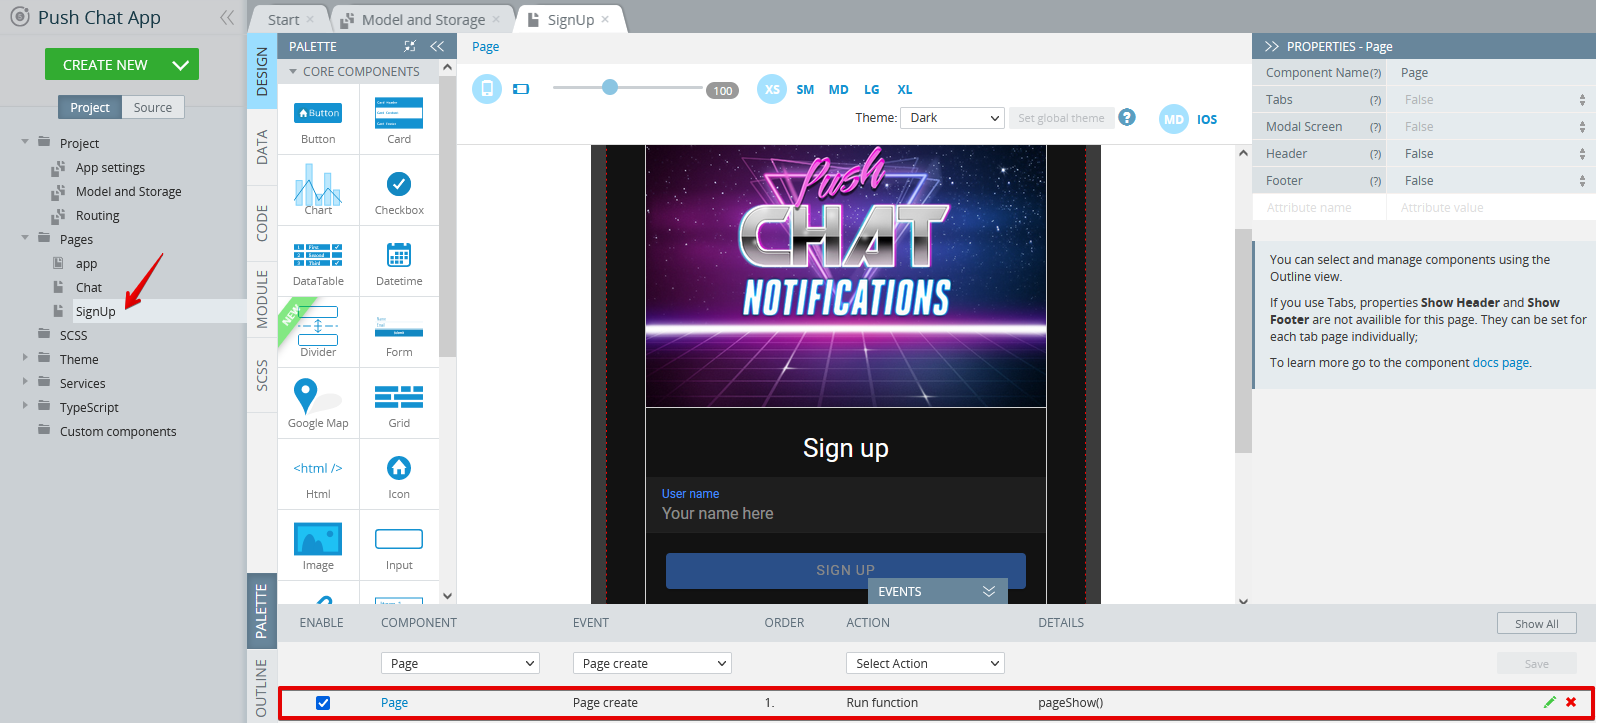
This page also has the Page create event that fires the pageShow() function to check if this userName has already been registered and so the SignUp page can be skipped:
To view the pageShow() function, open the page CODE panel and select it:
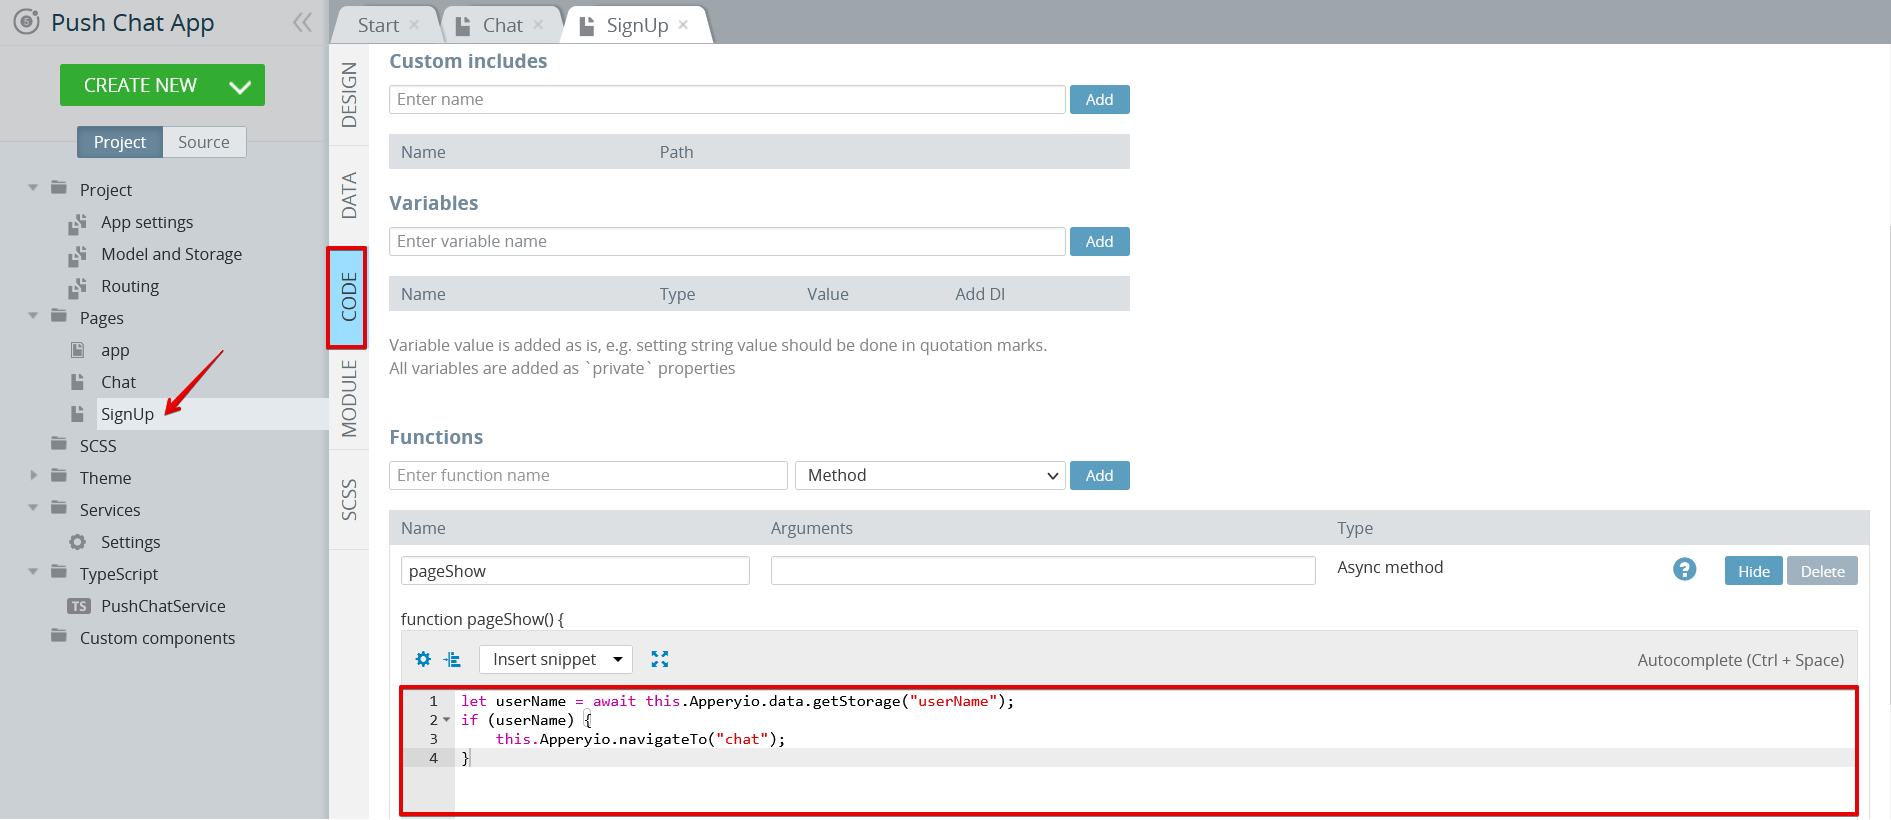
let userName = await this.Apperyio.data.getStorage("userName");
if (userName) {
this.Apperyio.navigateTo("chat");
}
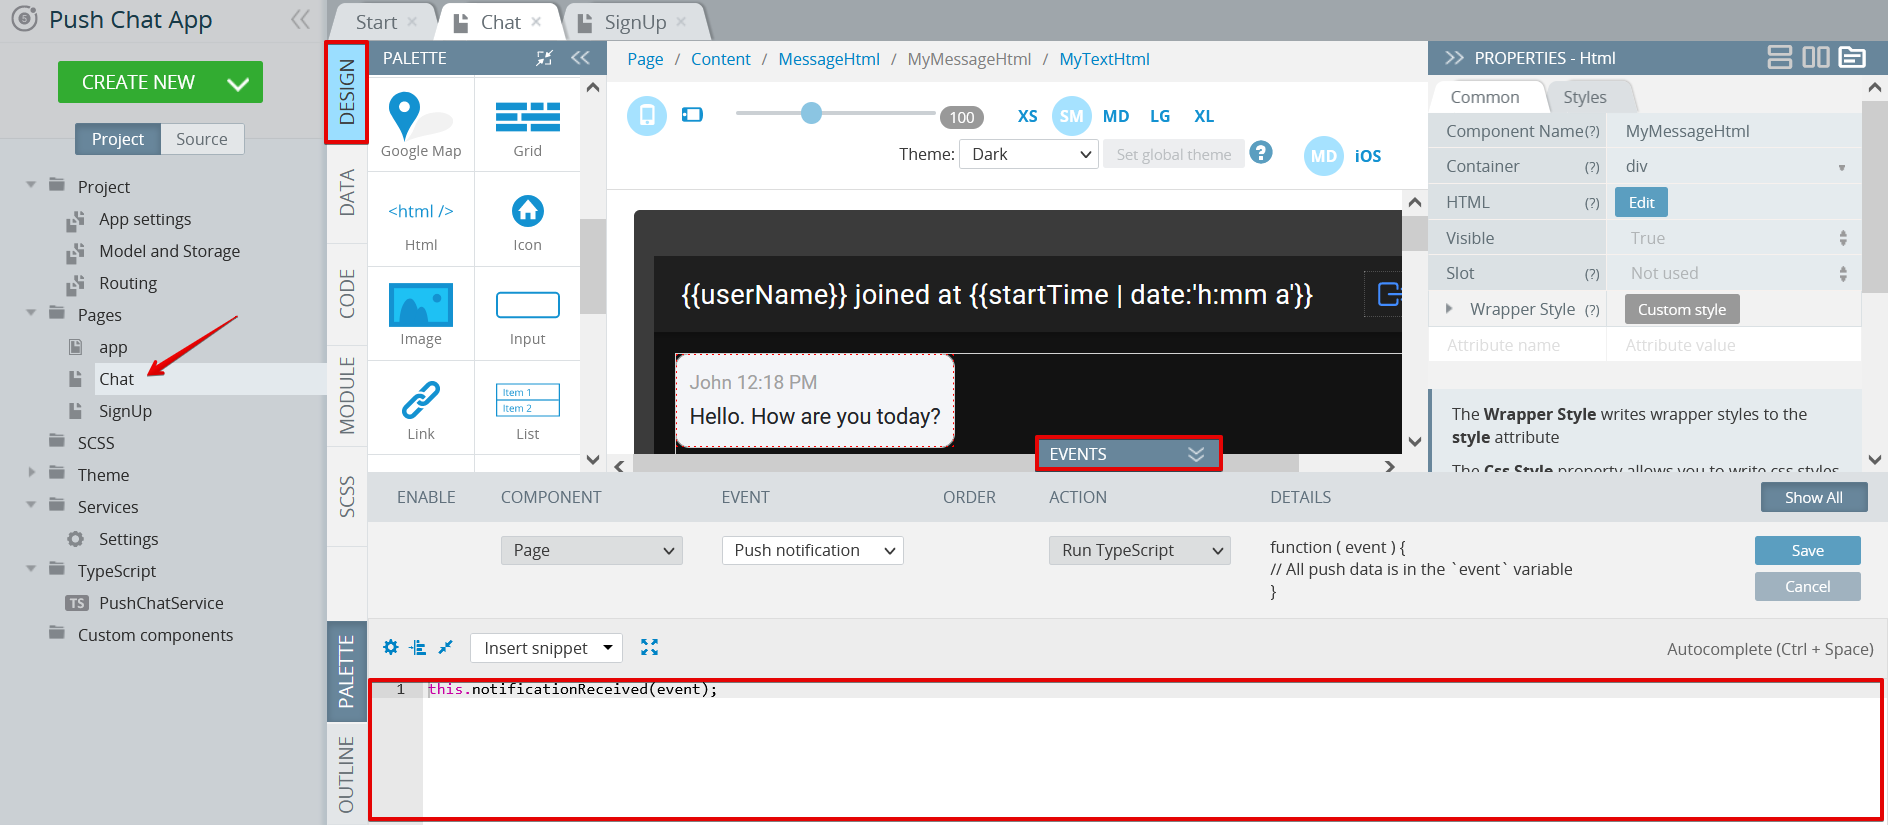
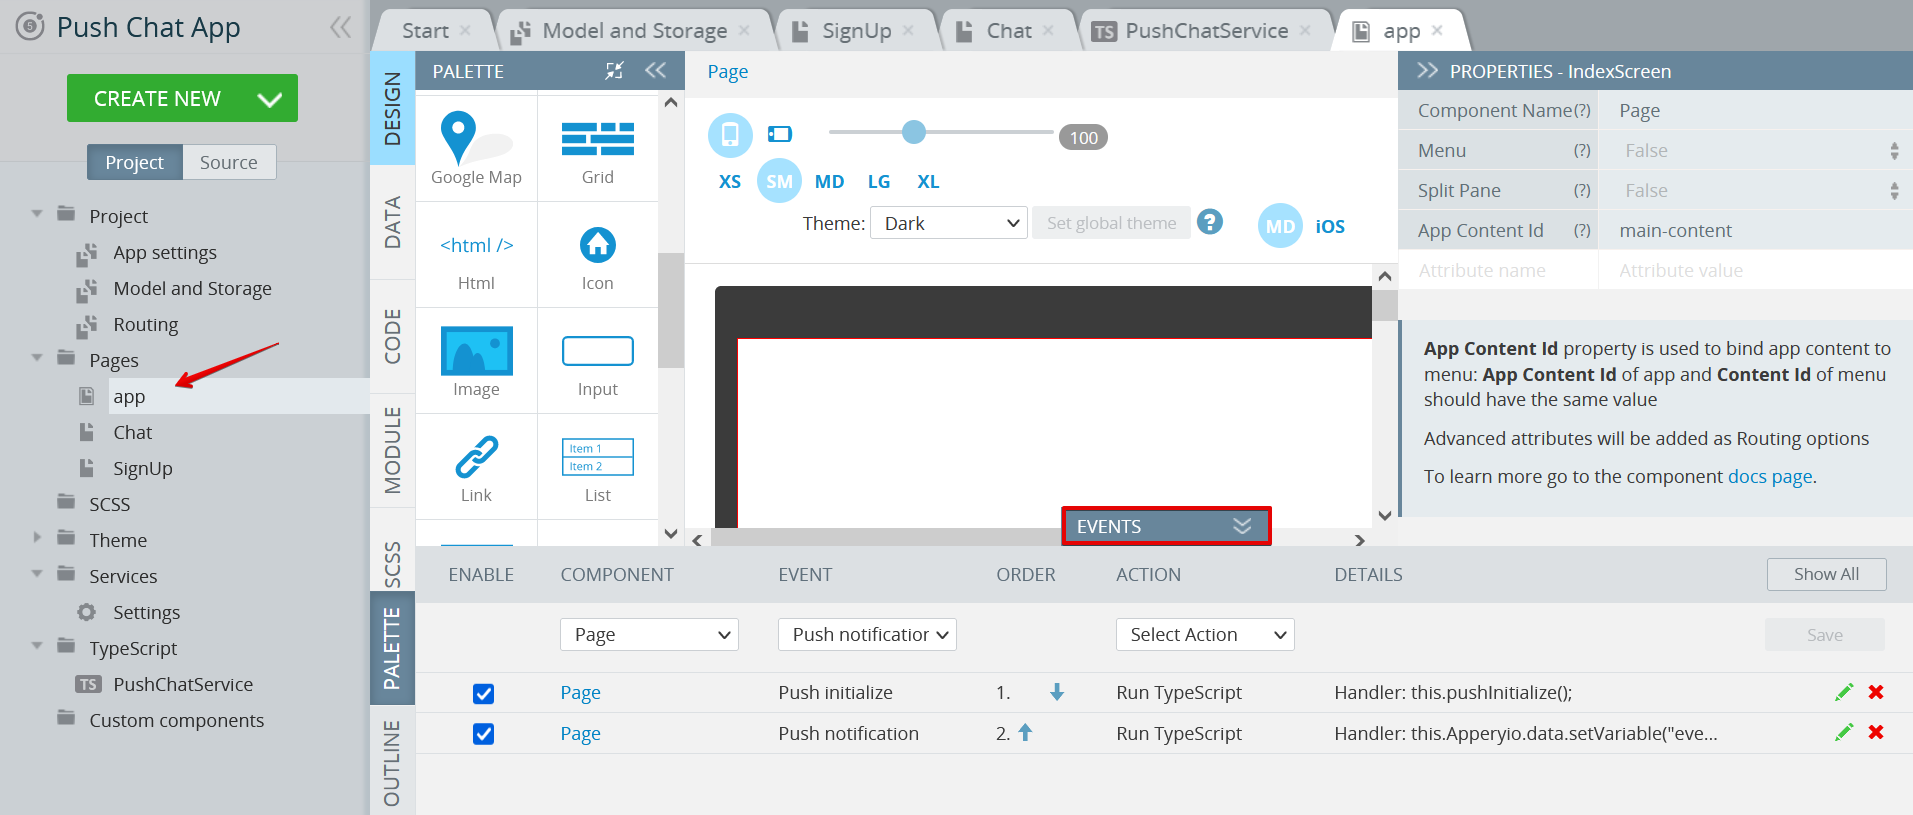
Chat page
The Chat page has the Push notification event that fires the notificationReceived(event) function to handle push notifications. Here we are forwarding the event to the pushChatService.receive(event) service and updating the messages list on the page:
If the app receives the Push notification event for the user that has not signed up yet, he will be redirected to the SignUp page:
await this.pushChatService.receive(event);await this.updateMessages();
let userName = await this.Apperyio.data.getStorage("userName");if (!userName) {this.Apperyio.navigateTo("signup");}
PushChat Service
Let’s take a look at the receive(event) service function that can be found under TypeScript > PushChatService. Here we need to handle several different situations:
Push message arrives with the app in background
In this case, the custom push notification sound will be played and the message will be displayed in the device’s notification center.
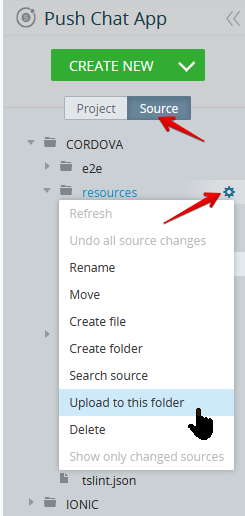
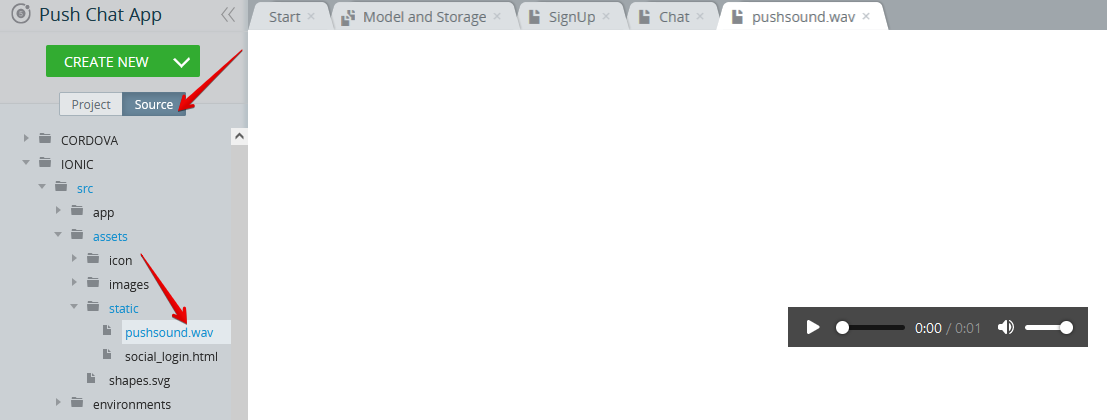
Our custom push notification sound file is called pushsound.wav. Switch to the Source tab, unfold the CORDOVA > resources folder and upload your custom sound file (should be prepared beforehand). Please note that to work on both iOS and Android the .wav format is recommended.
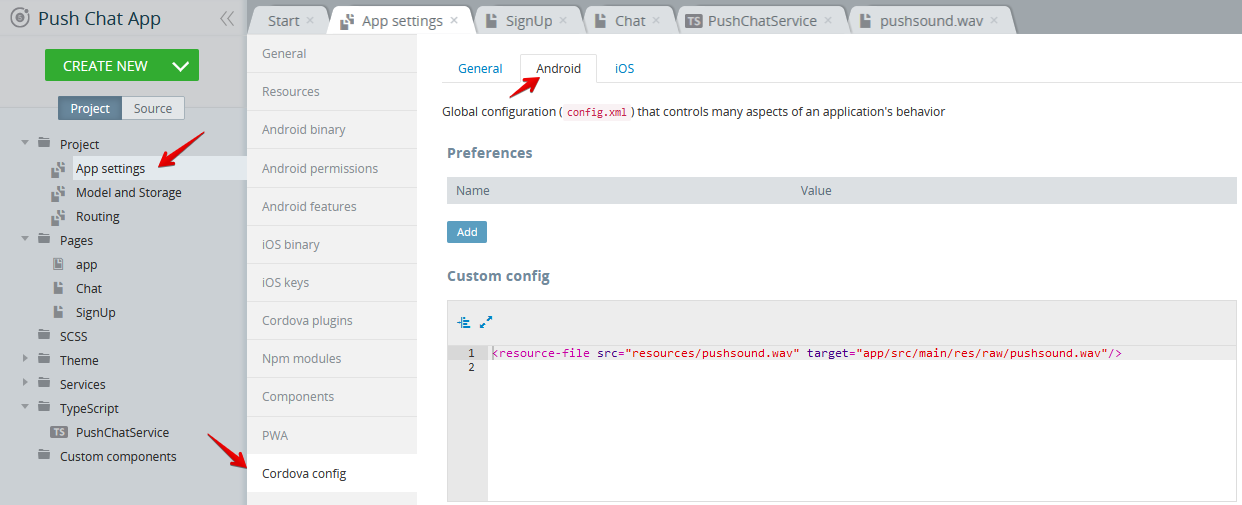
It is also recommended that this file is put into different folders for Android and iOS; this is handled on App settings > Cordova config tab.
For Android it will be:
<resource-file src="resources/pushsound.wav" target="app/src/main/res/raw/pushsound.wav"/>
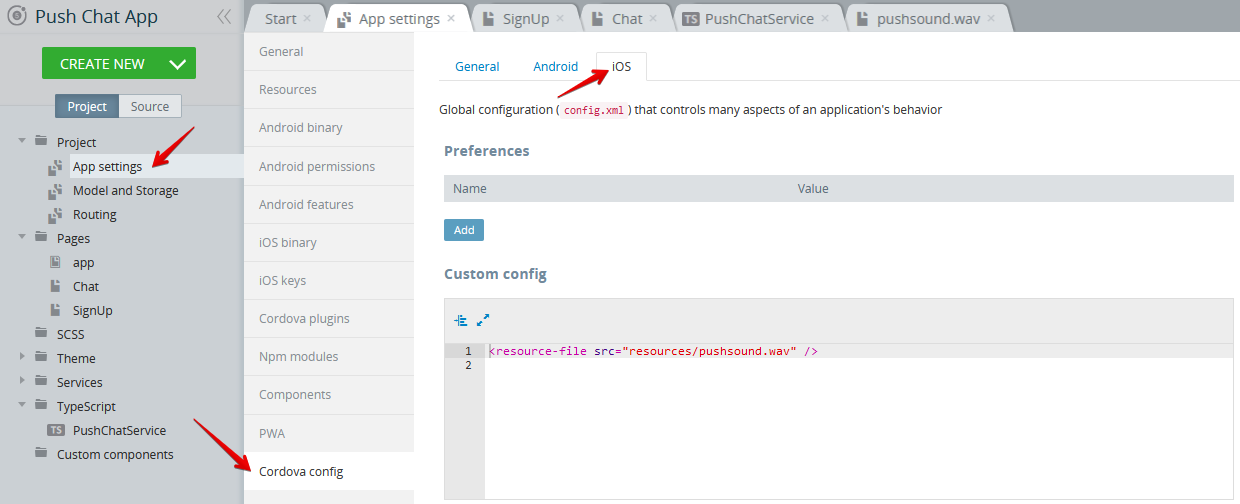
For iOS the code is like this:
<resource-file src="resources/pushsound.wav" />
Push message arrives with the app in foreground
In this case, custom push notification sound will not be played and we have to play it ourselves from the `receive(event)` function in PushChatService that we assigned to handle the push notification request.
But how can we differentiate between the app in the background when the sound was already playing, and the app in the foreground, when we still need to play it?
Here, `event.additionalData.foreground` field comes to rescue, so we have the code:
var ext = event.sound.endsWith('.wav') ? '' : '.wav';if (event.additionalData.foreground) {var soundPath = "assets/static/" + event.sound;var music = new Audio(soundPath + ext);music.play();}
To view it, open the ***PushChatService*** TS file and scroll down:
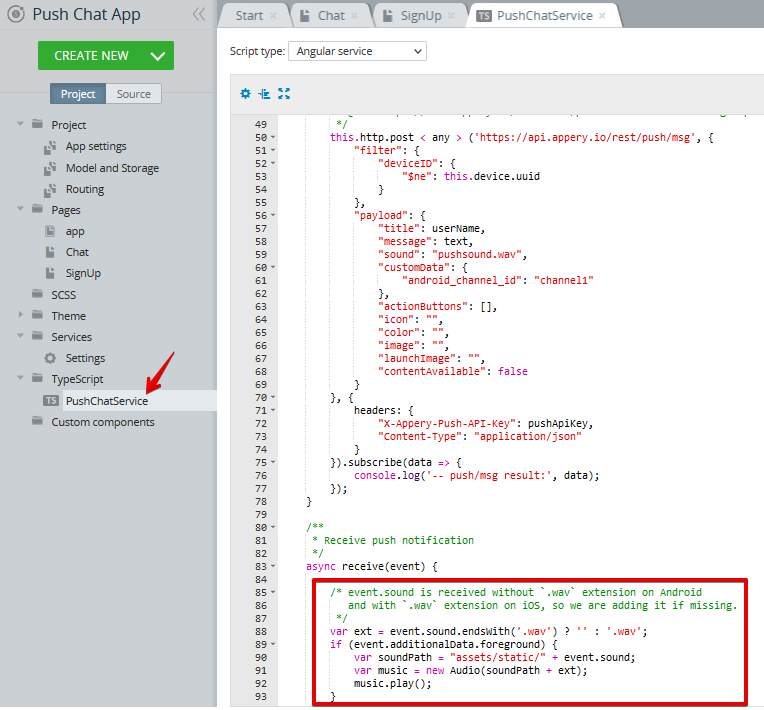
Sounds in Android vs sounds in iOS
Finally, the app also handles the situation when event.sound is received without .wav extension on Android, but with this extension on iOS, so we add it if it’s missing. We also expect pushsound.wav to be in assets/static/ folder, so we go back to the Source tab and upload the pushsound.wav file to the IONIC/src/assets/static folder as well:
 The remaining code in `receive(event)` function just saves the new message entry to local storage.
let messages = await this.Apperyio.data.getStorage("messages");messages = messages || [];messages.push({time: new Date().toISOString(),message: event.message,user: event.title});await this.Apperyio.data.setStorage("messages", messages);
Sending push notifications
We have another function embedded into PushChatService named `send(text: string)` that sends push notifications to other devices registered in your database’s Devices collection. Registration happens automatically when the user opens the app for the first time.
Appery.io API to send push notifications is documented here.
Angular HttpClient was already imported in our PushChatService when we created it with Create new > TypeScript > Angular service. We can use it to send REST request to the Appery.io push notification server.
this.http.post < any > ('https://api.appery.io/rest/push/msg', {"filter": {"deviceID": {"$ne": this.device.uuid}},"payload": {"title": userName,"message": text,"sound": "pushsound.wav","customData": {"android_channel_id": "channel1"},"actionButtons": [],"icon": "","color": "","image": "","launchImage": "","contentAvailable": false}}, {headers: {"X-Appery-Push-API-Key": pushApiKey,"Content-Type": "application/json"}}).subscribe(data => {console.log('-- push/msg result:', data);});
Here, in the filter field, we indicate that we are pushes will be sent to every device except ours. We also specify android_channel_id for the sound. This Android sound channel is initialized in Push initialize event of the app module.
let channelName = 'channel1';
( < any > window).PushNotification.createChannel(() => {console.log('Push notification channel created:', channelName);},() => {console.log('Error creating push notification channel:', channelName);}, {id: channelName,sound: "pushsound",description: channelName});
Basically, that’s all. Now you can build an app for your Android or iOS phone, install it using a QR-code, and help a friend to do the same, and voila! You can send messages to each other!
Important! Be sure to turn off the Silent mode on iPhone, otherwise this little toggle on mobile will be muting your push notification sounds.
Summary
We took a look at push notification settings in Appery.io and explored the insides of a small but smart app that uses the push notification mechanism to create a chat.
Please check out the code in the attached project and let us know if you have any questions.
Happy coding with Appery.io!