How to Get Access to the List of Contacts in an Ionic App
Have you ever wondered how to make you Ionic app access the list of contacts of your device?
This blog post walks you through the steps of creating an Ionic app that can do that. Also, if you prefer watching video guides, you can follow this YouTube tutorial to create such an app:
Getting Started with Your Ionic App
First, we need to create a brand-new Ionic app. For this tutorial, we’re using the Appery.io platform, which makes the development process straightforward and efficient.
1. Create a New App:
Open Appery.io and click Create new app.
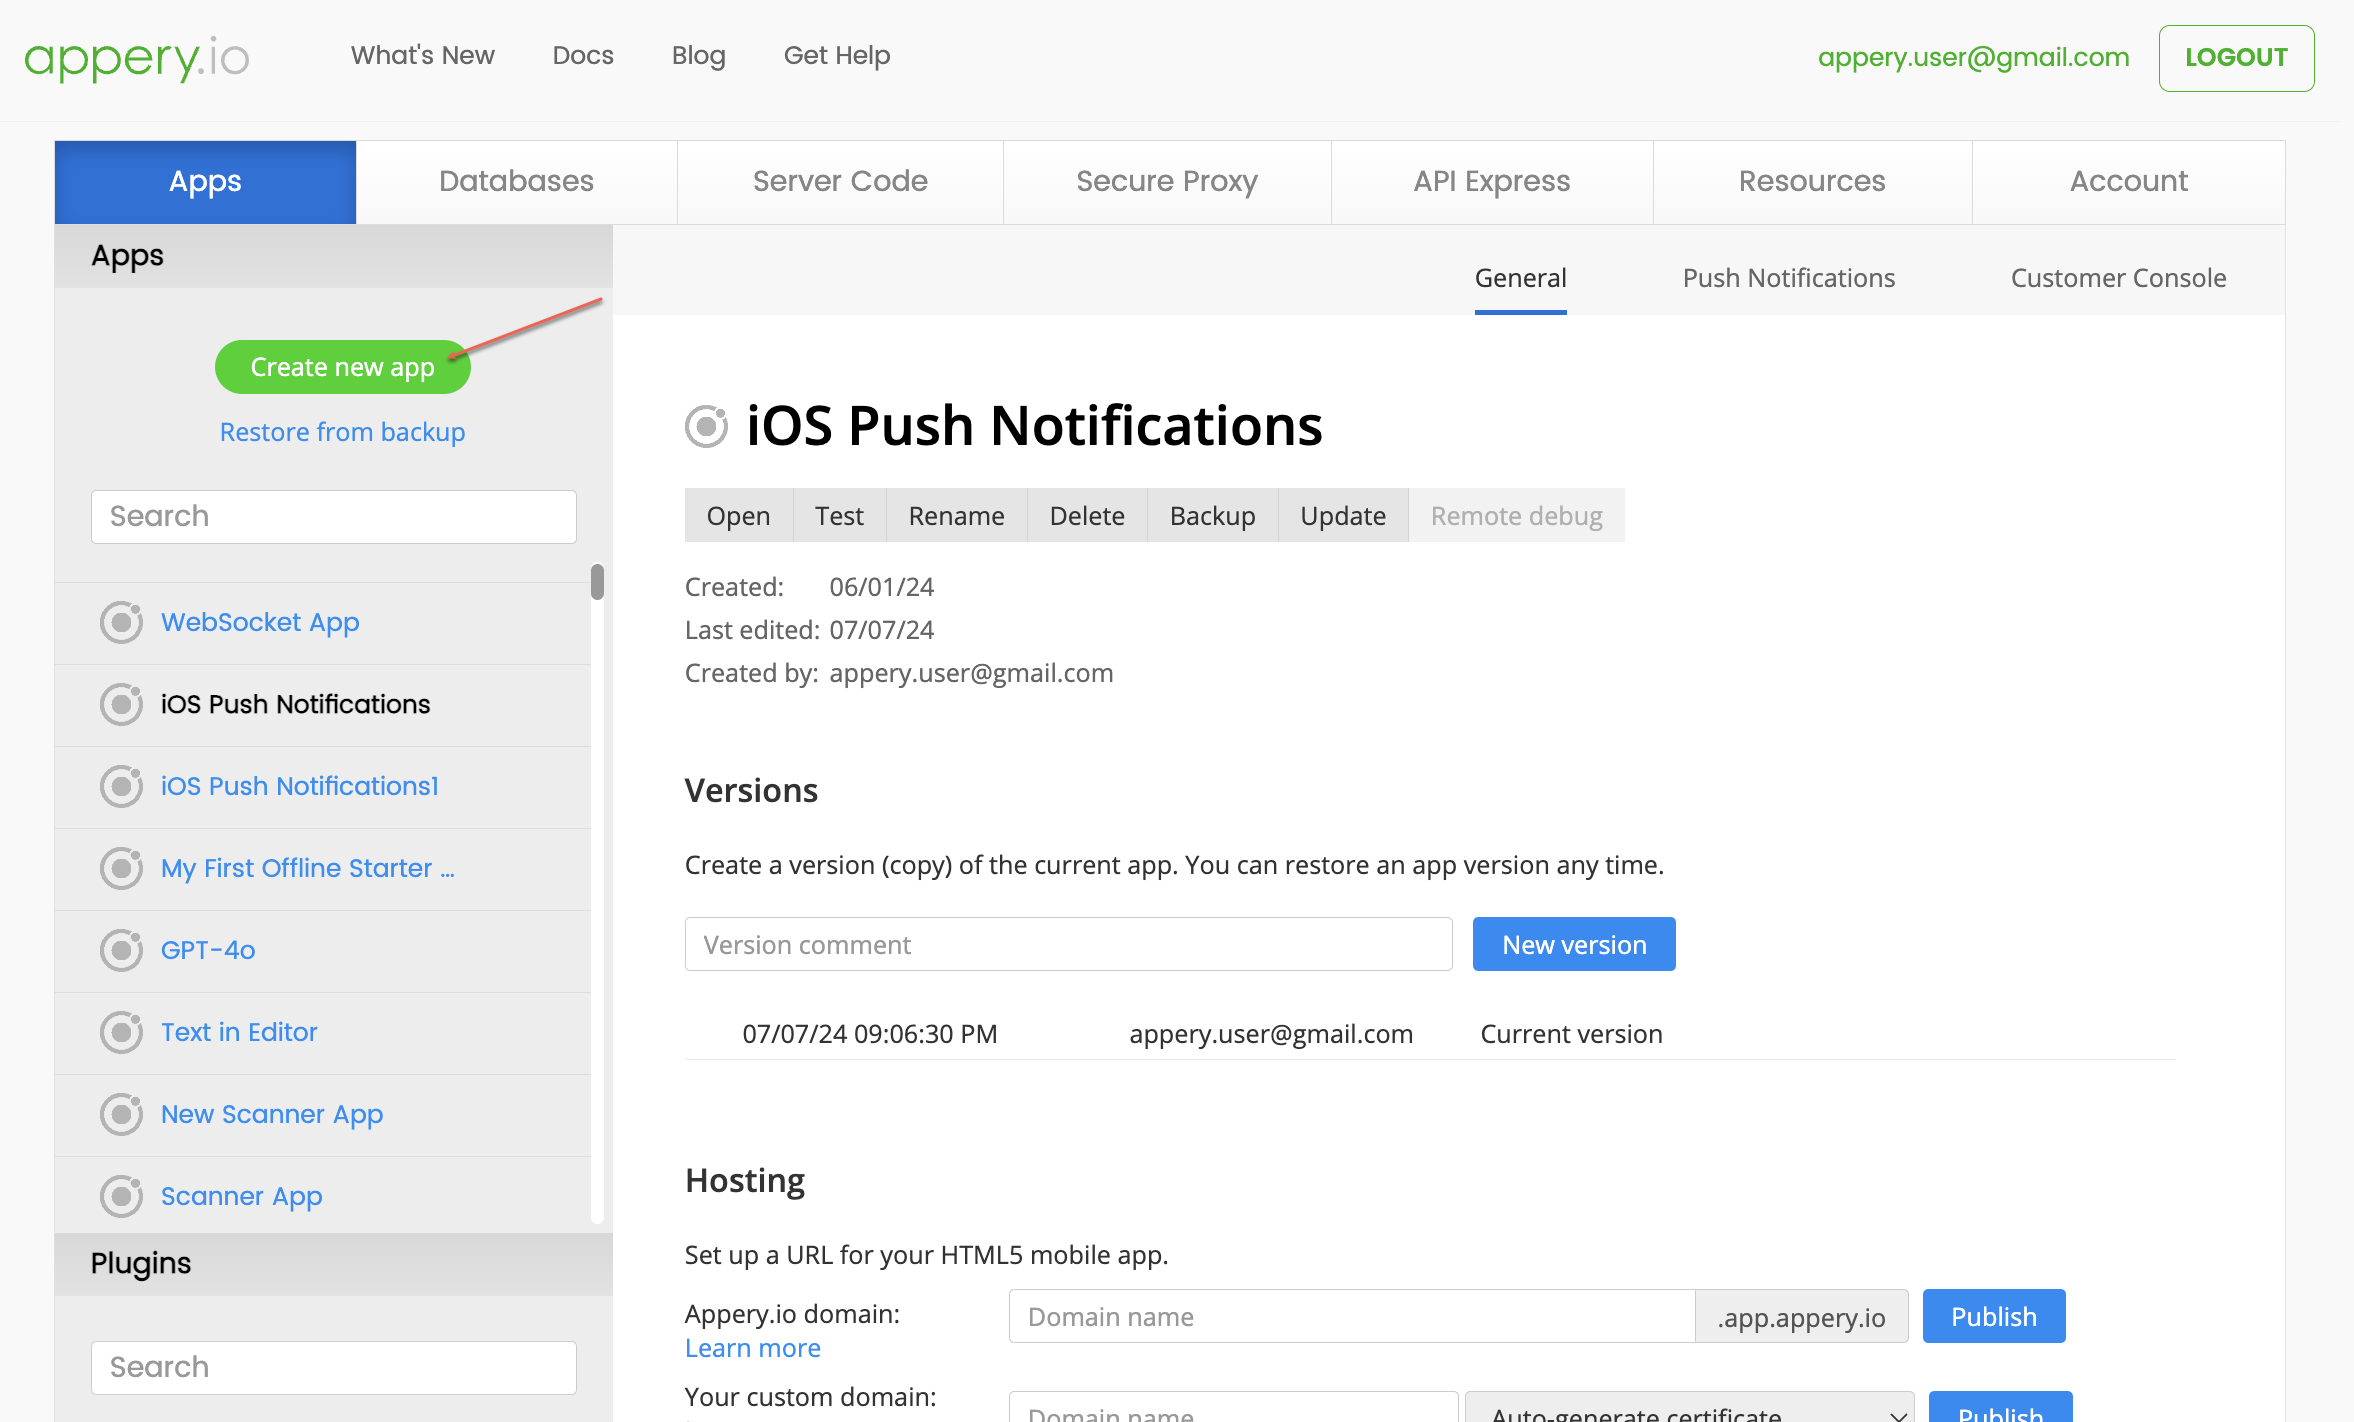
Name your app and confirm. This action creates a blank Ionic app with a predefined screen layout named Contacts.
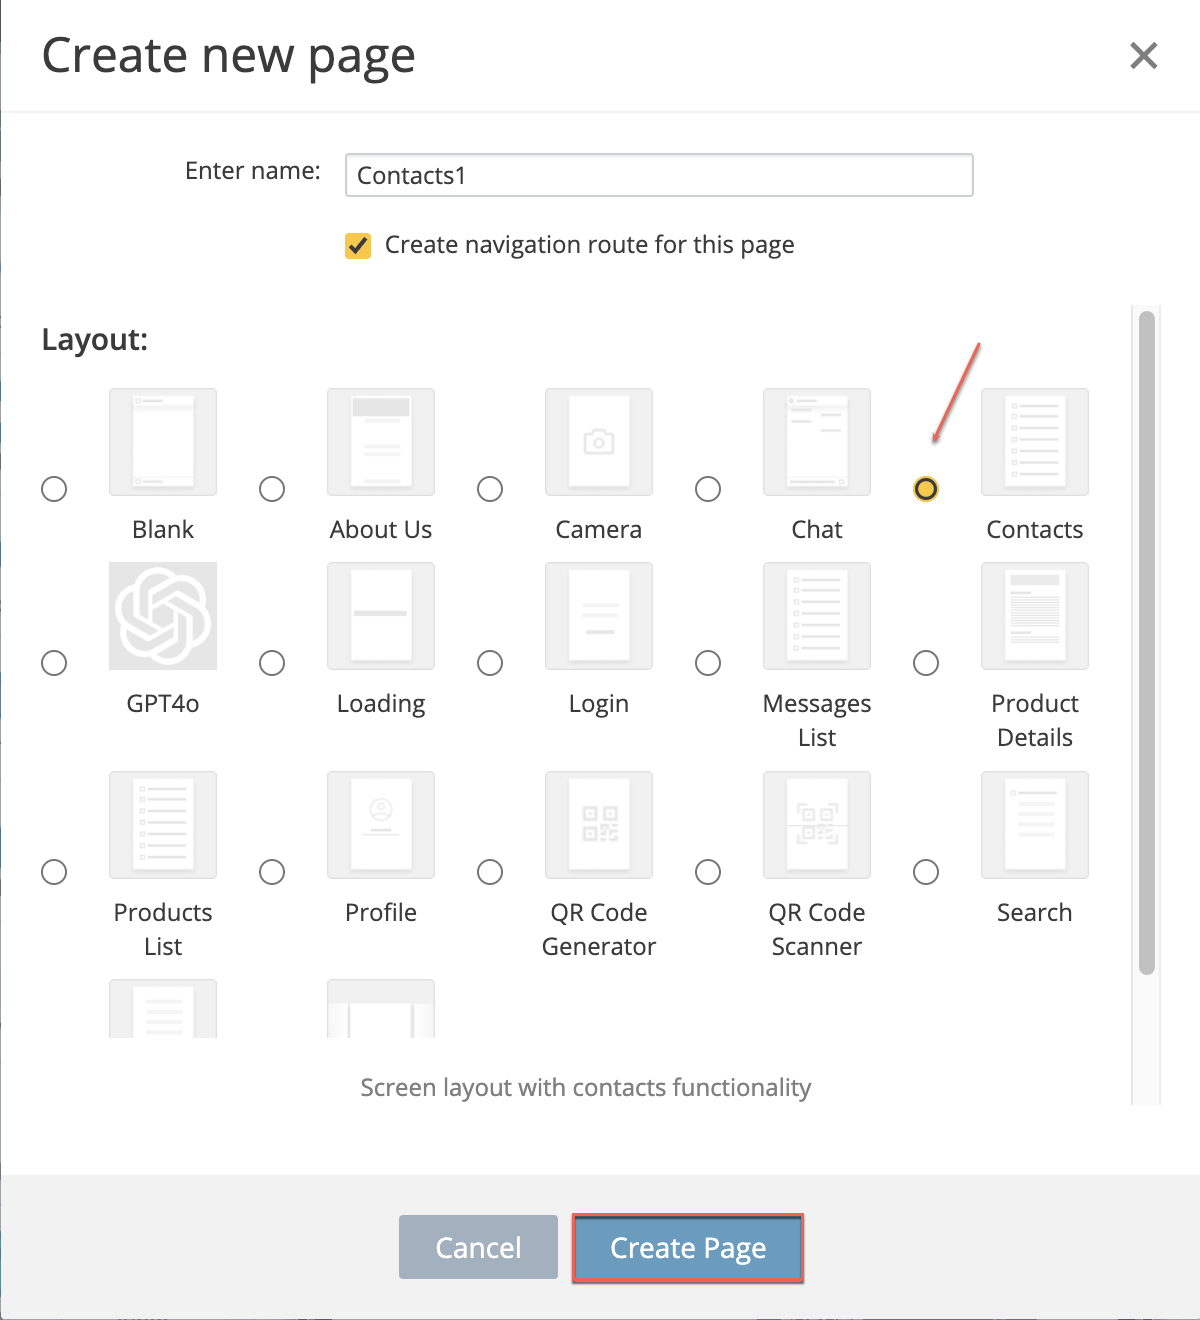
2. Adding the Contacts Page:
Add this Contacts page layout to your app and adjust the routing to make sure it points correctly to this page.

Reviewing & Testing Your App
Your app is now ready to display contacts. This page will show names, phone numbers, and pictures of contacts. Let’s click TEST to quickly preview the app.
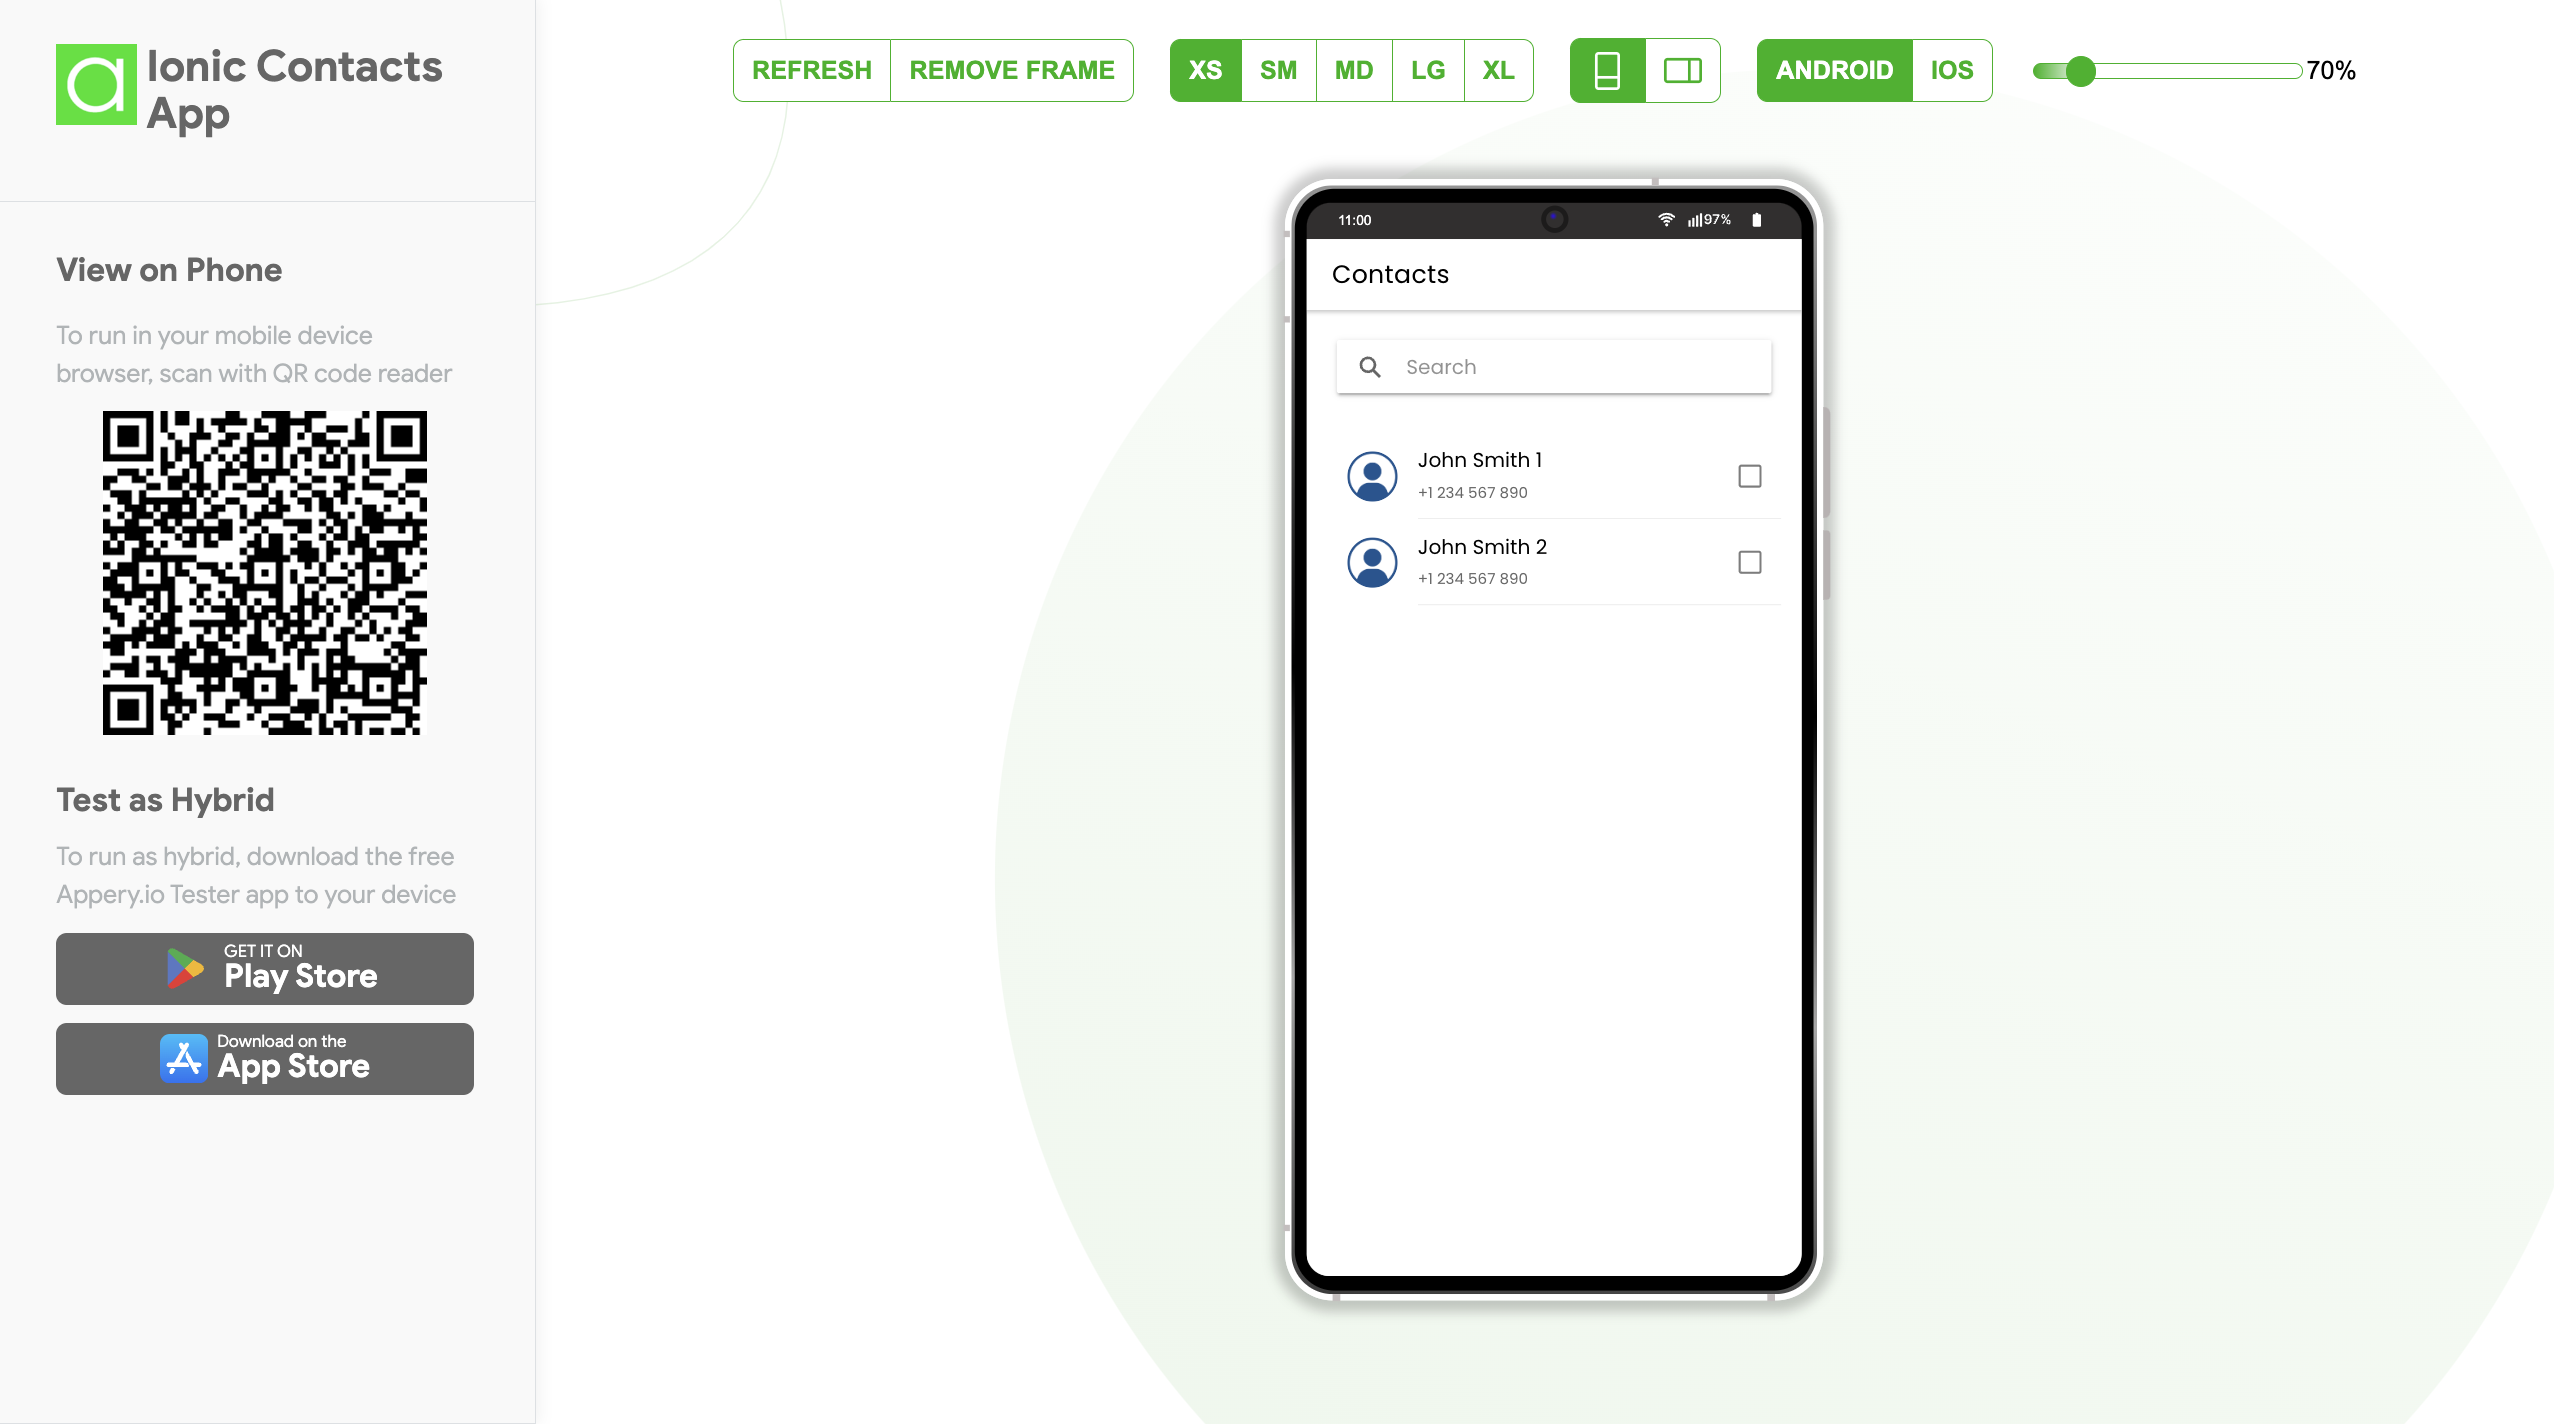
You can also preview what the app looks like and how it functions by using the Appery.io Tester, a native app for testing. It’s user-friendly and works perfectly!
How It Works Behind the Scenes
Now, let’s go deeper into the technical step-by-step process to understand how everything works:
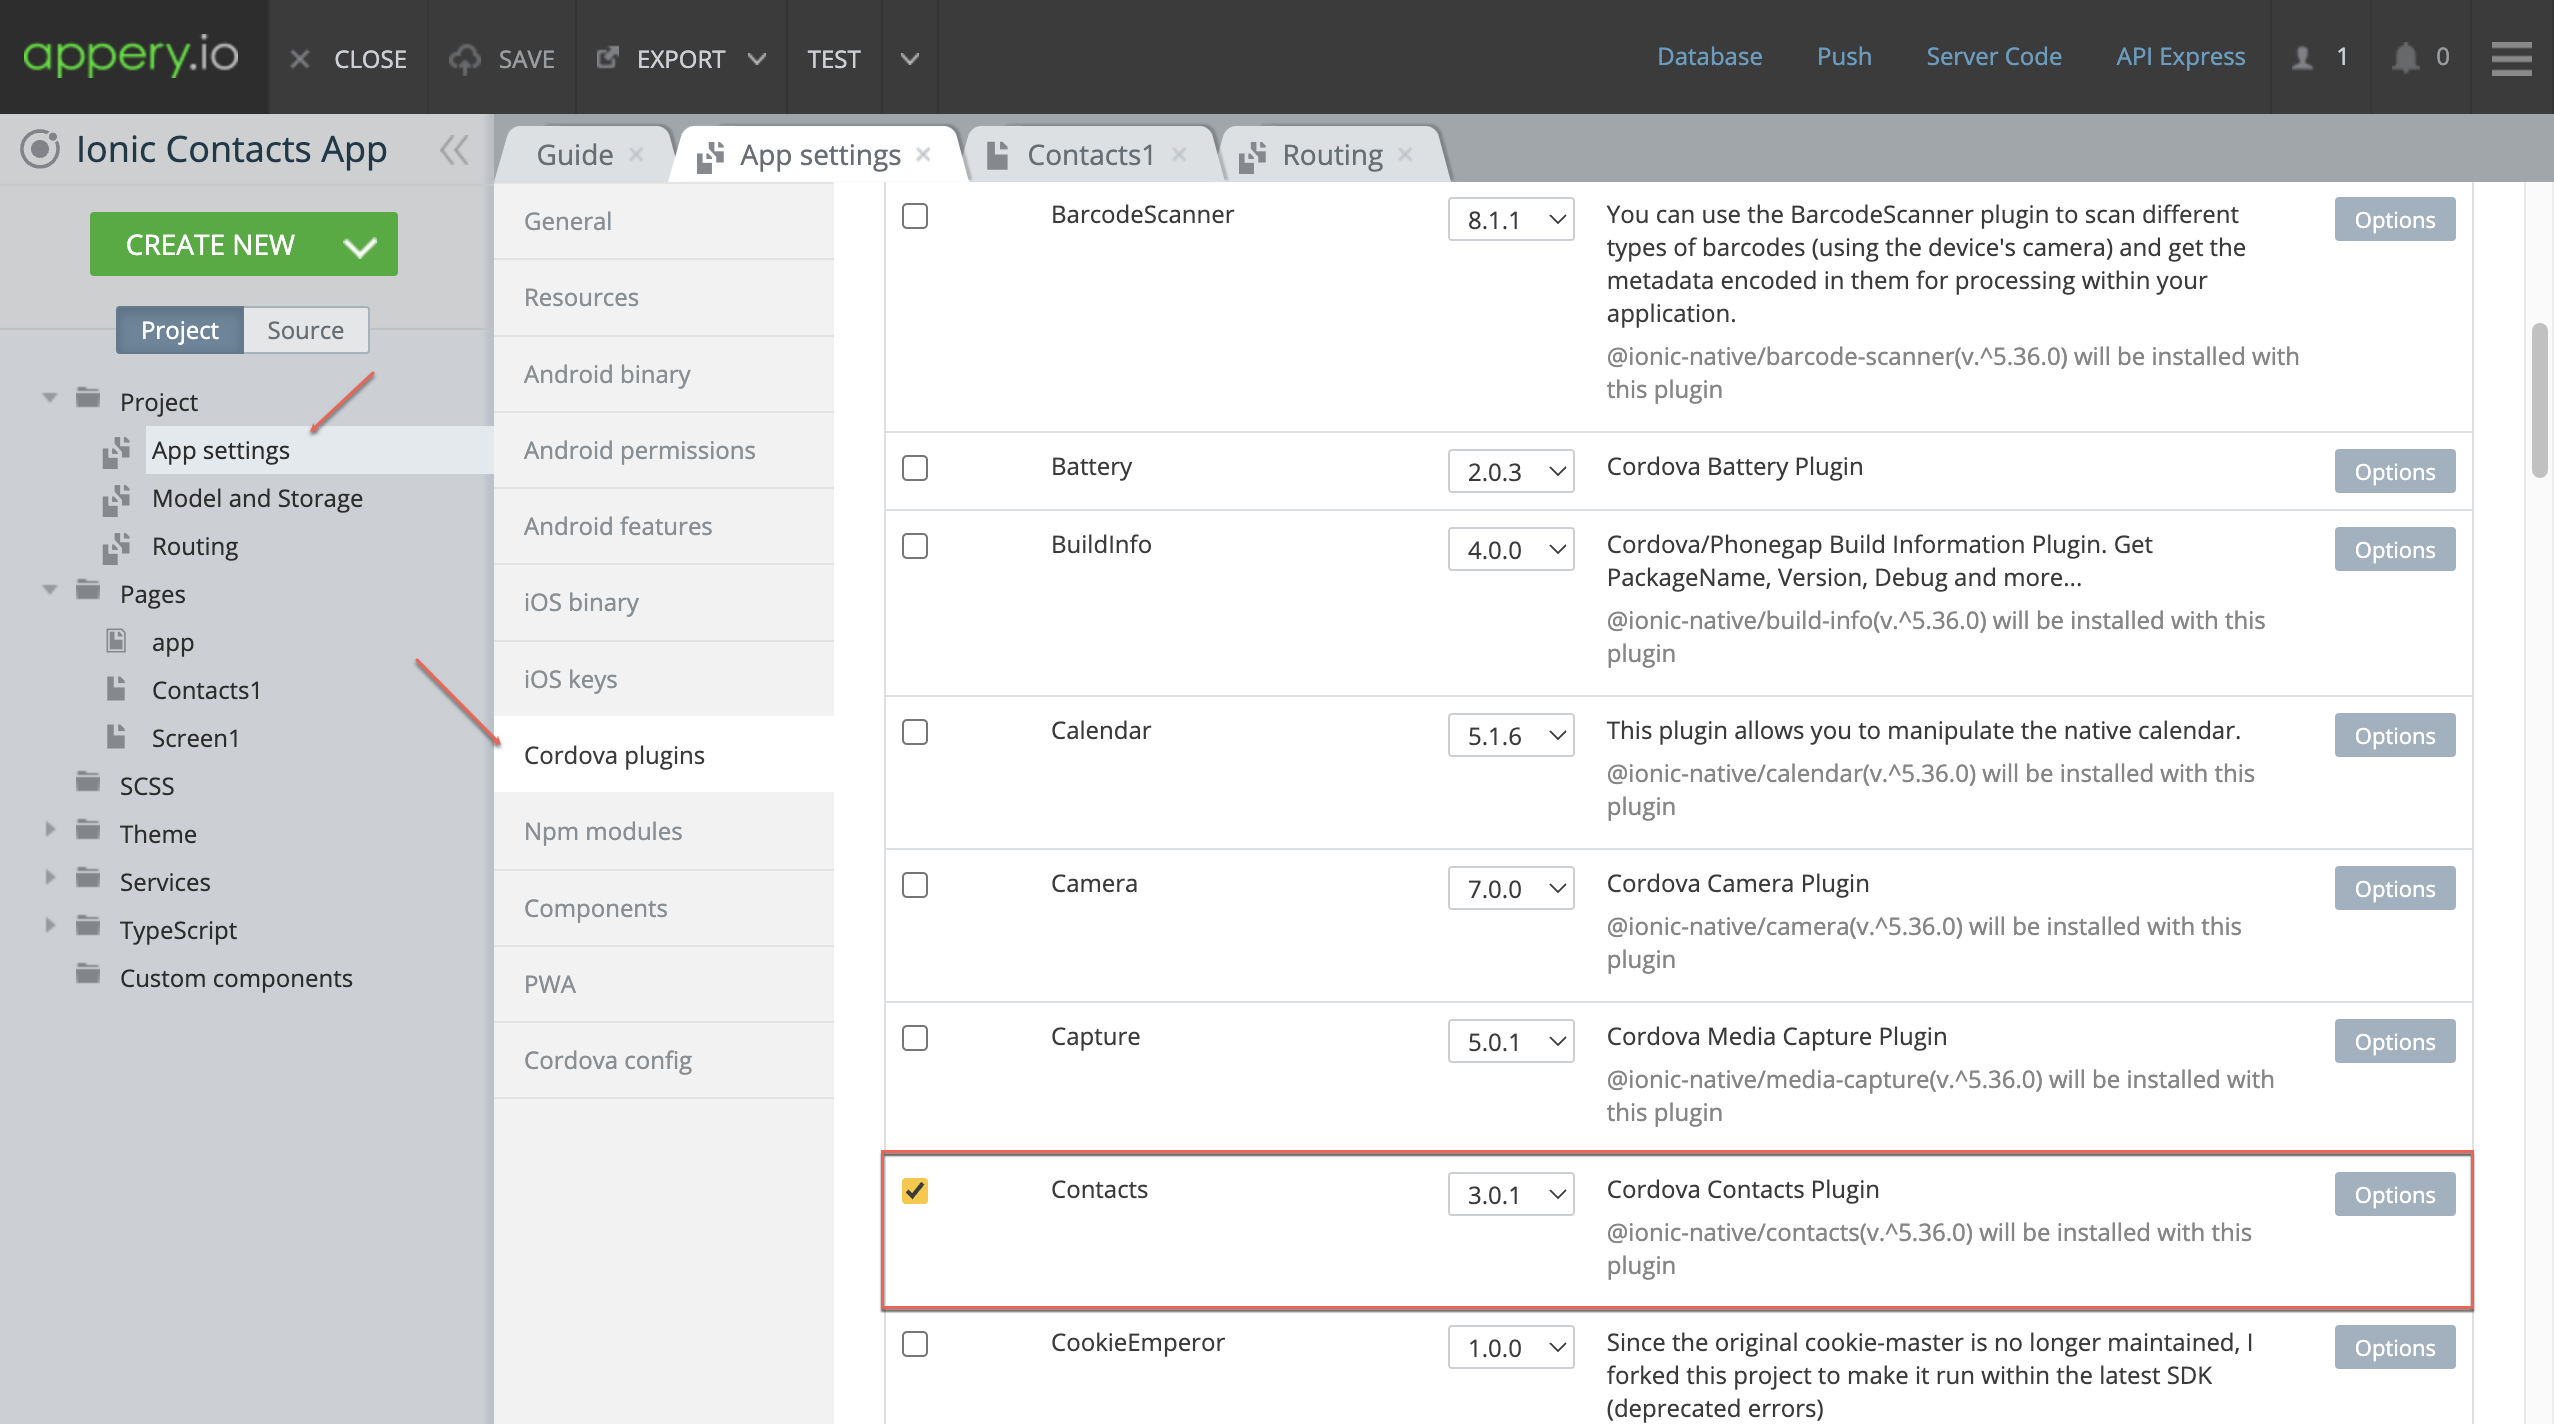
Cordova Plugins:
Under the Project > App settings > Cordova plugins tab, you’ll see that the app uses the Cordova Contacts plugin, which has been automatically imported. This plugin helps fetch the contacts.
Ionic Contacts Wrapper
We utilize the Ionic Contacts wrapper for better integration. You can check its detailed documentation page if you wish to dive deeper into this.
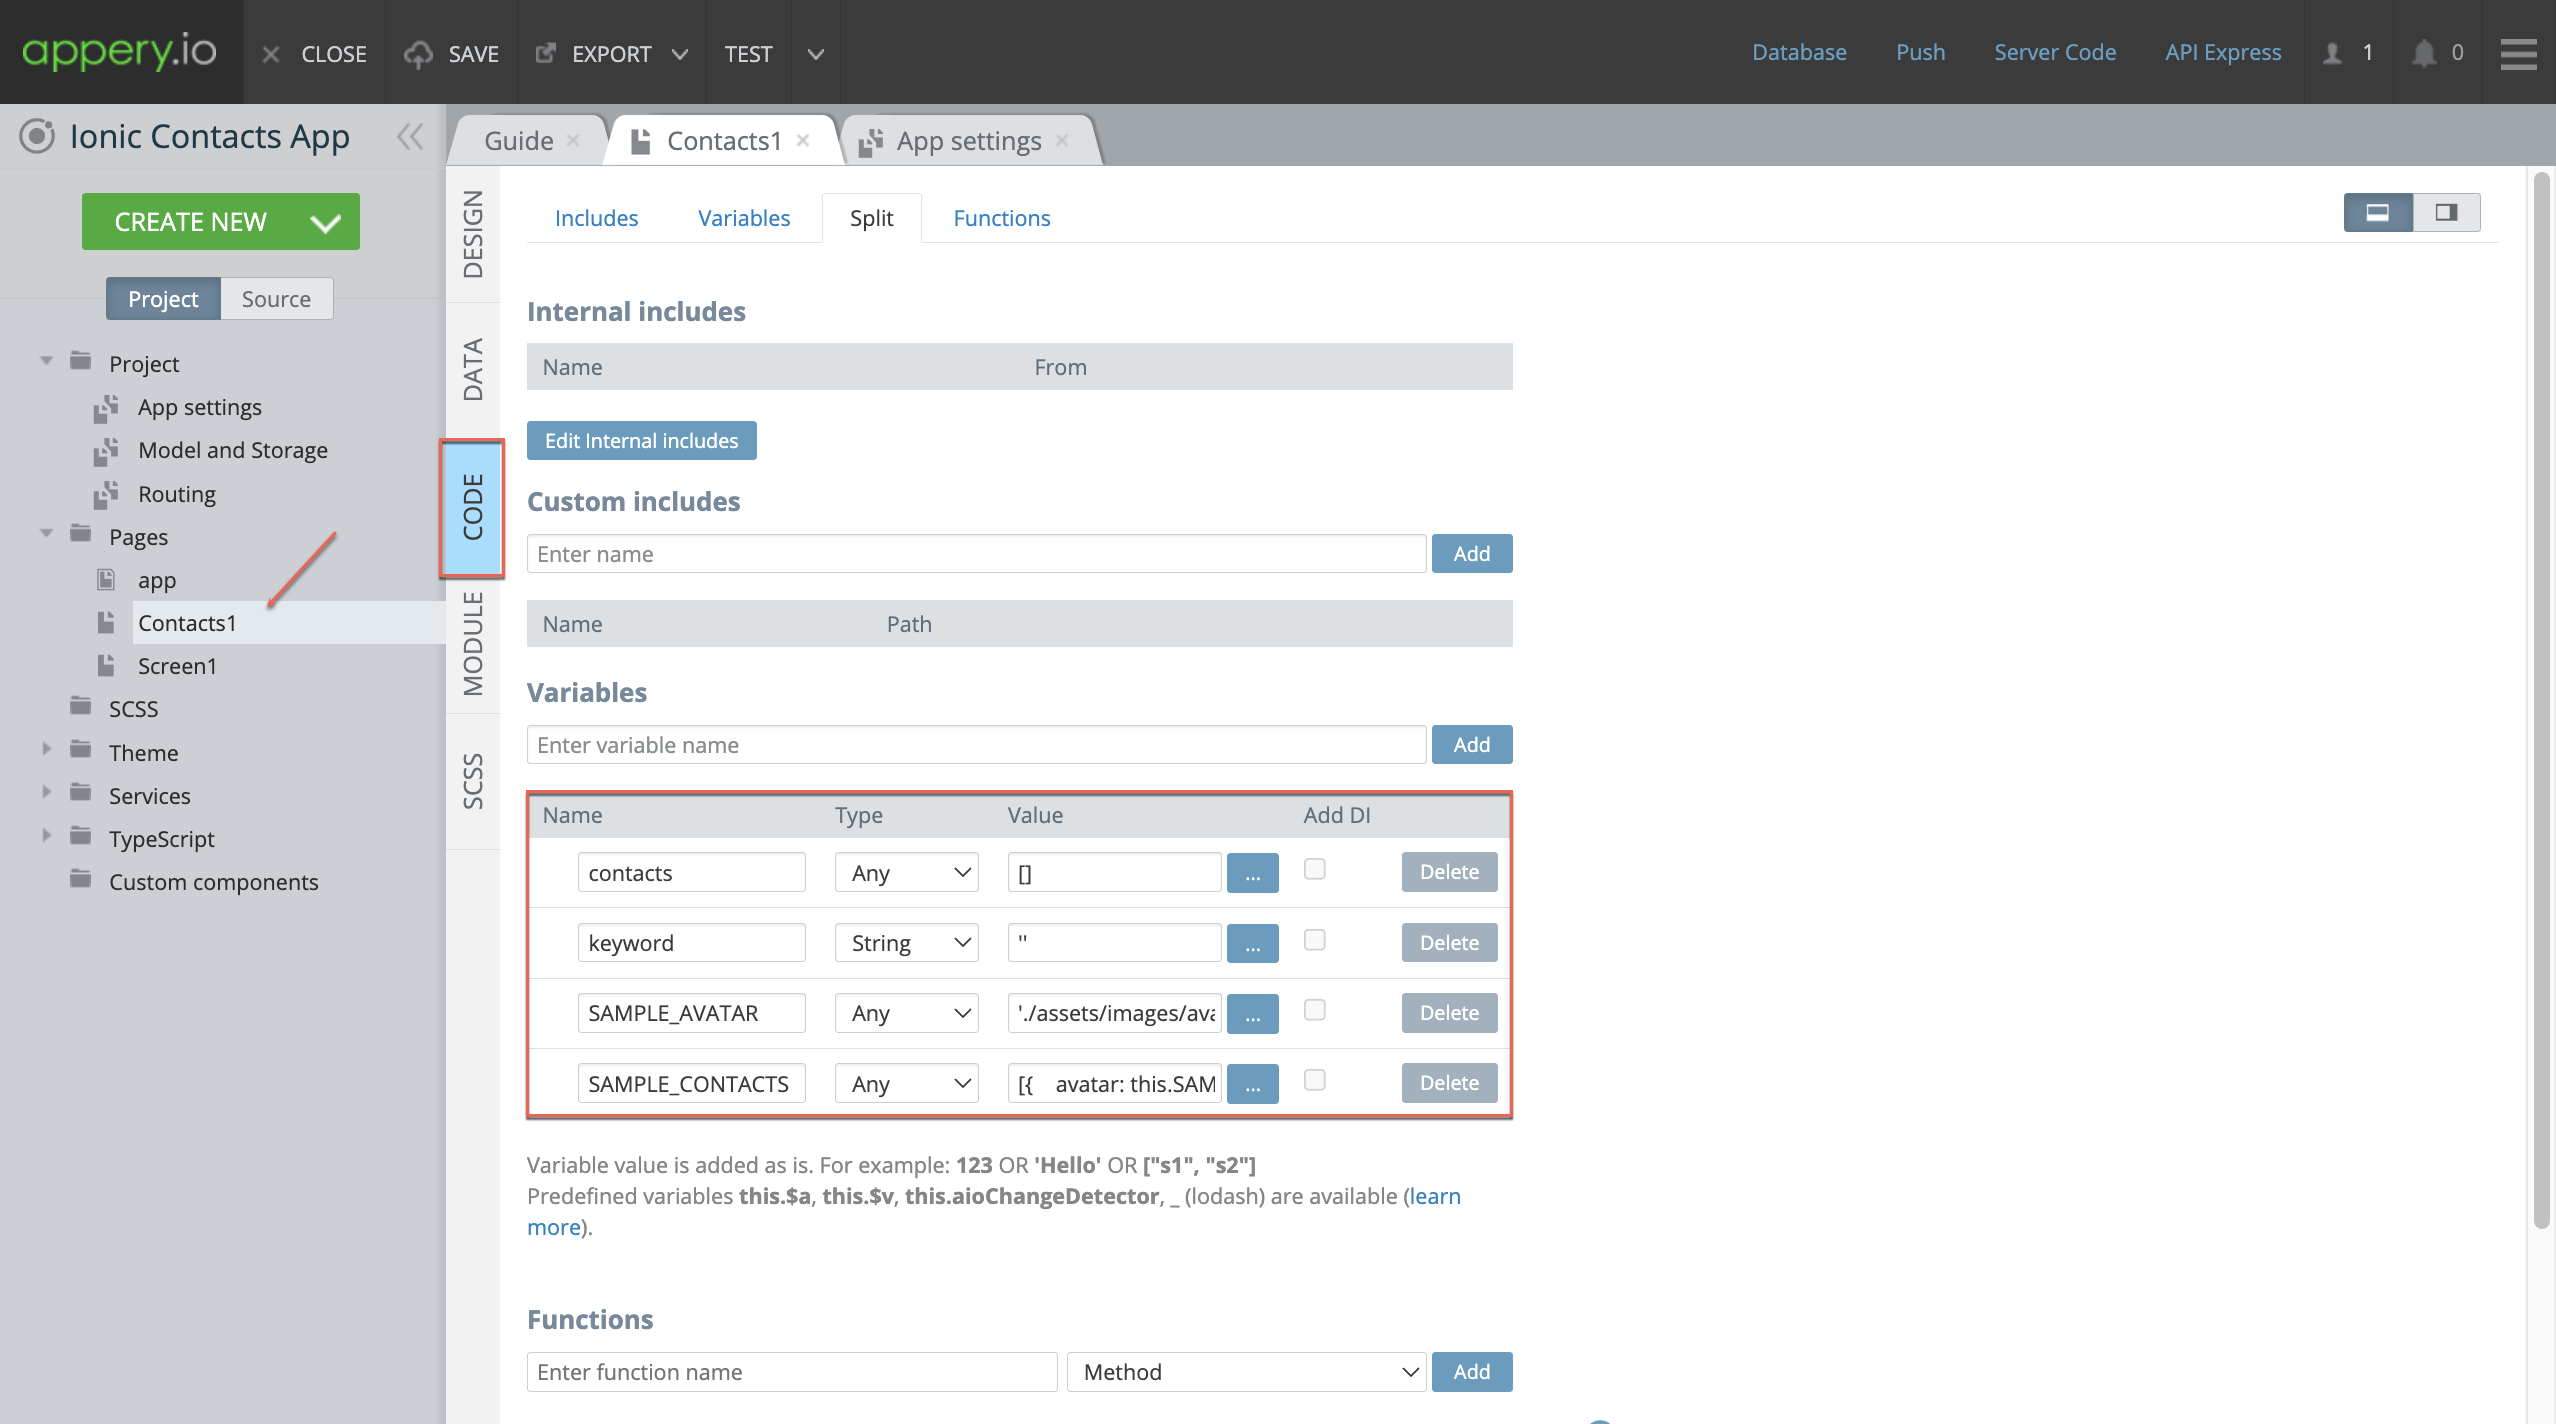
Setting Up Variables
Open the Contacts page’s CODE tab to see the variables that were added automatically:
– `contacts`: Returns the contact list.
– `keyword`: Enables filtering.
– `SAMPLE_AVATAR`: Displays a sample picture. You can upload your custom one by using the Media Manager, if needed.
– `SAMPLE_CONTACTS`: Provides a sample list for testing in the browser.
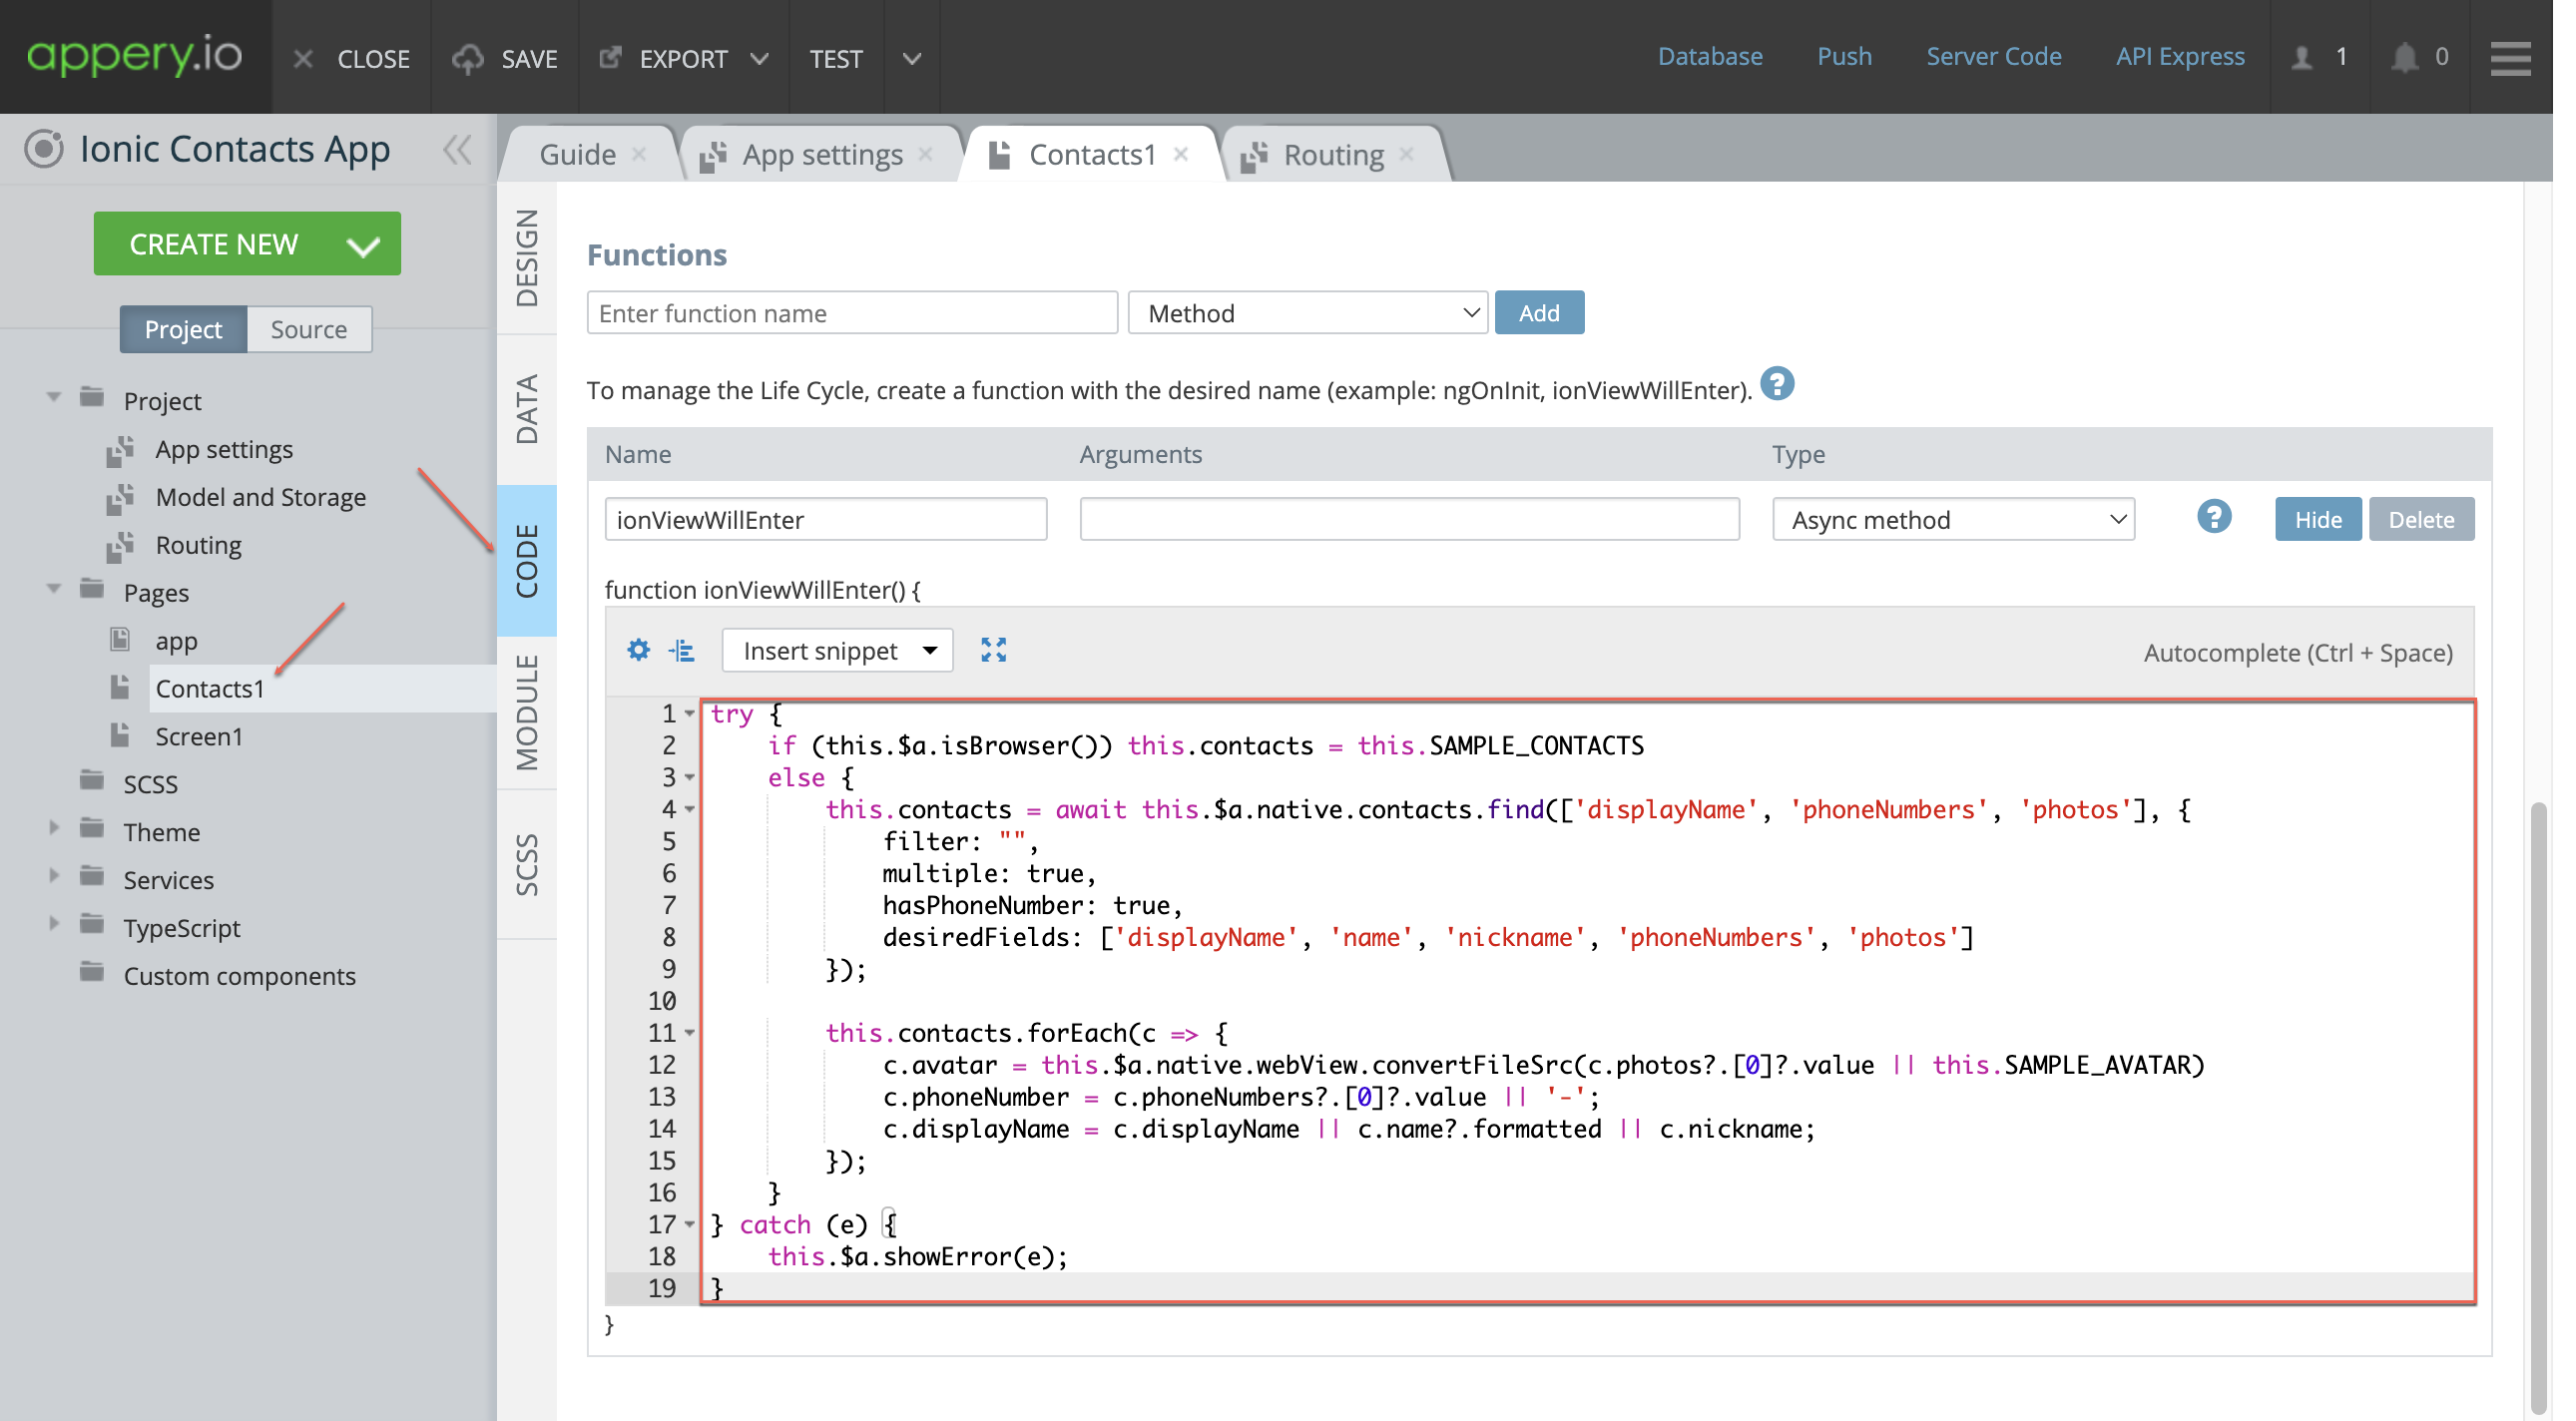
Displaying Contacts List in the App
Now, let’s scroll to the Functions section to see how the contacts list is added in our code.
If the app runs in a browser, it uses the sample contacts from the variable above. But if the app is run on a real device, it accesses the actual contacts list via the predefined `contacts` variable.
Creating a User-Friendly UI
Here’s how to make the contacts list visually appealing and easy to navigate:
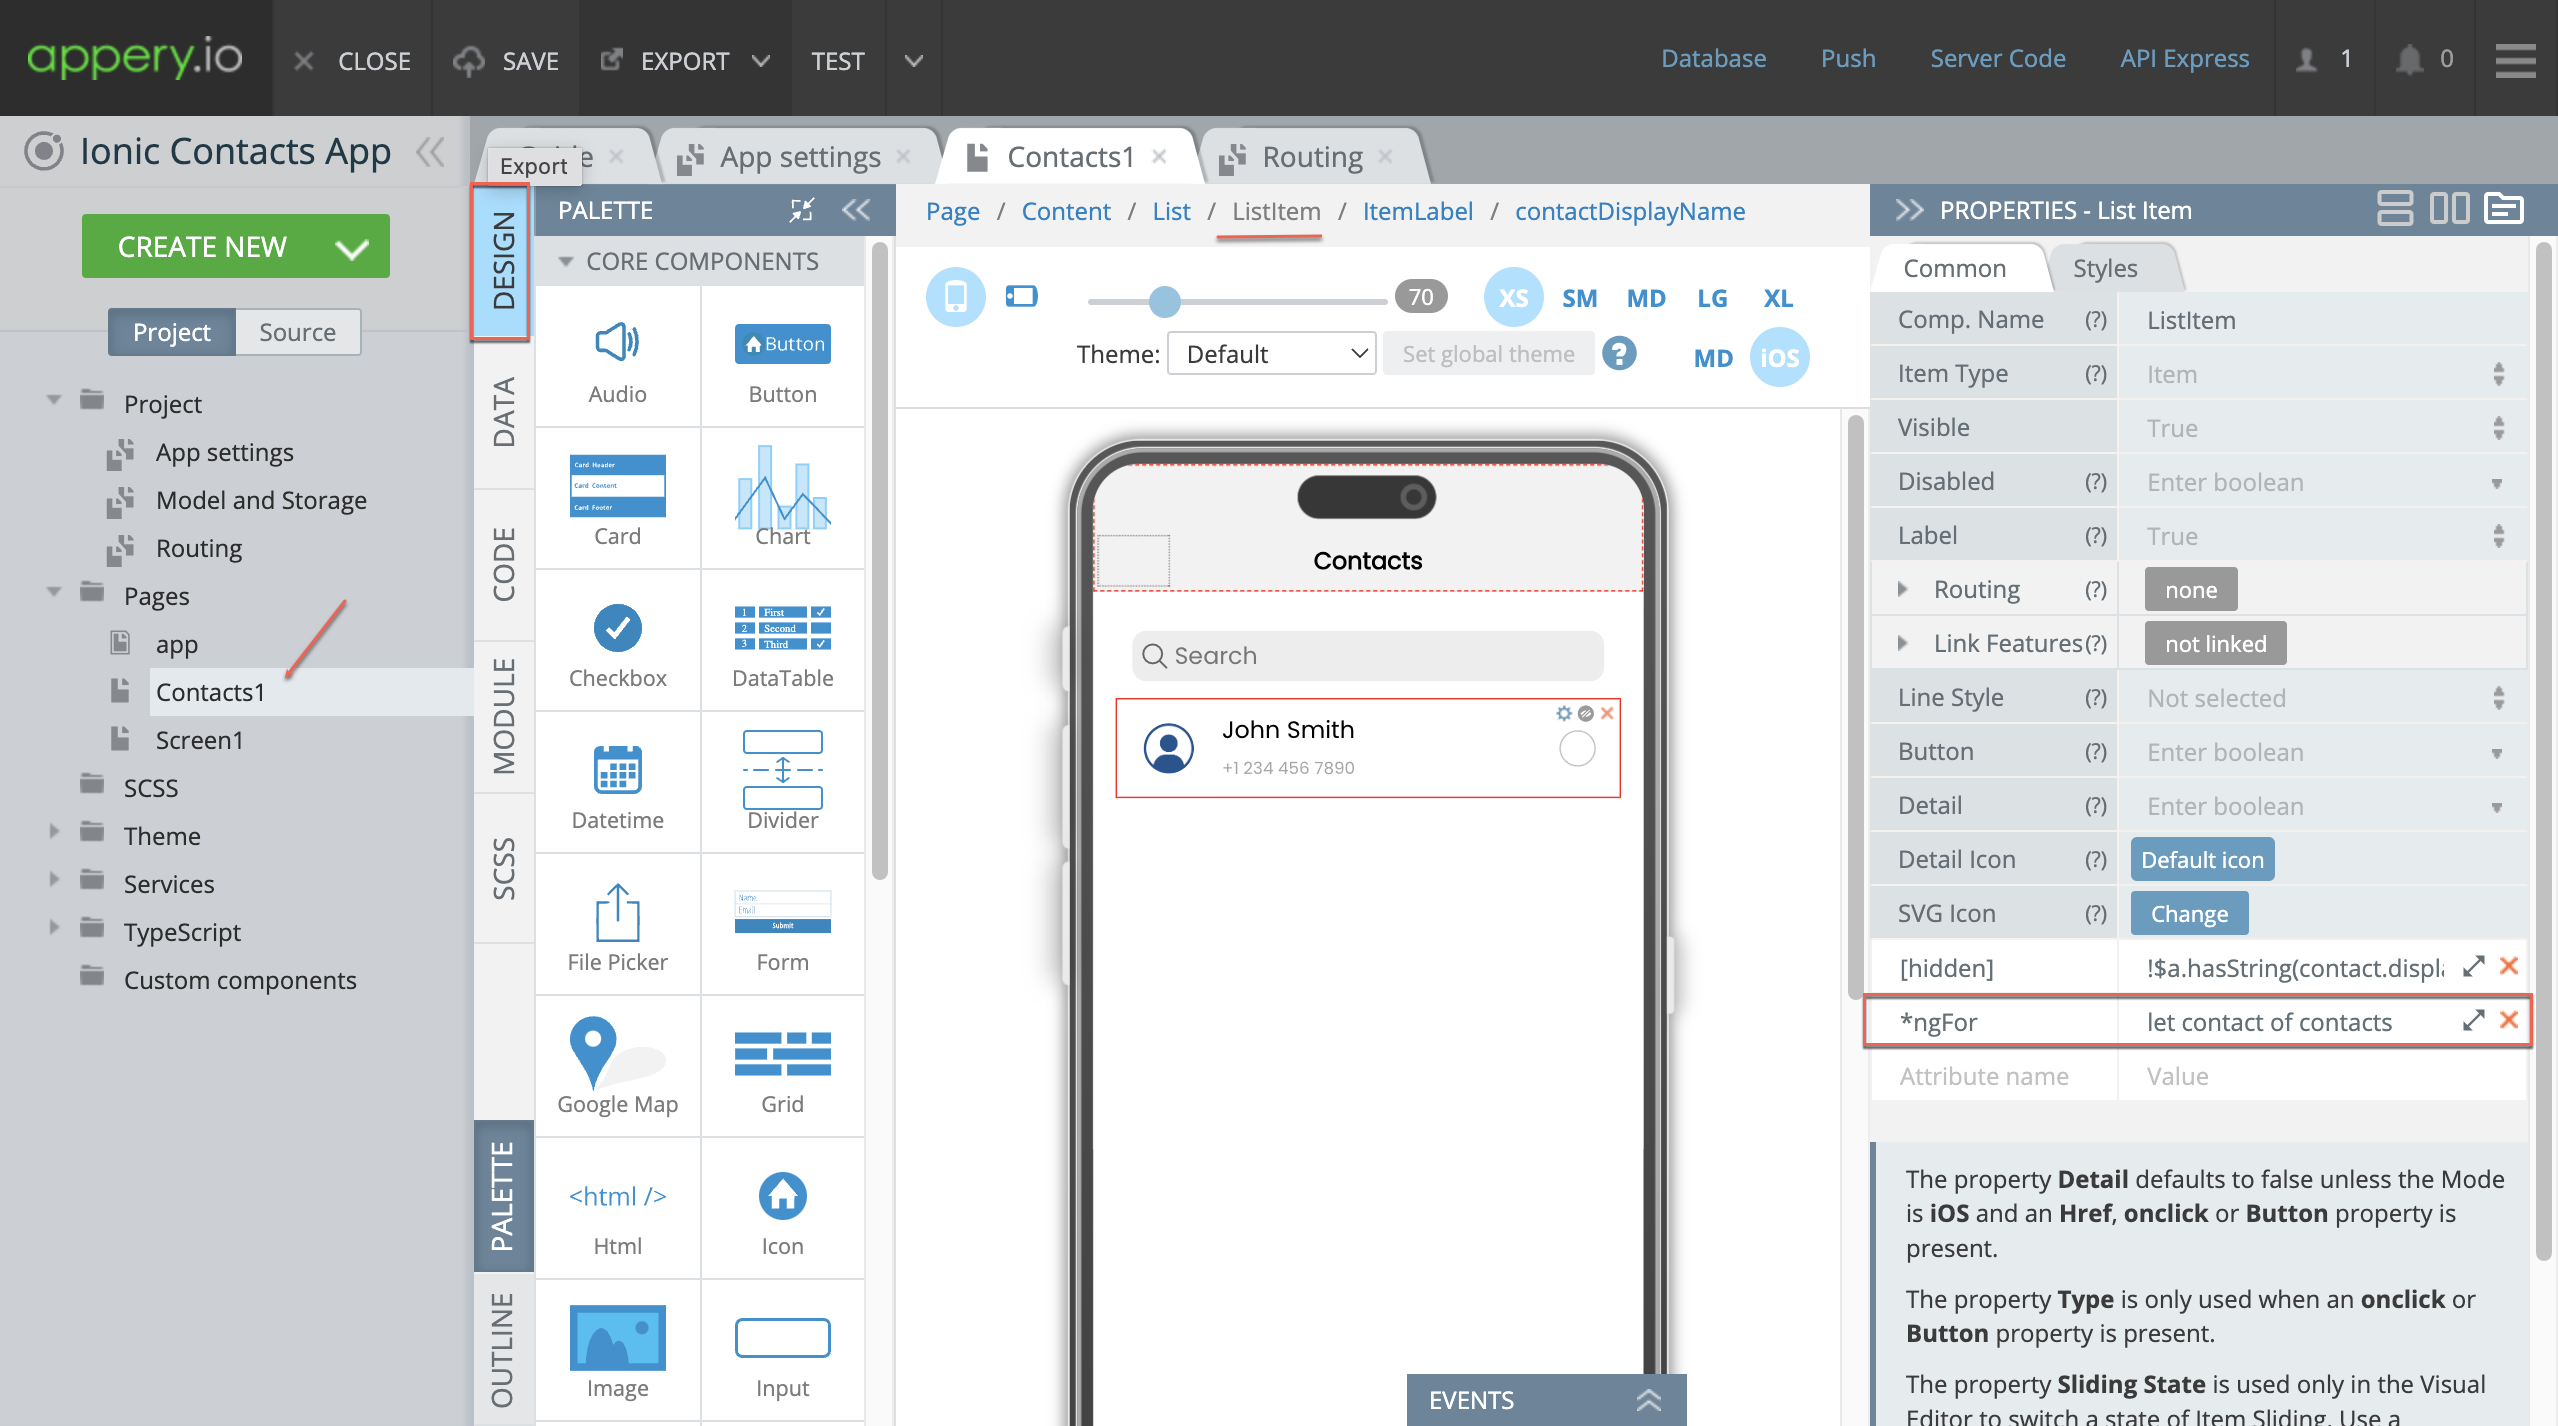
List Component:
Uses ListItem with the *ngFor attribute to iterate through the contact list and display each contact’s information.
Filtering Contacts:
The *ngModel keyword in the Search component allows users to filter contacts by name.
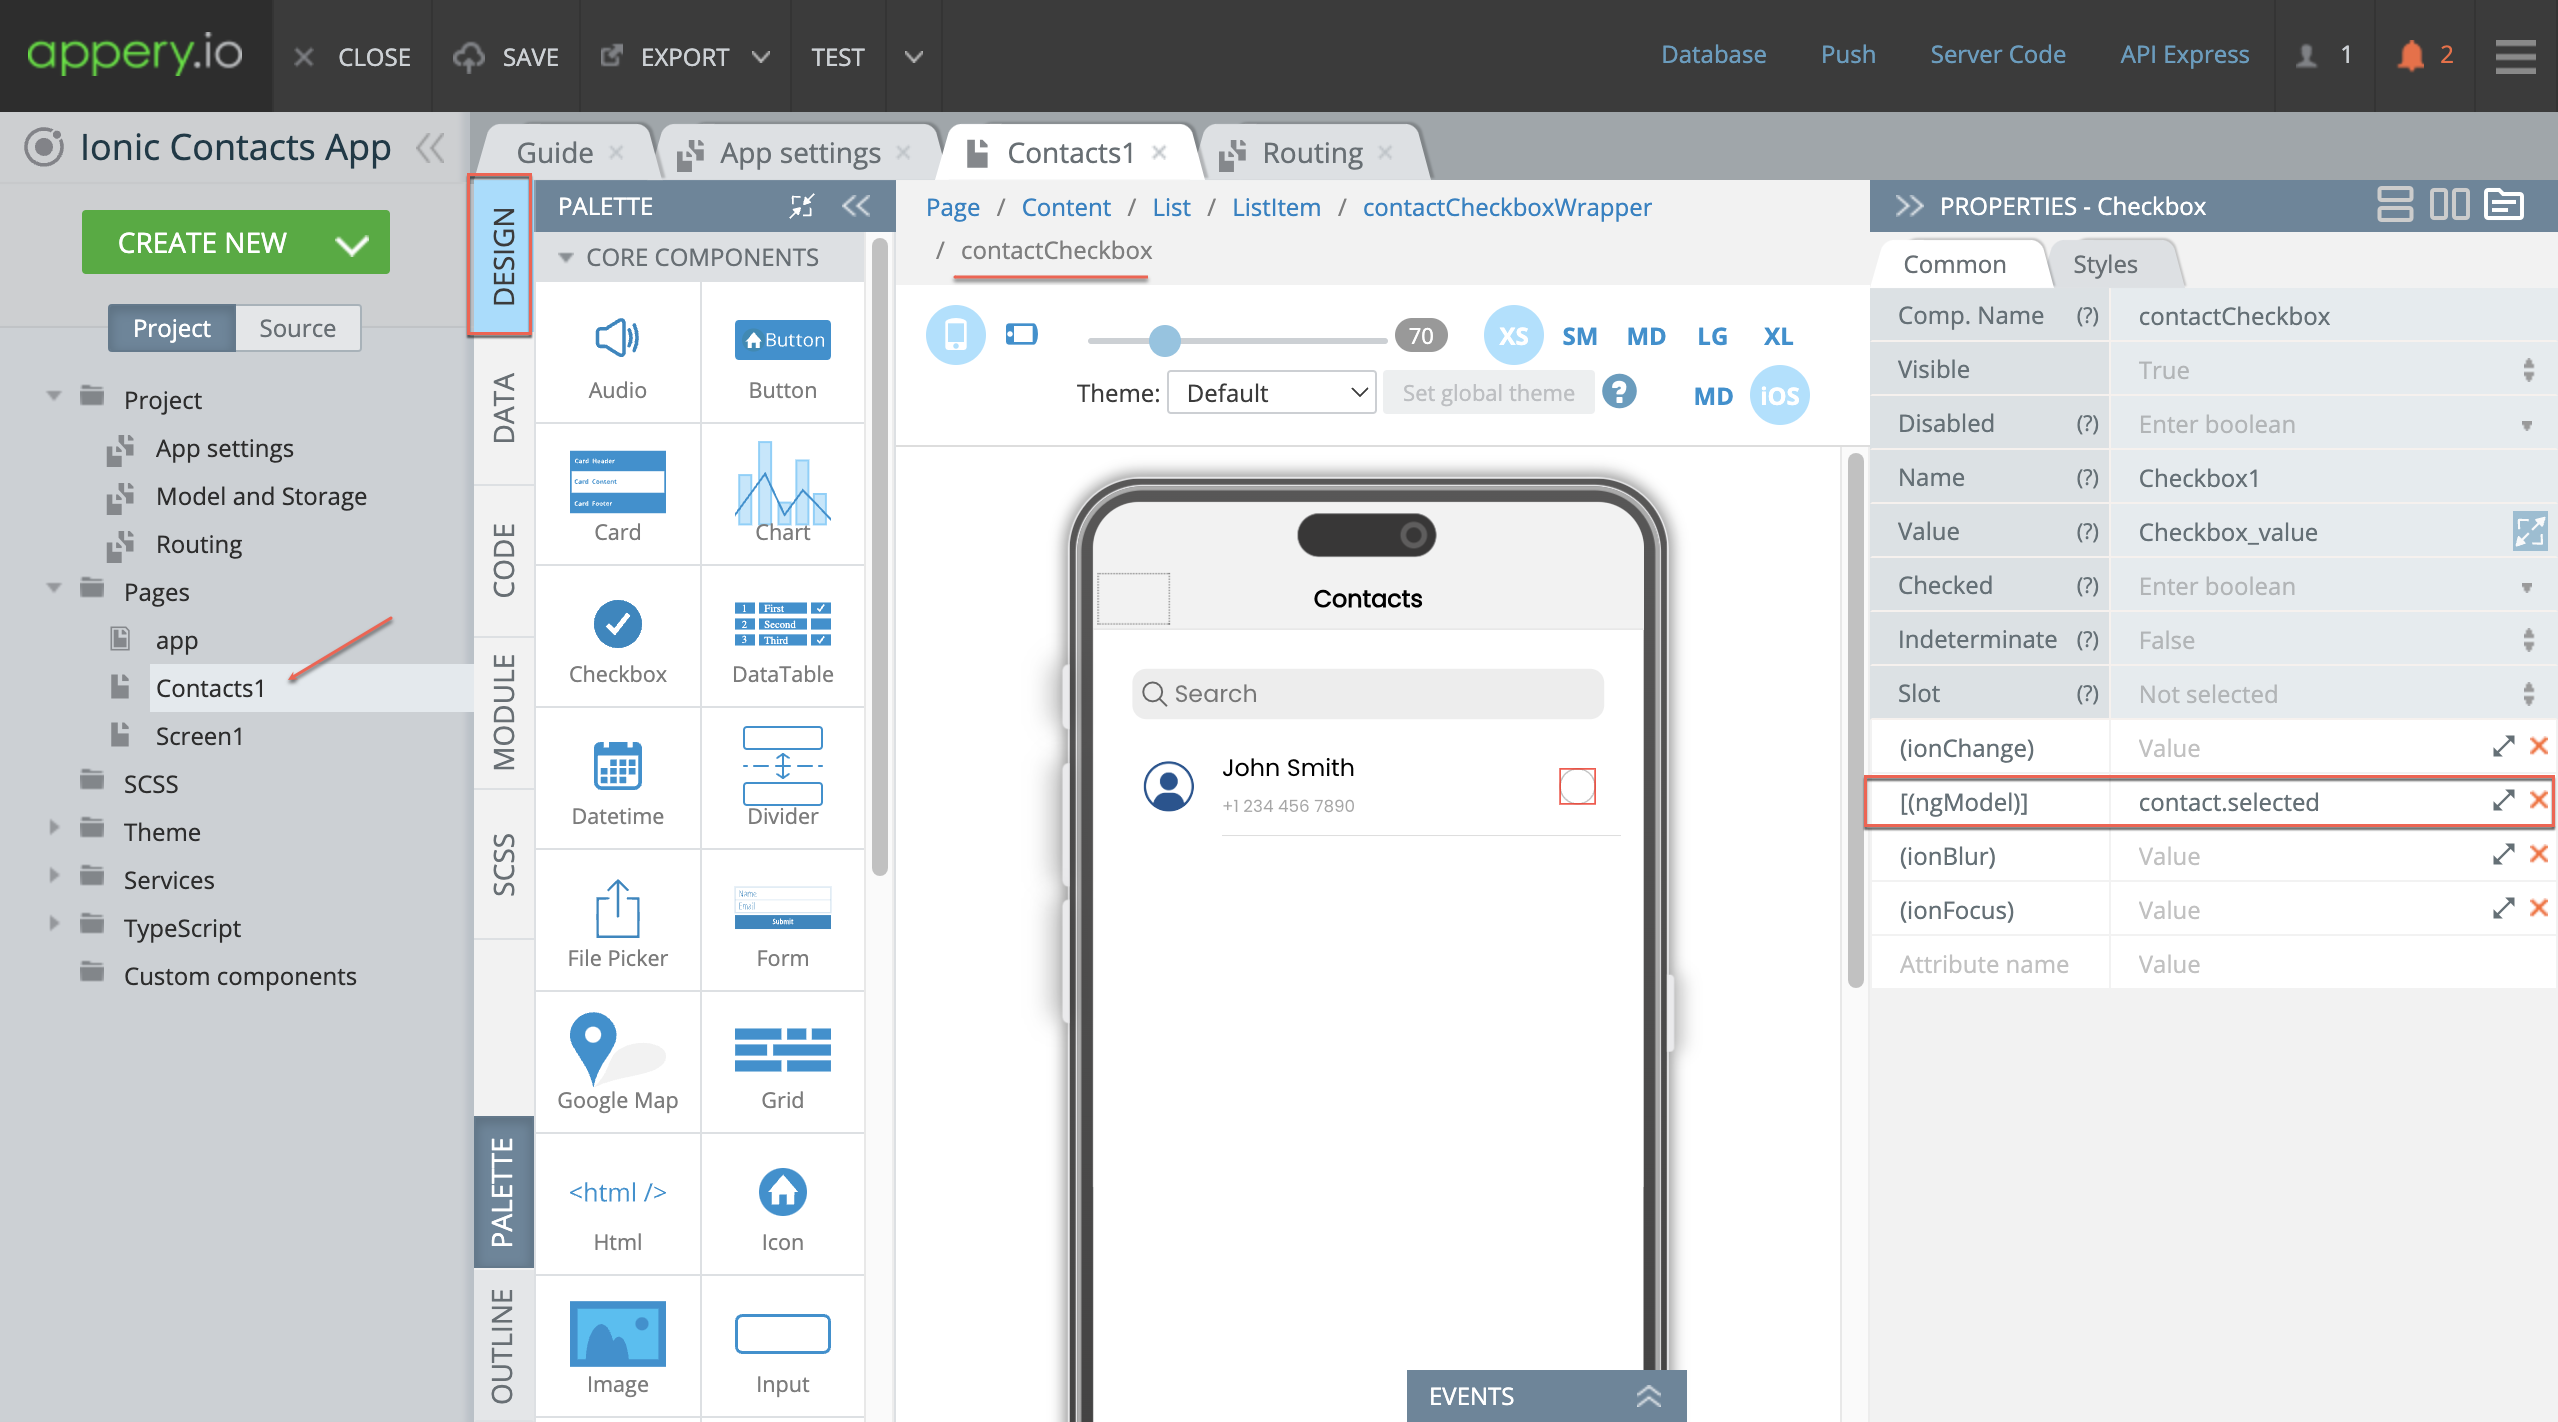
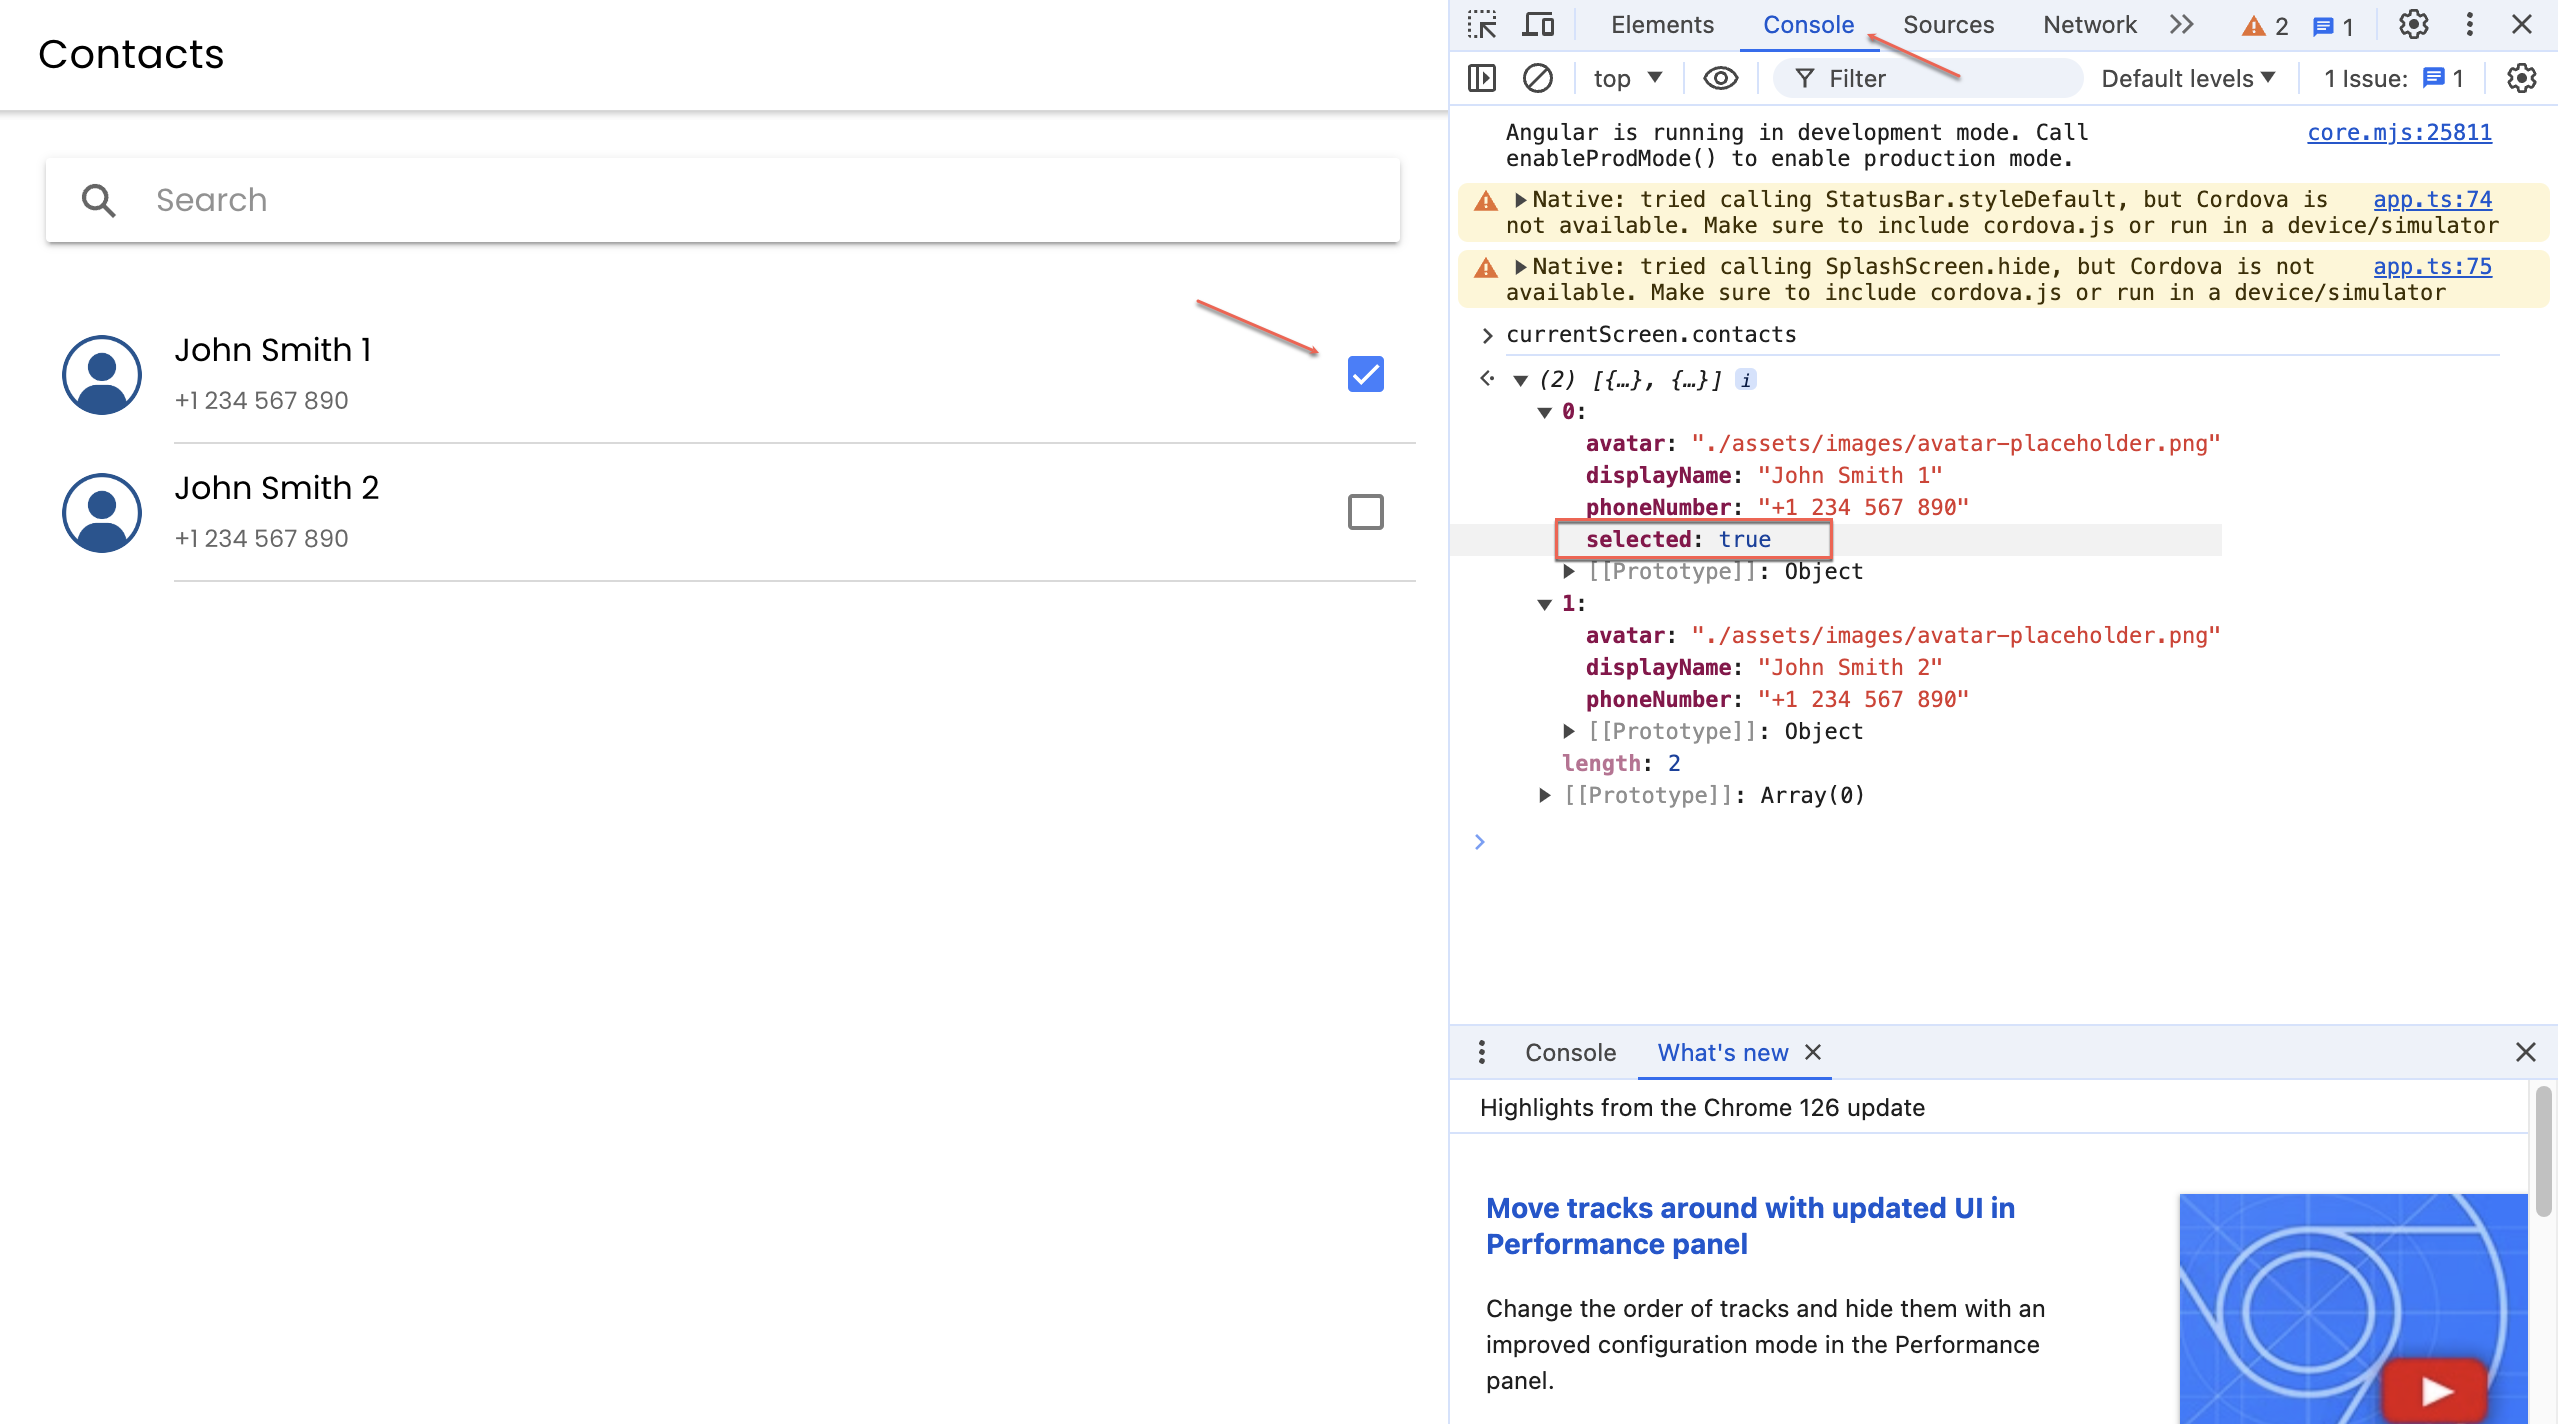
Using Selections:
The app lets users select contacts easily. Selected contacts have the selected property set to true.
Conclusion
And that’s how to get access to the list of contacts in an Ionic app! This straightforward guide aimed to simplify the technical aspects and provide a clear path for even beginners. Now you can easily fetch and display contacts in your Ionic apps.
Happy coding!