Ultimate Guide: Set Up Push Notifications for iOS with Appery.io
Push Notifications for iOS are essential for keeping your app users engaged and informed. Imagine seamlessly integrating this vital feature into your mobile app without coding headaches. That’s exactly what you can do with Appery.io, a user-friendly, low-code app-building platform. Let’s take a closer look at how you can set up push notifications for iOS using Appery.io.
Why Use Push Notifications for iOS?
Push notifications are a powerful way to communicate with your users. They ensure timely updates, promote re-engagement, and improve overall user experience. For iOS apps, configuring push notifications can often seem complex. But with Appery.io, even those without deep technical expertise can accomplish this task with ease. For details, you can watch our how-to video or follow the steps below.
Getting Started with Appery.io
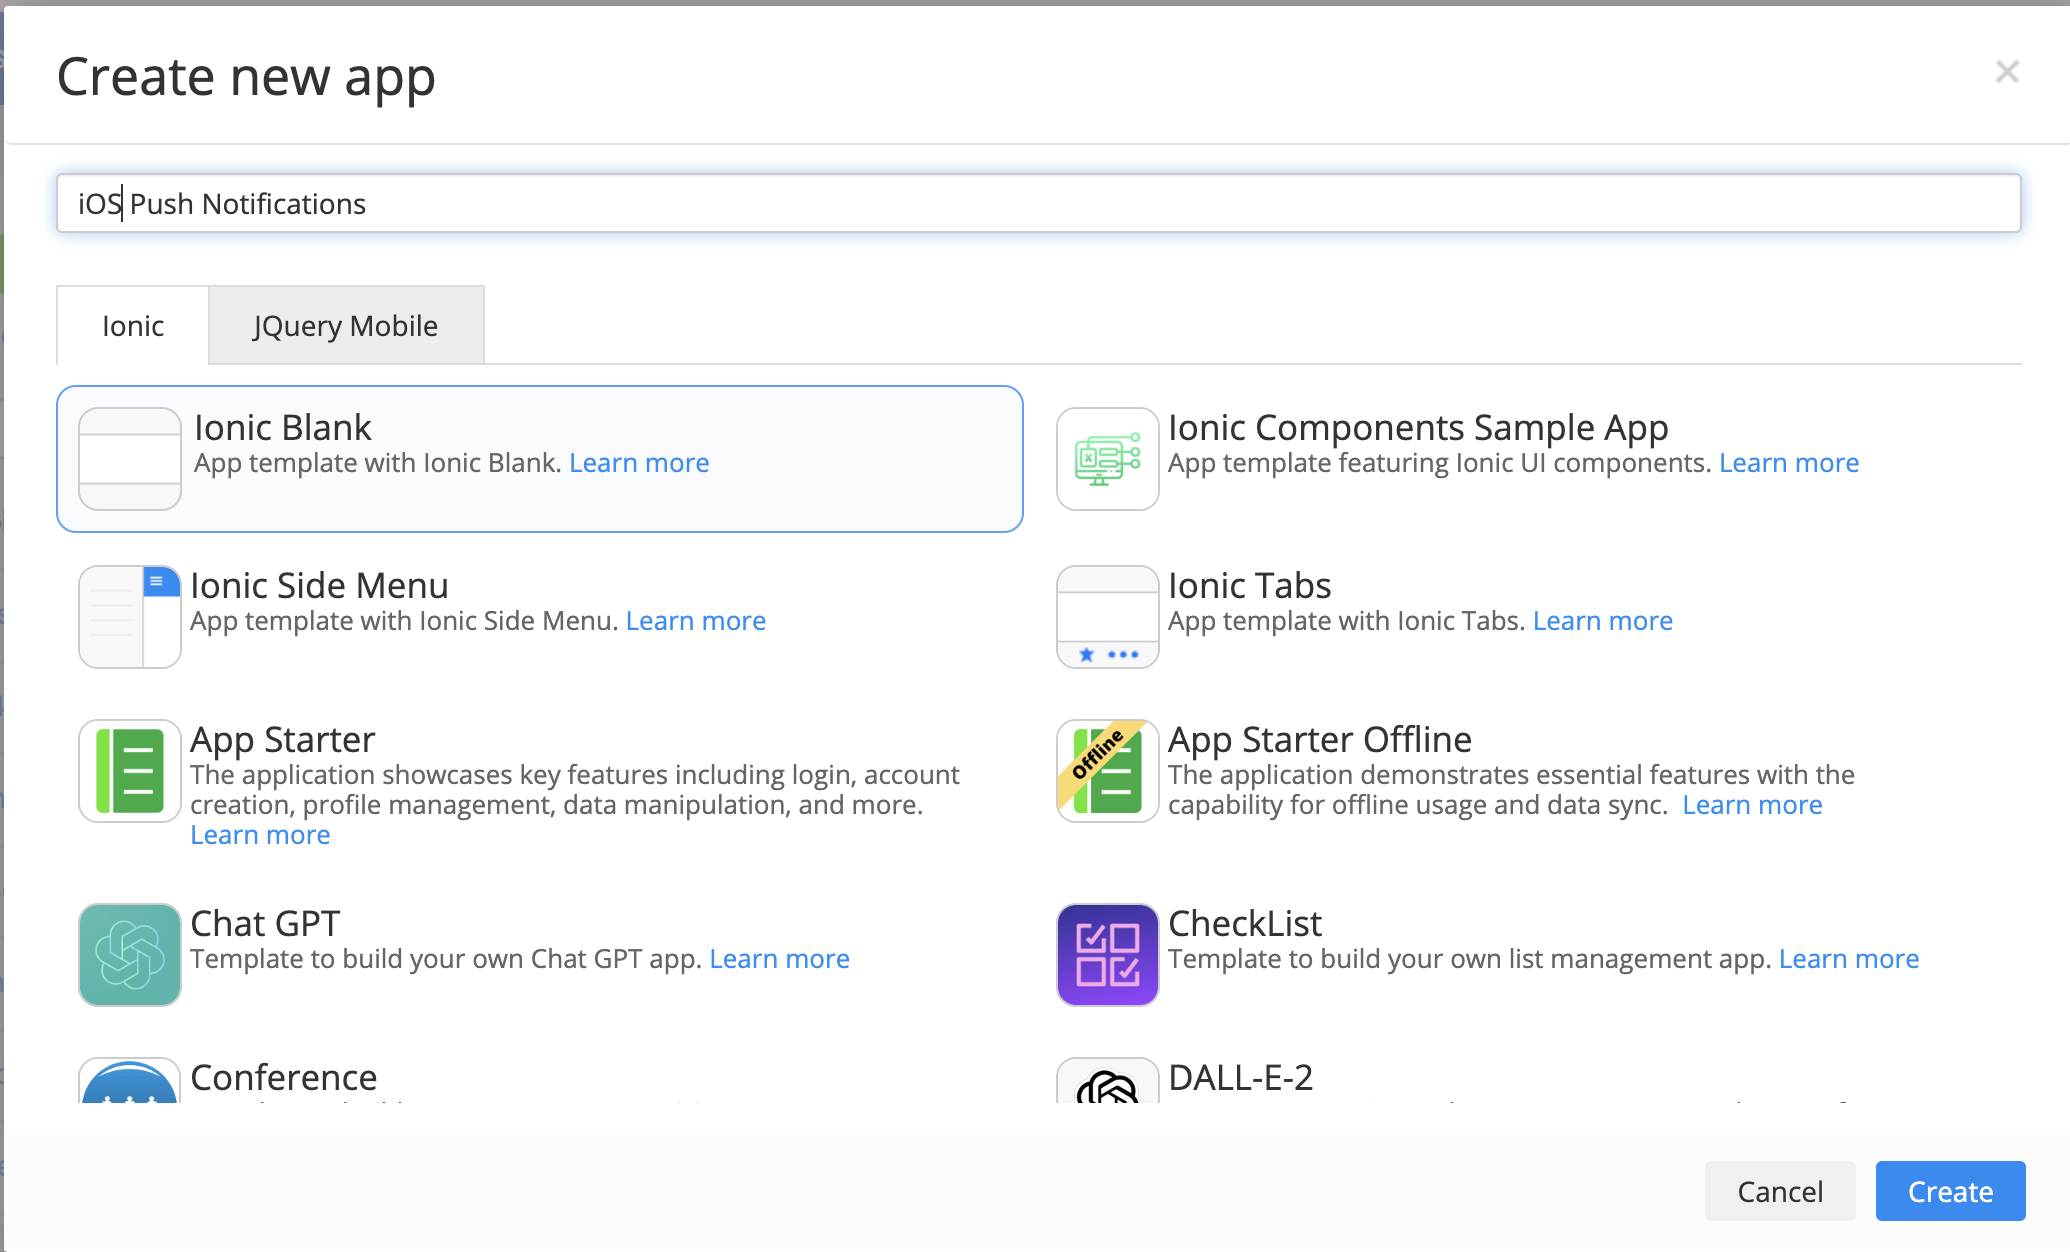
Before diving into the configuration process, you need to create your app on Appery.io:
1. Create Your App:
– Log into Appery.io.
– Start a new project by selecting the template that suits your requirements.
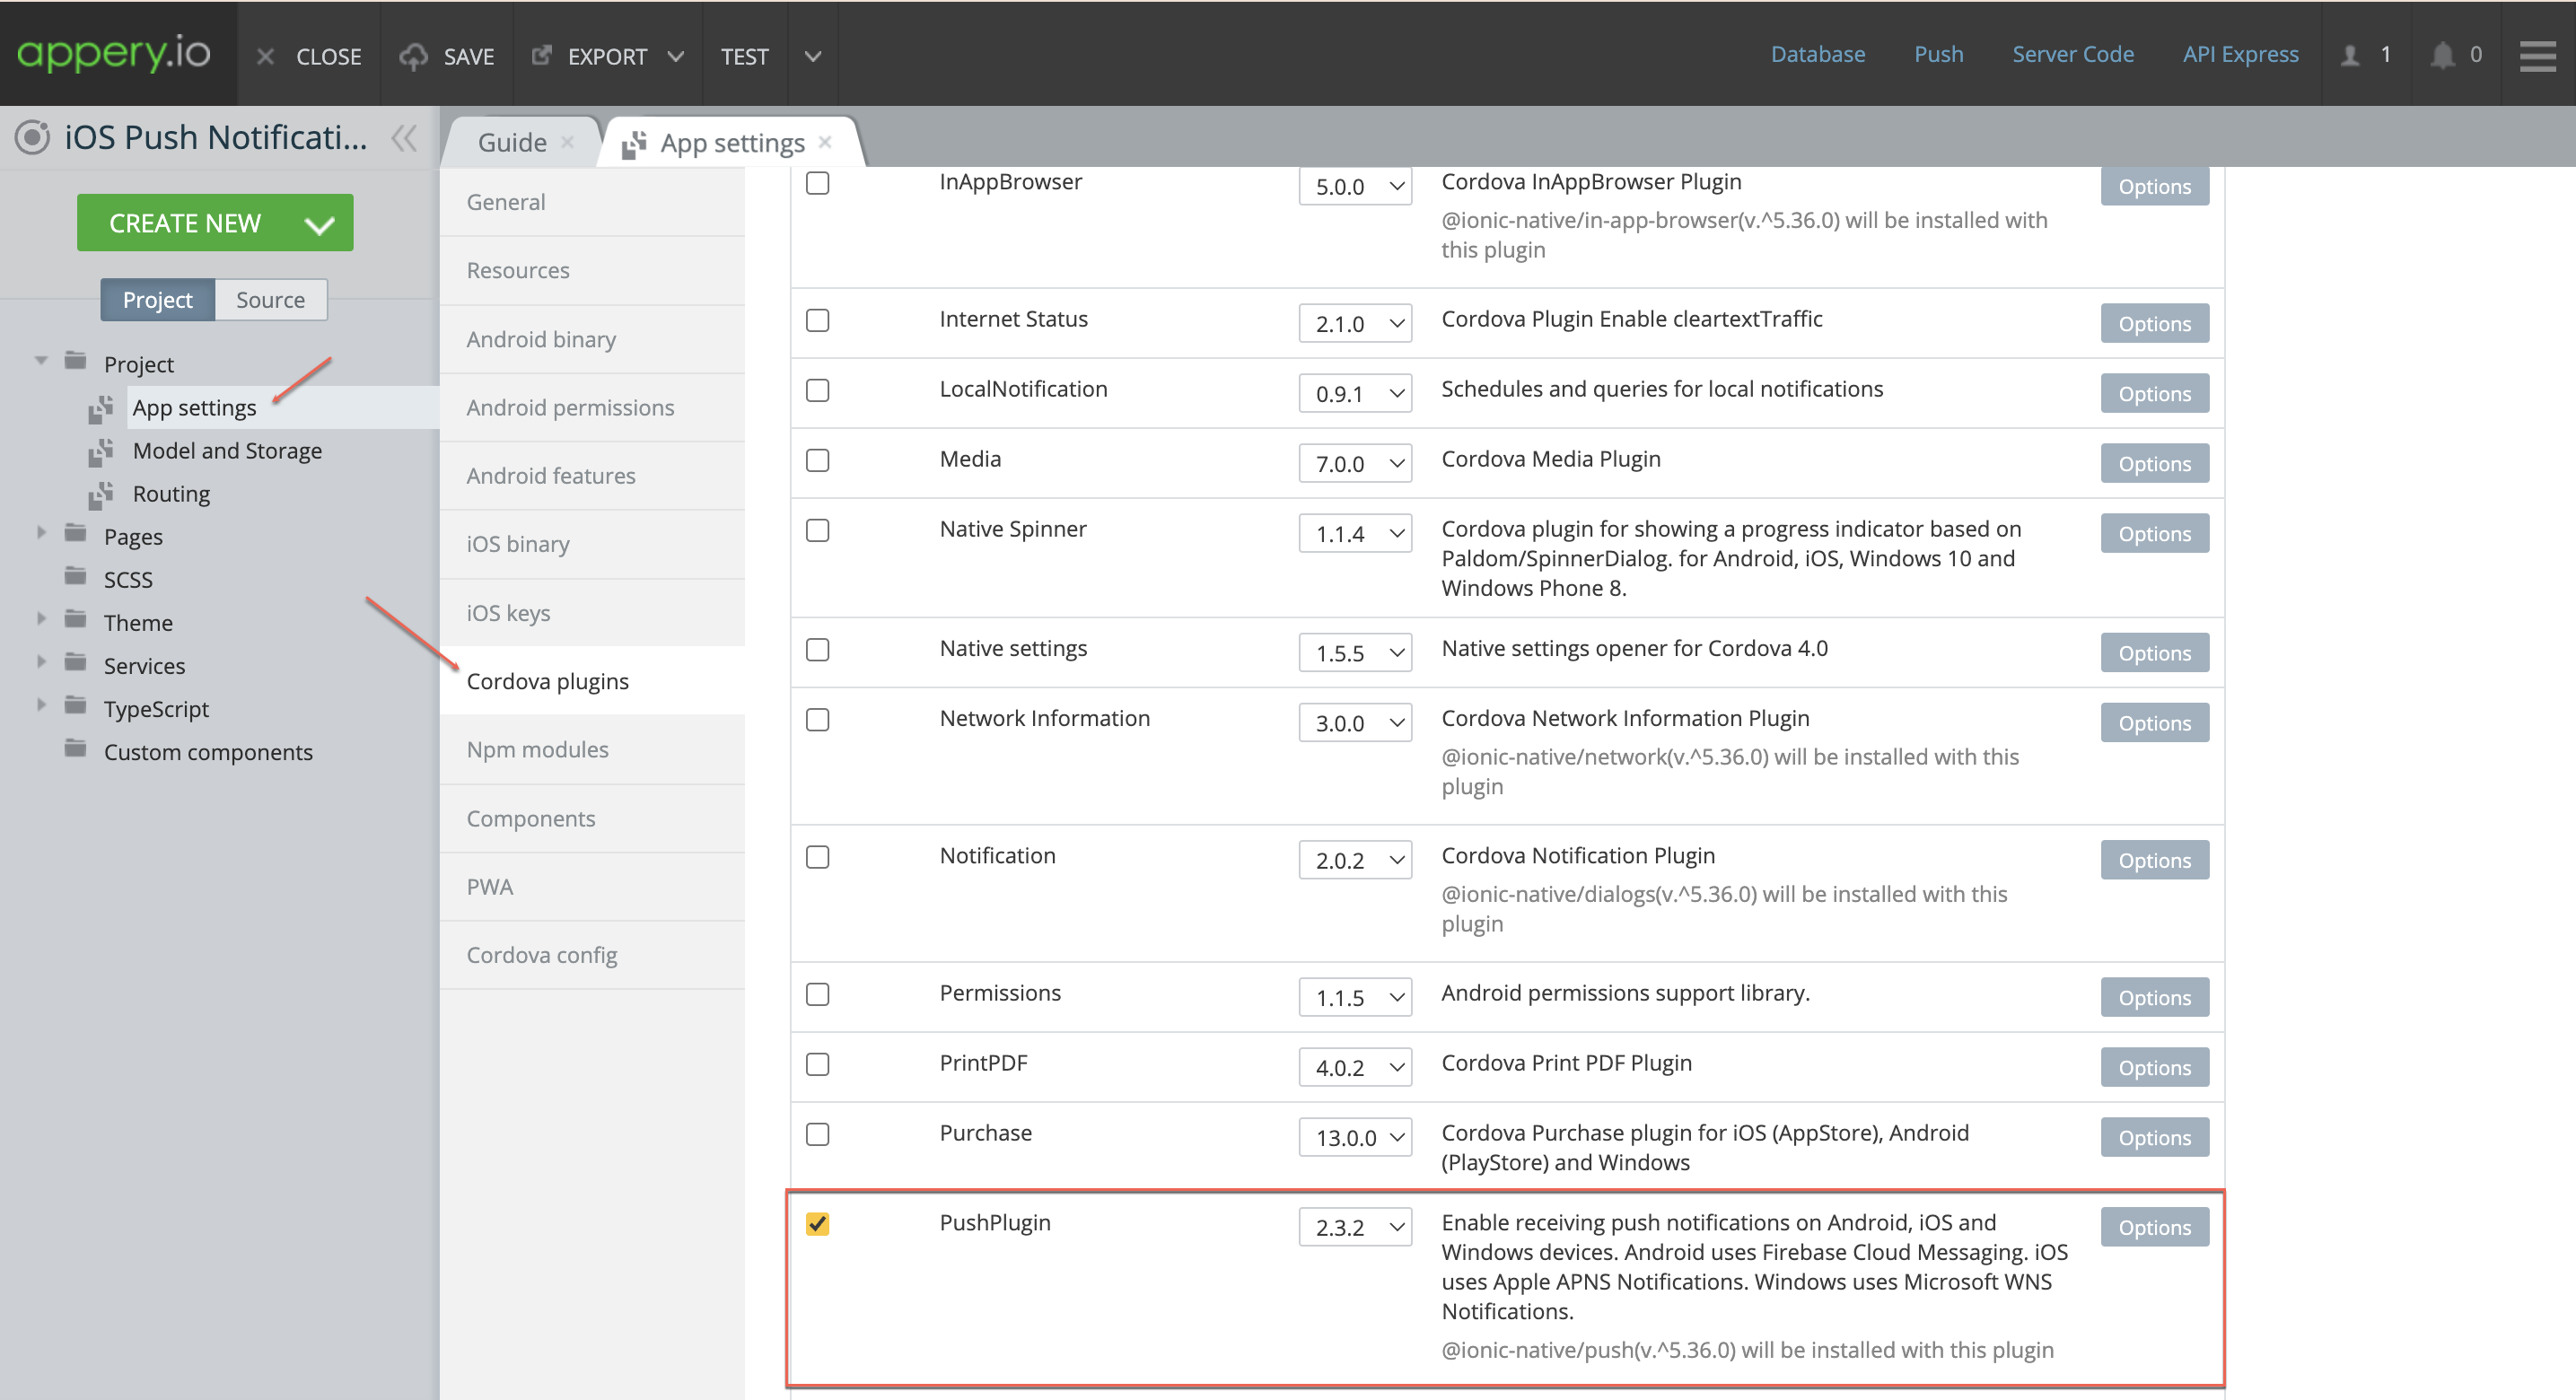
2. Enable Push Cordova Plugin:
– Navigate to the App settings > Cordova plugins section.
– Enable the Push Cordova plugin to add push notification capabilities.
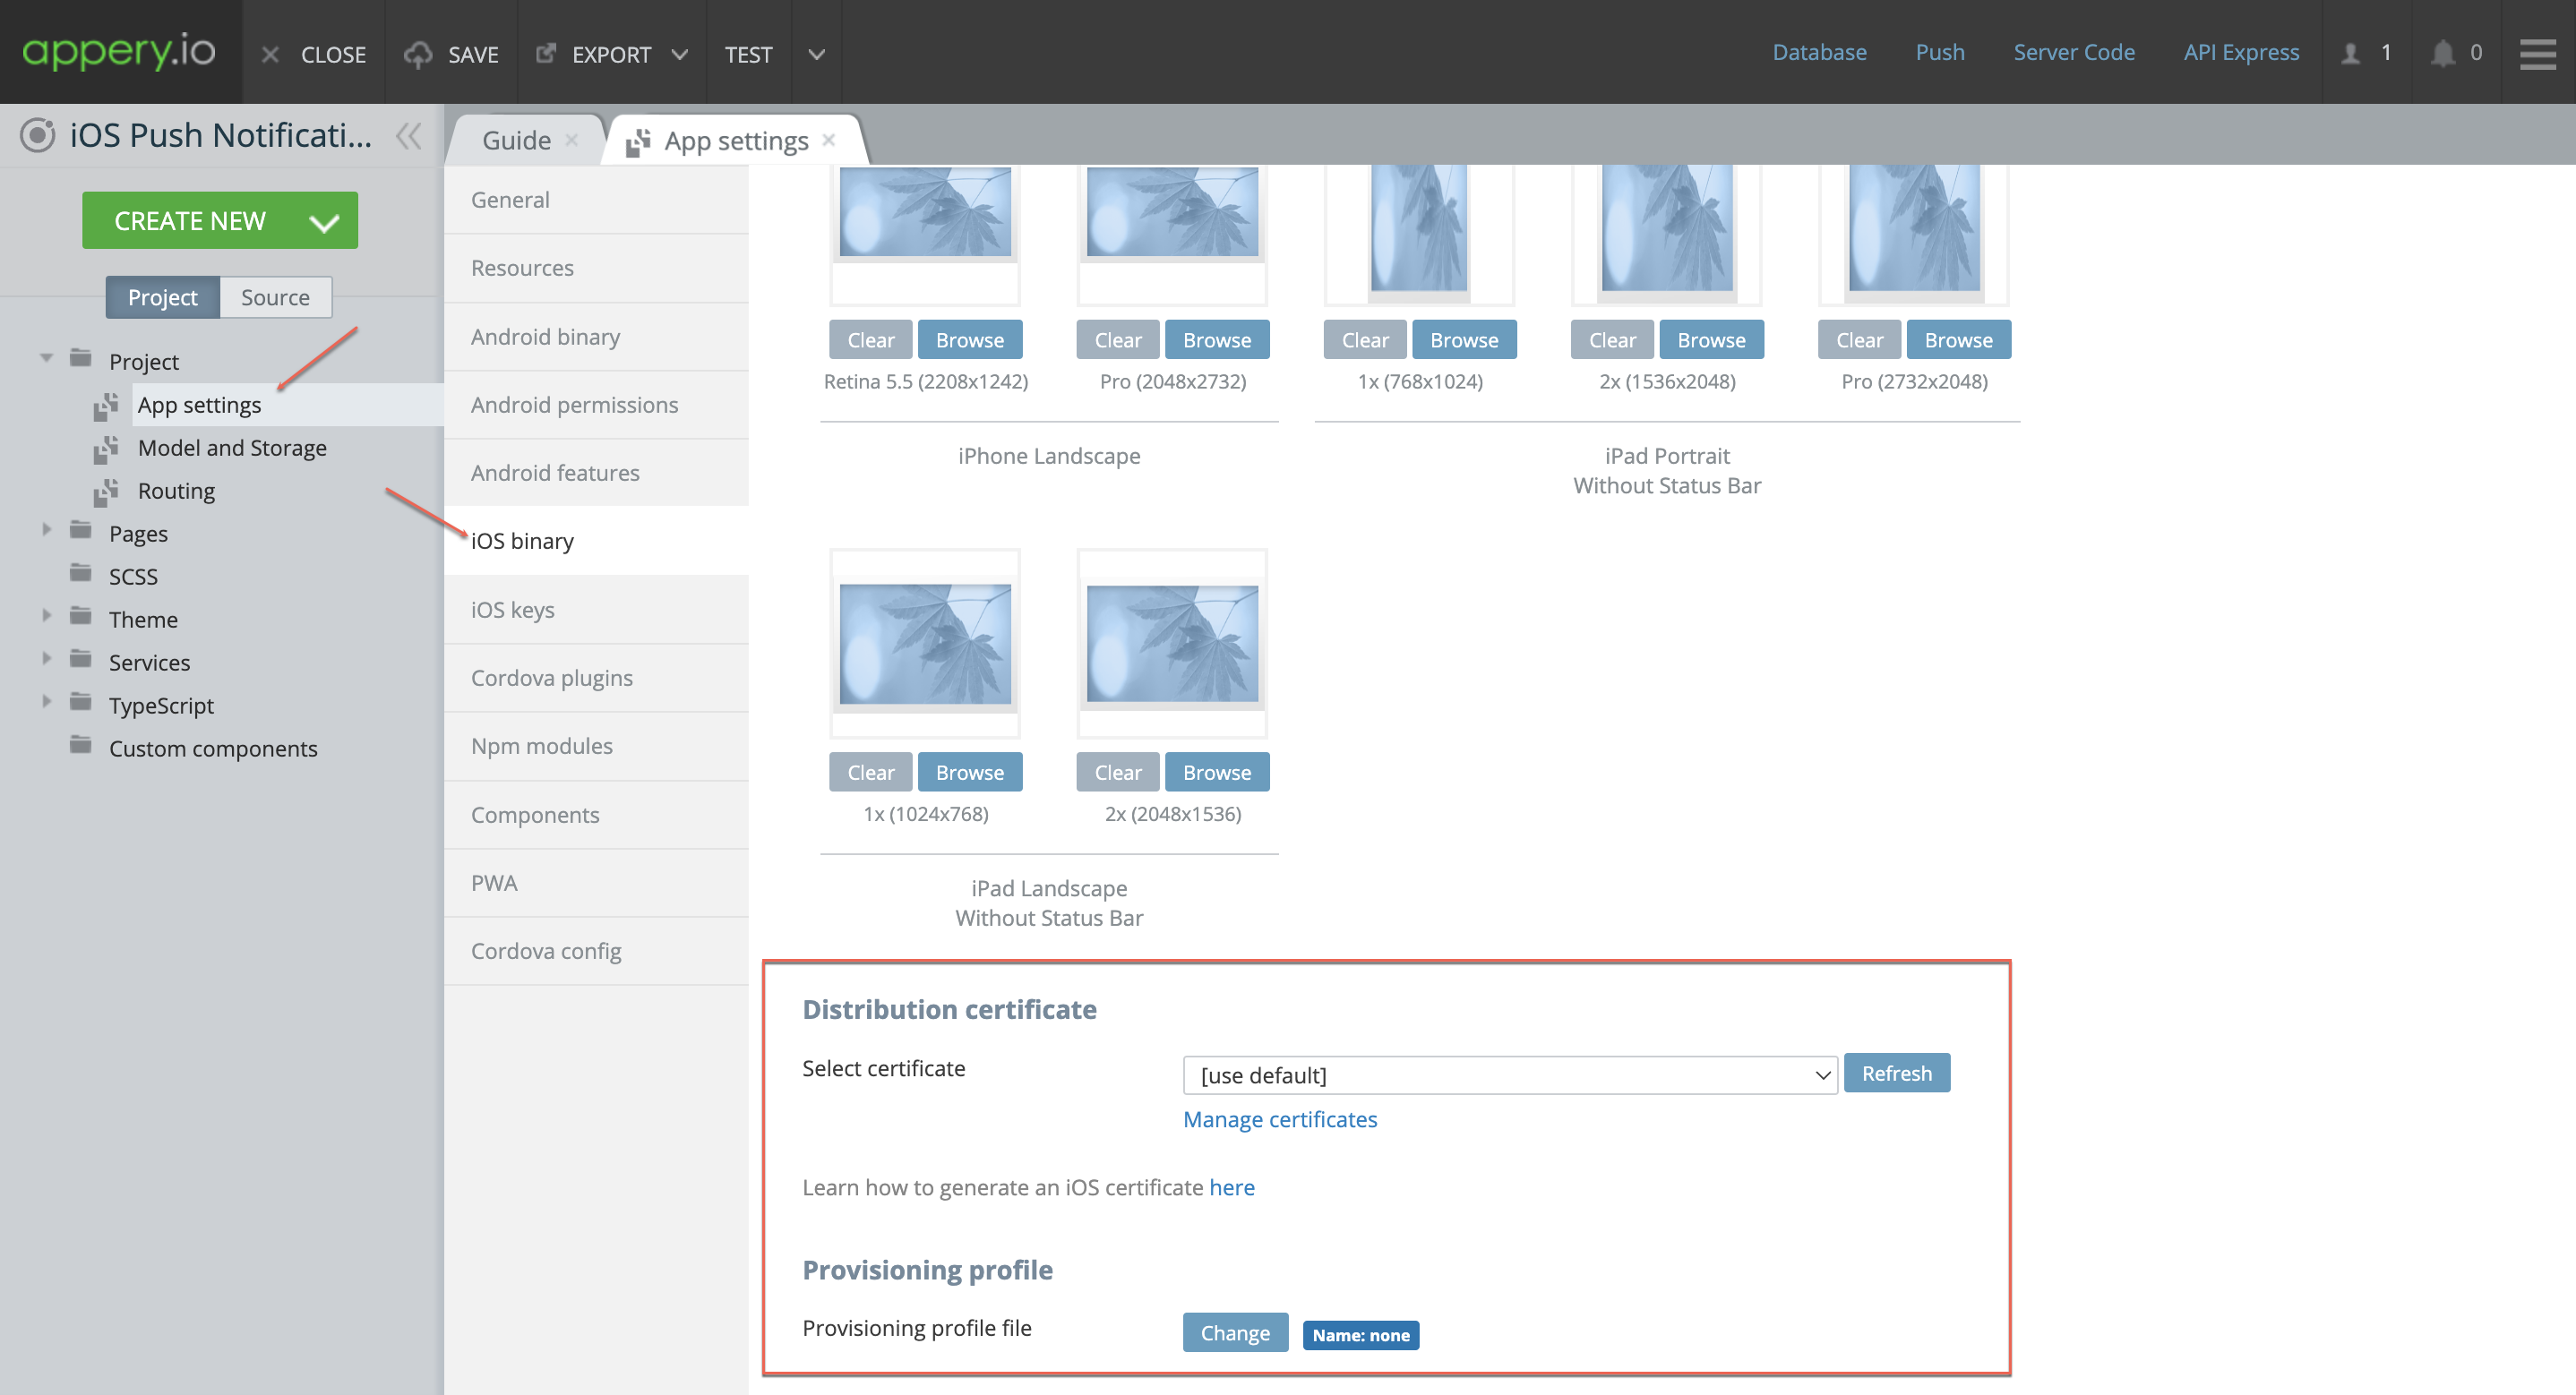
3. Configure iOS Binary:
– Go to the iOS binary section and note that the app already has a bundle ID that is required for setting an app for iOS.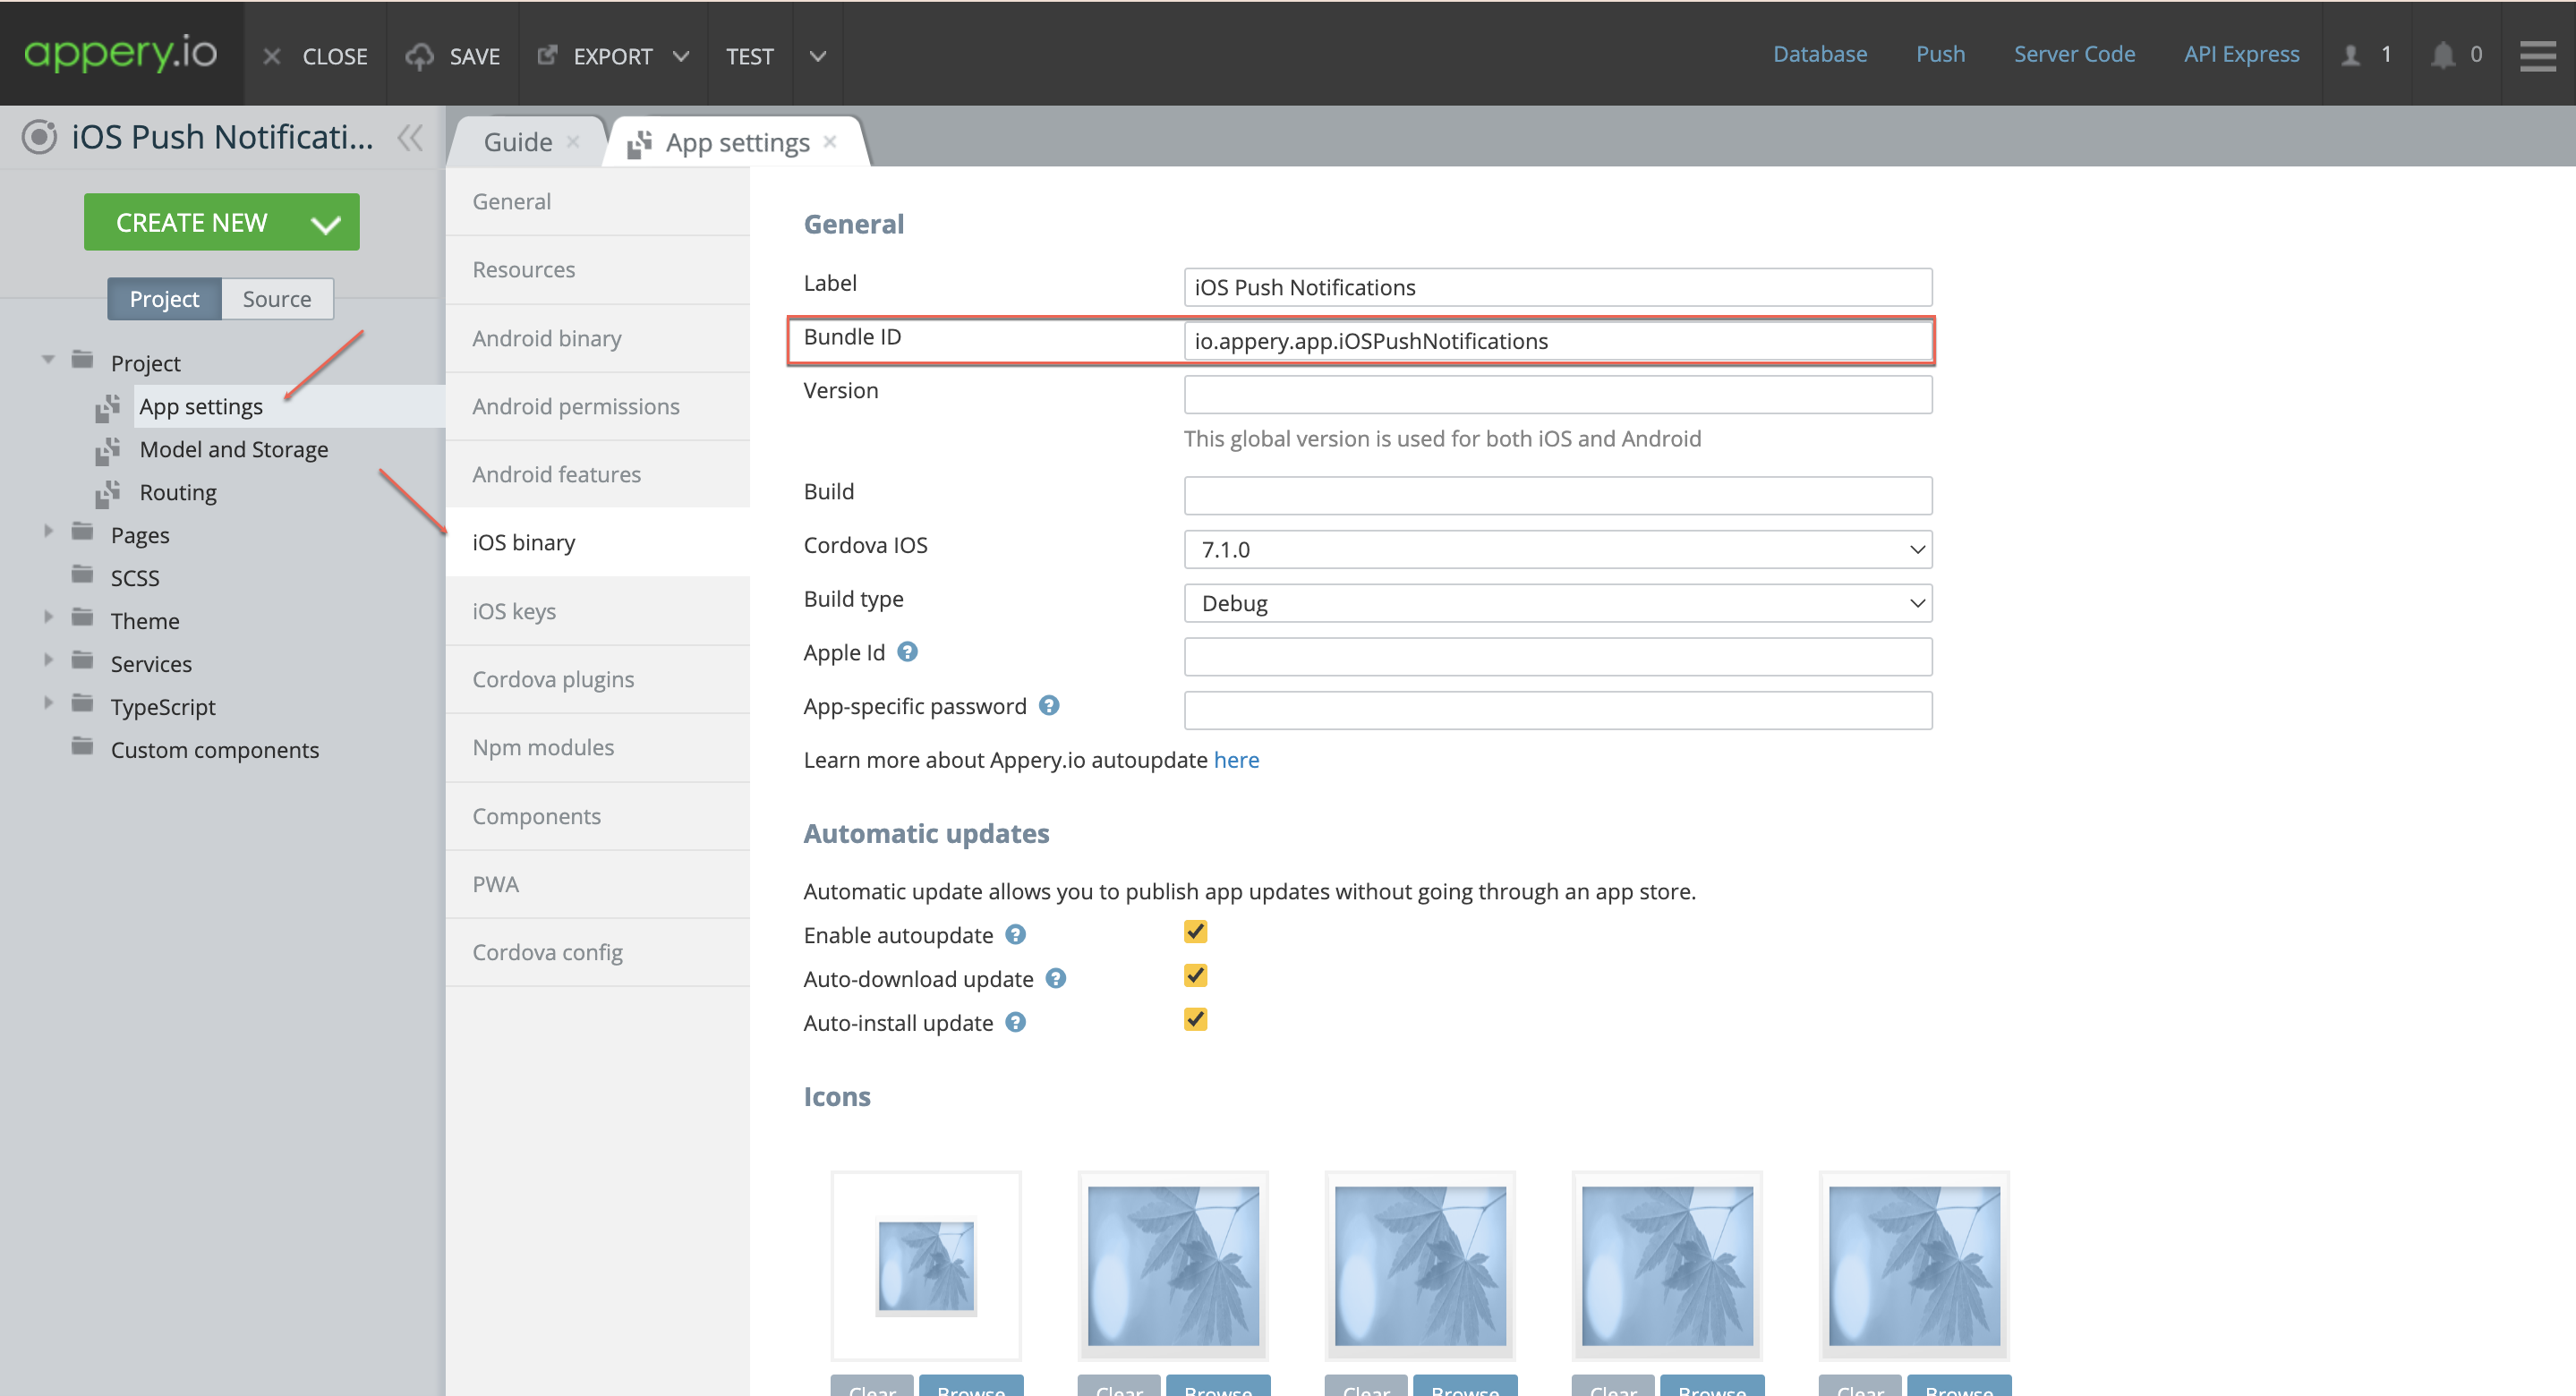
Note that the build type indicated is Debug which means the app is created for testing purposes. When building an app to be uploaded to the App Store, select the Release option instead.
– However, due to Apple’s policies, you need a a distribution certificate and provisioning profile to install apps on iOS devices.
Setting Up Your Apple Developer Account
Setting up your Apple Developer account is a must if you plan to develop for iOS. So, if you have no account, you need to create it. When done, you are ready to start with configuring your Apple Developer Console.
1. Create a Certificate:
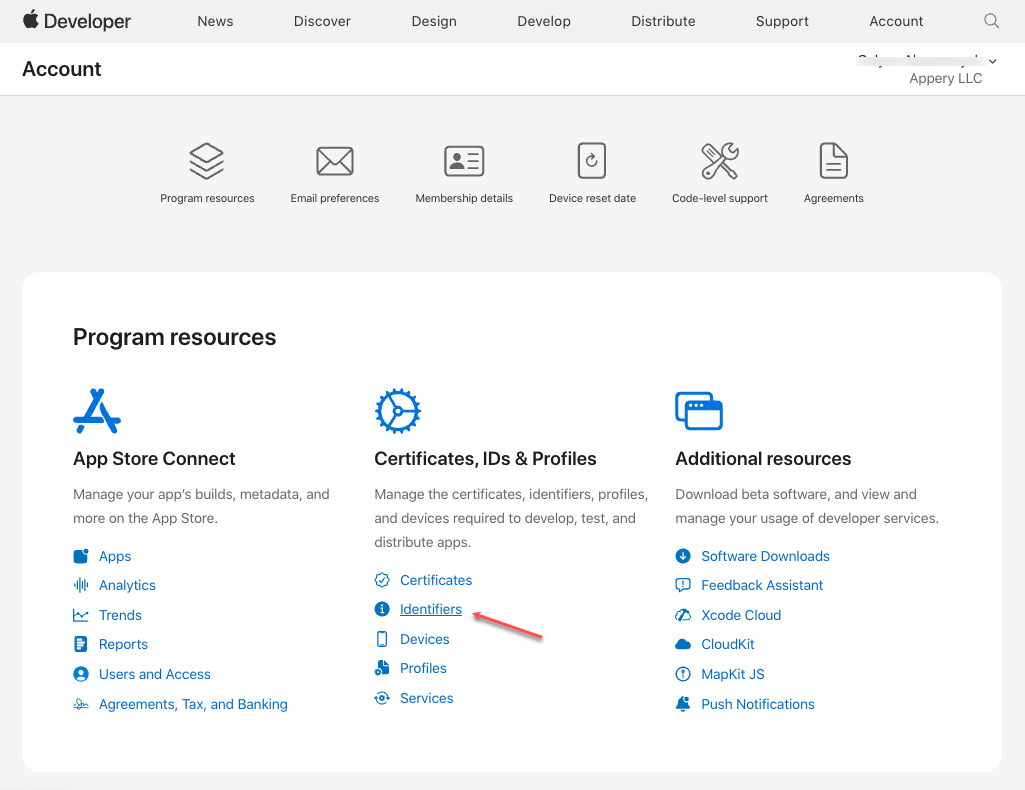
– Log into the Apple Developer Console, click the Identifiers link.
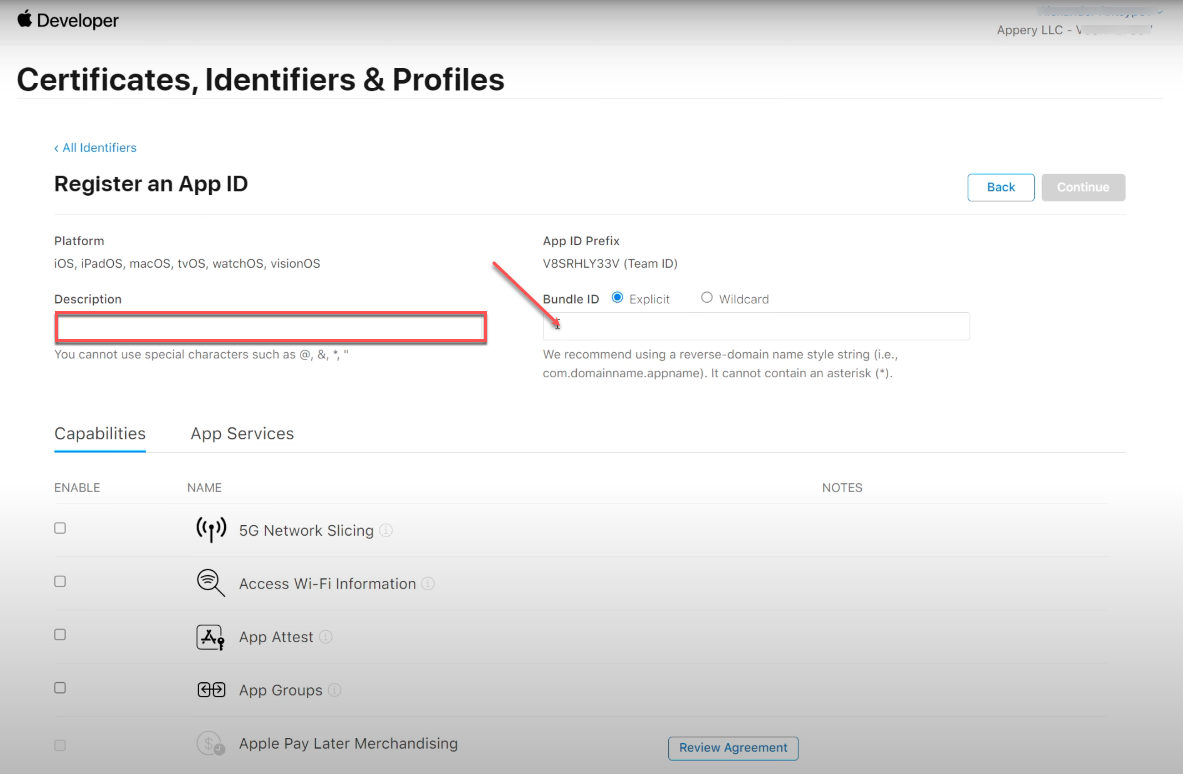
– Create an identifier for your app by clicking the + button, specifying it as an App ID (paste the Bundle ID you copied before) and adding the description.
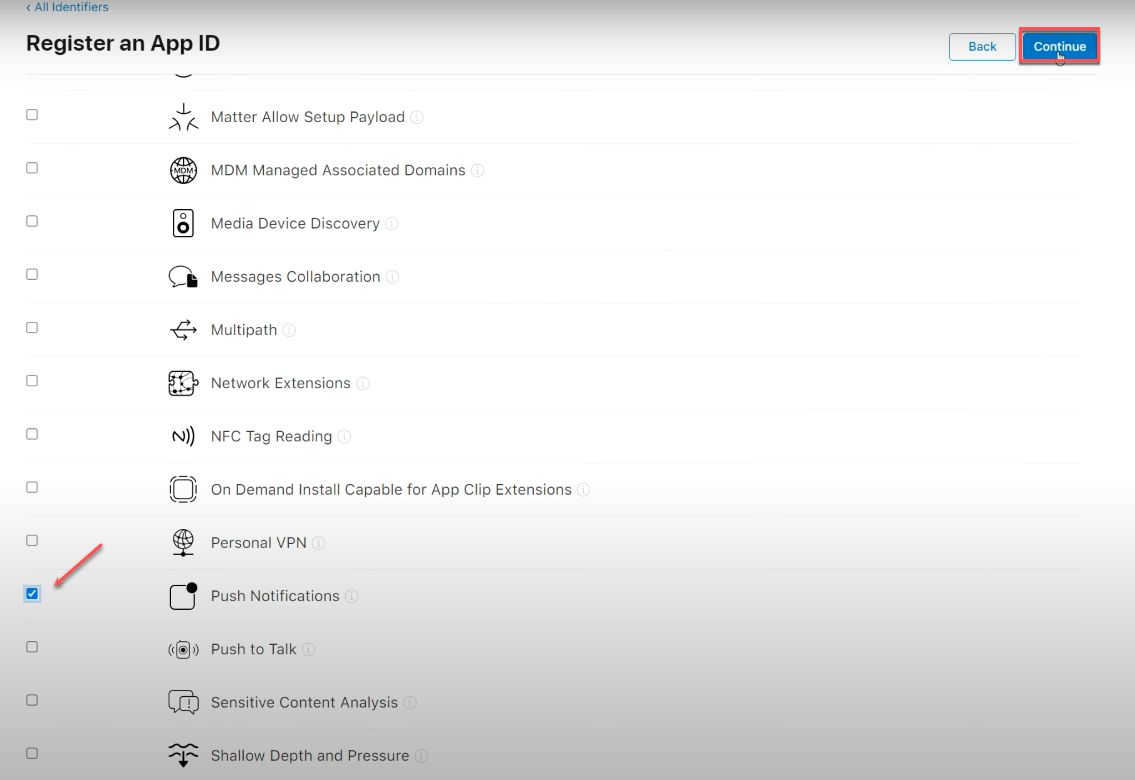
– Scroll down to enable the push notifications capability and register your new app.
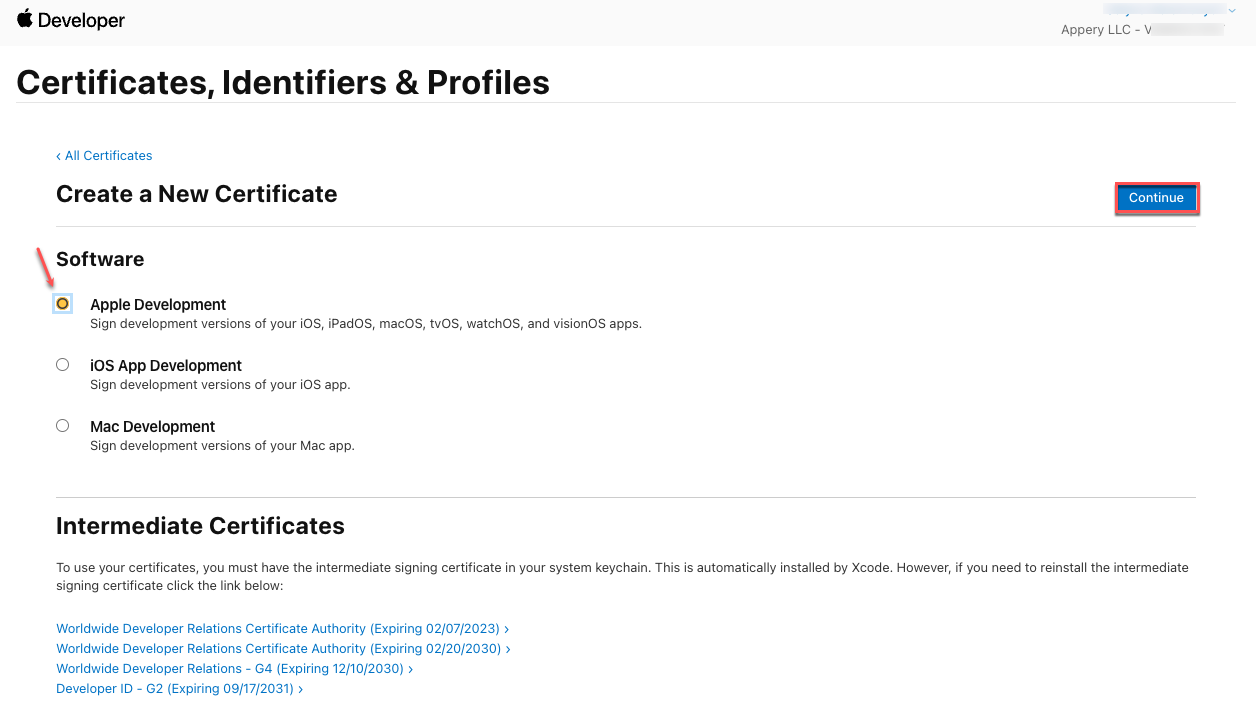
– Switch to the Certificates section and click + to create a new Apple Development certificate, then click Continue.
Note that the Apple Development certificate type can be used for development purposes only! If you are planning to publish your app with the App Store, the build type iOS Distribution is required!
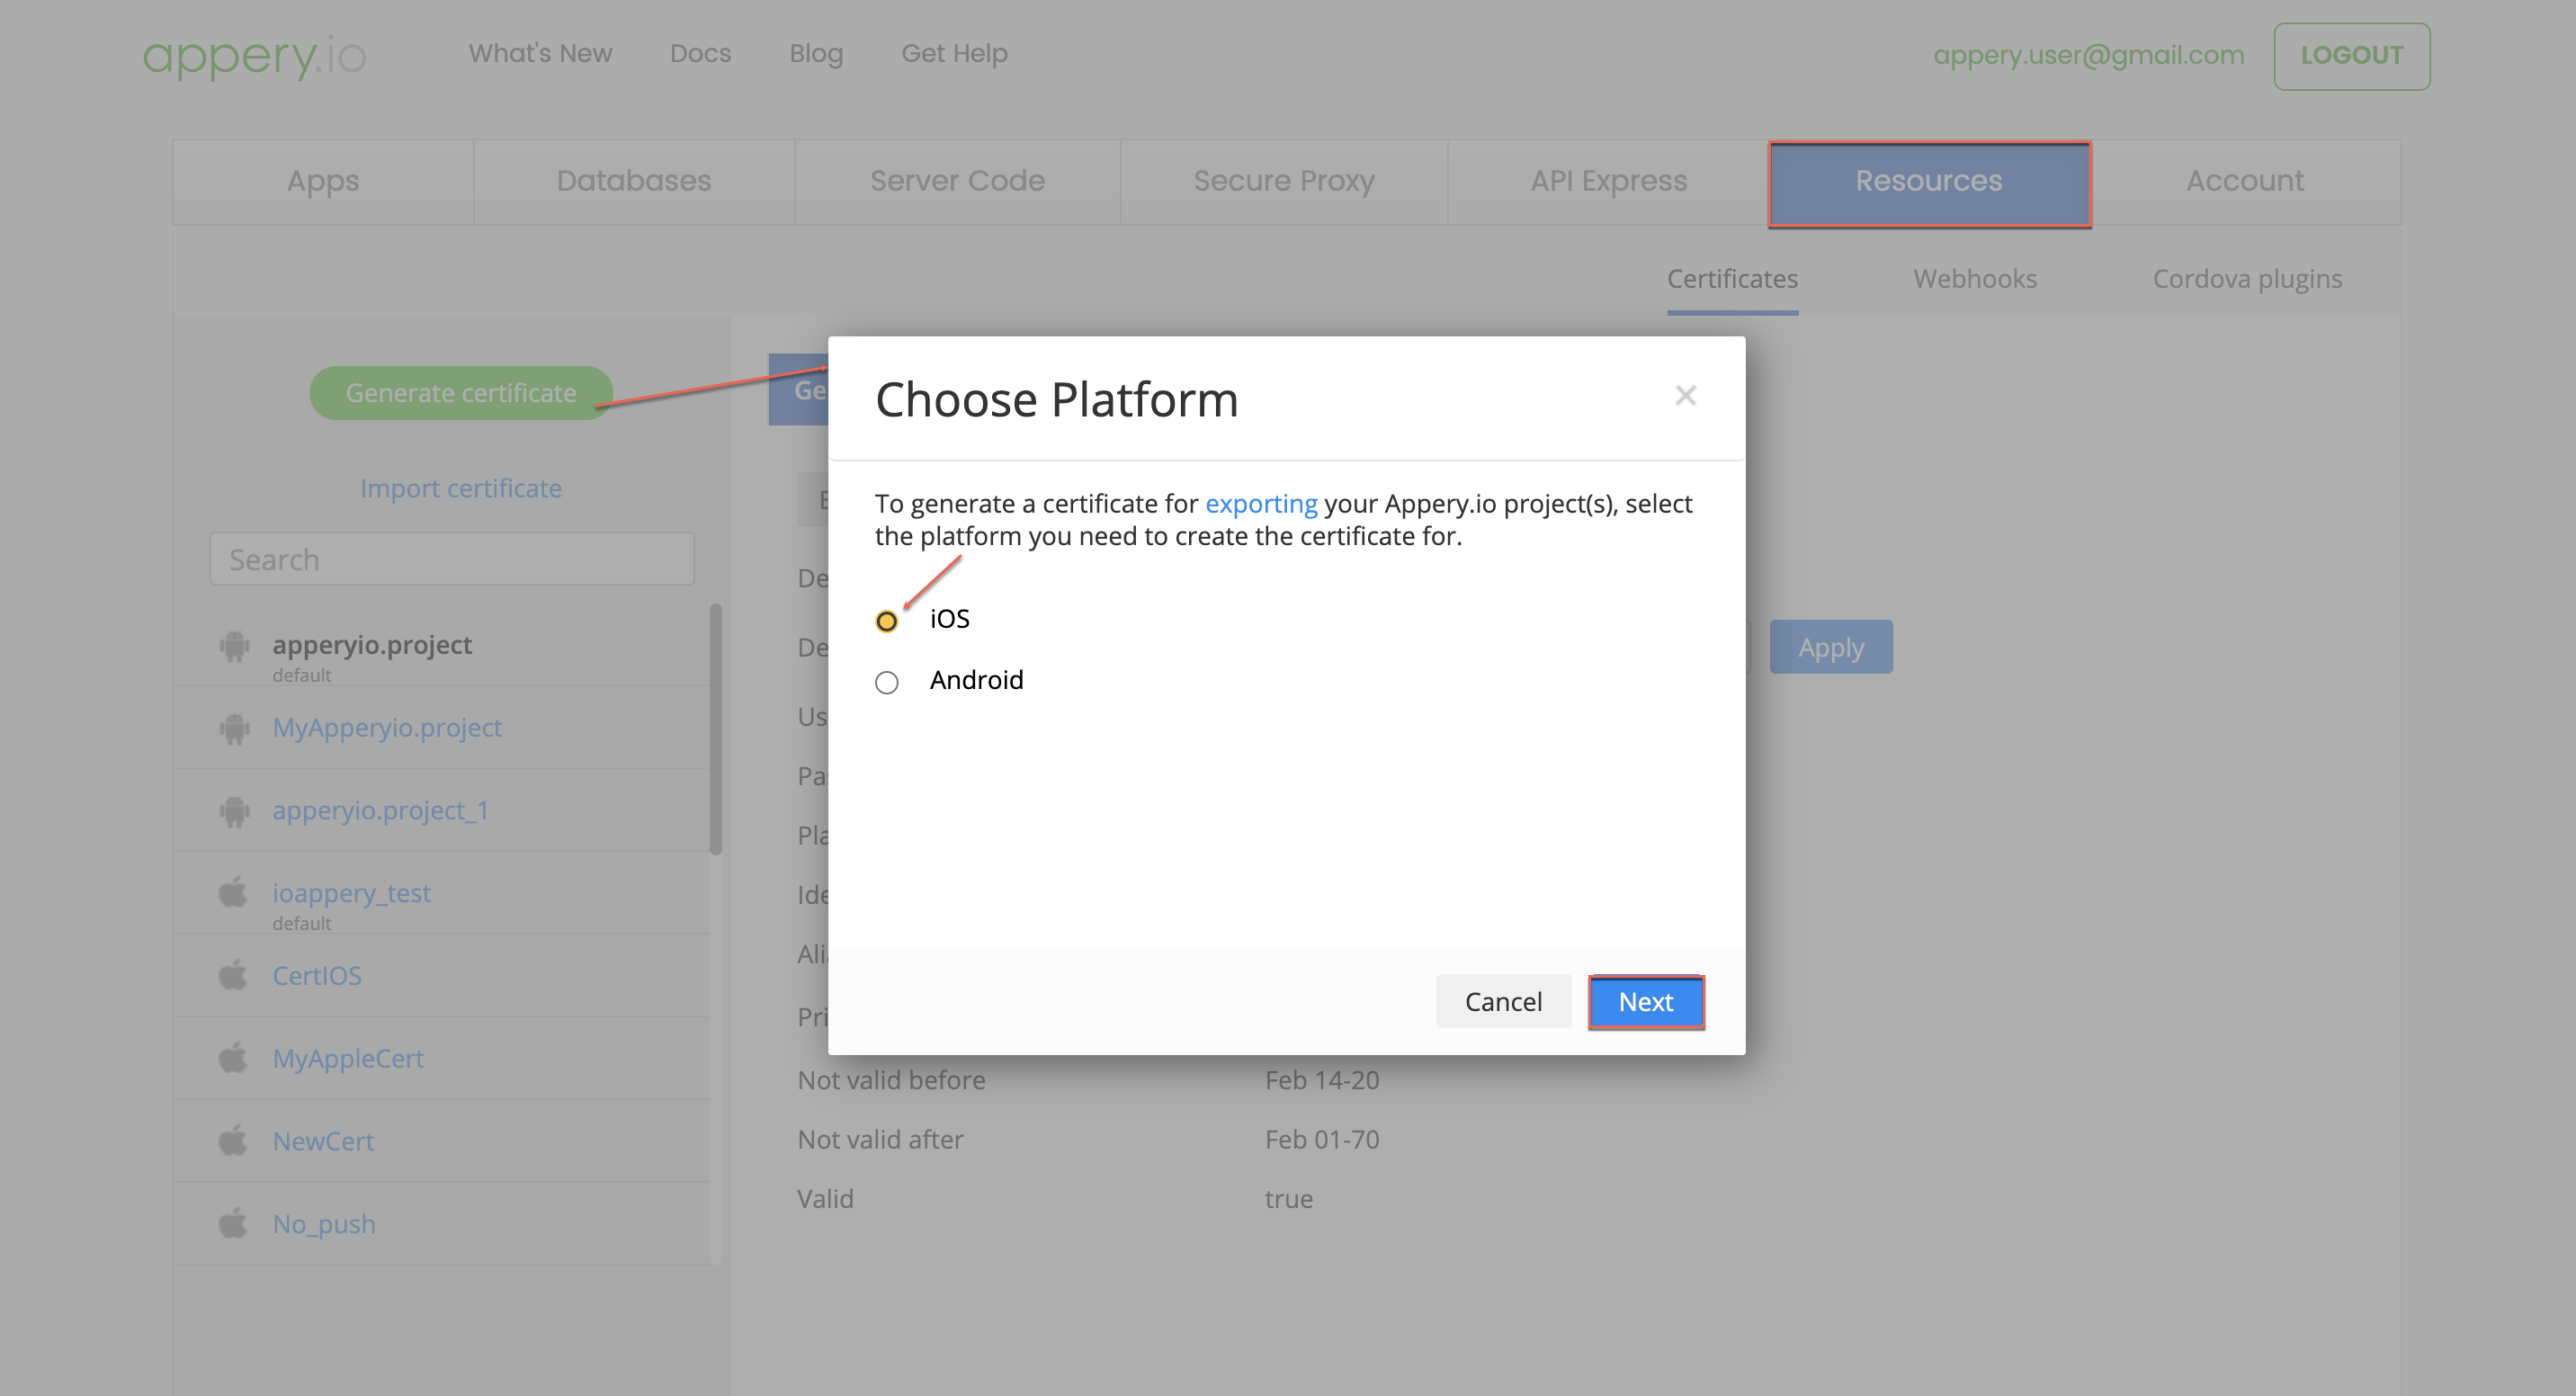
– In the next page, you must upload a Certificate Signing Request. To get it, go back to Appery.io Resources tab. Click Generate certificate, for Platform select iOS, and click Next.
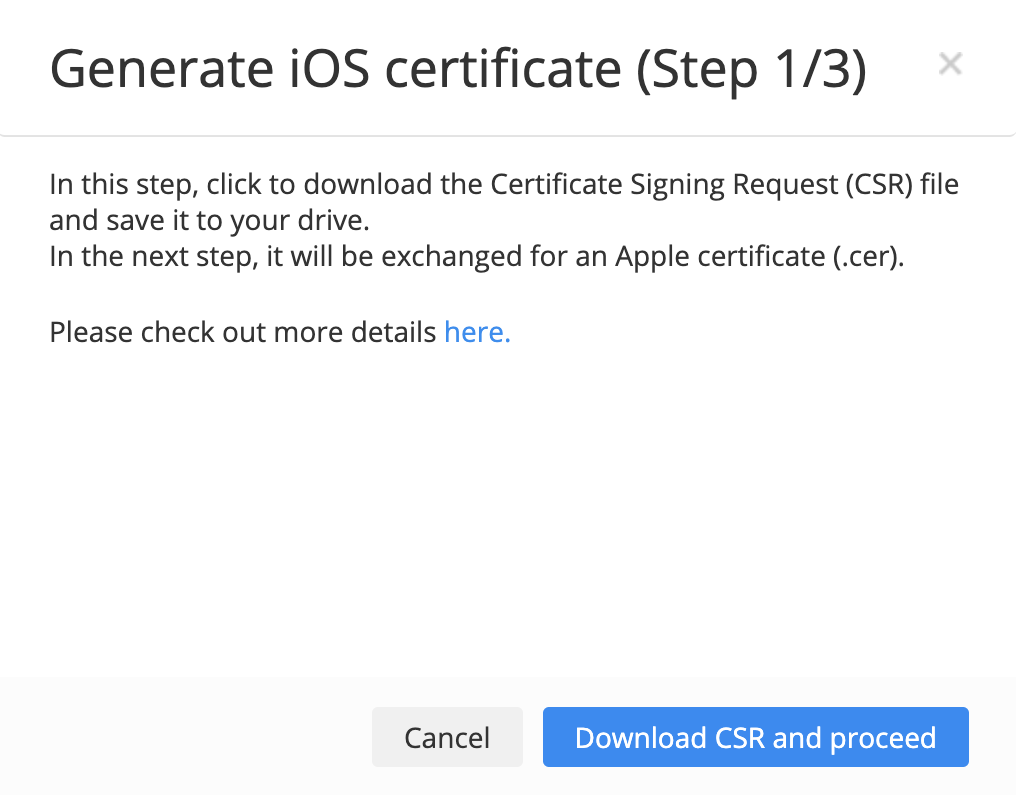
– The Generate iOS certificate wizard opens. In Step 1/3, download the CSR file to your drive.
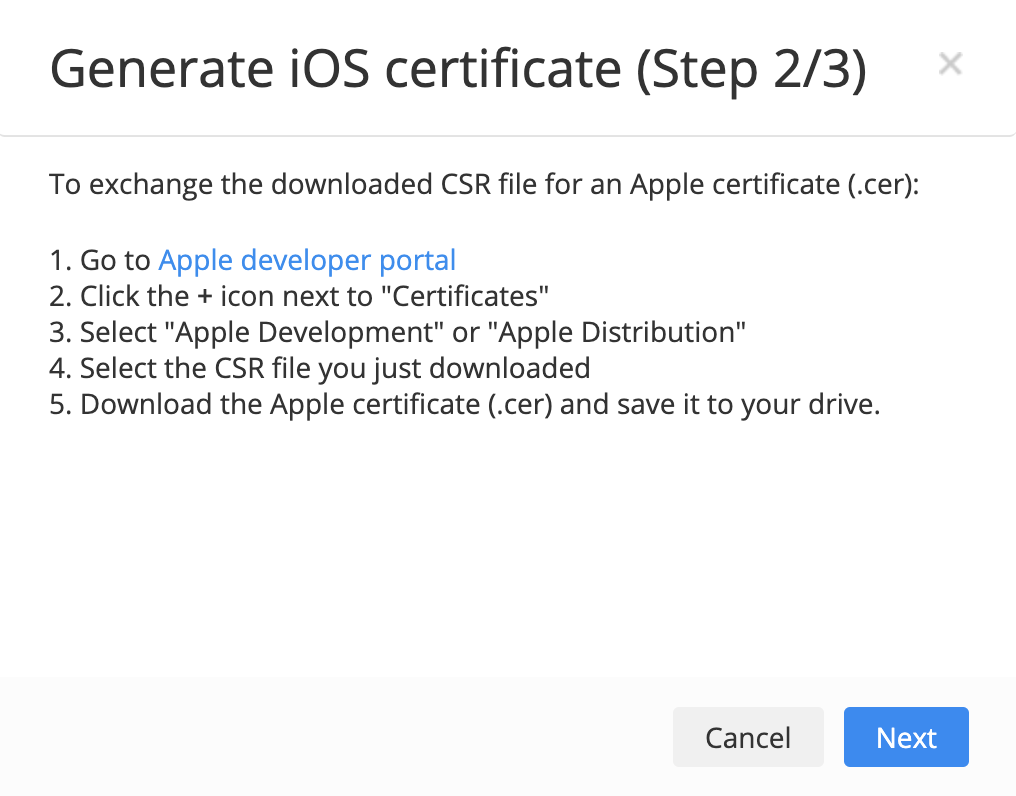
– In Step 2/3, the instructions are displayed how to exchange the certificate signing request (CSR) you just downloaded for an Apple certificate (.cer).
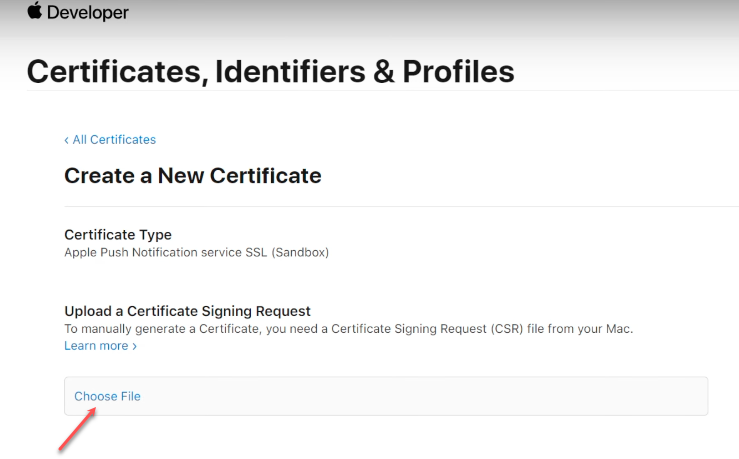
– For this, go back to the Apple Developer Console Certificates section and click Choose File to select and upload the downloaded CSR file. Click Continue.
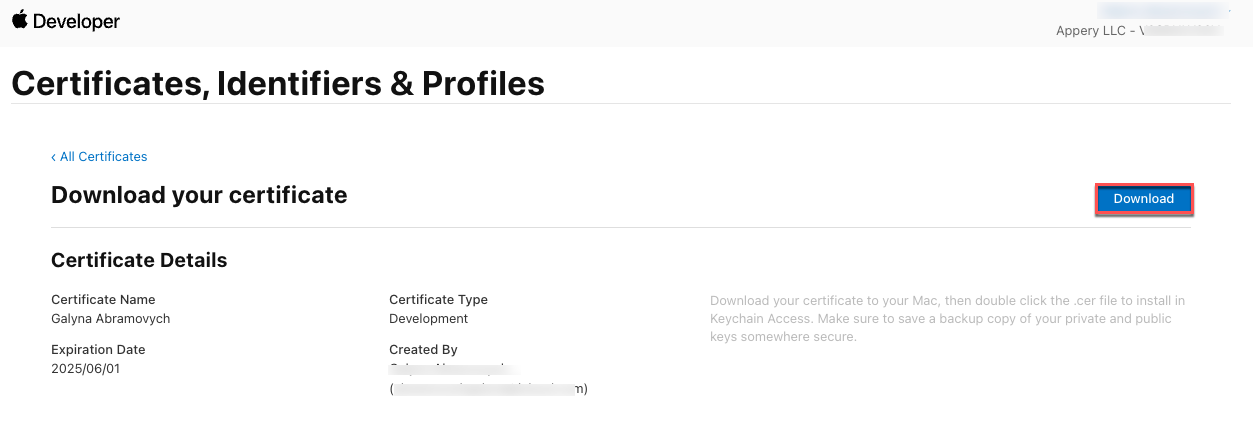
– Download the generated certificate in the next step.
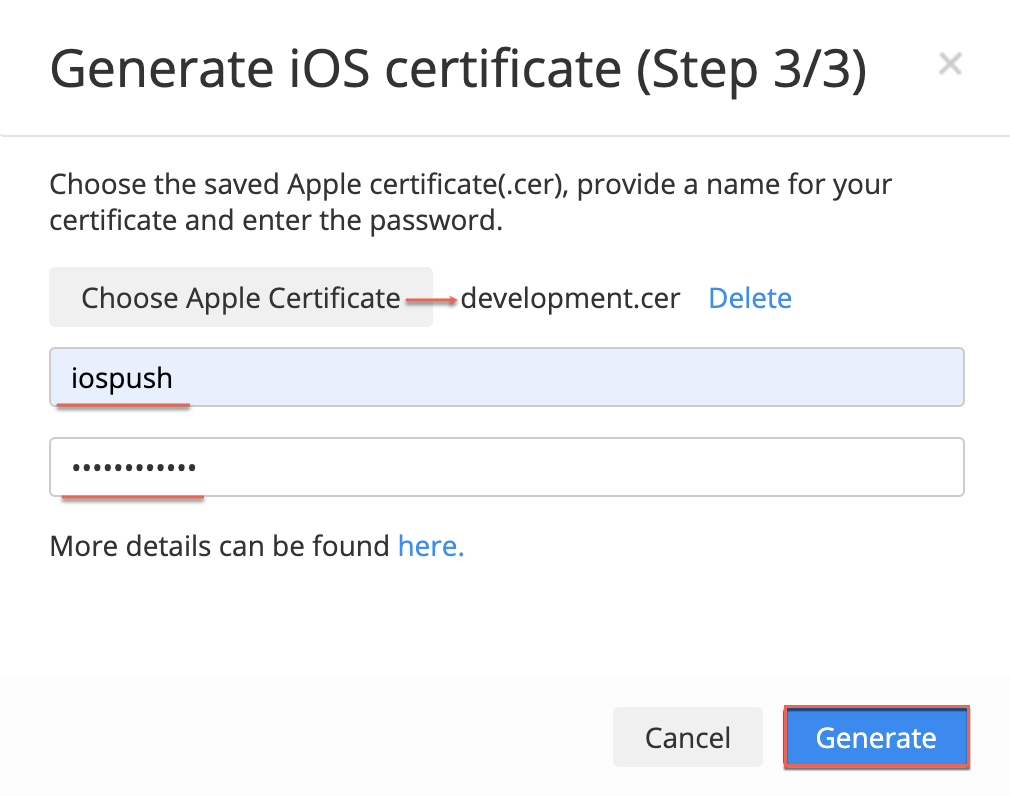
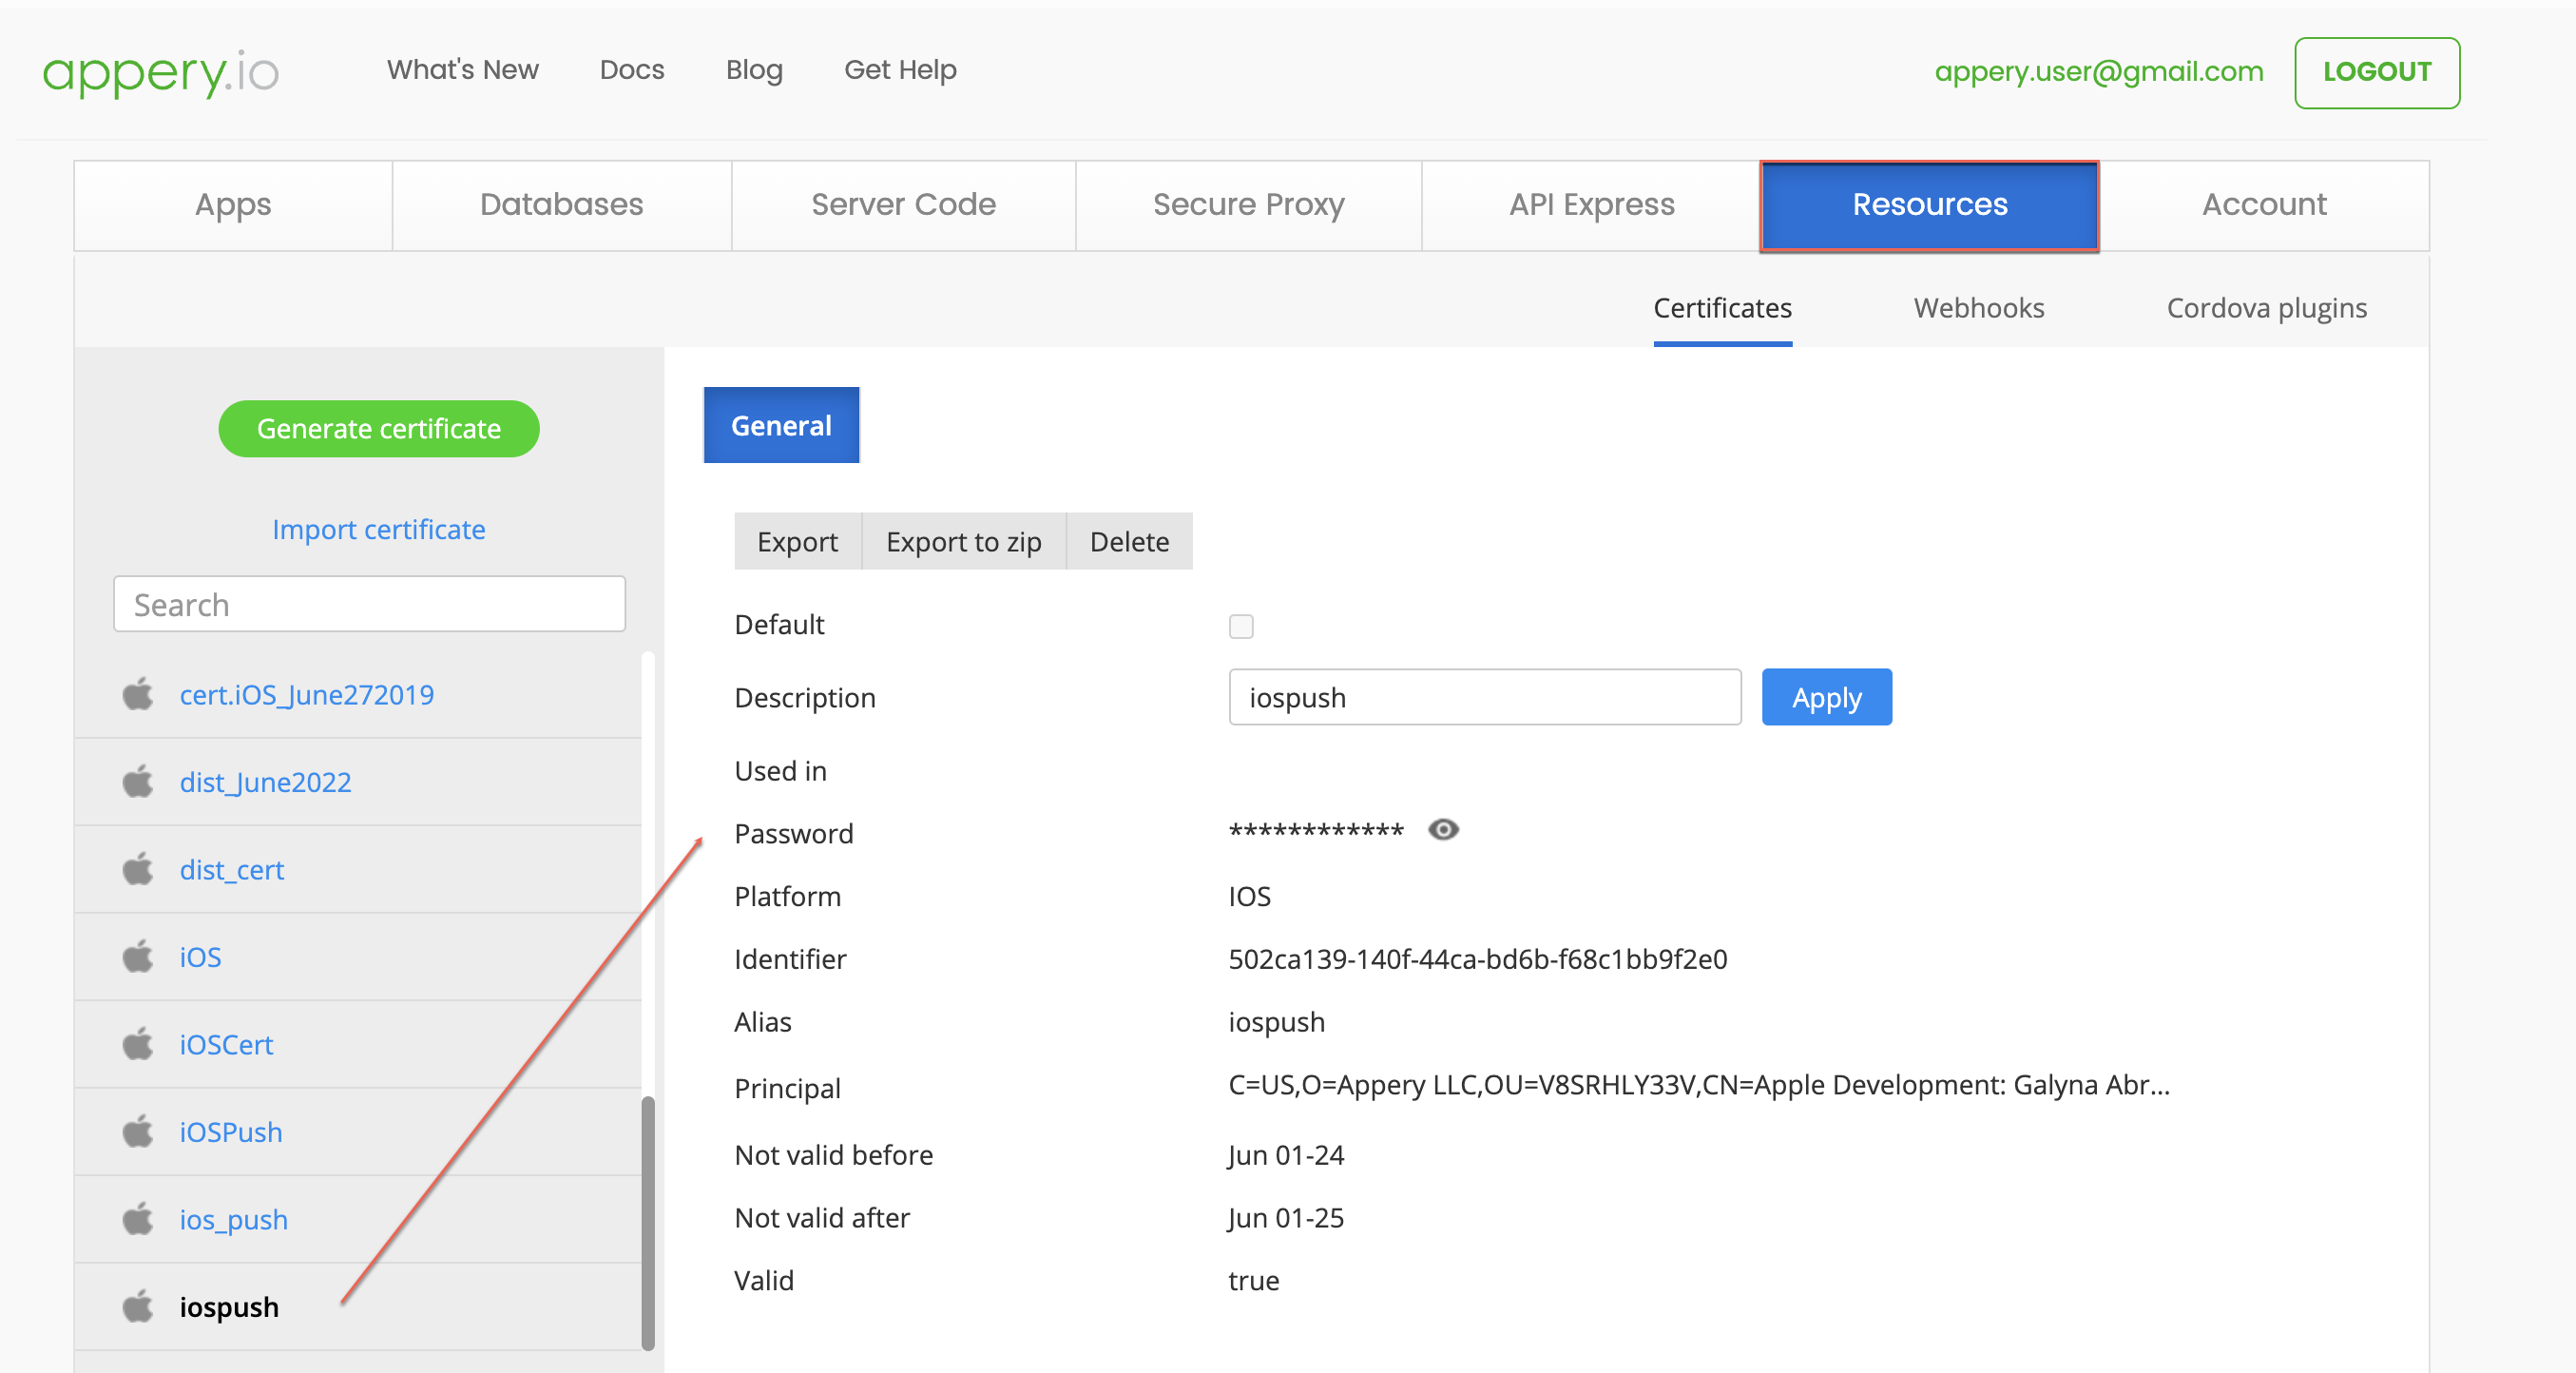
– Go back to Appery.io and in Step 3/3 of the Generate iOS certificate wizard, choose it, enter the name and password for your certificate, and click Generate.
The development certificate is generated successfully.
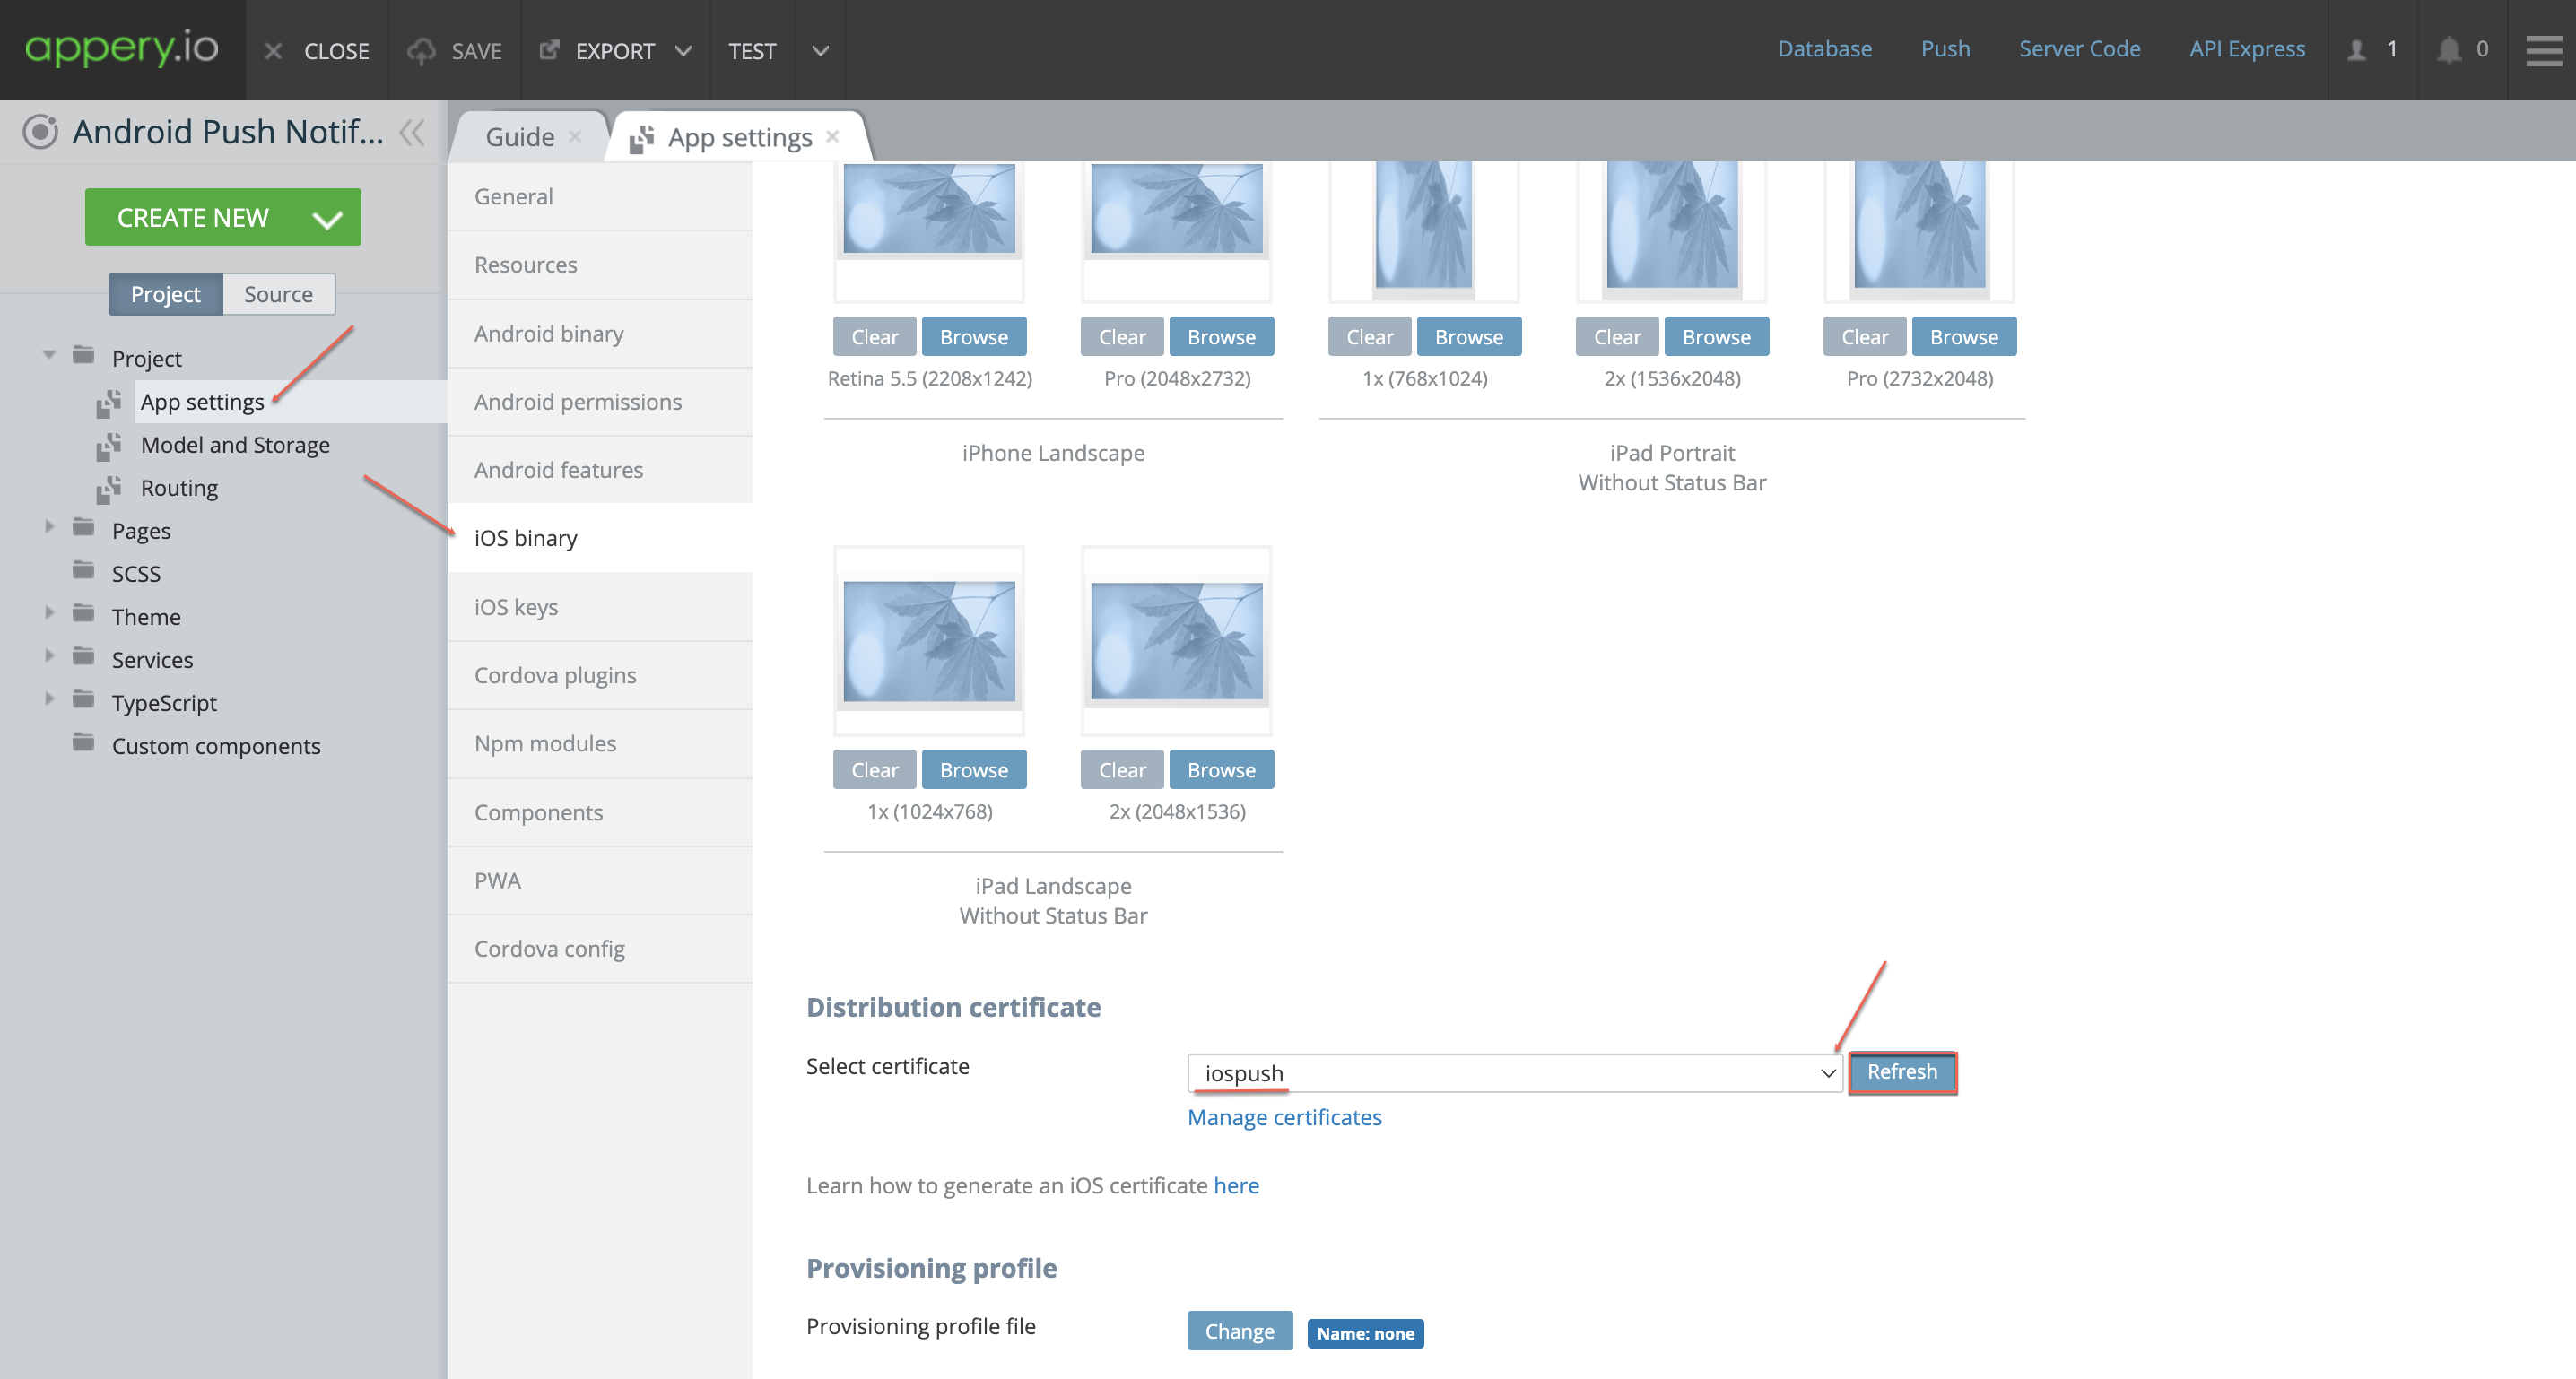
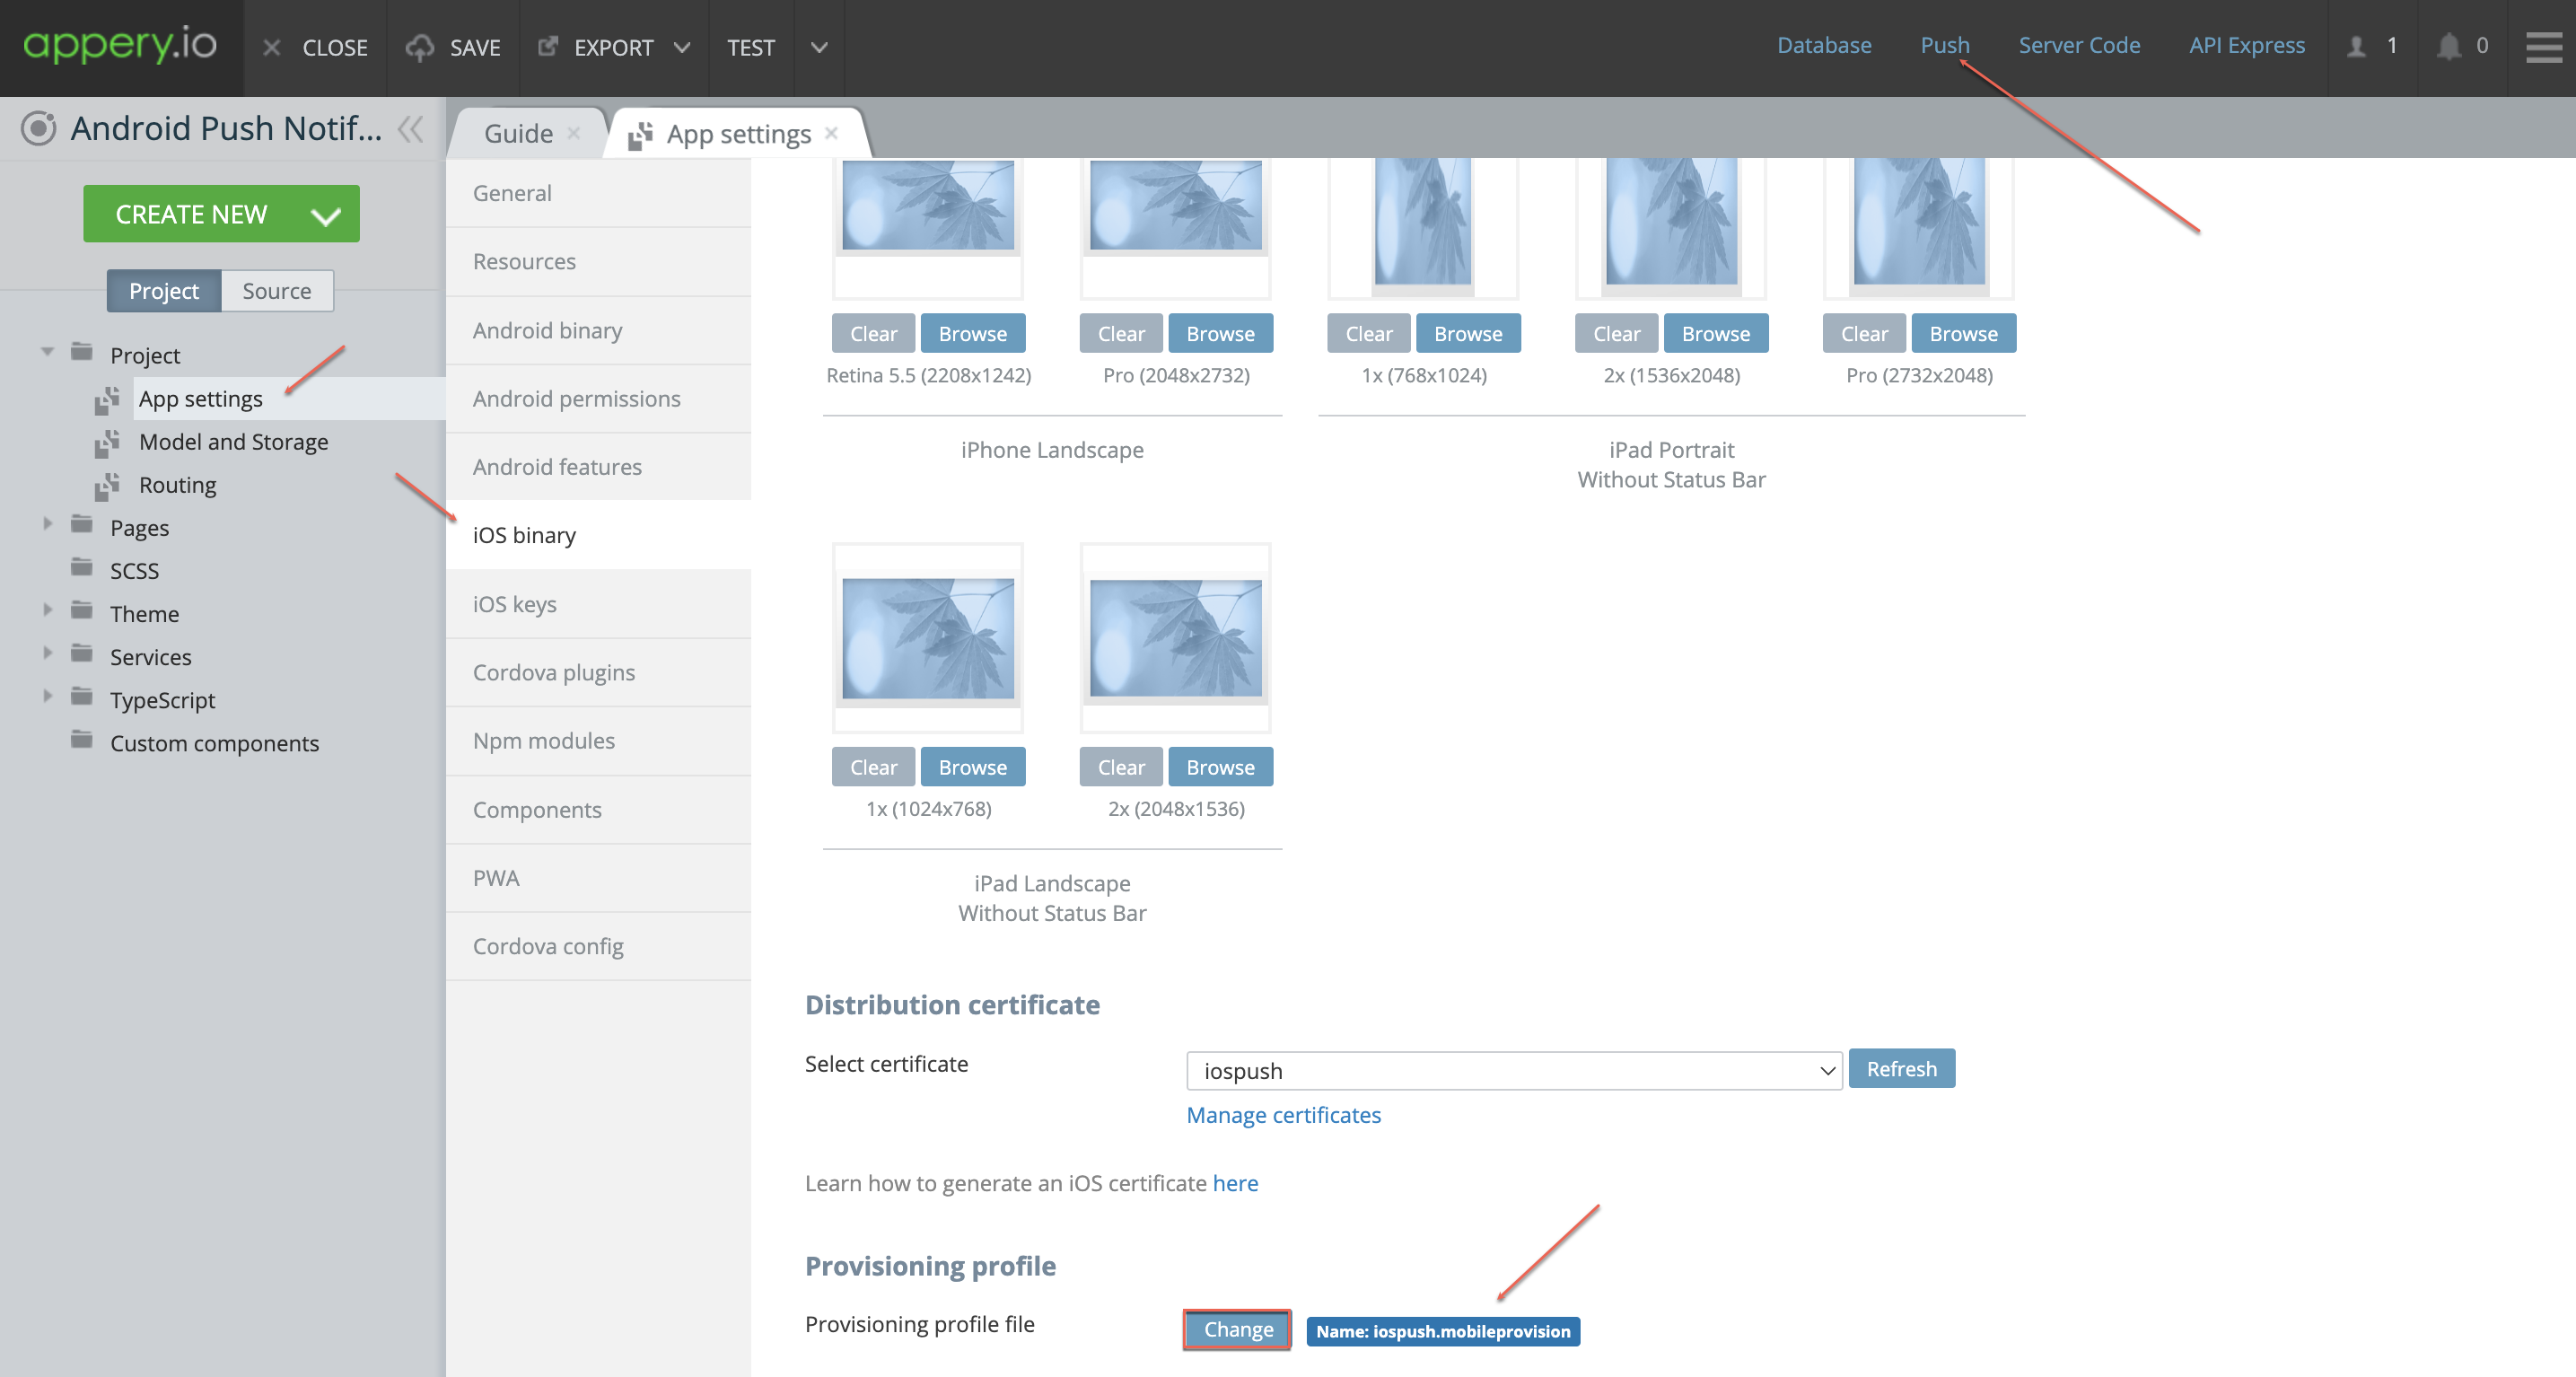
- Now, you can add it to the Appery.io app App settings > iOS binary tab. To do it, scroll down to the Distribution certificate section, and select the iospush certificate you just generated (refresh the list if the certificate cannot be found).
2. Create a Provisioning Profile:
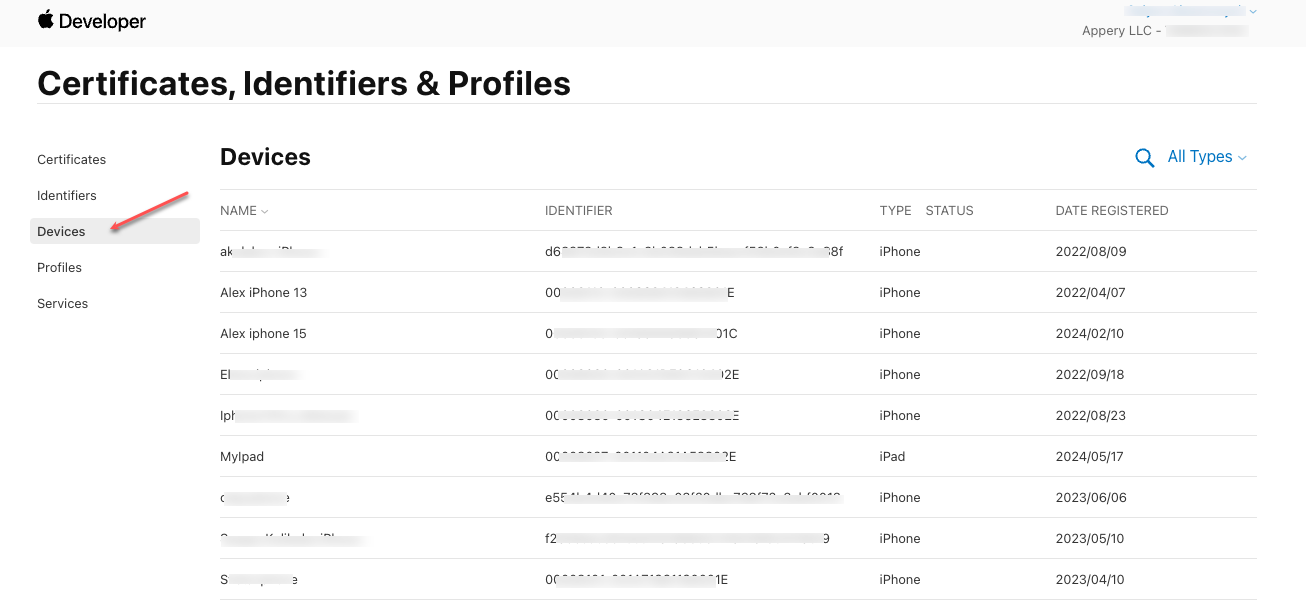
– Now, we need to create a Provisioning profile. For this, in the Apple Developer Console, register your device in the Devices section. You will be asked to add your device UDID. To find it, start iTunes, go to the Summary section, and click the device info panel several times until the UDID appears.
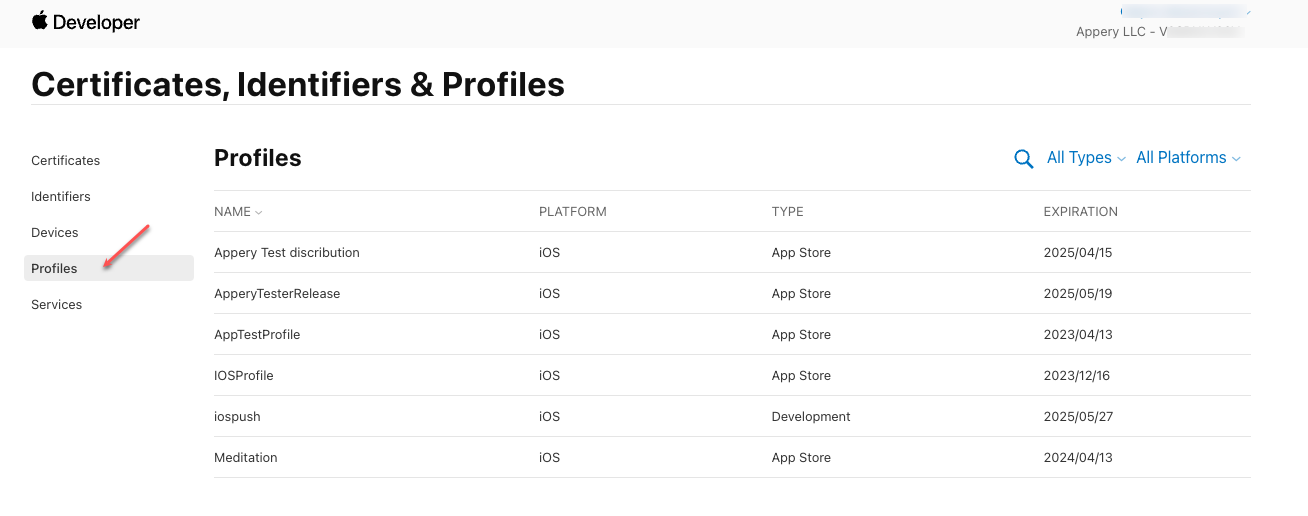
– Next, go to the Profiles section and create a new profile.
When specifying it, indicate it is of the iOS App Development type, then proceed to selecting an App ID from the list, then selecting your certificates and devices (you are free to select all the available certificates/devices).
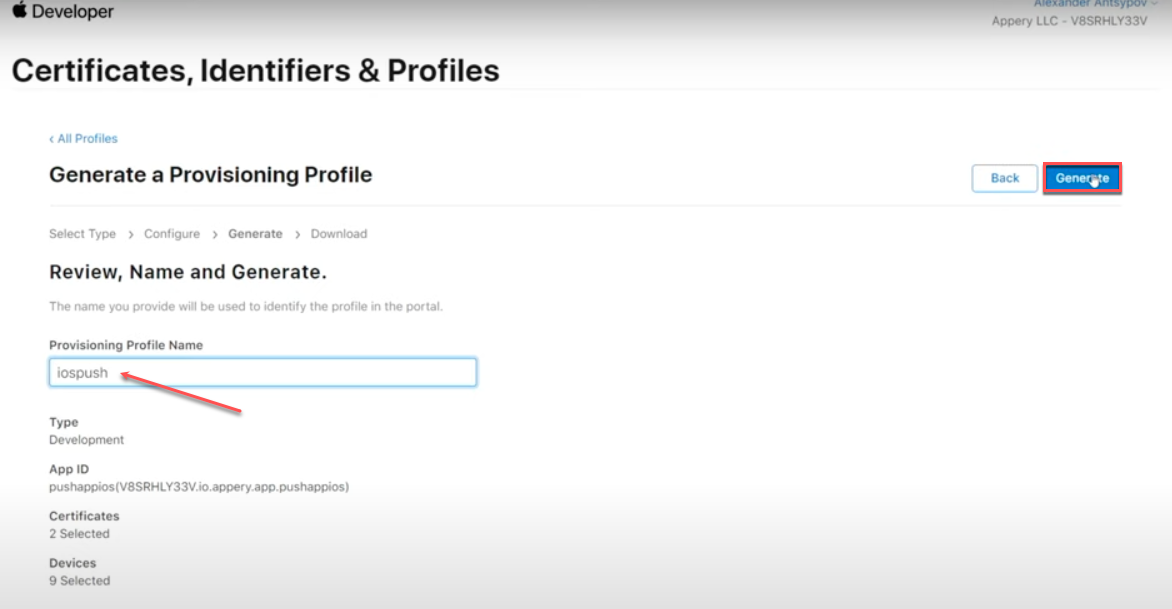
– When done, enter the Provisioning Profile Name, click Generate and download it to your drive.
– You can now upload it to Appery.io. Go to the App settings > iOS binary tab, scroll down to the Distribution certificate section, and click the Change button to upload the file you just generated using the Media Manager tool. Then, click the Push link in the header to open the Push Notifications tab.
Set Up Push Notifications in Appery.io
Now, let’s configure push notifications within Appery.io:
1. Enable Push Notifications:
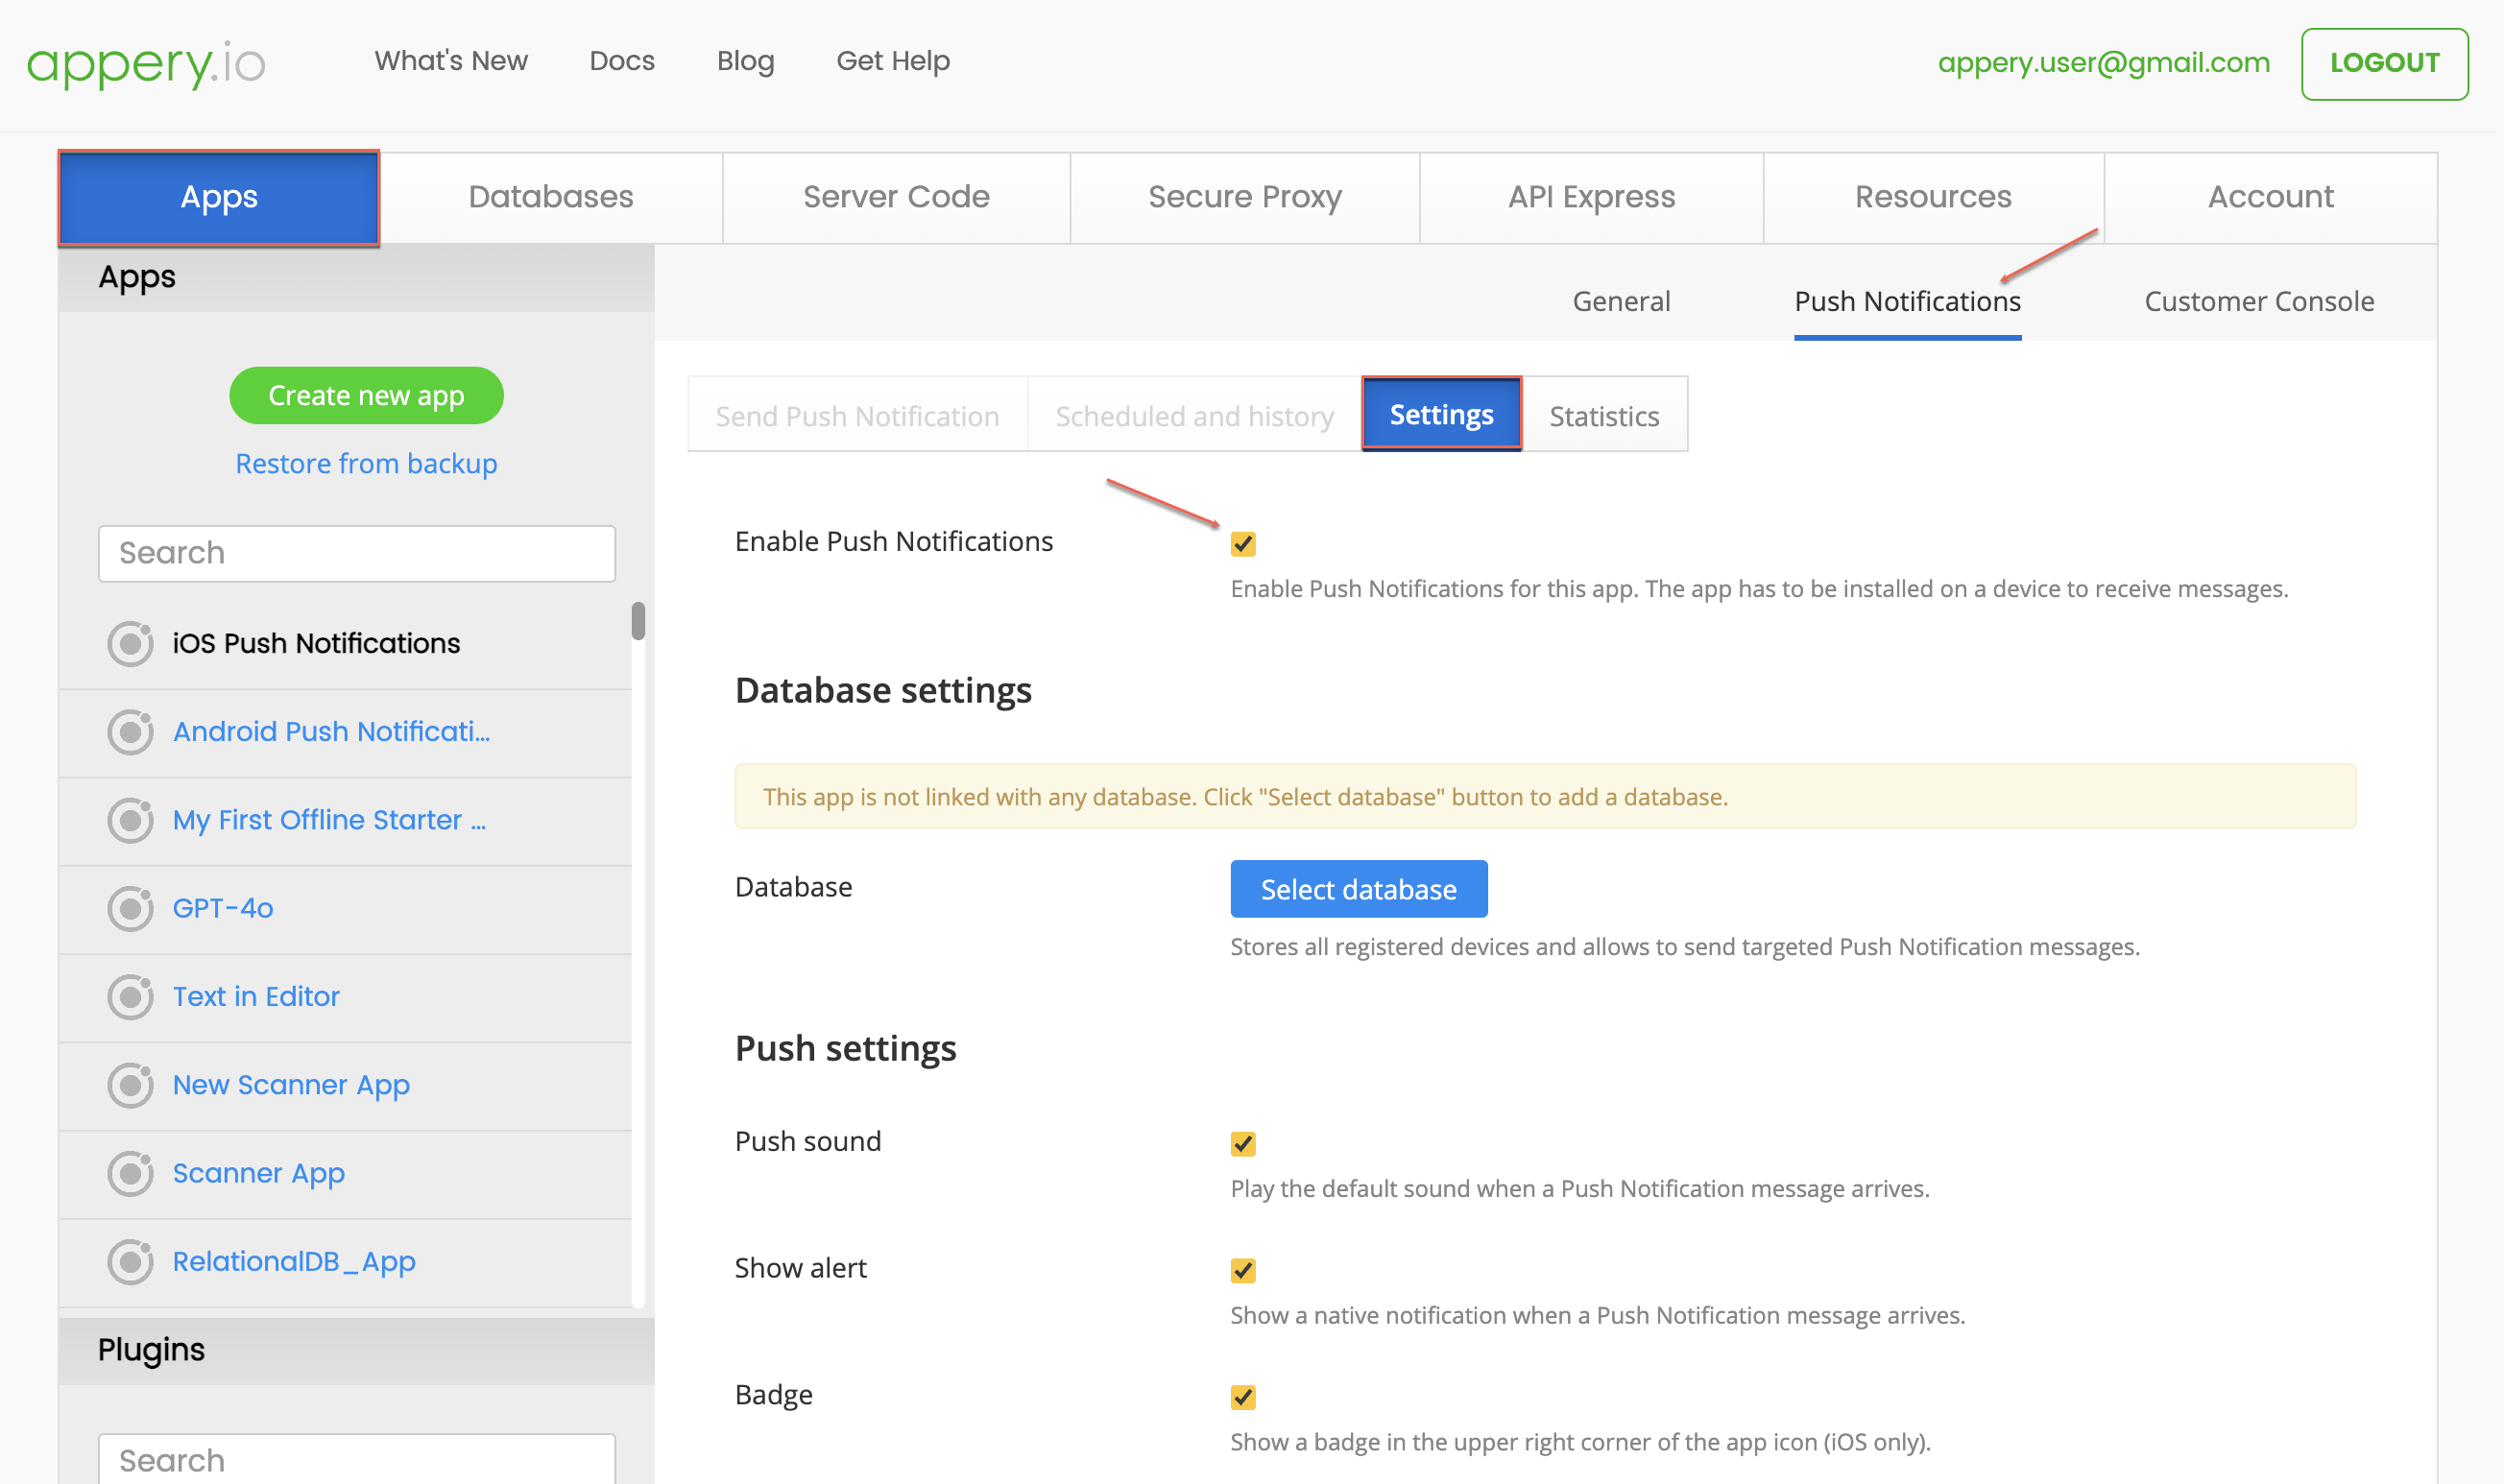
– In your project, go to the Push Notifications > Settings section and enable the Push Notifications checkbox.
2. Configure the Database:
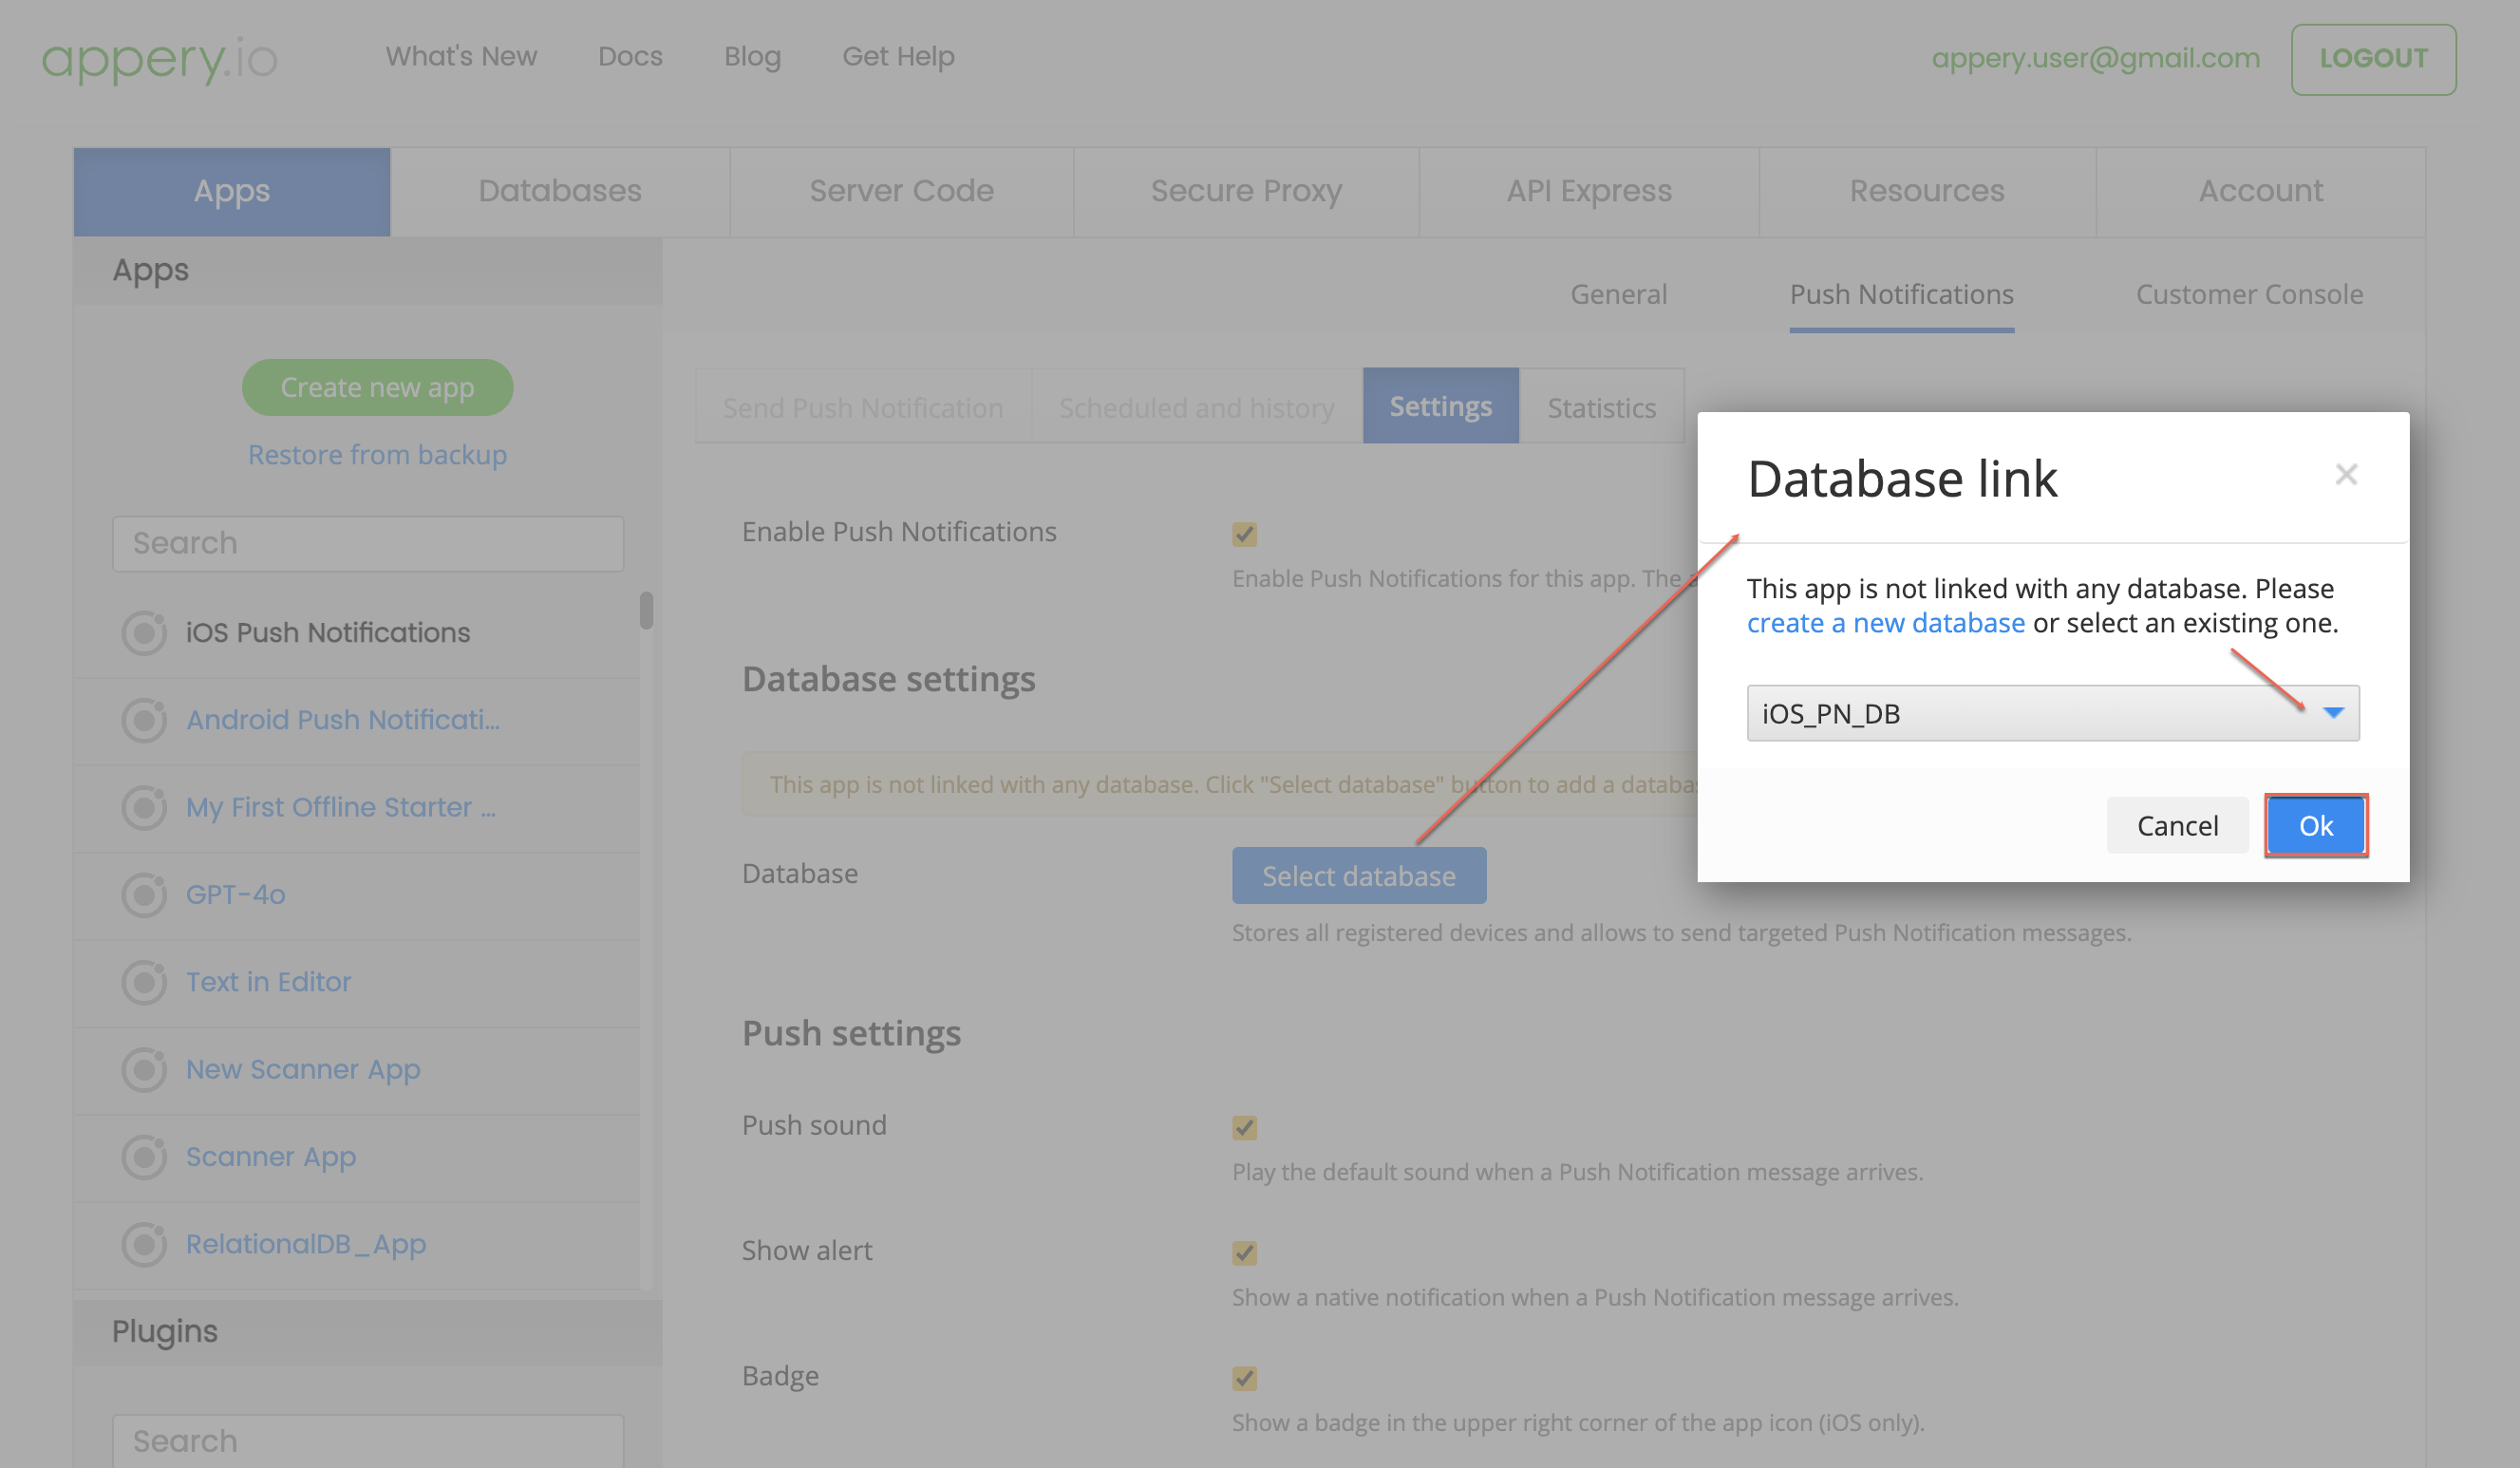
– In the Database settings section, select a database where device tokens will be stored. You can use any existing database or create a new one.
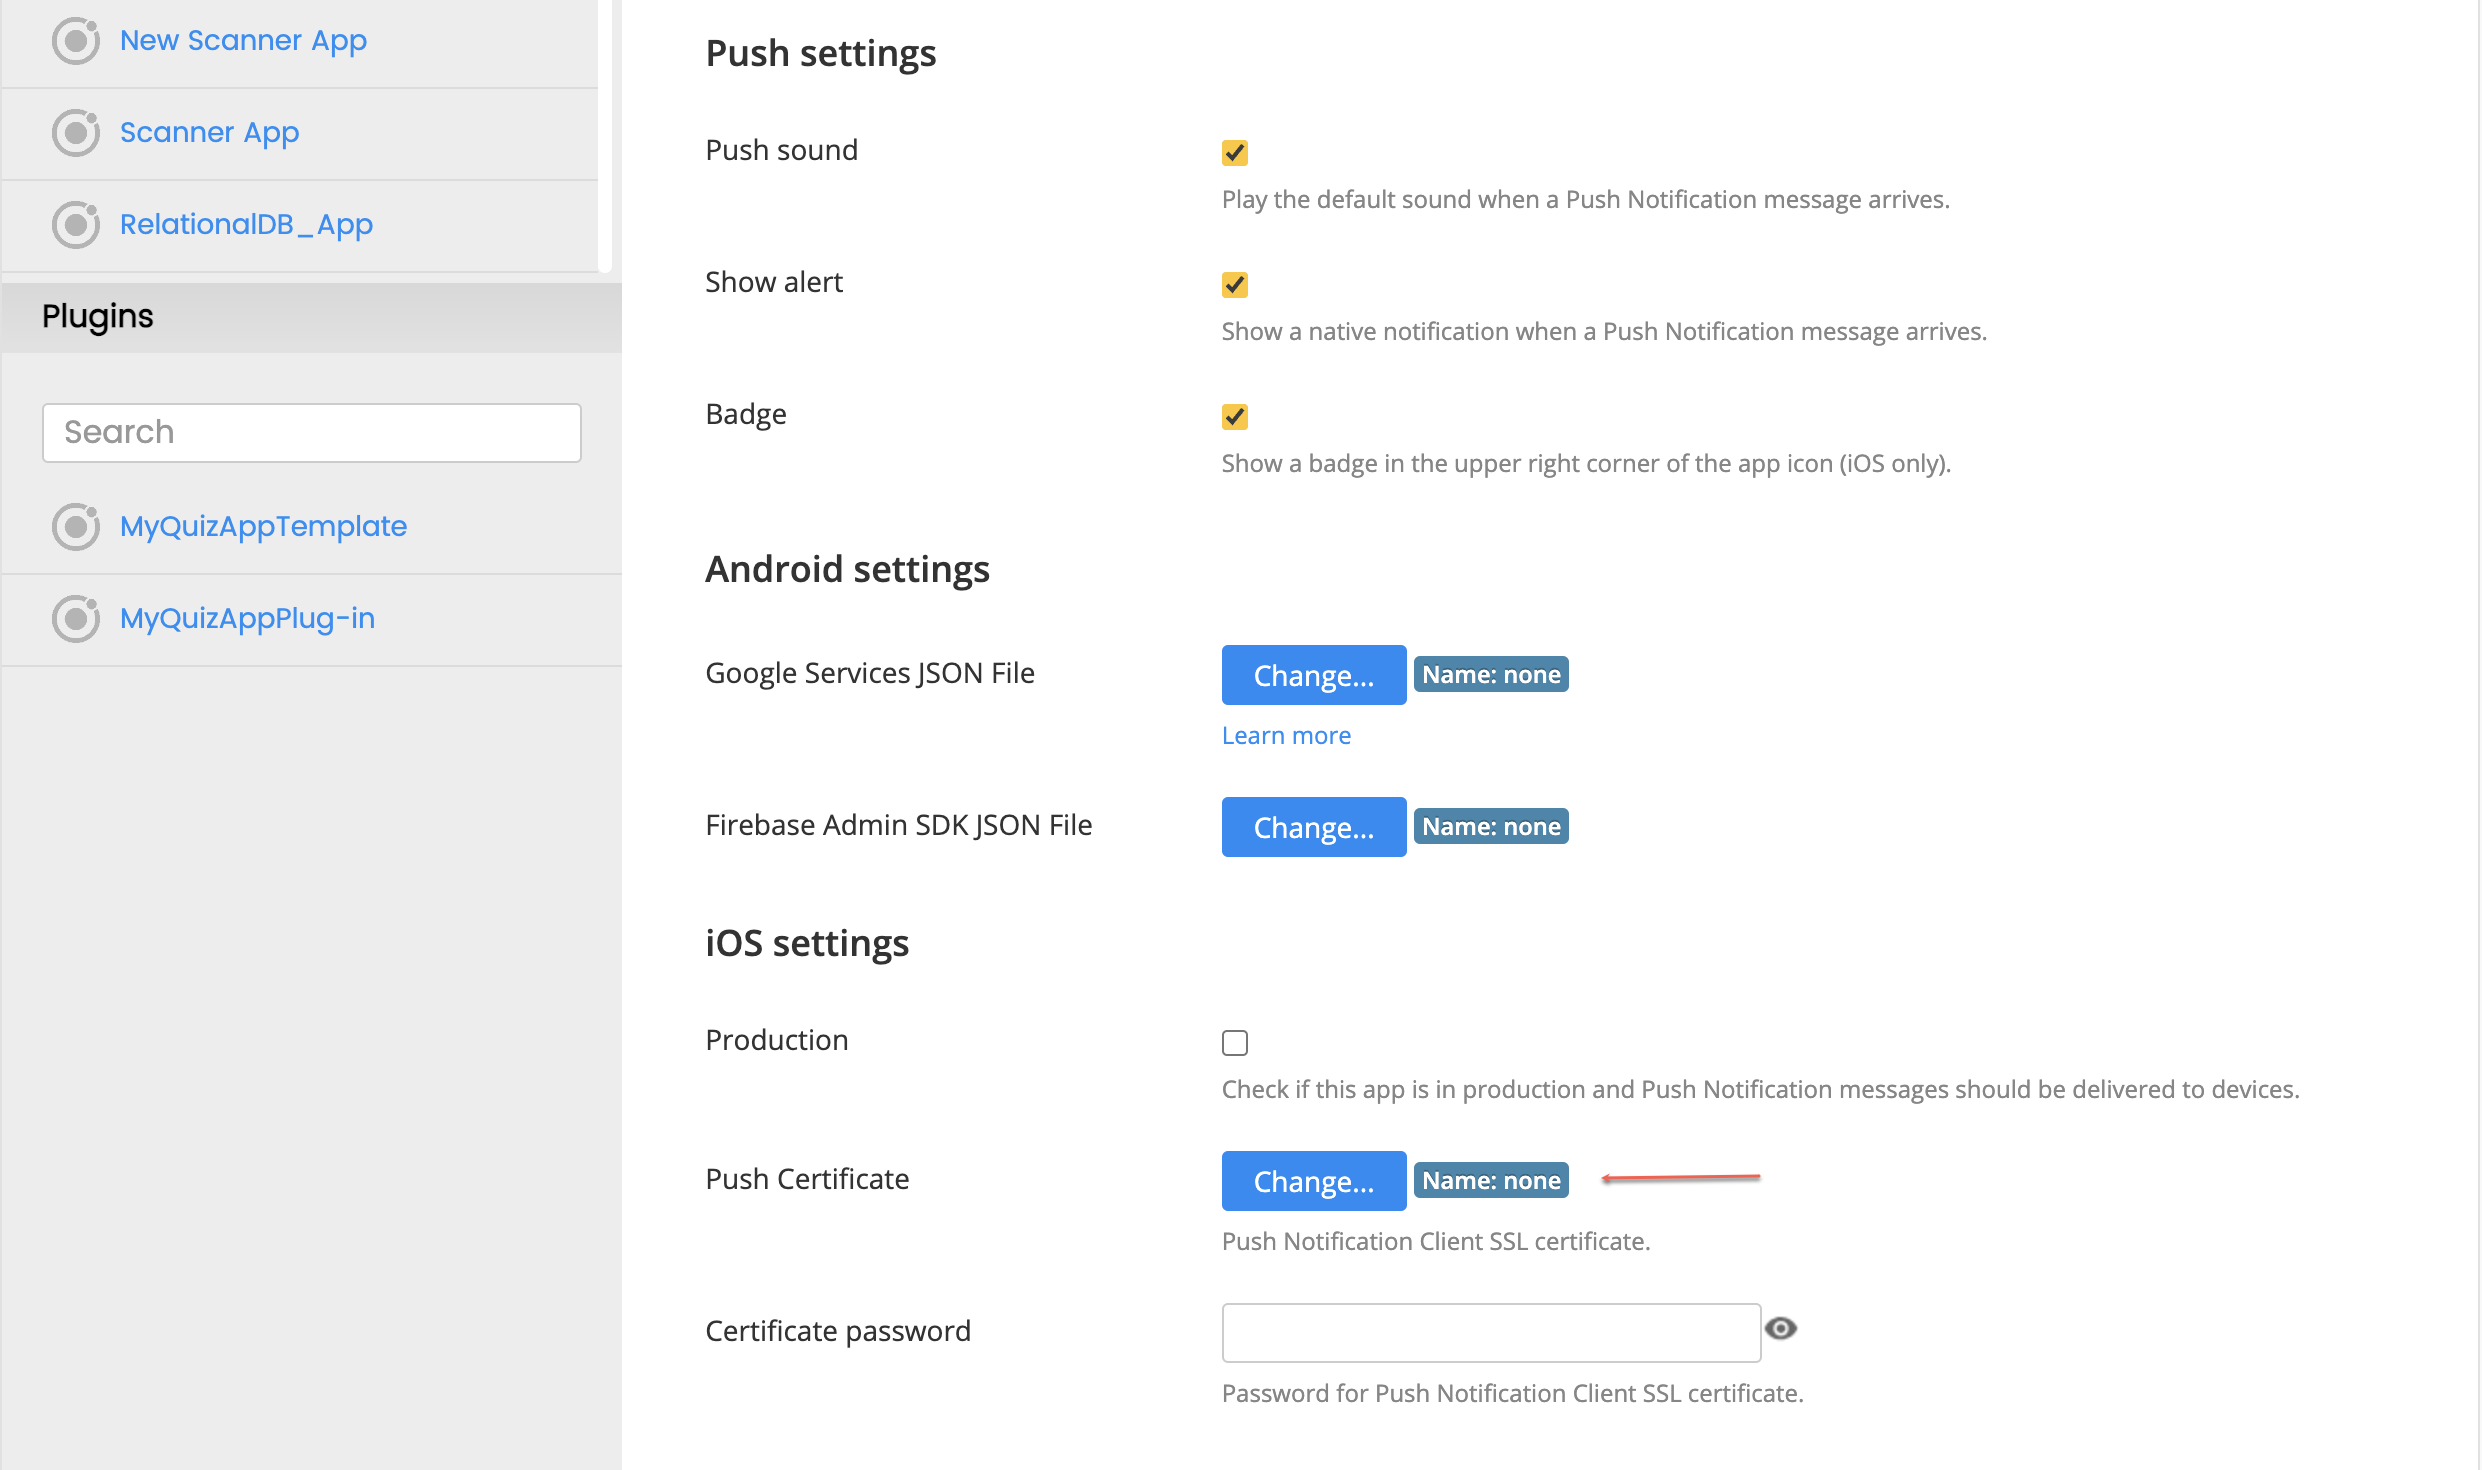
– When you scroll down, you will see that you will also need to provide the Push Certificate to make you app send pushes.
3. Upload Push Notification Certificate:
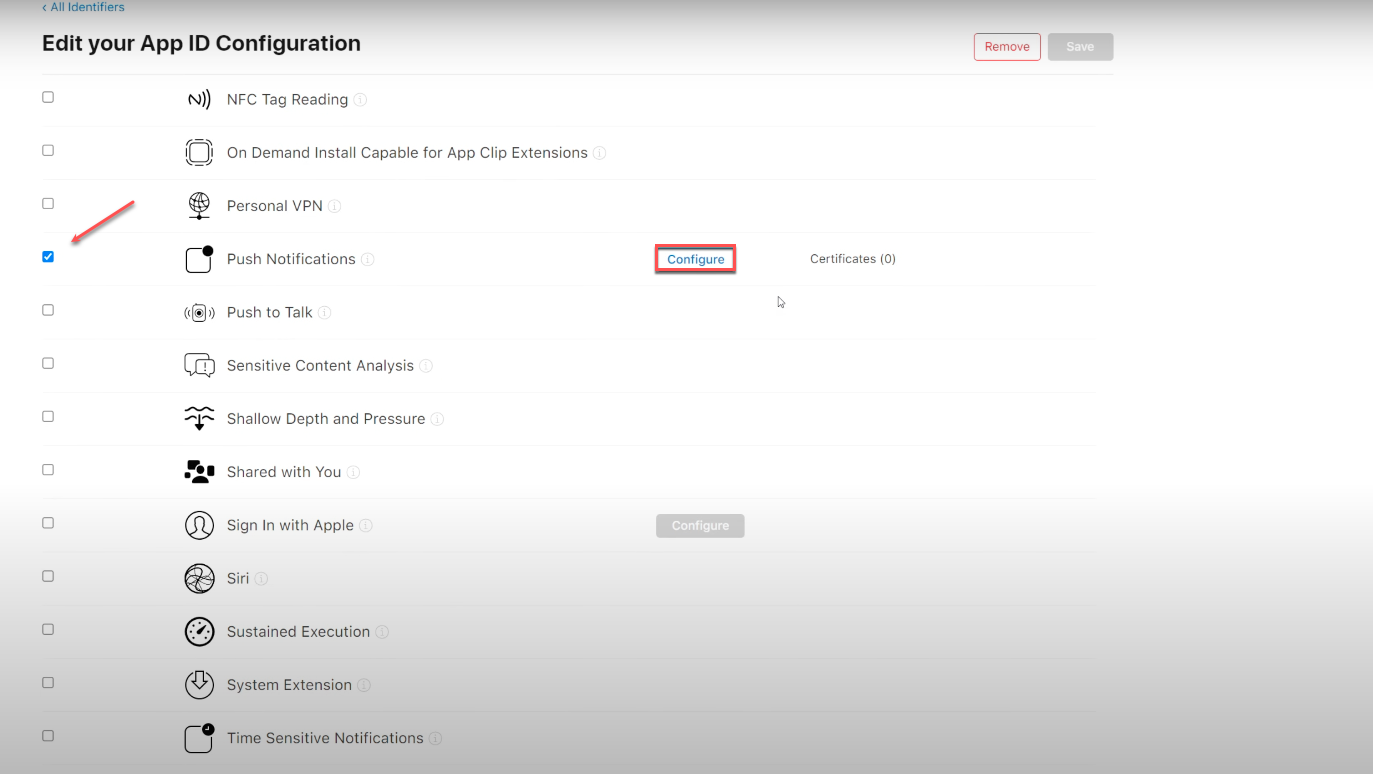
– To generate and download a push notification certificate from the Apple Developer Console, go to the Identifiers section, select the pushappios identifier created earlier and, in the Edit your App ID Configuration page, scroll down to the Push Notifications app service item, and click the Configure button.
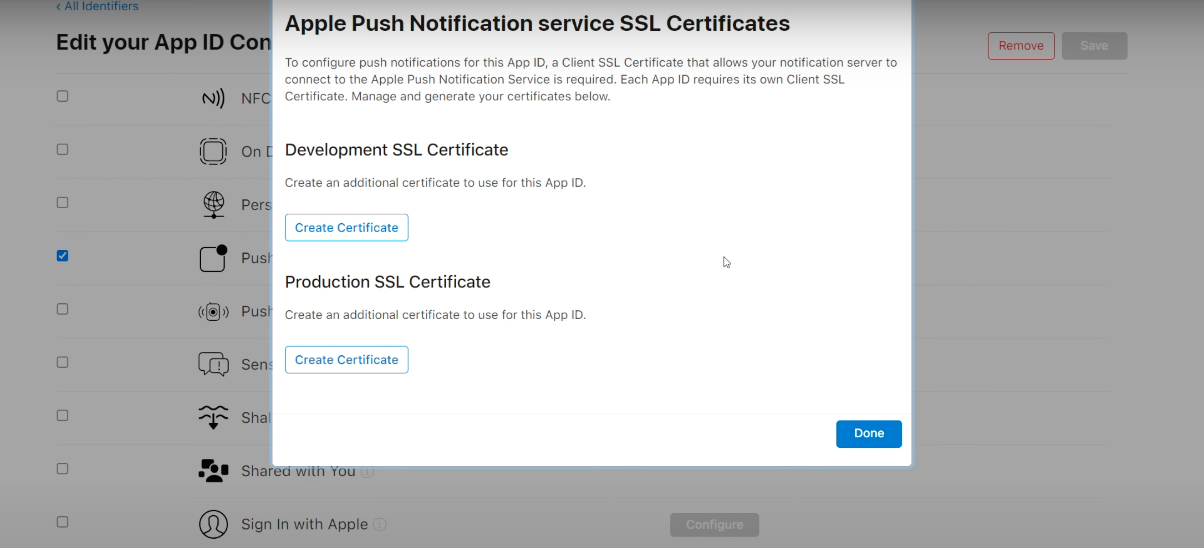
– Select Development SSL Certificate and click Create Certificate.
– Next, you need to generate and upload a certificate signing request for Apple Push Notification service SSL. To do this, go back to the Appery.io app and, in the Resources tab, generate a new request it by using the Generate iOS certificate wizard. When ready, the certificate signing request can be uploaded to Apple: for this, just select the file you just downloaded and upload it.
– After Apple has processed this request, you can finally download the push certificate and then upload it to Appery.io for use in your app.
– Go back to the Generate iOS certificate wizard, choose the certificate from your drive, then provide the name and password for your it. Click Generate.
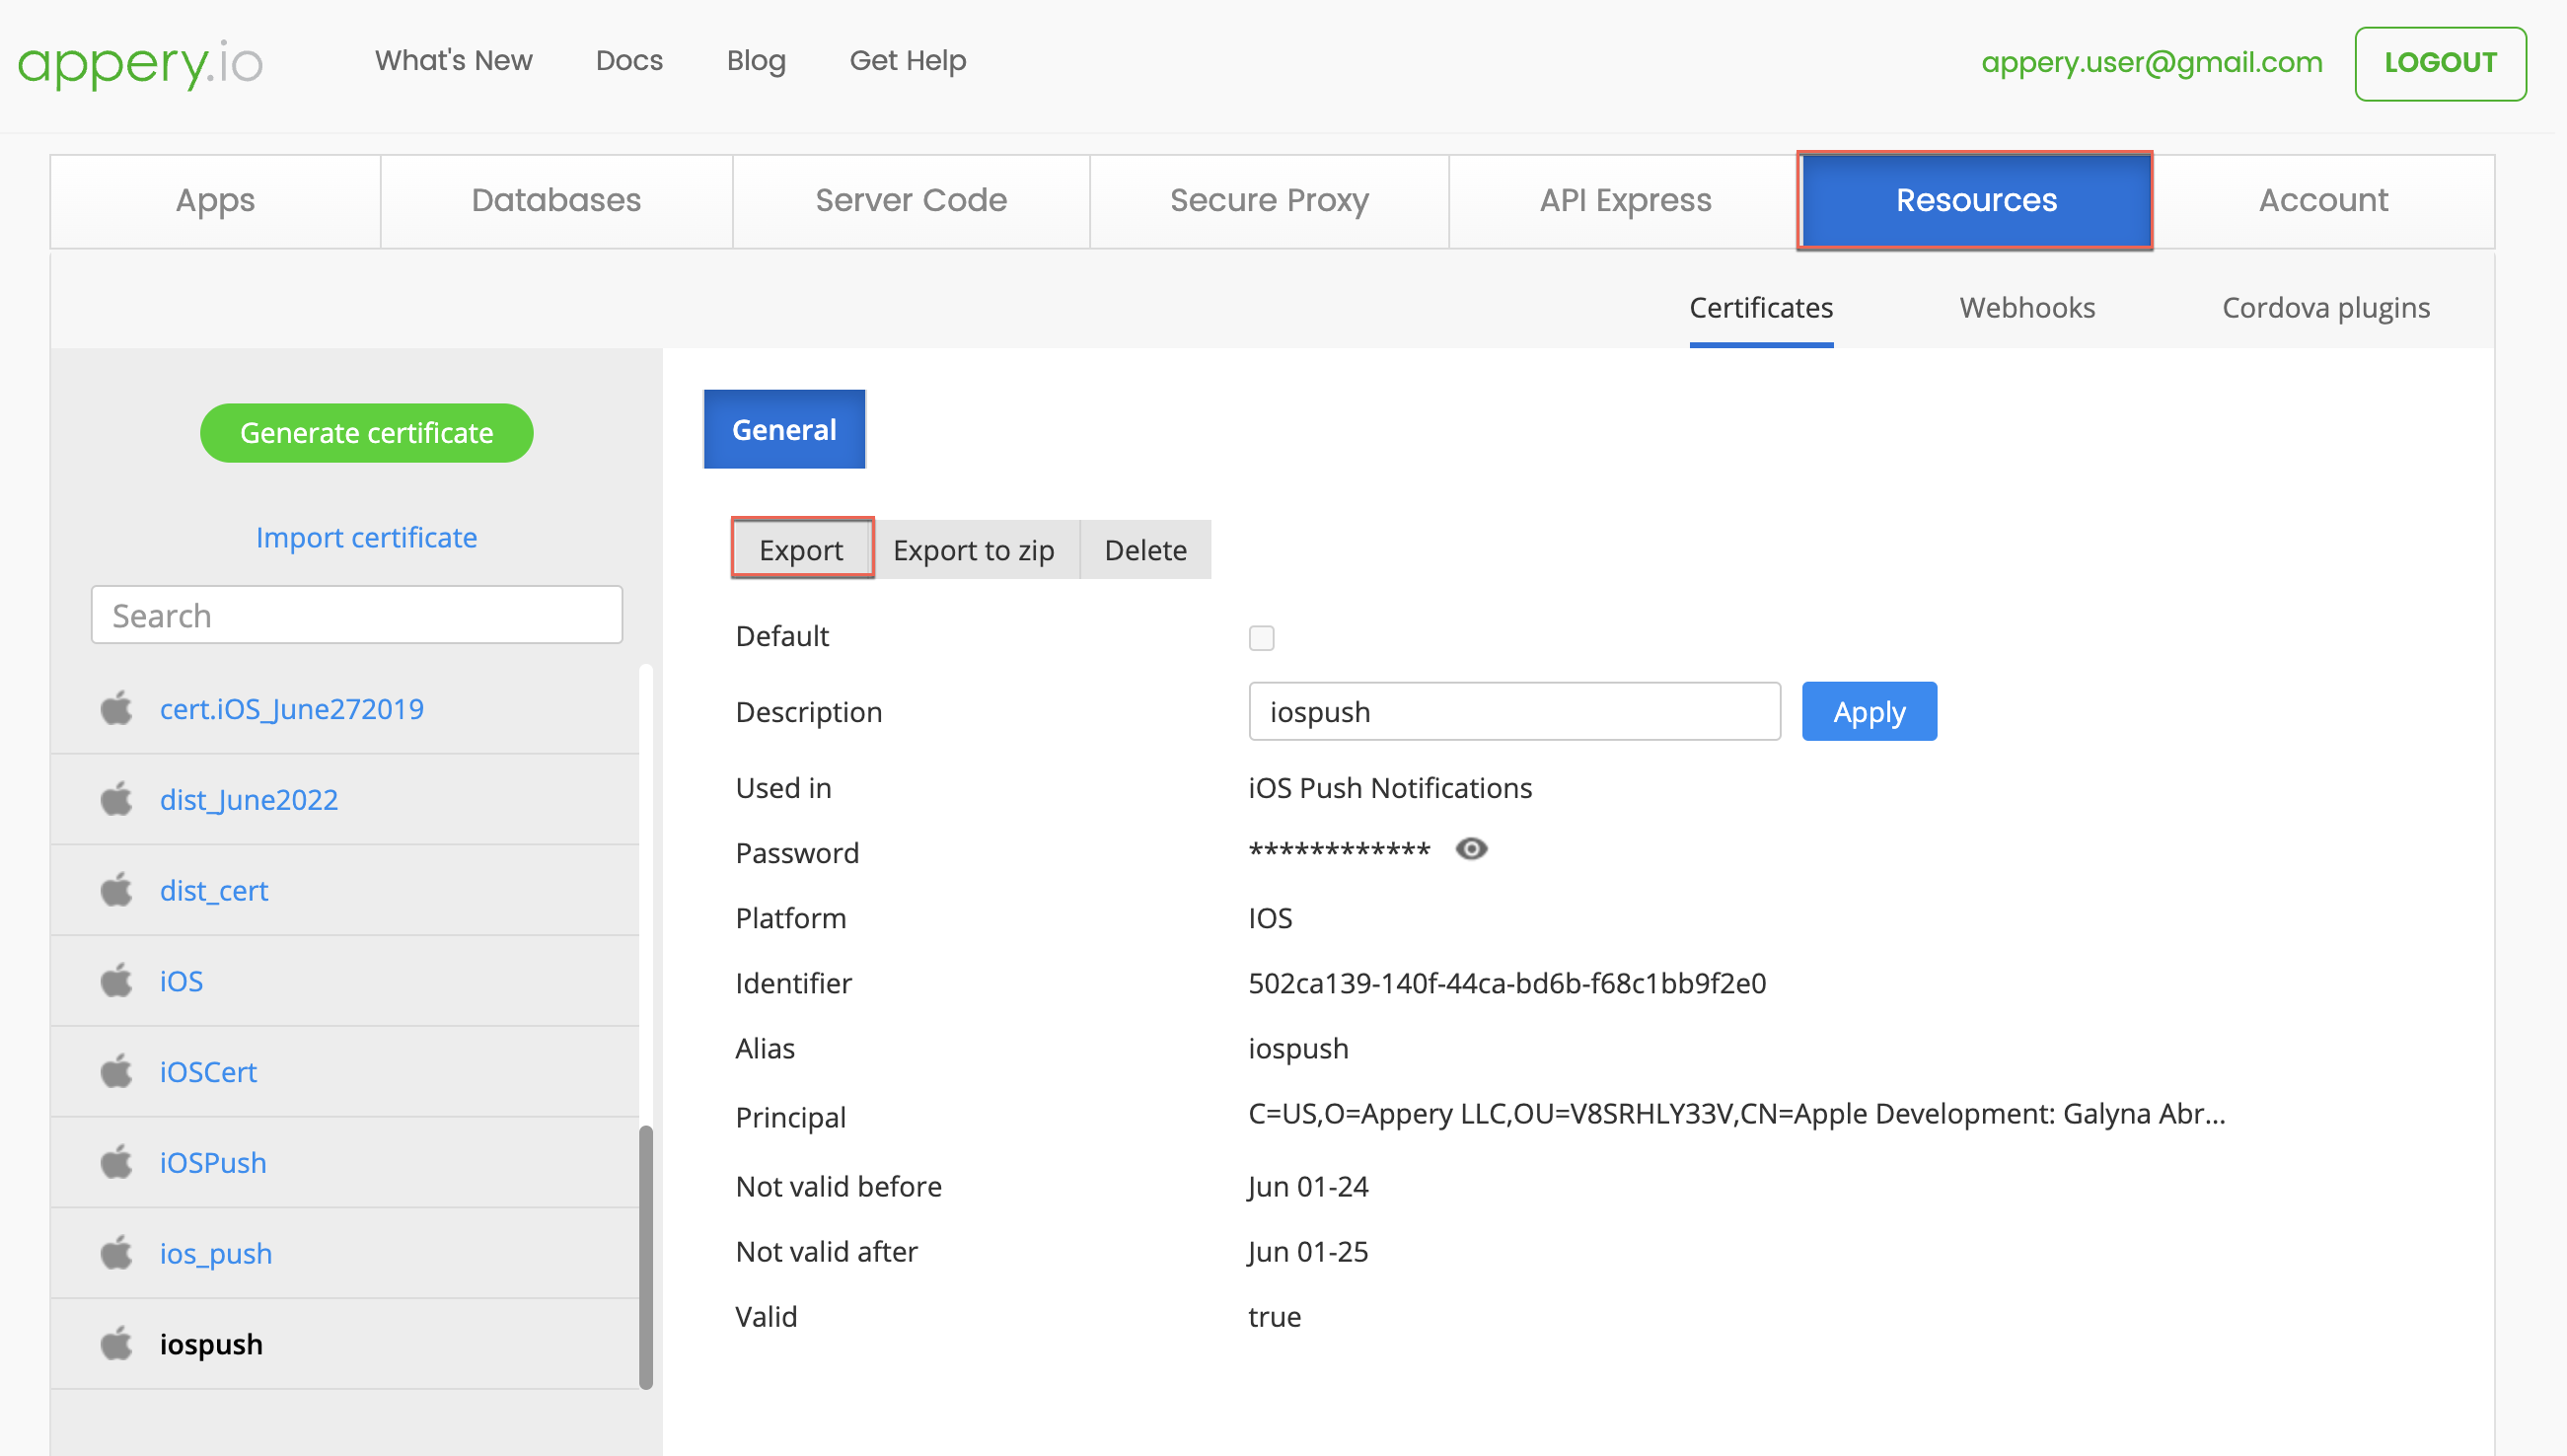
– In the Resources > Certificates tab, find the the iospush certificate, and click the Export button.
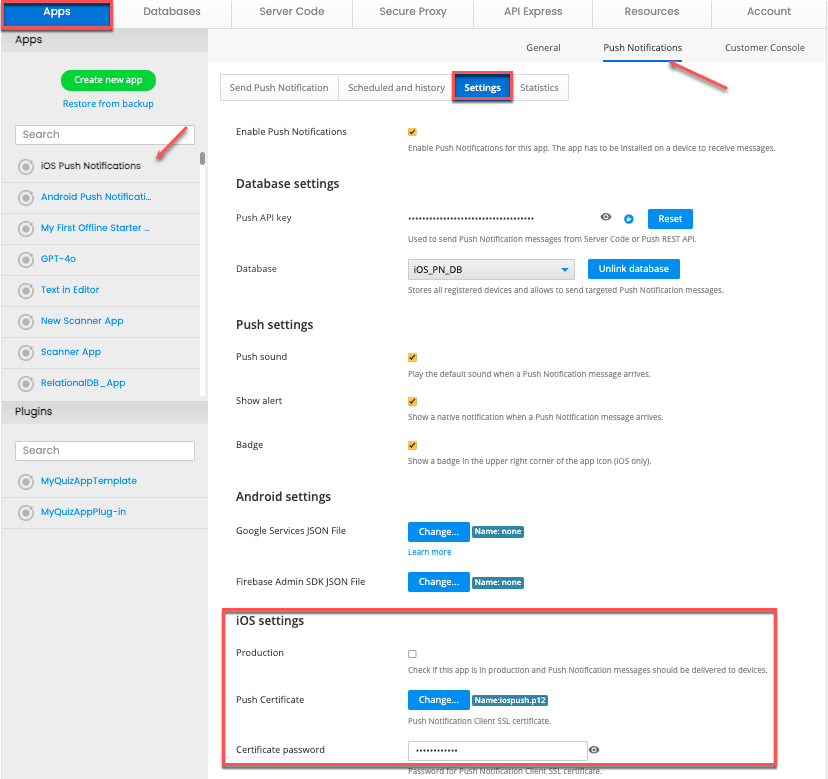
– We can finally specify it for the app. Go to the Push Notifications > Settings page, scroll down to the iOS settings section and upload the certificate you just downloaded in the .p12 format.
4. Build and Install Your App:
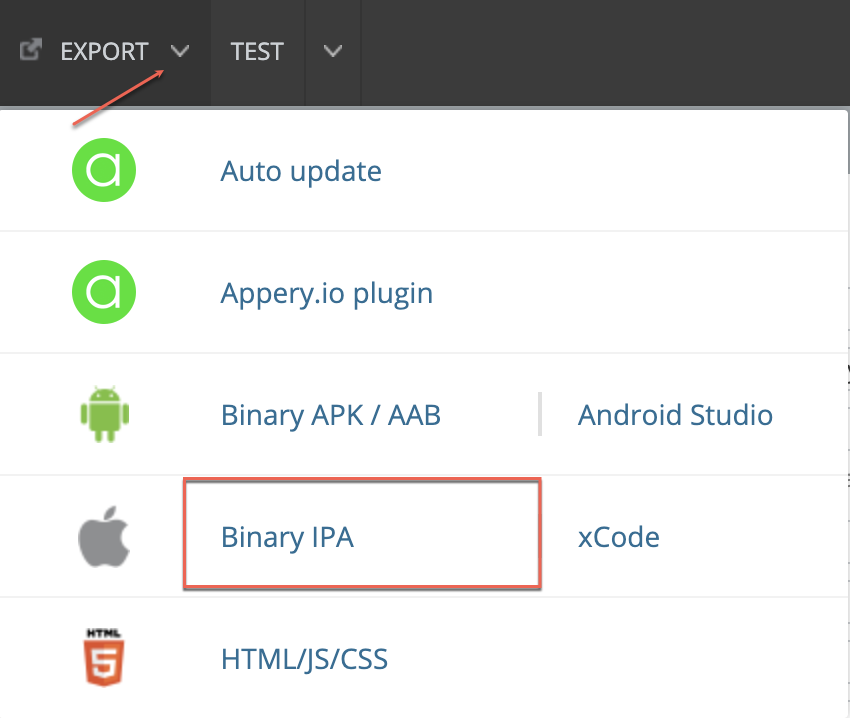
– Build your app’s binary IPA file: EXPORT > Binary IPA.
– After the app is built, install the app on your device by scanning the QR code provided and grant permission to receive push notifications within the app.
5. Test Push Notifications:
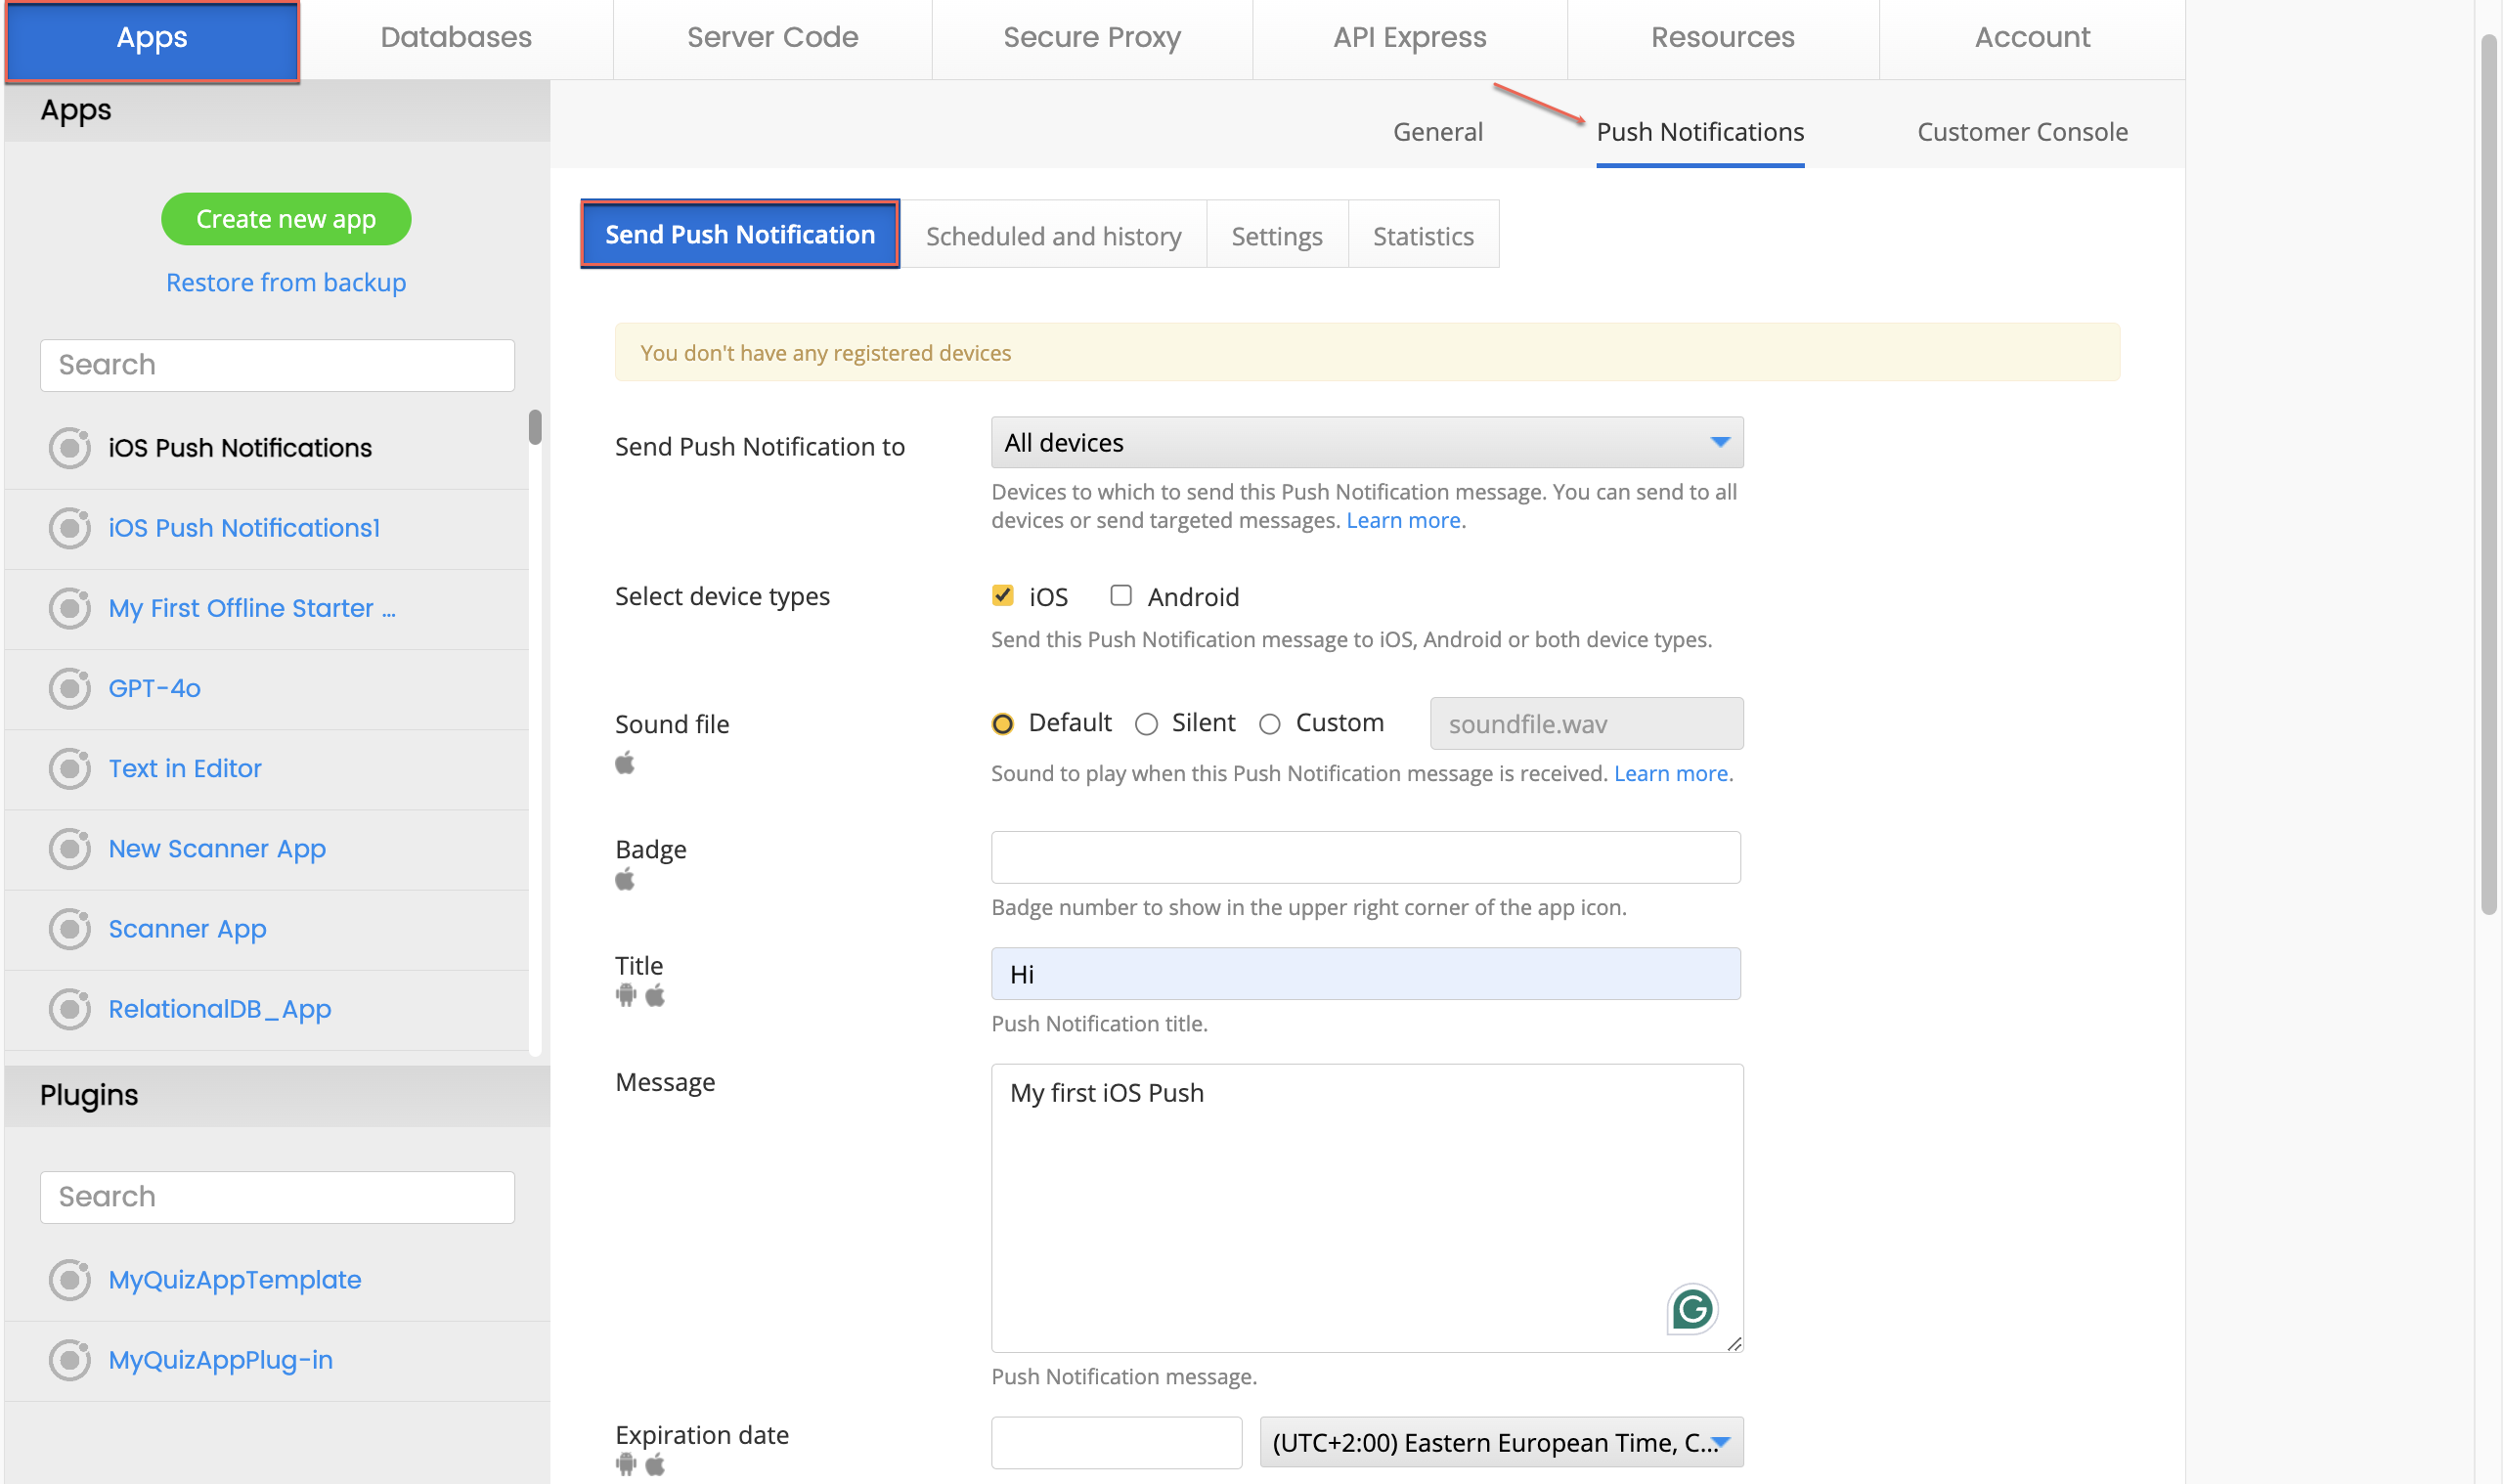
– Go to Push Notifications > Send Push Notifications tab, choose your device type (iOS), specify the title and message of the push notification and click Send.
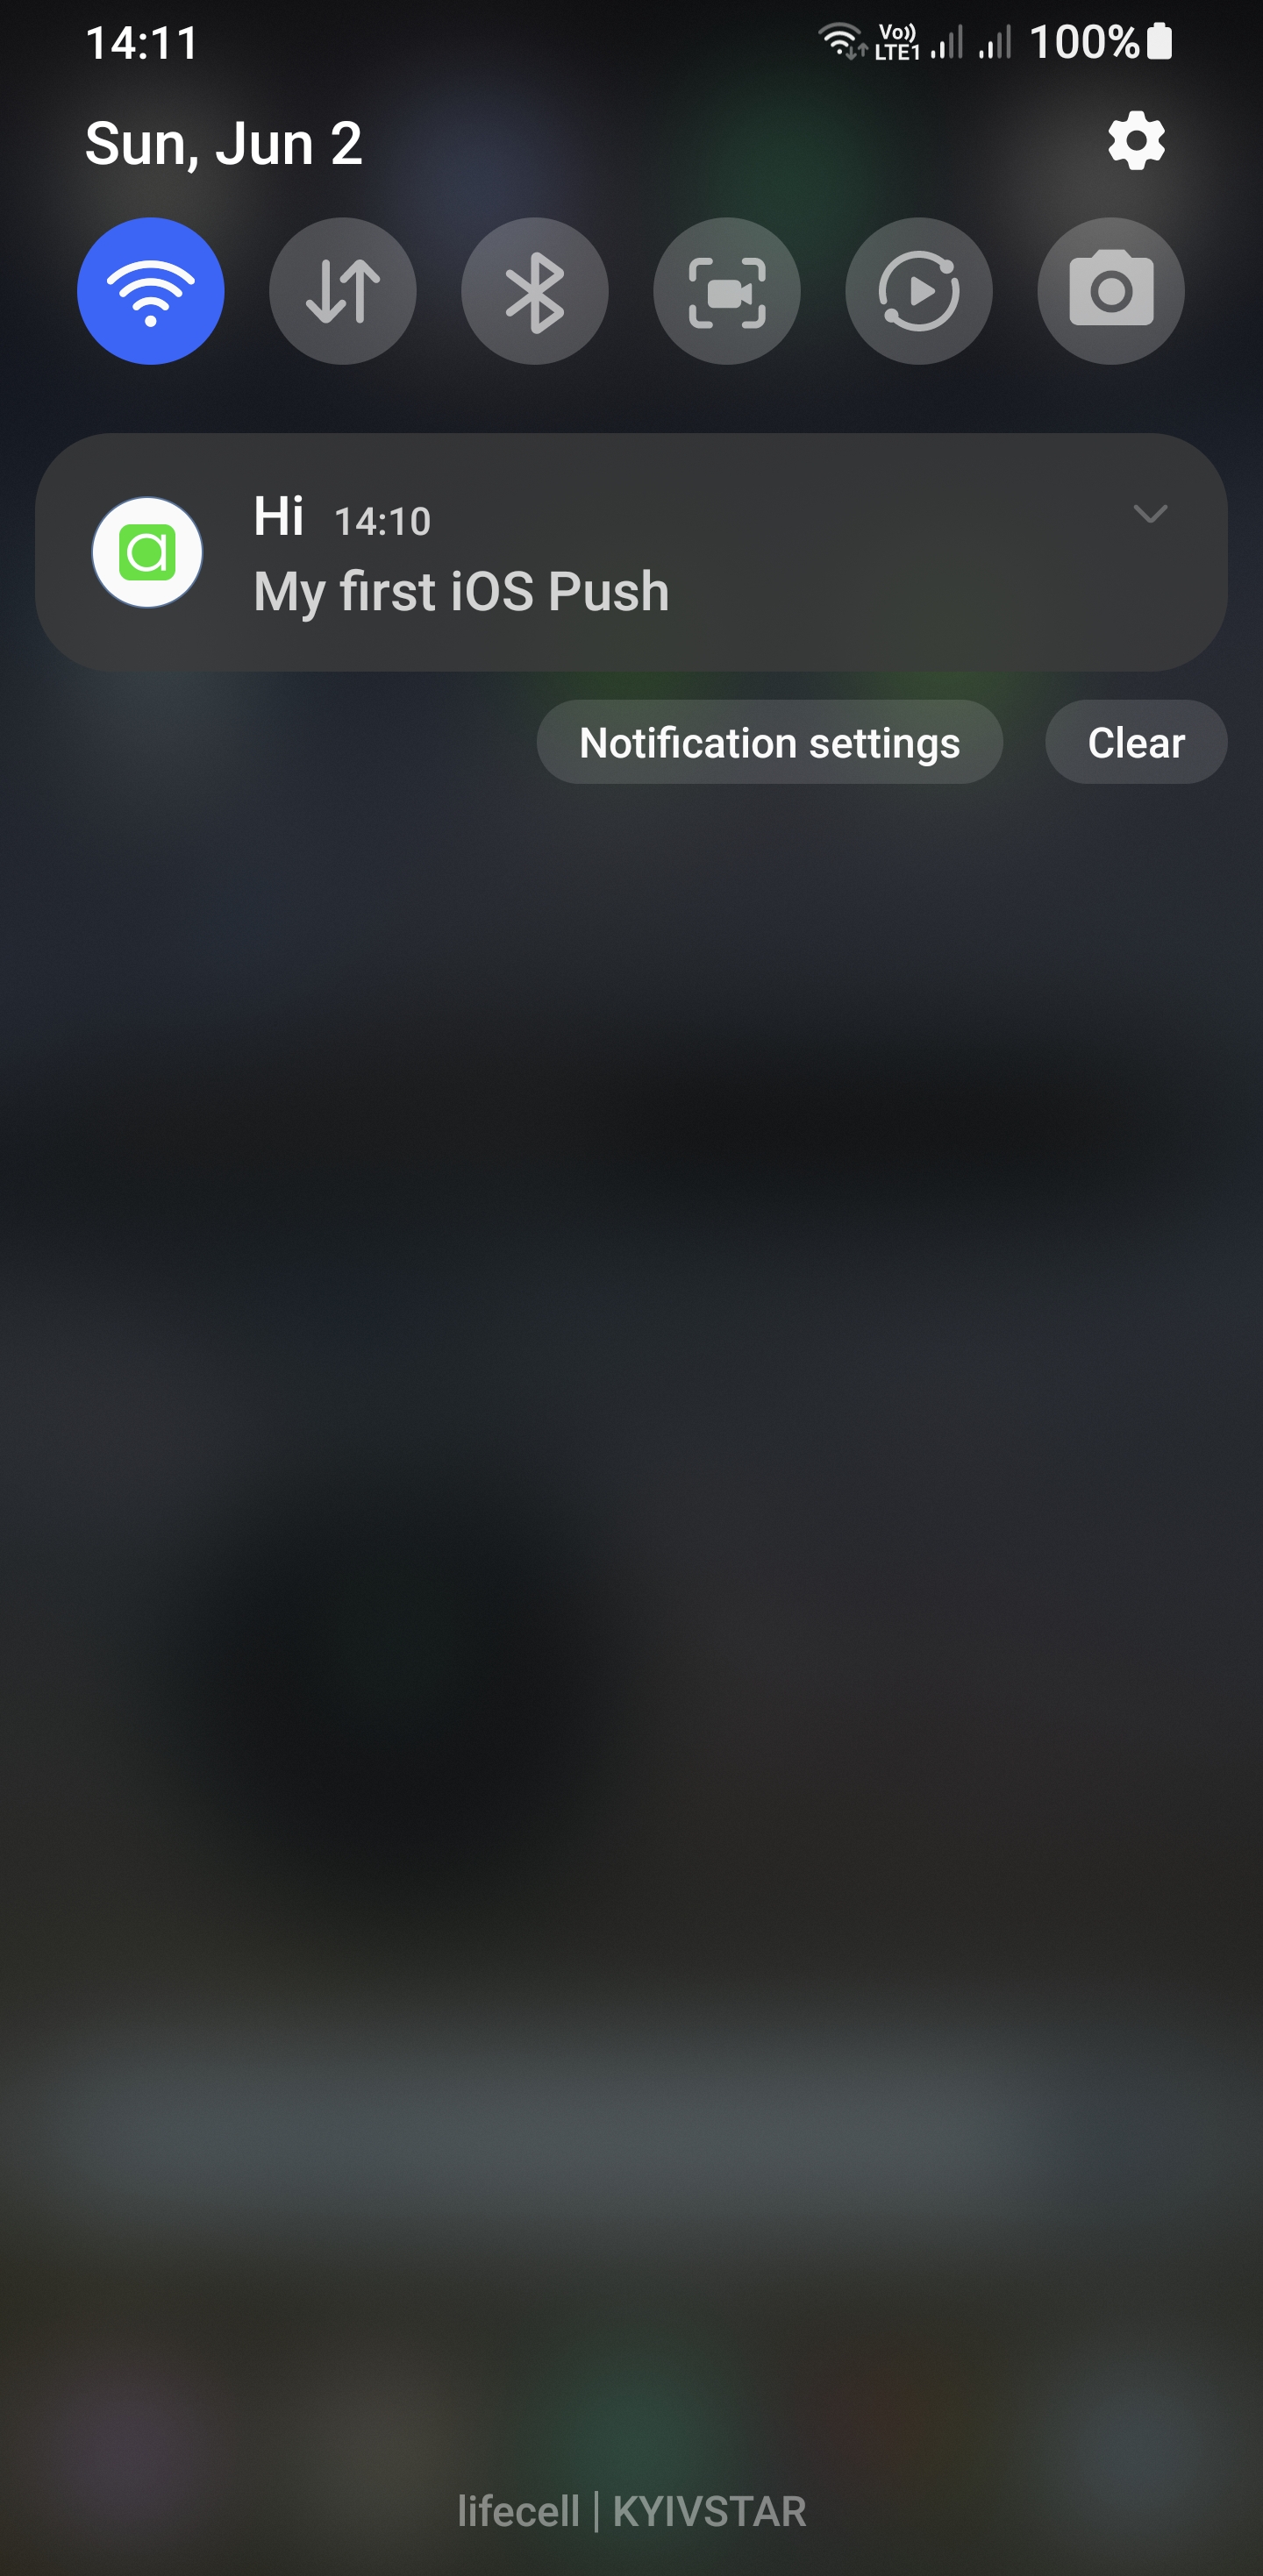
– Confirm it appears on your iOS device.
Conclusion
By following the above steps, you can effortlessly integrate Push Notifications for iOS into your app using Appery.io. This low-code platform simplifies app development, allowing you to focus more on great user experiences and less on coding complexities.
Ready to enhance your mobile app with push notifications? Start your journey with Appery.io today and keep your users engaged like never before!

