How to Install and Use the Cordova Background Plugin for Route Tracking
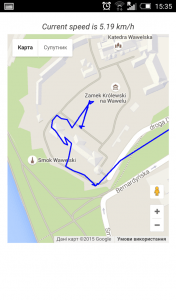
Every Appery.io app comes with the Apache Cordova library automatically installed. This means you have access to default Cordova APIs such as Camera, Contacts, Geolocation, and more. Many users also wanted to add 3rd-party Cordova plugins to the app. To make this process very simple, we’ve added a simple wizard. In this tutorial you are going to learn how to upload a Cordova plugin to your app and use it. You will build an app that will track your route and draw it on a map. The app will do this in the background. (This is a popular feature in fitness apps.)
The first step is to download and install the Cordova Background plugin.
- Download the Cordova Background plugin.
- Upload upload the plugin into Appery.io as described in this document.
- Create a new app, call it
Route track. - Add the plugin to your app. Go to
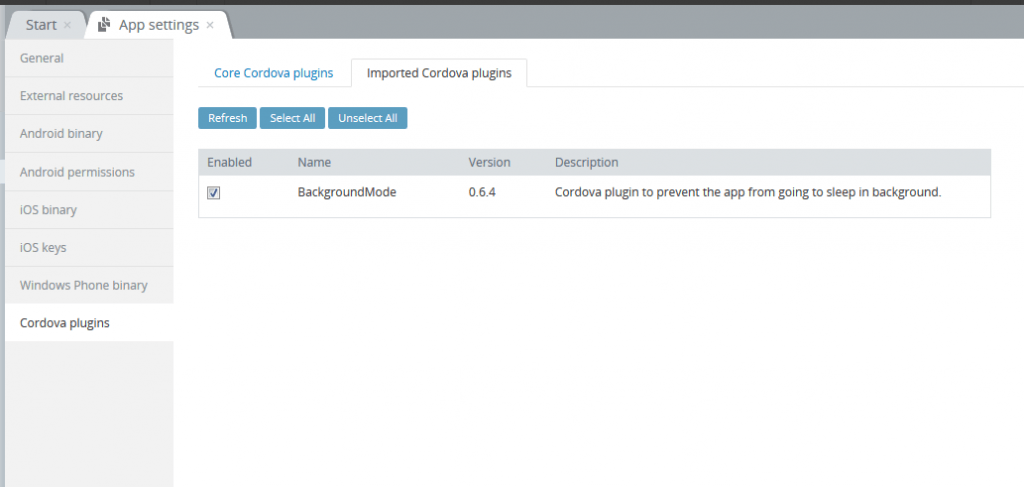
App settings->Cordova plugins->Imported Cordova pluginsand enable theBackgroundModeplugin.
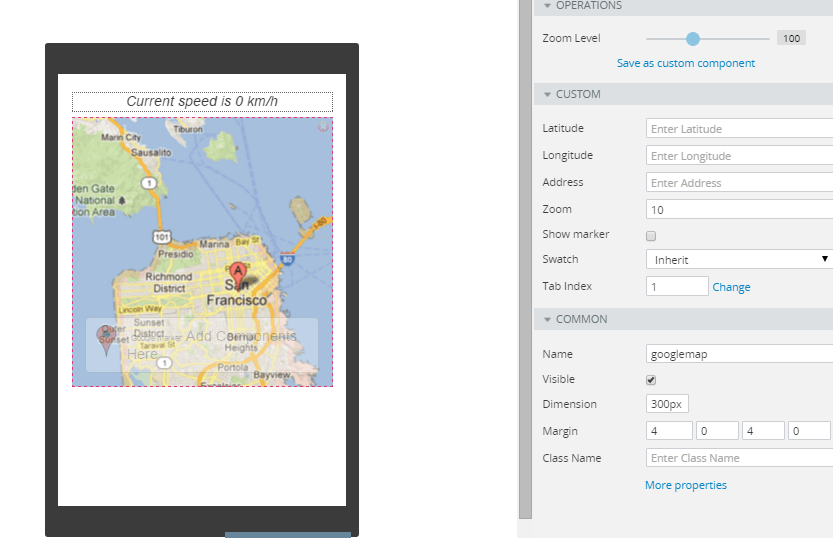
The plugin is now available in the app. Next you are going to build the app UI. The UI is very simple, we have only one label and a Google Maps component.
- Open the
startScreenpage - Remove the header and footer components as we don’t need them in the app
- Place a
labelon a page and call itspeed_label, and change its text toCurrent speed is 0 km/h
- Place the
Google Mapscomponent below thelabel - Name the component
googlemap, changeDimensionto 300px, clearAddress, uncheckShow marker, uncheckvisibleforGooglemap marker, and save
Since you are going to find the coordinates and draw the route on the map you will use the Geolocation service in your app (read more about the service here)
- Go to
Create newand chooseService - Select
Geolocation(the service name will be set toGeolocationService) - Next you are going to create a new JavaScript file. Go to
Create Newand chooseJavaScript. Call itHelper, paste the following code, and save the app:var Helper = { map:null, coordinates:[], getDistance: function (origin, destination, miles) { var R = 6371; // Radius of the earth in km var dLat = Helper.degrees2radians(destination.lat - origin.lat); var dLng = Helper.degrees2radians(destination.lng - origin.lng); var a = Math.sin(dLat/2) * Math.sin(dLat/2) + Math.cos(Helper.degrees2radians(origin.lat)) * Math.cos(Helper.degrees2radians(destination.lat)) * Math.sin(dLng/2) * Math.sin(dLng/2) ; var c = 2 * Math.atan2(Math.sqrt(a), Math.sqrt(1-a)); var distance = R * c; // Distance in km var result = (miles) ? distance * 0.621371192 : distance; // convert km to miles return result; }, degrees2radians: function (deg) { return deg * (Math.PI / 180); }, initMap:function(){ Helper.map = Apperyio("googlemap").gmap; if (!Helper.map){ Helper.setInitDelay(); } else { $(".startScreen_googlemap").height(Apperyio("mobilecontainer").height() - 35); geolocation.execute(); Helper.drowDirections(); } }, setInitDelay: function() { setTimeout(Helper.initMap, 50); }, drowDirections:function(){ var path = new google.maps.Polyline({ path: Helper.coordinates, geodesic: true, strokeColor: '#0000FF', strokeOpacity: 1.0, strokeWeight: 2 }); path.setMap(Helper.map); } };This code finds your current coordinates and draws them on the map.
- Go back to the StartScreen and switch to
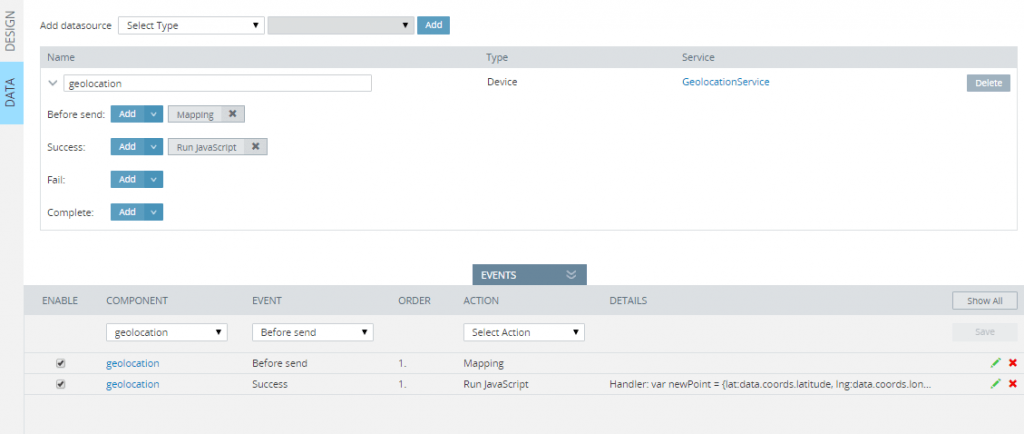
Datatab - Choose
Deviceas the datasource andGeolocationServicefrom the menu and expand the menu forgeolocation - Delete the mapping for the
Successevent and open theEventstab. SelectgeolocationforComponents,SuccessforCommon events, andRun JavaScriptforAction. - Put in the following JavaScript code:
var newPoint = {lat:data.coords.latitude, lng:data.coords.longitude, time: (new Date().getTime())};
var previousPoint = Helper.coordinates[Helper.coordinates.length - 1];

if (Helper.coordinates.length){
    var distanceDelta = Helper.getDistance(previousPoint, newPoint);

    var rounded = Math.round((distanceDelta * 60) * 100) / 100;
    Apperyio("speed_label").text("Current speed is "+rounded + " km/h");
}

Helper.coordinates.push(newPoint);

Helper.drowDirections();

Helper.map.setCenter(newPoint);
This code calculates your speed, writes it in the label, and interacts with our major code Helper giving current data to it.
- Click Save
- Go back to
Designtab of the page
You are almost done, now you need to add the code be be invoked when the app launches.
- Open the
Eventstab, and chooseDevice ready eventandRun JavaScriptasActionfor the componentstartScreenpage. Paste the following code:// Android customization cordova.plugins.backgroundMode.setDefaults({ text:'Doing heavy tasks.'}); // Enable background mode cordova.plugins.backgroundMode.enable(); // Called when background mode has been activated cordova.plugins.backgroundMode.onactivate = function () { setTimeout(function () { // Modify the currently displayed notification cordova.plugins.backgroundMode.configure({ text:'Running in background for more than 5s now.' }); }, 5000); };You are calling the background plugin in this code. It is called with a timeout of 5 seconds. As you are planning to use it for outdoor exercise, you also use it to display how long the app has been running.
- Save and create one more
Run JavaScriptevent, this time for theStart Screencomponent and thePage Showevent. Paste this codeHelper.initMap();
This code is needed for your main JavaScript helper.
- Save and add this last code to call the geoservice –
startScreenas Component,Loadas Event,Run JavaScreeptas ActionsetInterval(function(){ geolocation.execute(); },10000);
The app is finished and ready for testing.
As this app uses a custom Cordova plugin, you need to build a binary and install on the device to test the app on the actual device. Appery.io makes it easy to export a binary.


