How to Build a Mobile Chat App with Ionic, Server Code and EventSource API in Appery.io
The Appery.io platform comes with many visual tools to help you build your mobile app fast. We understand that there are cases where you need to go beyond visual tooling and be able to customize your app with code. There are a number of ways to do that in Appery.io.
- You can write any custom JavaScript code in the app (client). You can also include any 3rd party libraries.
- With Appery.io Server Code you can develop any custom logic on the server, also using JavaScript. This logic is automatically exposed via a REST API. That’s like creating a custom API on the fly.
In this tutorial we are going to show you how to combine the visual tools with custom code to build a chat mobile app. In particular, you’ll learn how to use EventSource API to receive server-sent events and create a simple chat application. The app will be based on the Ionic Framework and also use Server Code script. The app looks like this:

Chat app
You will start with the app UI. Open the index page.
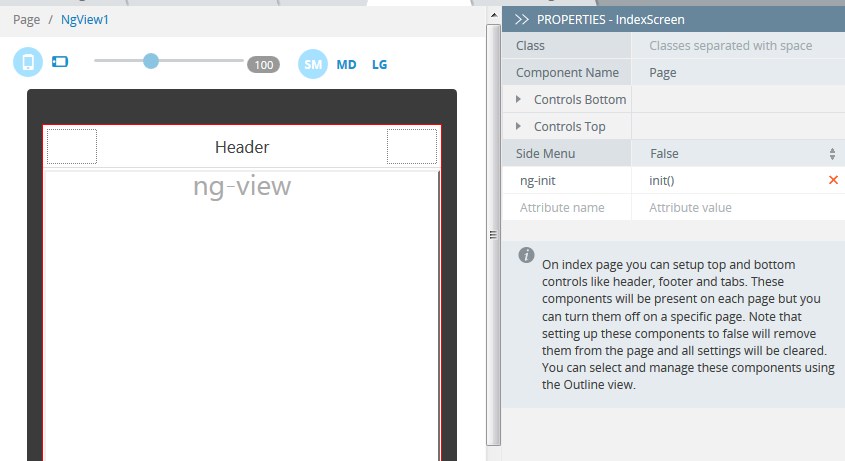
Main index (template) page
Add an ng-init attribute with init() value.
Go to Project -> Models and create the following models:
message(Object type)- Add to it
authorandbodyparameters of String type.
- Add to it
messages(Array type)user(Object type)- Add to it
nameparameter of String type.
- Add to it
Navigate to the Scope tab and add Variable user of user type:

Setting up scope variables
Next, rename the page Screen1 to NamePrompt page.
Add a Form component to this page, and place Input and Button components inside the Form. The page should look like this:
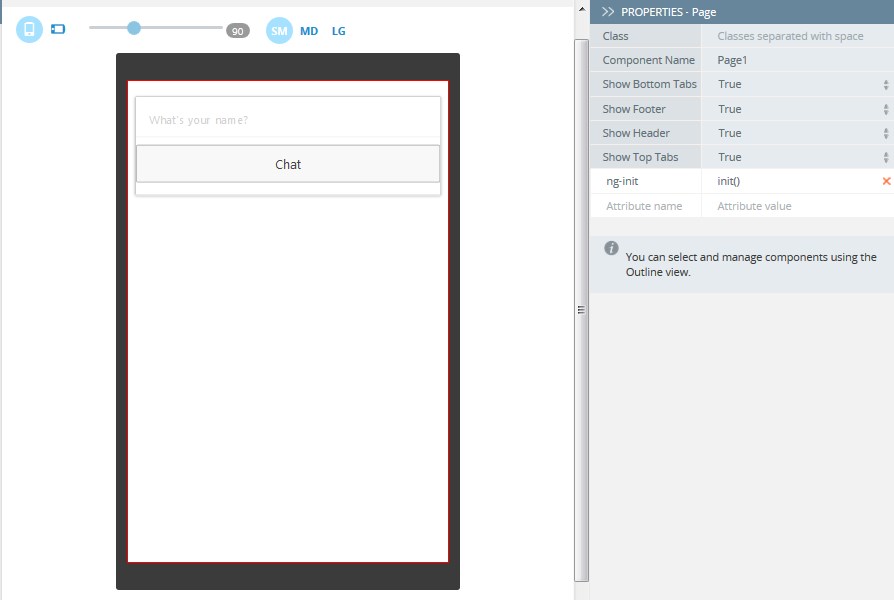
Building the NamePrompt page
Now let’s set up Input component where you’ll type your chat username.
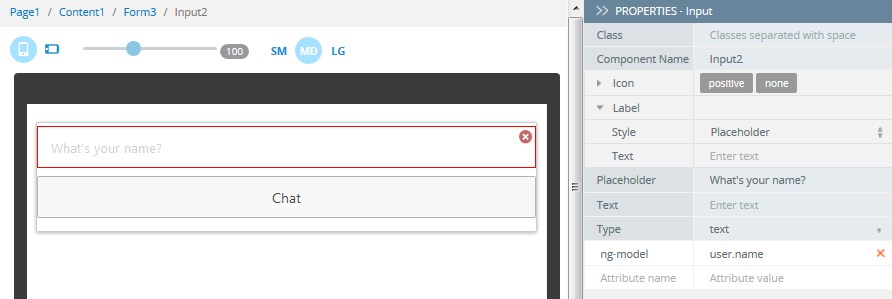
Configuring the input component
In properties, find the Placeholder field and set it to ‘What’s your name?’.
Type a new Attribute name ng-model and add user.name as the value.
The next step is setting up the Chat button, which will navigate to the ChatPage.
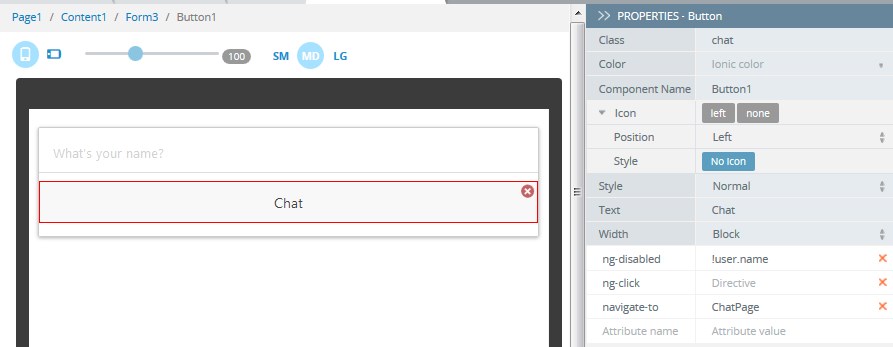
Binding UI components to scope variables
Add the following AngularJS attributes and set their values as follows:
ng-disabled =!user.name.
ng-click = Directive (leave it empty)
navigate-to = ChatPage.
Now you are ready to build the ChatPage. Design the ChatPage to look like in the screen shot below. The Outline shows which containers the page uses. This page will be used to send messages.
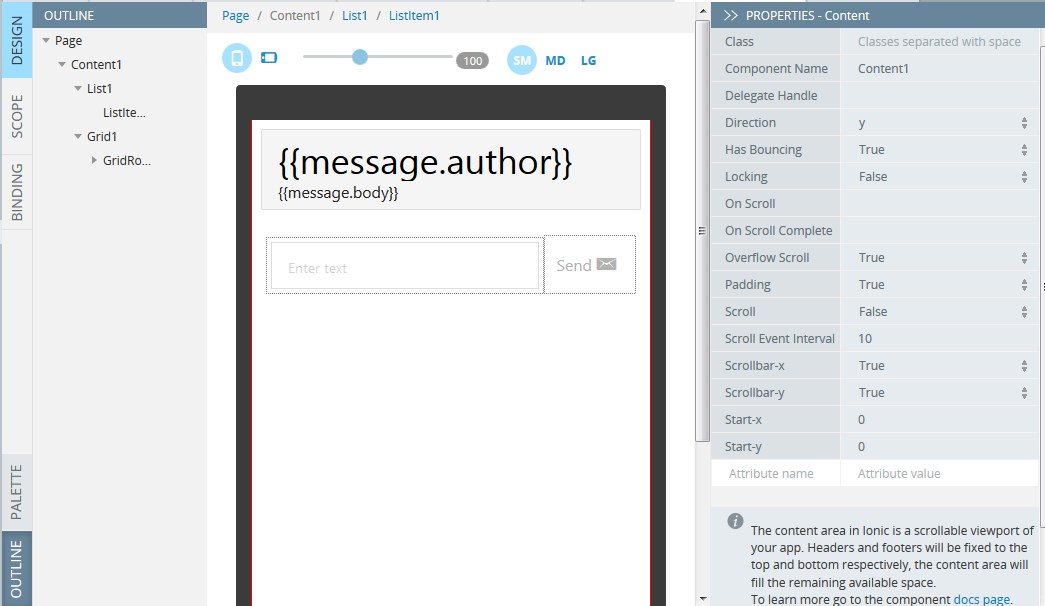
Building the ChatPage page
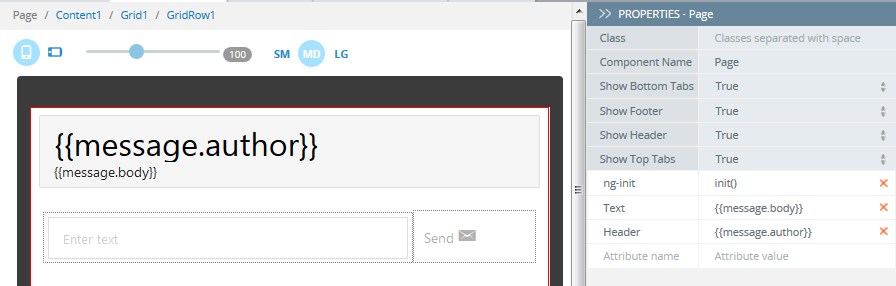
Choose the Page element (breadcrumbs or via Outline view) and define the Header and Text property values:
Header as {{message.body}}.
Text as {{message.author}}.
Now you need to set up the functionality for List Item, so select it and set up these parameters:
Add the Heading text property value as {{message.author}} and the Text property as {{message.body}}.
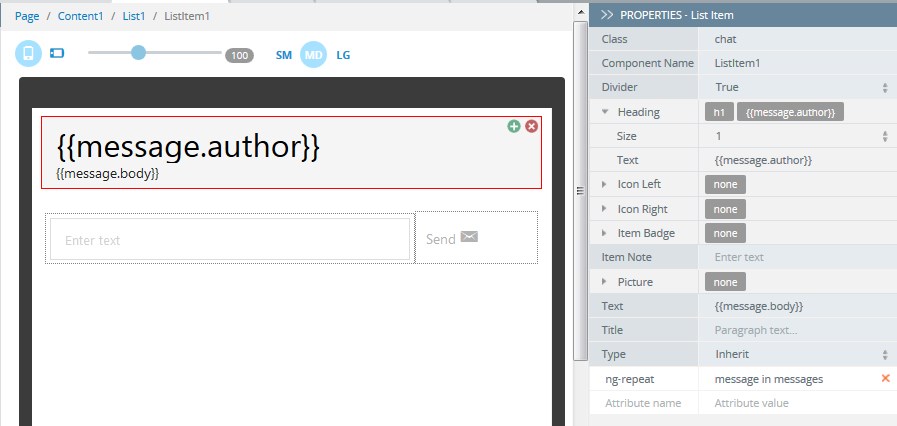
Finish editing by adding a new AngularJS attribute: ng-repeat with the value message in messages.
Inside the Grid component we have Input and Button components. These components will be used for typing and sending chat messages:
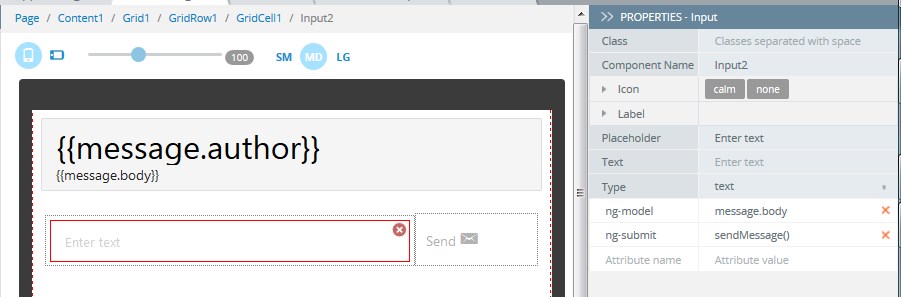
UI components to enter and send chat messages
You will need the following attributes and their values:
ng-model set to message.body.
ng-submit set to sendMessage().
Add Placeholder property as Enter text.
Select the button, add ng-click attribute with value of sendMessage().
To customize, let’s change the button label. Select property Text and set it to Send. You can also change the Icon; we have chosen Envelop.

Customizing button UI
Now navigate to Scope -> Variables tab:
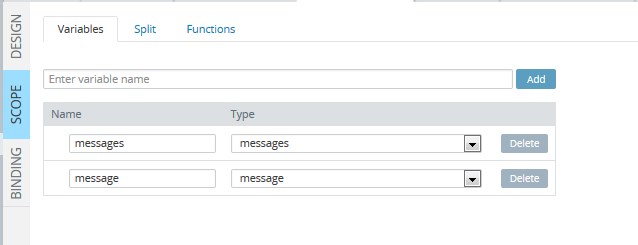
Enter variable names messages of messages type and message of message type.
Let’s go to the Database dashboard. Create a chat database, and add collection messages.
Add columns author (string type) and body (string type).
Next you need to link the database to app. Go back to the App Builder and select Create new -> Database Services, choose chat database and Create service for messages collection. Click to import the service into the app.
Last thing is to create a Server Code script. Navigate to the Server Code tab and create a new chat script, and add this code:
var responseBody = {},
    requestParams = {},
    MASTER_KEY = 'e4-xxx-xxx-xxxx-xxx90',
    headers = Apperyio.request.headers,
    lastEventId = headers['Last-Event-ID'] || request.get('last-event-id'),
    messages,
    message,
    isoDate;


if (lastEventId) {
  var lastEventDate = new Date(parseInt(lastEventId));

  var lastEventDateText = lastEventDate.toISOString();


  messages = Collection.query('database_id', 'messages', {
    'criteria': {
      '_createdAt': {
        '$gt': {
          '$date': lastEventDateText
        }
      }
    },
    'sort': '_createdAt'
  }, MASTER_KEY);

  message = messages[0];


  constructSSE(Date.now(), JSON.stringify(messages));
}
else {
  constructSSE(Date.now(), '');
}


function constructSSE(id, body) {

  var data = 'id: ' + id + '\n';
  data += 'data: ' + body + '\n\n';

  Apperyio.response.success(data, "text/event-stream");
}
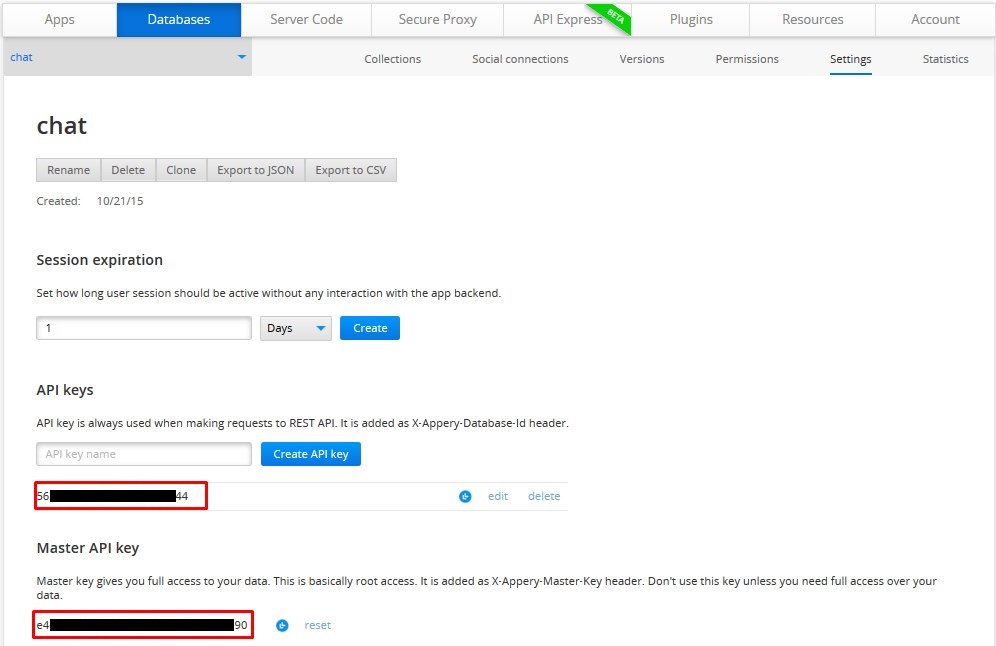
You should replace the values of MASTER_KEY and database_id with the actual values.
MASTER_KEY = 'e4-xxx-xxx-xxxx-xxx90',
messages = Collection.query('database_id', 'messages', {
You can find this information in Database Settings:
Switch back to ChatPage, open the Scope tab, and navigate to the Function tab, where you’ll add the following functions:
init, click Edit and add code:
if ( !! window.EventSource) {
    var source = new EventSource('https://api.appery.io/rest/1/code/xxxx/exec');

    source.addEventListener('message', function(e) {

        if (e.data) {
            $scope.$apply(function() {
                Array.prototype.push.apply($scope.messages, JSON.parse(e.data));
            });
        }

    }, false);

    source.addEventListener('open', function(e) {
        console.log('connection:open');
    }, false);

    source.addEventListener('error', function(e) {
        if (e.readyState == EventSource.CLOSED) {
            console.log('connection:closed');
        }
    }, false);
}
sendMessage, click Edit and add code:
var requestData = {};
requestData = (function mapping8072($scope){
    var requestData = {};
    requestData.data = Apperyio.EntityAPI('chat_messages_create_service.request.body', undefined, true);

    var message_scope = $scope.message;
    requestData.data.author = $scope.user.name;
    requestData.data.body = message_scope.body;

    return requestData;

})($scope);

Apperyio.get("chat_messages_create_service")(requestData).then(

    function(success){


    },
    function(error){


    },
    function(notify){

    });

$scope.message.body = '';
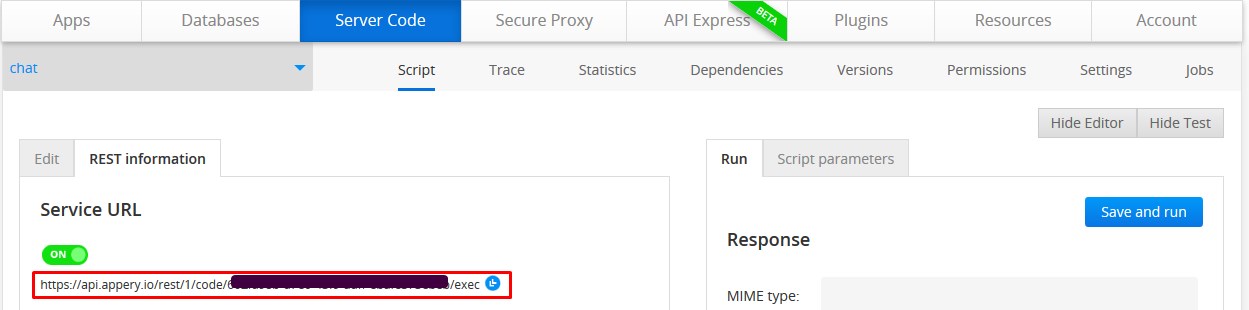
To connect your script, go to the Server Code tab, find the tab REST information, and copy and replace the Service URL in the code above:
Save all the changes.
Now go back to the App Builder and click Test to run the app in the browser.
Running the finished app:
Chat app