Unlock the Magic of ChatGPT-4o: Effortless Low-Code Transformation for Your Text App!
We have an exciting news for you today! In our last video (you can find more details in this post), we showed you how to integrate an app with ChatGPT-4o using our platform as a no-code editor. Now, we’ll take it a step further. In out new video tutorial, we are demonstrating a similar integration, but this time using a low-code approach.
This means that only a minimum amount of code will be needed to implement the ChatGPT functionality for more complex integrations. Intrigued? Let’s dive in!
For your convenience, we are also providing the step-by-step instructions below.
Getting Started: Create a New App
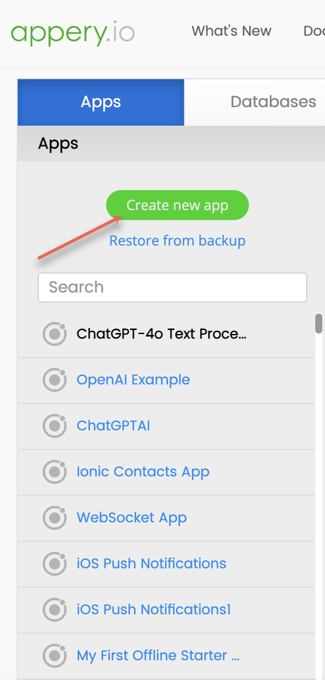
First, let’s go to the Appery.io platform and traditionally create a new app.
You’ll need to add the necessary OpenAI Key that you can get from the OpenAI portal. Navigate to the Settings service and enter this key.
Just like before, any application will automatically get access to the OpenAI object once the OpenAI API key is specified. You can find more details in our documentation if you need further guidance.
Setting Up the User Interface
Before we start creating our UI, we need to decide how the code will access the input and display the output. We can use either local or global variables. For this demo, let’s use global variables.
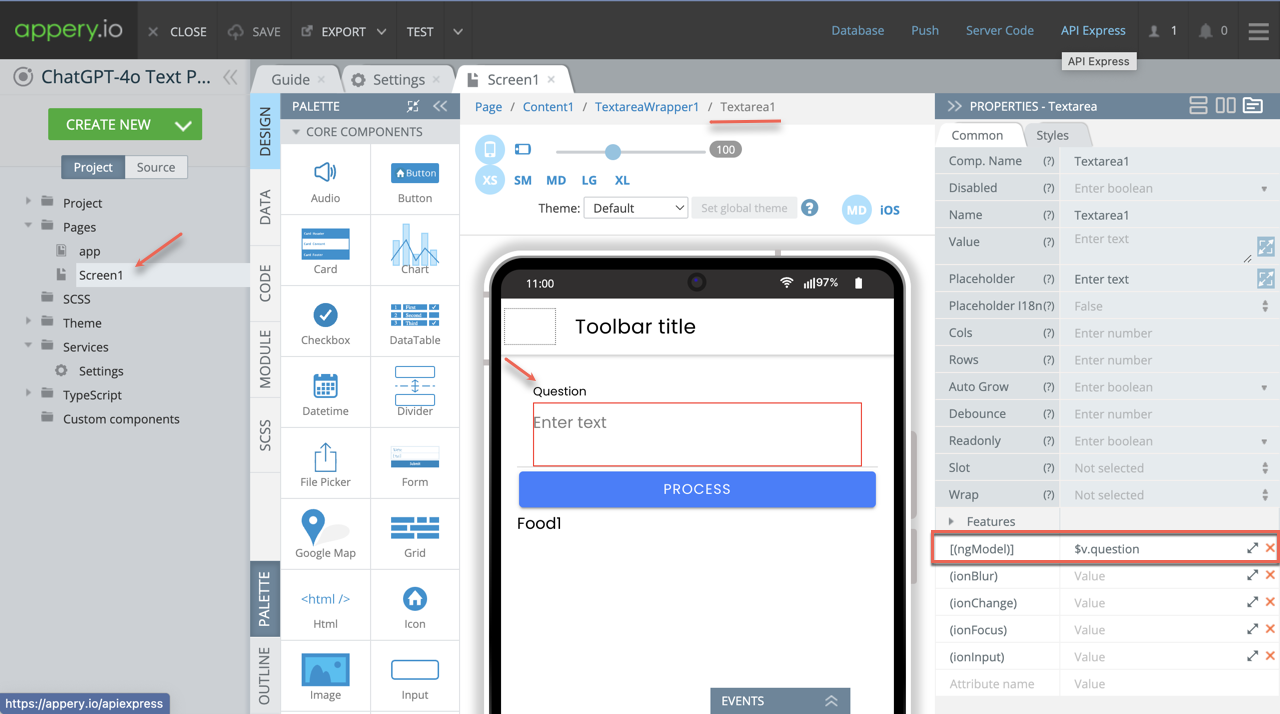
So, open Screen1 in your new app, drag the following UI components onto the page and define them as follows:
– Textarea (this is where you’ll enter questions):
- Label = Question
- [(ngModel)] = $v.question (Global variables are accessed with the $v variable)
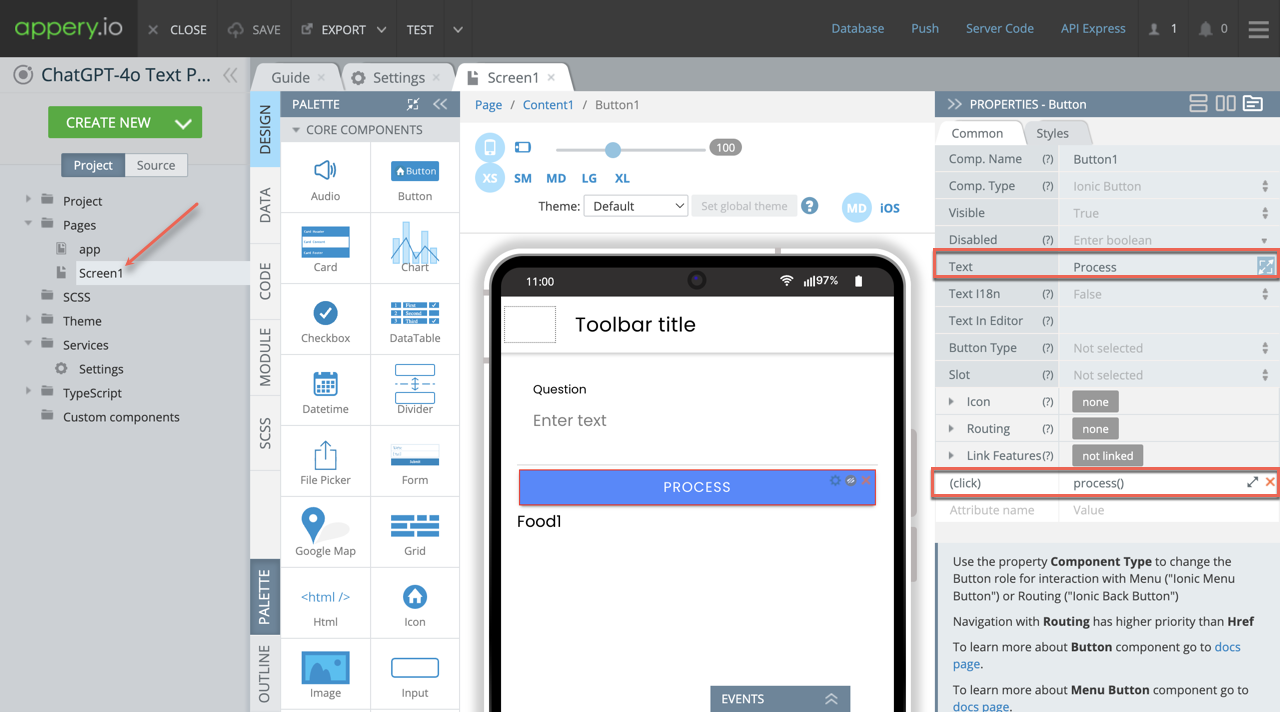
– Button: (this will trigger the function named process() to handle the questions):
- Text = Process
- (click) = process()
– Text: (this will display the responses from ChatGPT):
- Text = {{obj}}
- Text in Editor = Food1 (to make page appear appealing in the editor without breaking the app’s UI)
- *ngFor = let obj of $v.arr
We configured our no-code app to receive output as an array, not a string. For this low-code app, we’ll do the same. Let’s assume that ChatGPT will return an array of entities which we will iterate over and display.
Setting Up the Process Function
It’s time to configure the process function:
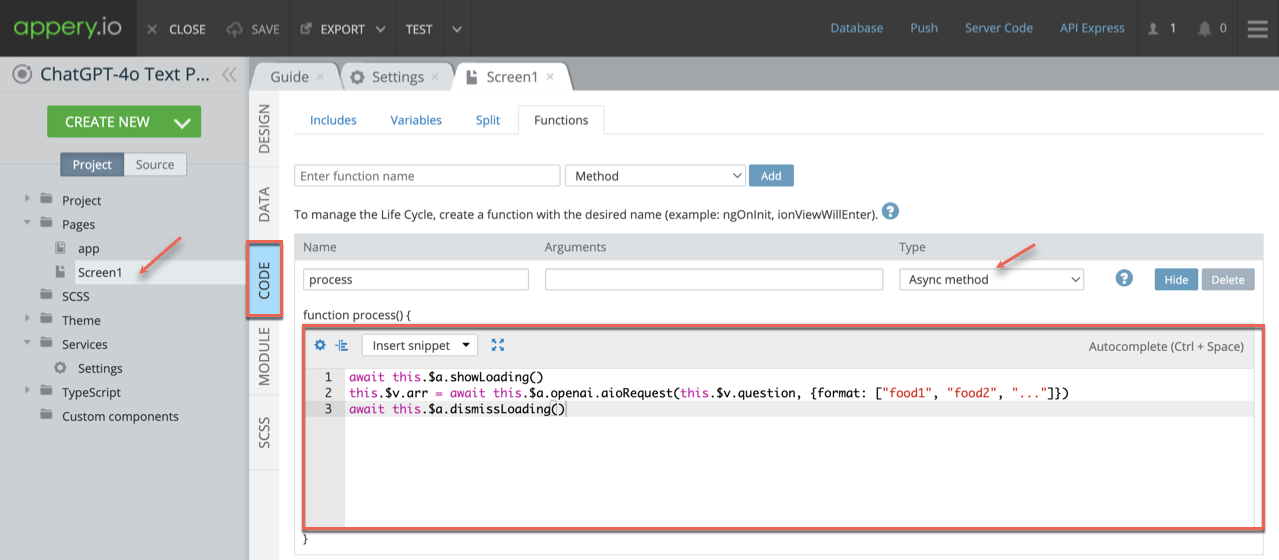
1. Open CODE > Functions, enter process for the function name and make sure it’s set as an async method.
2. Define the process method with the following code:
this.$v.arr = await this.$a.openai.aioRequest(this.$v.question, {format: ["food1", "food2", "..."]})
In this code, we’ll use the OpenAI object to send requests and receive an array of strings as responses. The first parameter is our question, represented by
$v.question.We also need the response to be an array of strings, so we’ll define the
formatfor the second parameter in our code.
To enhance user experience, add a loading indicator before sending the request and remove it once the response is received.
await this.$a.showLoading()await this.$a.dismissLoading()
All Set! Testing the App
Your app is ready for testing! Enter a query, press the button, and see the output from ChatGPT-4o:
Thank you for keeping up with us! We hope you found this video helpful.
Don’t forget to subscribe to our channel for more insightful content. Stay tuned and happy coding!


